It is perhaps one of the most daunting tasks for a 3D artist, creating materials using a node system. Certainly more technical of a workflow than it is artistic, but fortunately there is an addon that makes working with nodes so much easier, and that is the node wrangler.
Below is a shortlist of 8 tools that the node wrangler introduces that you should be looking to use:
- Adding A Principled Texture Setup
- Using The Viewer Node To Display A Nodes Effect
- Deleting Unused Nodes
- Framing Your Selection
- Swapping Out The Existing Nodes
- Modify Labels
- Align Selected Nodes
- Add Reroutes
- Lazy Connecting
These are just a few examples of what you can do with the node wrangler add on but they are some of the most useful features and really help to improve both your organization and your workflow.
How To Enable The Node Wrangler?
Dy default the node wrangler add-on should already be enabled unless you are using a much older version of the Blender software. Either way, it is always good to check and make sure that any addons that you wish to use are ready to go.
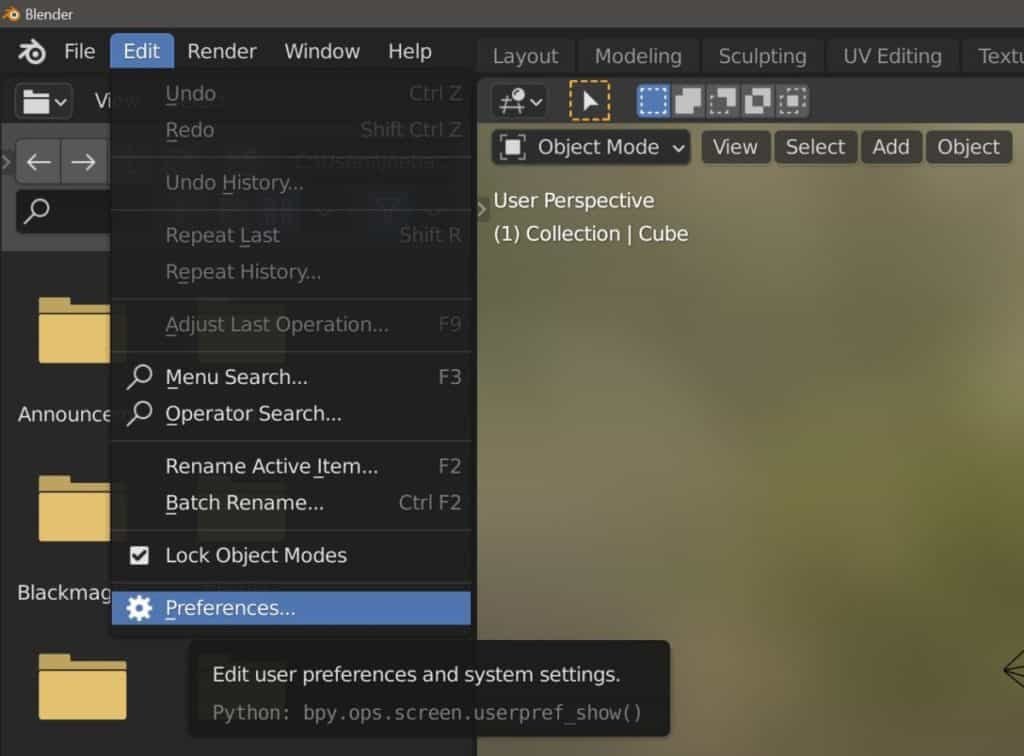
To check the node wrangler, go to Edit > Preferences > Add Ons and type node wrangler into the search bar. Each ad on will have a checkbox, make sure the checkbox for node wrangler is ticked and then close your preferences panel.
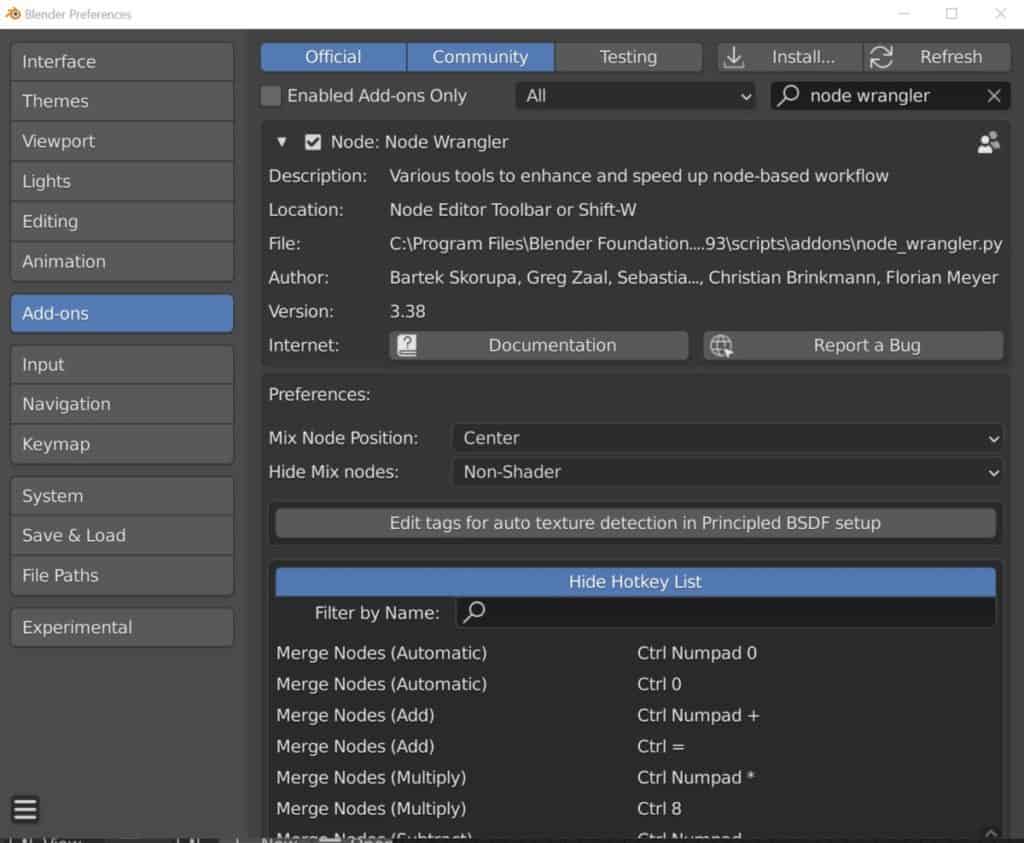
By the way, if you open up the add-on in the preferences panel you can view a list of all the hotkeys that are associated with the node wrangler, including the tools that we list below.
Adding The Principled Texture Setup
Perhaps my favorite tool for the node wrangler is the ability to add a fully PBR ready material using a single hotkey combination.
First, select the shader node that will act as the base for your texture maps. This will normally be the Principled BSDF node.
Then use the hotkey combination of Shift + Control + T to open up the file browser in a new window. Locate the texture maps that you want to import.
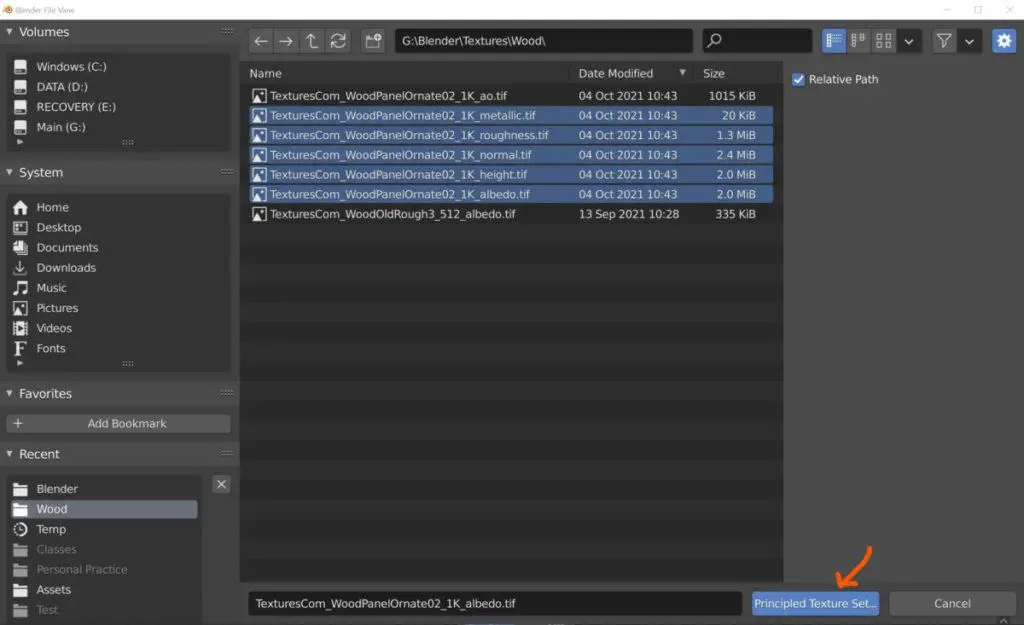
If you name the texture maps clearly, then you can import multiple maps at the same time. For example, you can import the following maps…
- Albedo
- Roughness
- Metalness
- Normal
- Height
If the name accurately describes what the map is used for then Blender will be smart enough to position it correctly.
You can select multiple texture maps by using the control key and selecting each map one by one. When you are ready to import, press the blue button labeled Principled Texture Setup.
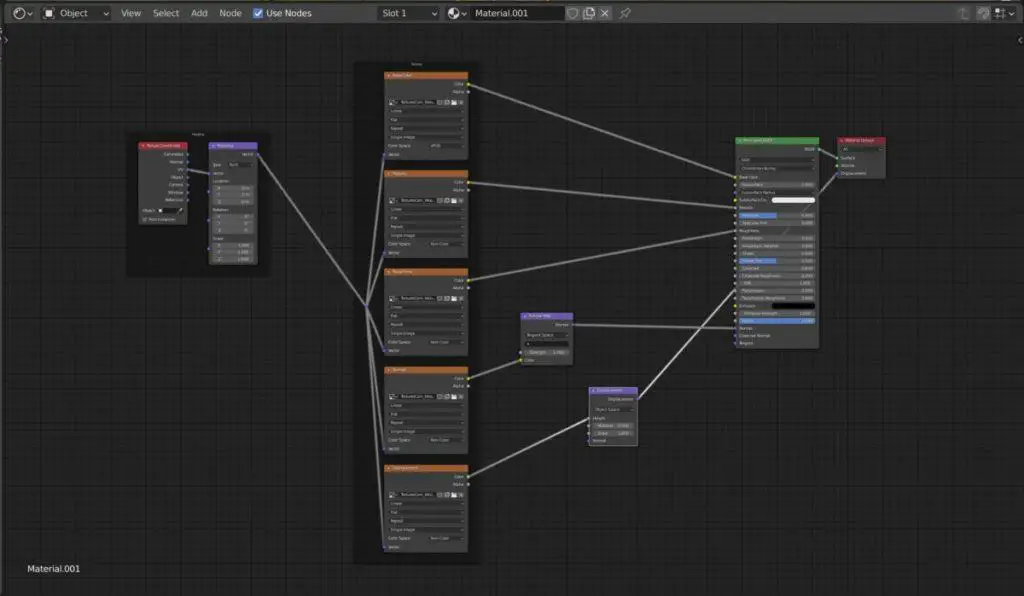
Your textures will now be added to your node setup and should be correctly positioned. Additional nodes are also added where applicable, such as the normal map and texture coordinate nodes. In other words, a fully completed PBR setup ready for use all with a single hotkey.
Using The Viewer Node
If the principled texture setup is the most useful feature of the node wrangler, then the viewer node is a very close second.
With this, you are able to preview the effect that any one node has on the material but connect that node to the material output through a viewer node.
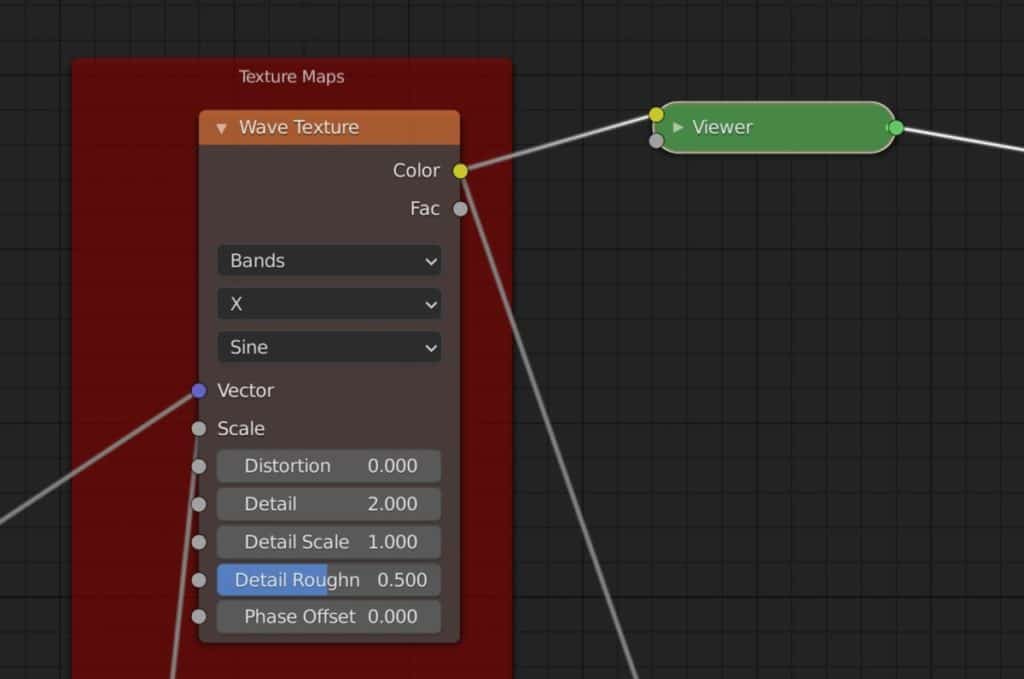
To add a viewer node, use the hotkey of Shift + Control + LMB when selecting a node, which then connects that node to the viewer.
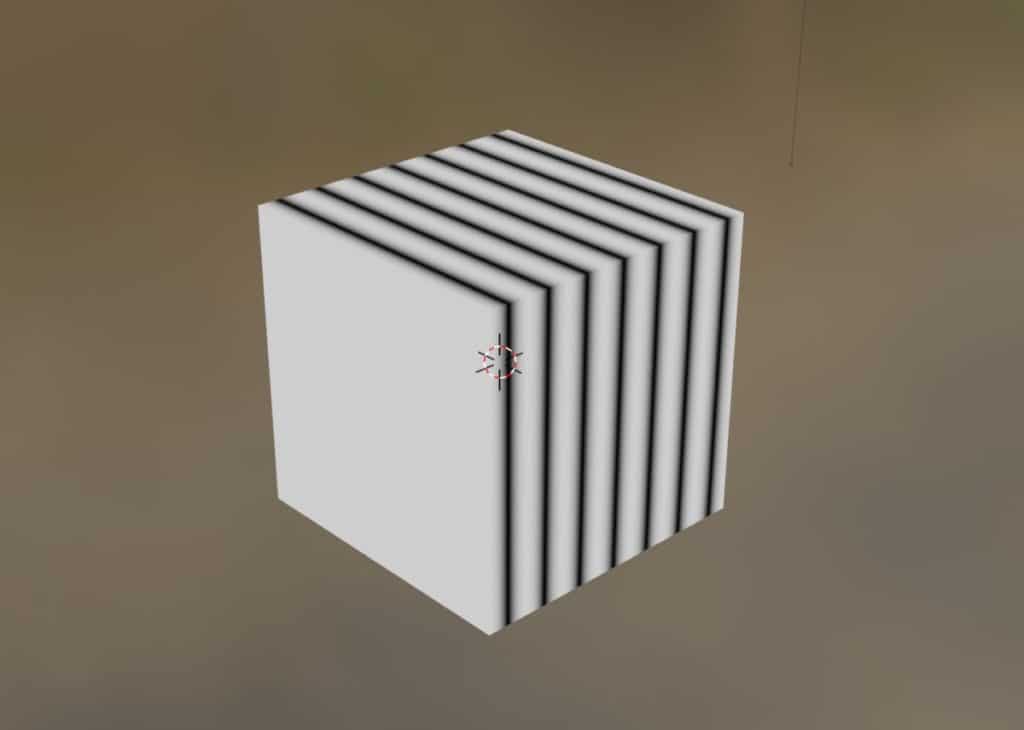
If you look in the viewport, you will now see your material based on the selected node, and anything after that is ignored. You can change the parameters of that node to preview exactly how it affects the material by itself.
Deleting Your Unused Nodes From Your Material
A very simple tool used to help reduce the clutter of your node tree by deleting any nodes that are not connected to the same tree as the material output.
This is more useful in larger node trees where it is easy to miss nodes that are no longer connected or that you no longer need to use.
To delete the unused nodes in your material, use the hotkey Alt + X. You will be given a command prompt asking you if you are sure you want to delete them, so left-click on the prompt to confirm the action.
Framing Your Selection
Framing is a great way of organizing nodes that fall within a specific category or task. The principled texture tool actually creates a frame for all of the texture maps, as well as the nodes used for mapping the textures.
Nodes inside of frames can be moved within the frame itself. You can also select the frame to reposition and it will carry all the nodes inside.
Frames do not affect a node’s ability to be connected with other nodes, regardless of whether they are inside or outside of the frame.
To add a frame using the node wrangler, first select the nodes that we want to create a frame around. With the texture setup, we could create a frame to store the norma map and displacement nodes.
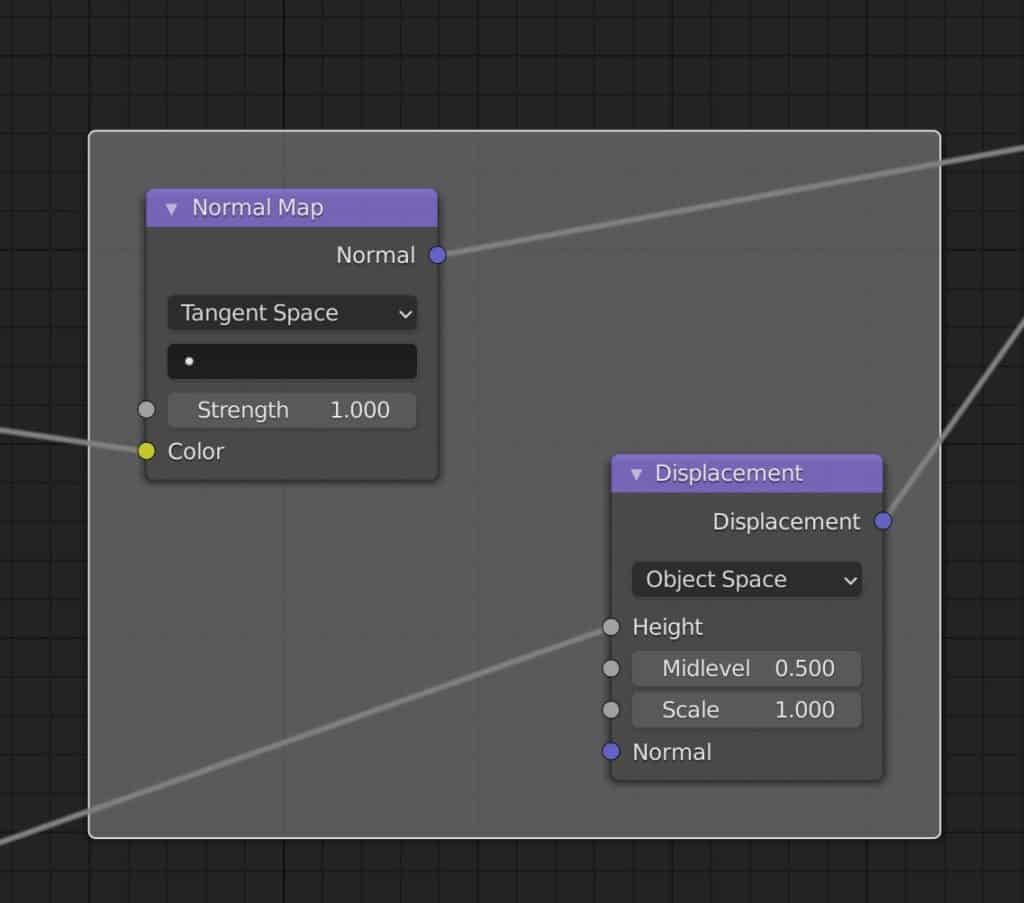
The hotkey used to automatically create the frame is Shift + P, which will instantly create a frame that surrounds the selected nodes.
By pressing N to open up the side panel, you can access additional options that will allow you to create a label for your frame, increase the label size so that it is easy to view, and even give the frame a unique color.
Swapping Out Your Existing Nodes
Lets say you are in the position where you are experimenting with the effects different nodes have on your material. You are testing out different texture nodes to see which one works best. The normal method would be to delete the node, add a new texture node and then reconnect all the noodles to see the node’s effect.
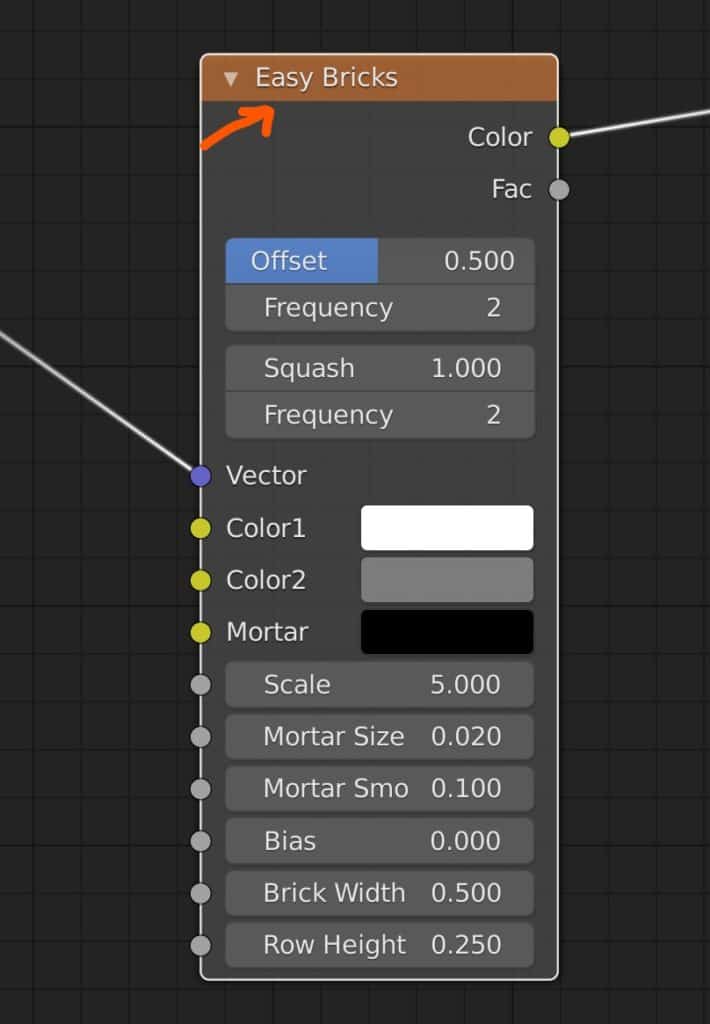
A much simpler way is to just swap out the node directly rather than deleting it. To swap out one node for another, first select the node that you want to swap, and then use the hotkey Shift + S. This will now bring up the swap menu, which is the same as the add menu.
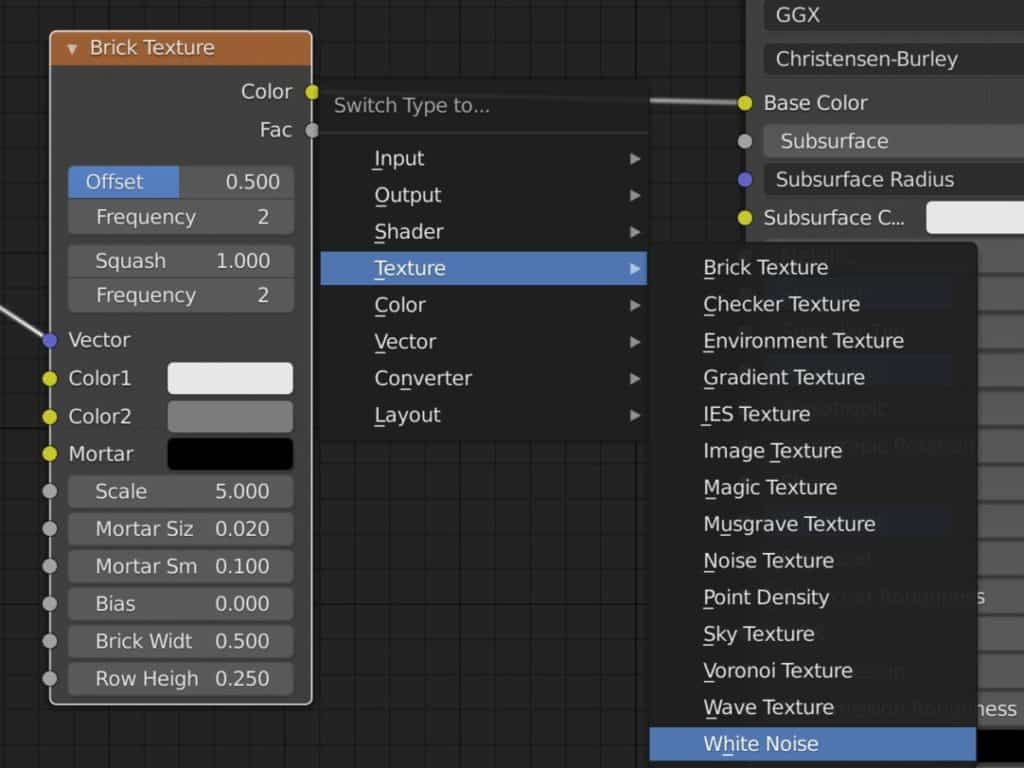
Select the node that you want to use from the list just as you would if you were adding the node normally, only this time it will replace the node that you previously had selected.
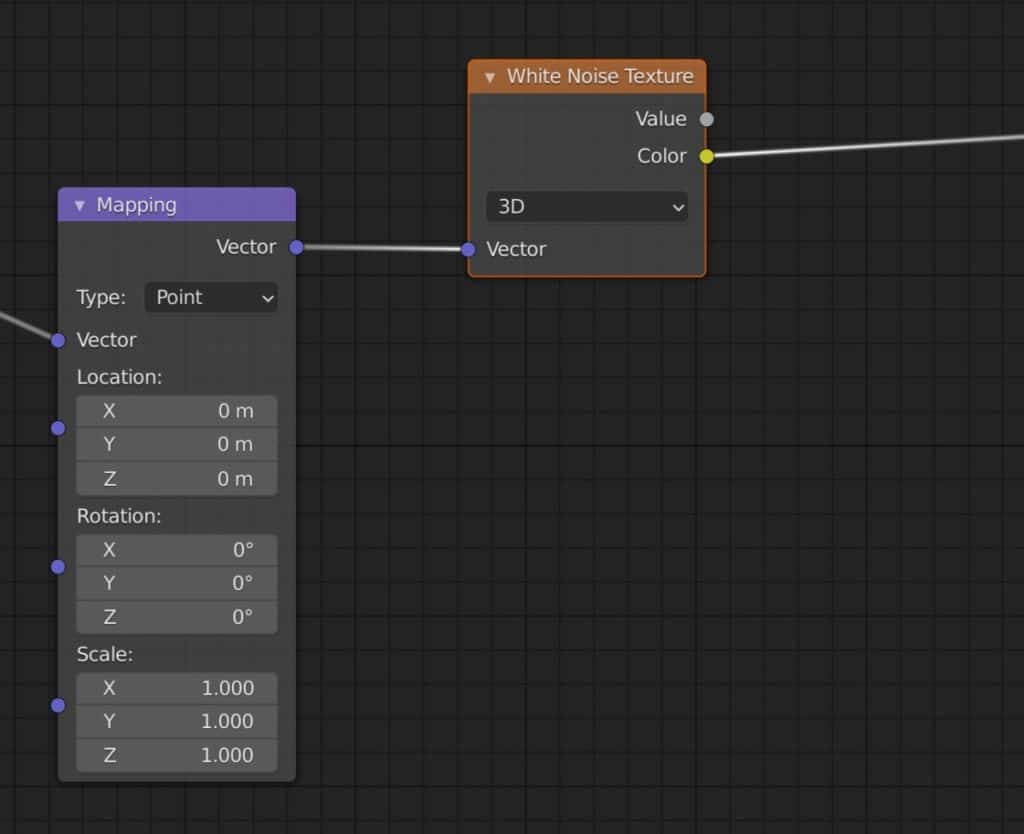
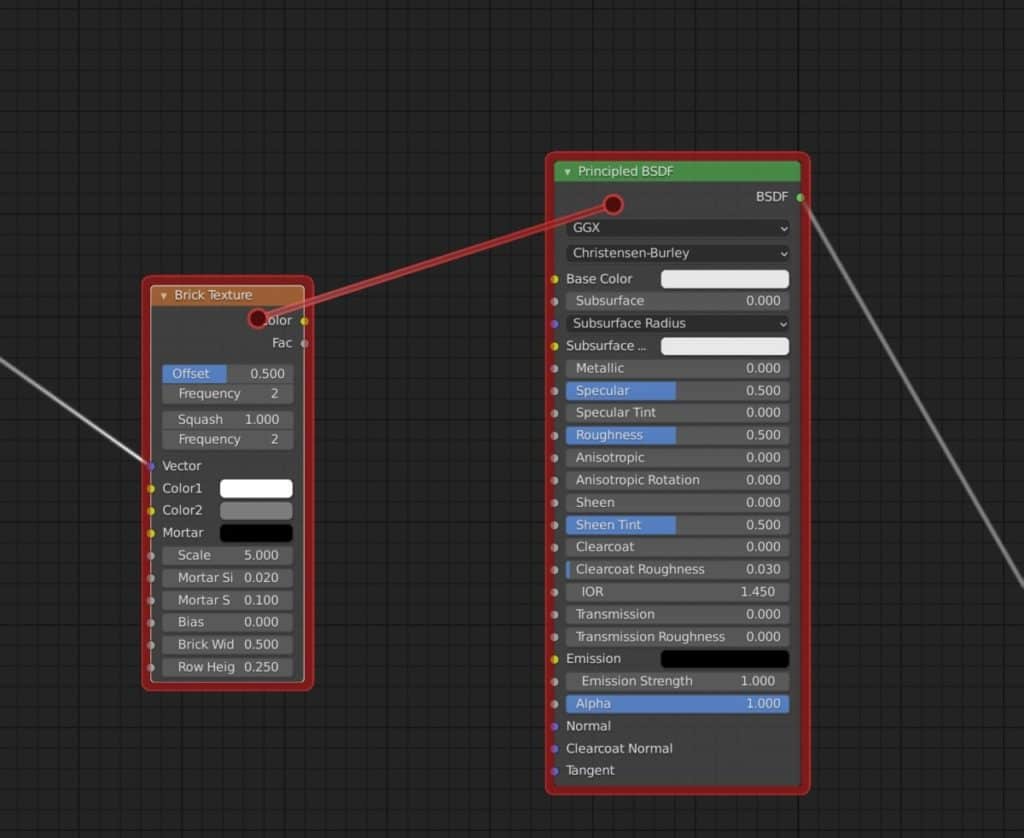
Note that Blender will try and keep the connections the same for each node. For example, if you swap out the brick texture with the white noise texture, then the mapping node will still be connected to the vector input.
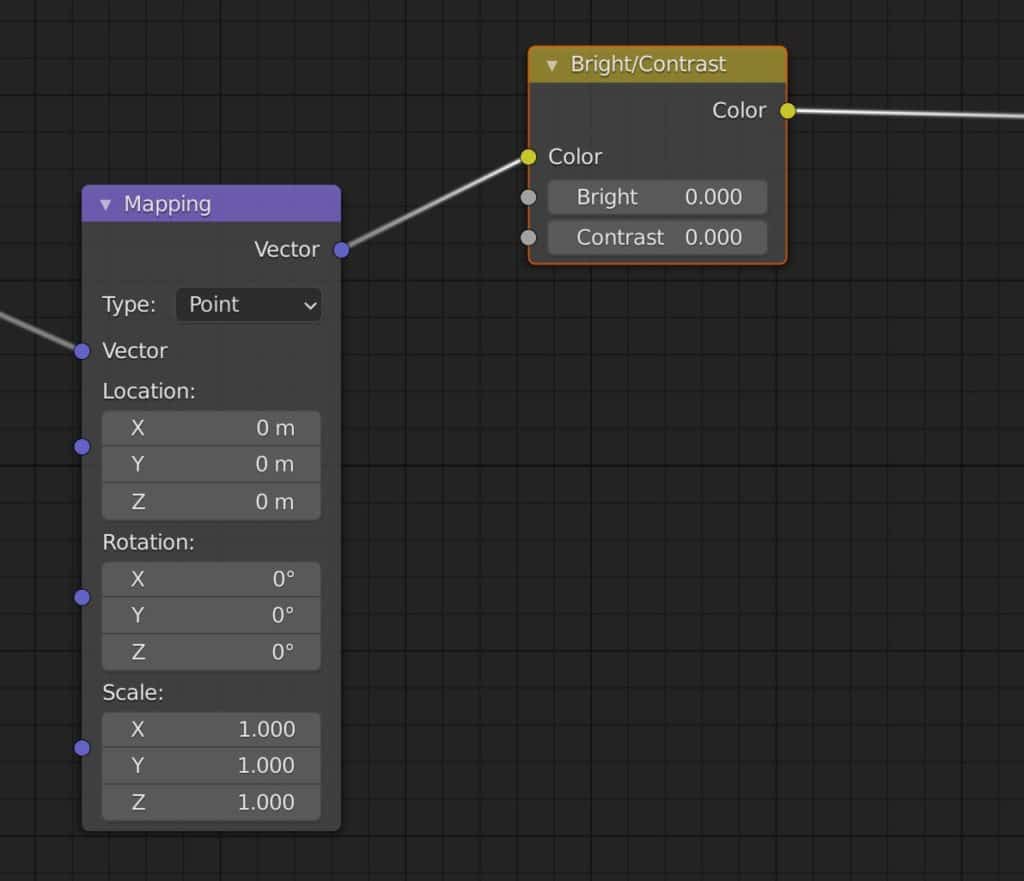
However, changing it to a node that does not have a vector input will see Blender connect to the first available socket instead.
Below the node was changed again to the bright/contrast node. As this node does not have a vector input the color input is used instead.
When swapping out your nodes make sure that the one you are planning to use is going to be suitable for that setup.
Modify And Clear Labels
All nodes by default will use their ID name as the title for that node. This name is used internally by Blender to recognize what the node is used for. However, you can also add labels to nodes if you want to give them a more accurate title based on what they are used for in your material.
The normal method of adding a label is to first select the node, then press N to open up the side panel. There will be an option that allows you to add a label to the selected node, which will initially be blank. Adding a name here will add the label to the node itself.
With the node wrangler, we can do the same thing using a hotkey, plus a few additional features. The hotkey for modifying labels is Shift + Alt + L. Note that the nodes still need to be selected beforehand to be affected.
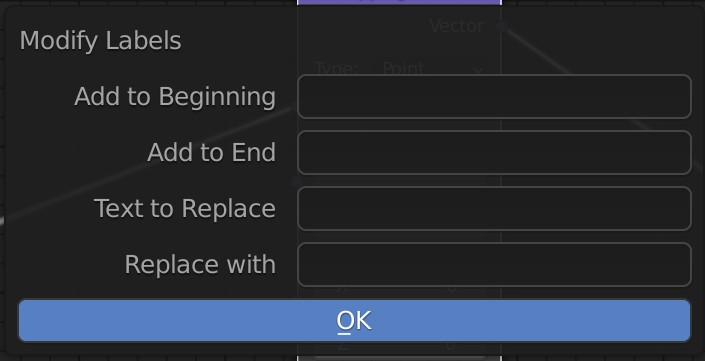
Using the hotkey brings up the pop-up menu that will allow you to create the label for your node, as well as adjust existing labels.
In addition to creating the label from scratch, you can add words to the beginning or end of the label, and also replace existing words.
These options do not work on original titles, and only affect labels that you have already created.
You can also clear any labels that you have created by selecting your nodes, then using the hotkey Alt + L. This will revert the title of a node back to its ID name.
Align The Selected Nodes Together
Another useful tool for the organization is the align tool, which can be used to reposition your nodes into either rows or columns.
While it does an ok job at aligning the nodes, it is perhaps more useful for getting consistent spacing in between those nodes.
To align your nodes, first, select them, then use the hotkey of Shift + =. Your nodes will now snap into new positions but maintain their connections.
Add Reroutes
A reroute works as an additional socket that acts independently from the other nodes. You can use it to streamline your node tree by combining noodles at a single point.
The reroute can take in a single input, and then branch out numerous outputs to different nodes. As noodles are key contributors to the appearance of the node tree, being able to better control their direction and structure is very useful.
To add a reroute using the node wrangler, you need to select a node, as it does still need to be connected in some way.
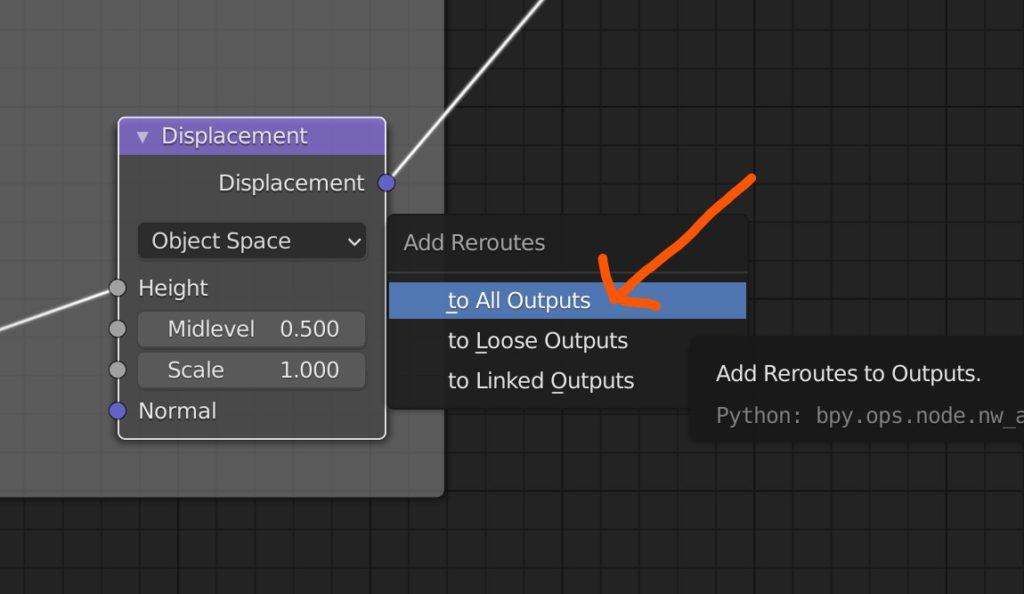
Then use the hotkey / or Numpad / to bring up the add reroute menu. You can then choose to add a reroute socket to either your linked or loose outputs.
You can then use the reroute to redirect or redistribute your connections.
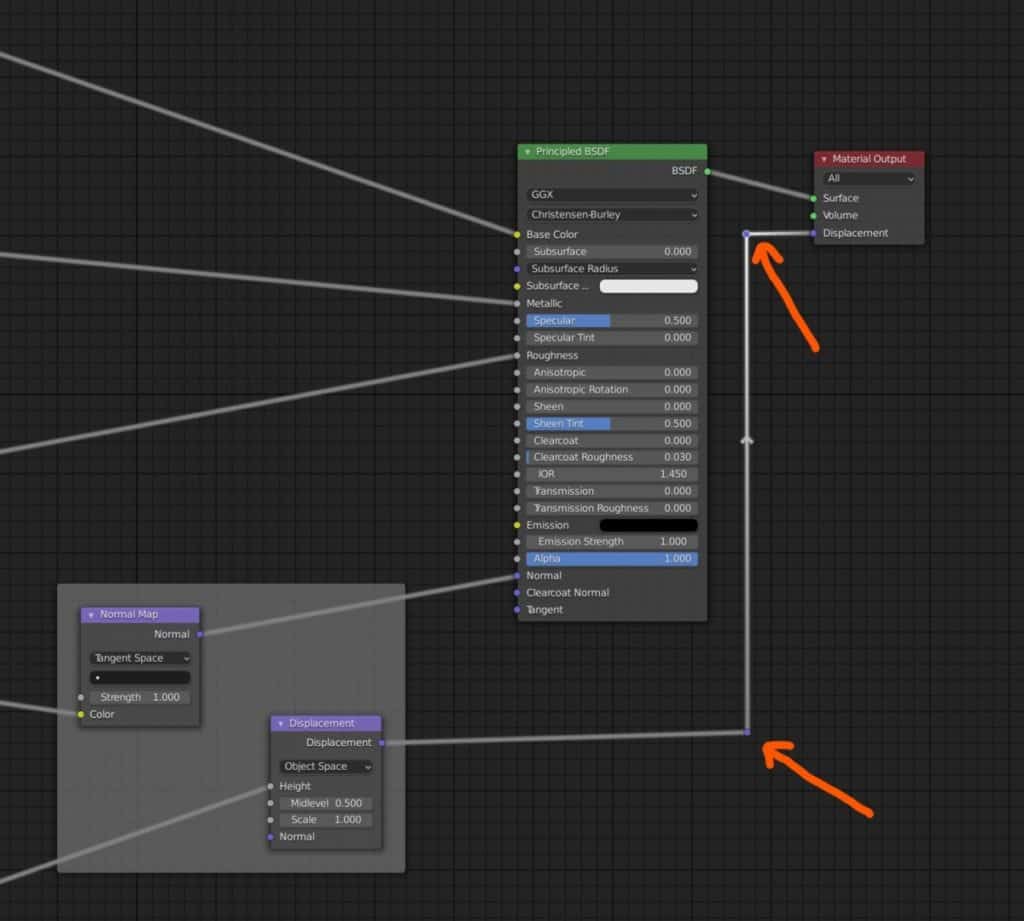
Another way of creating a new reroute is to hold down Shift + RMB and drag your cursor across a noodle, then release for it to add a reroute. You can also use this to combine two noodles together with the reroute.
Lazy Connections
A pain point for some is the need to drag and drop noodles to make connections. Fortunately, the node wrangler allows an easier way to connect your nodes together.
You can lazy link two nodes together by holding down Alt + RMB and then dragging the noodle over to the target node. This will take the top available output of the 1st node and connect it to the top input of the second node.
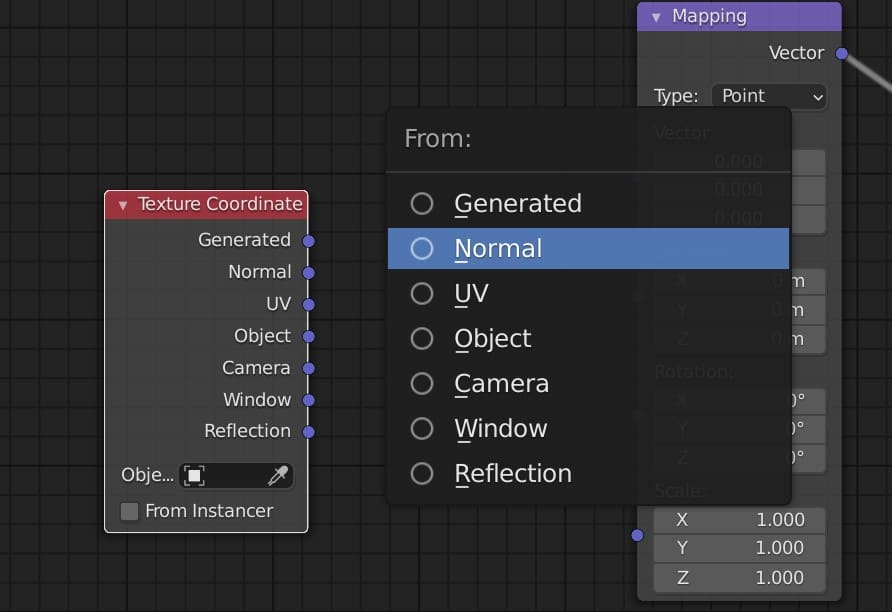
If you want control over which inputs and outputs will be connected then you can use the hotkey Shift + Alt + RMB. If you connect a texture coordinate to a mapping node, for example, you first get a menu that asks which output you want to use.
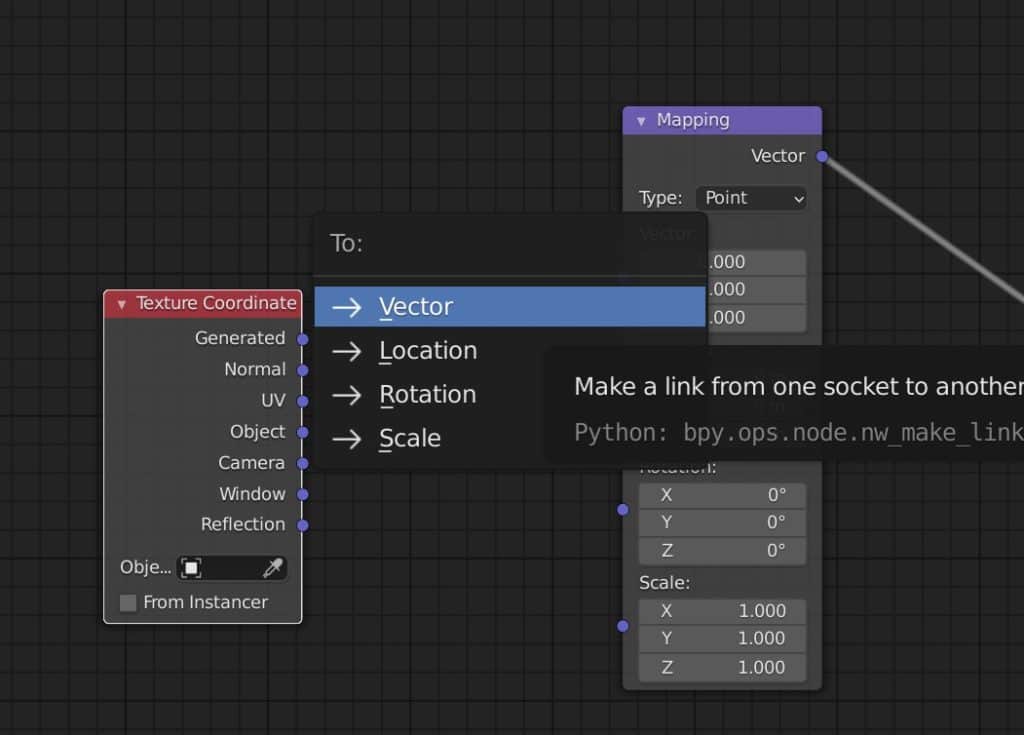
Then after selecting, a second menu will pop up asking you which input you want to connect it to. The nodes will now be connected using the correct sockets.
Thanks For Reading The Article
We hope that you found this article useful for learning about the node wrangler. Below we have created a small list of topics that we also think you may be interested in.
- Using The Node Editor To Create Materials
- Organizing Your Node Setups For Materials
- Making Glass Transparent In Eevee
- Painting Transparency Onto An Image Texture
- Applying An Image Texture To An Object
-
Expressions with Shape Keys in Blender
Creating expressive characters with Blender’s Shape Keys.
-
Stylized vs Realistic: Blender Techniques
Comparing stylized versus realistic sculpting techniques in Blender.
-
Detailing with Multires in Blender
Utilizing Blender’s Multiresolution for detailed sculpting and texturing.