It has to be said that the video sequence editor in Blender is not the most powerful video editing software that you will find, but it is able to perform many of the more commonly used tasks when editing movie files from cutting clips to manipulating their scale. One useful tool for any video editor is the ability to add text overlays to your movie file.
Text is an element that can be added as an independent layer to your video sequence by going to the add menu in the video sequence editor and selecting the text element. Then you can position the text in your timeline, adjust its length, and add additional effects such as fading or adjusting the font, size, and color.
There are quite a few things that you can do with text elements to help make your movie files look more professional, and a fair few scenarios where you would need to use text elements as overlays to your videos.
How To Overlay Your Text Elements On Top Of Your Video?
As with most video editors, your videos, elements, and effects all appear as strips that can be positioned anywhere on your timeline. This means that when you add a text element you can position it at any point in your video. You have a series of numbered channels for which to place your strips, and these channels act as layers, with a higher number being positioned on top of a lower one.
This means that when you add an element like text to your project, it needs to be positioned in a channel above the main strip to be visible.

Adding text or other elements is as easy as adding an image or a movie file, in fact, it is located in the same place! To add your text, go to the add menu located in the video sequence editor. You can reach the menu by using the hotkey Shift + A as well. From the add menu select text and it will be positioned wherever your active frame is in the timeline.
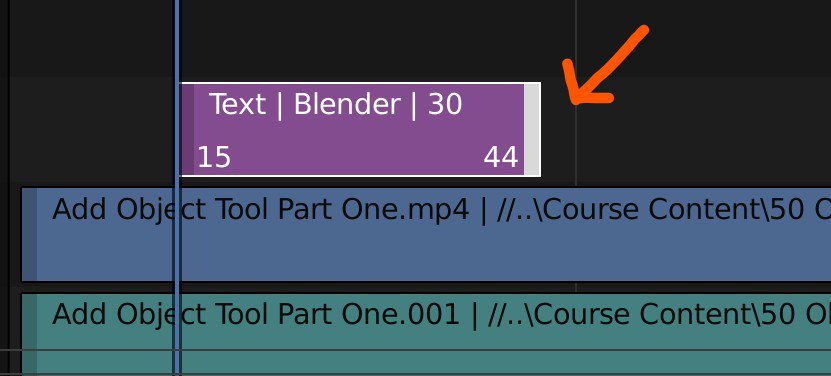
You can click and drag to move the text clip across your timeline to wherever you need it. For example, if you are using the text element to add credits then you would want to position the clip towards the end of the video, or just after if you wanted to combine it with a background image/color.

Clips can also be adjusted in terms of their length. you will find the ends of each clip are highlighted in a slightly different color, so click and drag from the ends to adjust the duration of the text.
When you have both positioned your text clip and define its length, you’ll then need to change the parameters of the text element itself, such as the font, color, and what the text actually reads.
How To Edit Your Text Elements Font And Color
Much like the 3D viewport and most other editors in Blender, the video sequence editor has a side panel that may at first be hidden from view. If this is the case, then you can press the universal N key to open up the side panel. From the side panel, you can edit the parameters of the selected clip. which in this case is the text element.
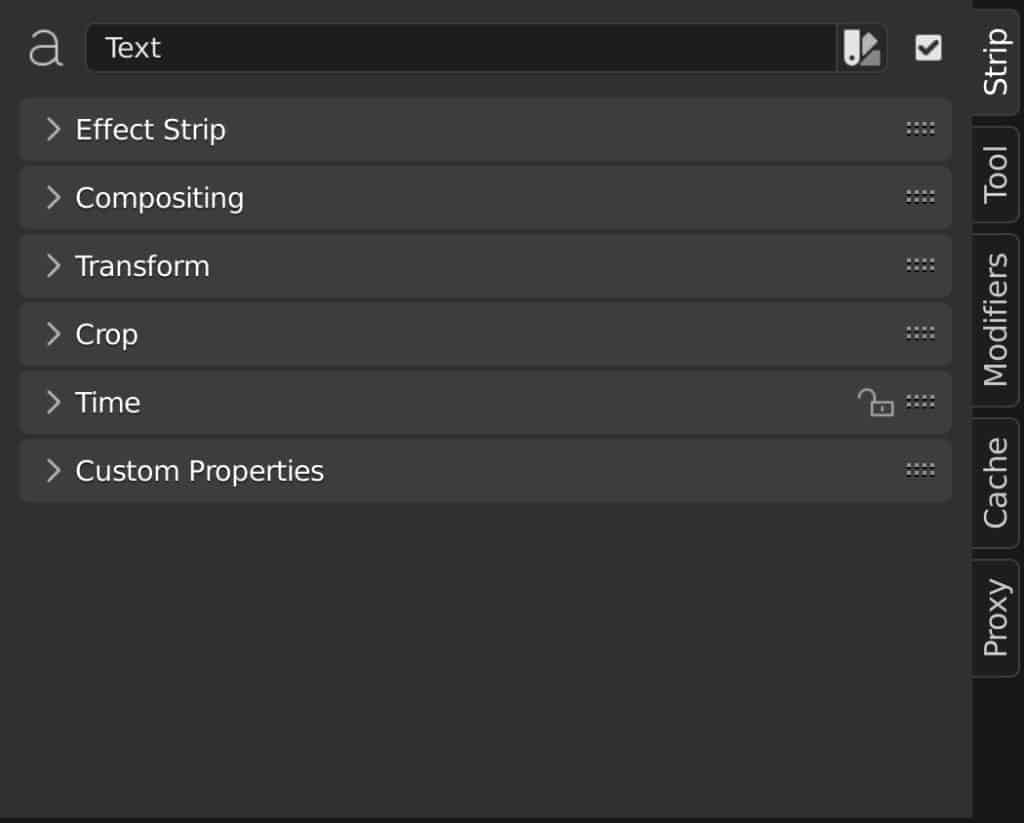
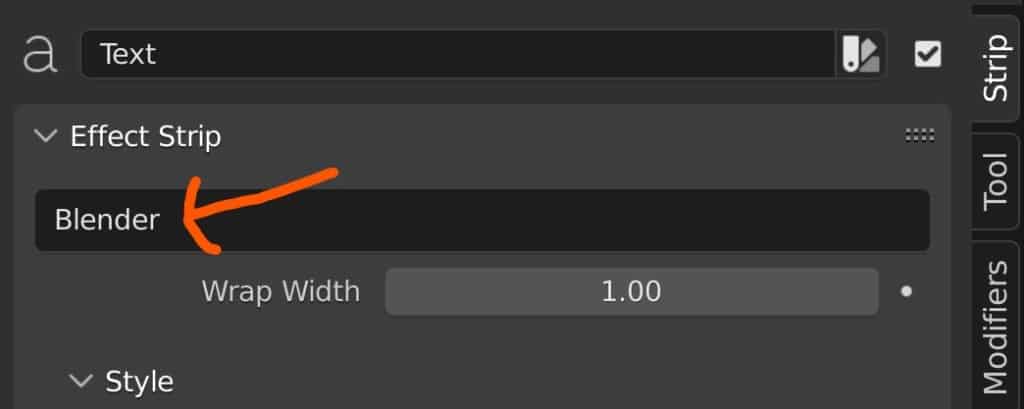
The first option that you will be able to change is what the text actually reads under the branch titled effect strip. Simply type in what you want to be displayed and then press enter to change to the new wording. Below that, you have additional branches for the style and layout of the text.
The Style Of The Text
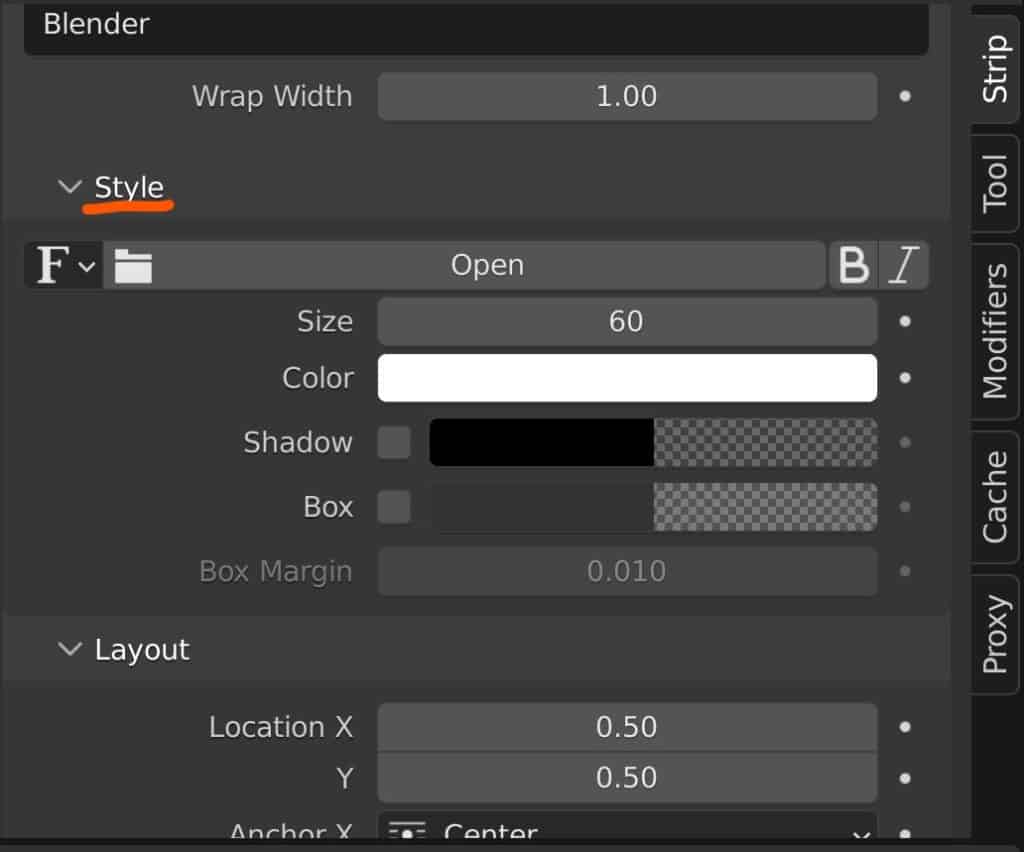
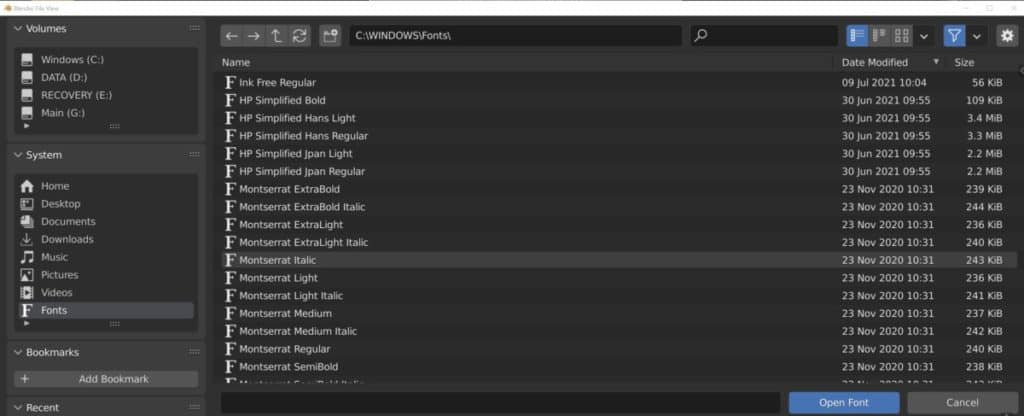
The options that are found under the style branch relate to the appearance of the text. The first option that will be available to you is the ability to change the font of the text. Click on the open button to bring up the file browser in a separate window.
If you are using the Windows operating system, then the directory should be sent to the fonts library. If it is not, then you can type in If you are using the Windows operating system, then the directory should be sent to the fonts library. If it is not, then you can type in C:\WINDOWS\Fonts\ into the bar at the top to go straight there. If it is not set up to do this automatically then go to Preferences > File Paths > Data > Fonts and paste in the same location, then close the preferences panel.
In addition, you can make your selected font either bold or italic with the buttons located to the side of the font, much like in a traditional typing application.
Of course, you can do more than just change the font. You can also change the size of the text as it appears on your video using the numerical value, as well as changing the color with the help of the color wheel. This is one aspect of text creation that is actually better than Word because it’s easy to choose any color that you want with the color wheel.
There are a few other stylings that you can change here. A popular tool is to add a shadow to your text, which makes it much easier for the text to stand out from the video background.
You can also create a box to surround your text to further help distinguish it from the background, but while you can change the size and the color of the box, it’s not as easy on the eye as using text-shadow.
How The Text Is Layed Out
The options that are found under the layout branch relate to the positioning of the text within its bounding box. Note that this is not to be confused with the text positioning on the screen.
Text objects are stored inside a bounding box which is in turn much easier to grab, rotate, and scale. The layout options relate to the text inside of its own box.
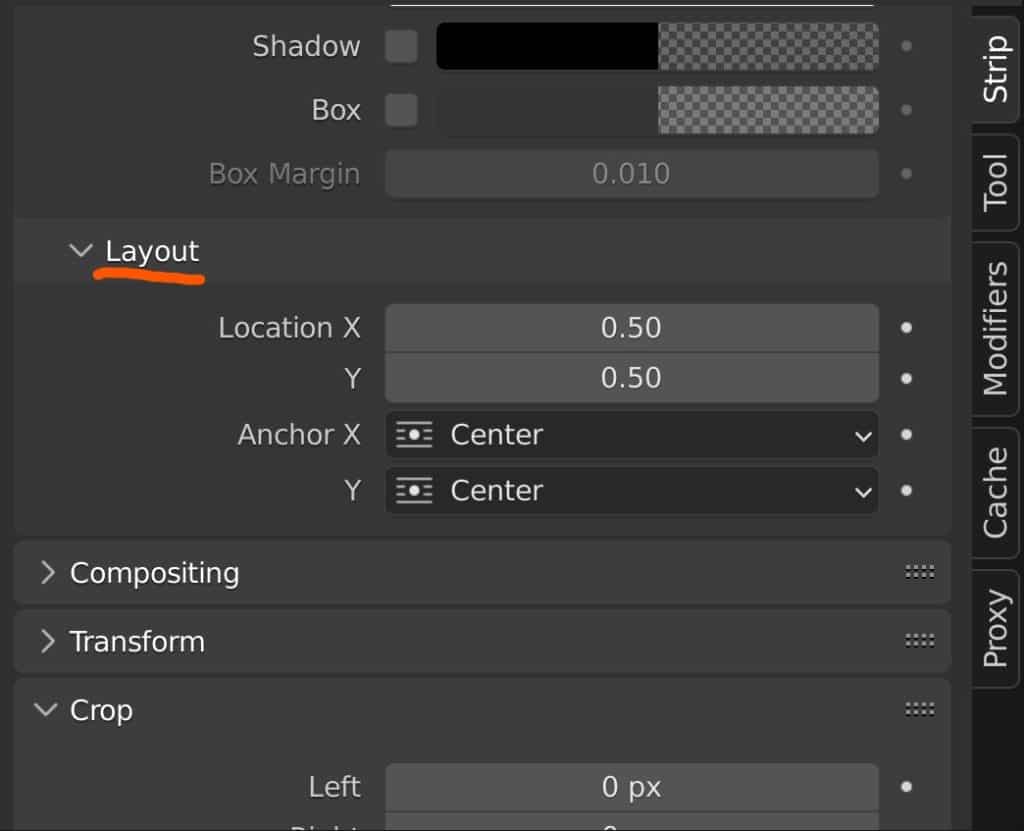
If you manipulate the location value of the text on either axis, you will be able to move that text within its box. As you reach the border though the text will begin to disappear out of sight.
This is useful actually because it allows you to add animations using the location of the text within its bounding box area. The anchor settings underneath act as the origin point for the text, but these are fixed areas within the bounding box
Compositing
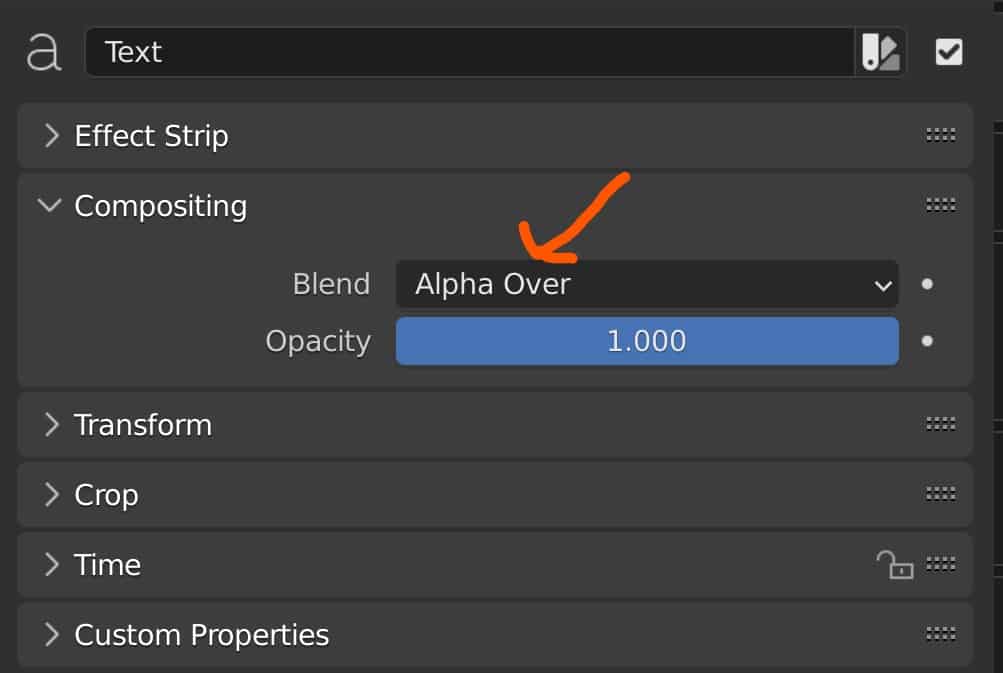
This branch only has one option to worry about, but it is an important one. It is here that you can change the blend mode, which is how the text element reacts to other elements in the sequence where there is overlap.
By default, the blend mode should be set to alpha over. If you cannot see your text in your preview then it is likely that the blend mode is set to something different, so make sure to set it to alpha over as a starting point.
The different blend modes can change the look and color of your text, so experiment to see what modes you might like to use in the future.
Transforms
An important distinction to make is the difference between the layout options and the transform options. Simply put, the layout relates to the text inside its bounds, while the transform is connected to the box that stores the text.
These are the settings that you will likely pay more attention to. The position values are basically the same as location values, and place your text wherever it needs to go in the preview. The scale values are used to make the text larger or smaller on each axis.
If the X and Y values are not equal, then the text itself will begin to stretch along the axis with the greater value. You can use this to create animated stretching for your text as a custom transition.
Rotation is a single value since you can only rotate on a single plane in two dimensions. This makes it easy to control the rotation of the text.
While it is not at the top of the list of transform tools, the origin is the one that affects how the over transform tools behave here, with the exception of the position.
By changing your origin, you change where your text can scale and rotate from. This is useful when you want to rotate text a certain way for an animation.
Then you have the mirror option, which allows you to flip the text on either the X or Y axis, creating a mirrored effect for the text.
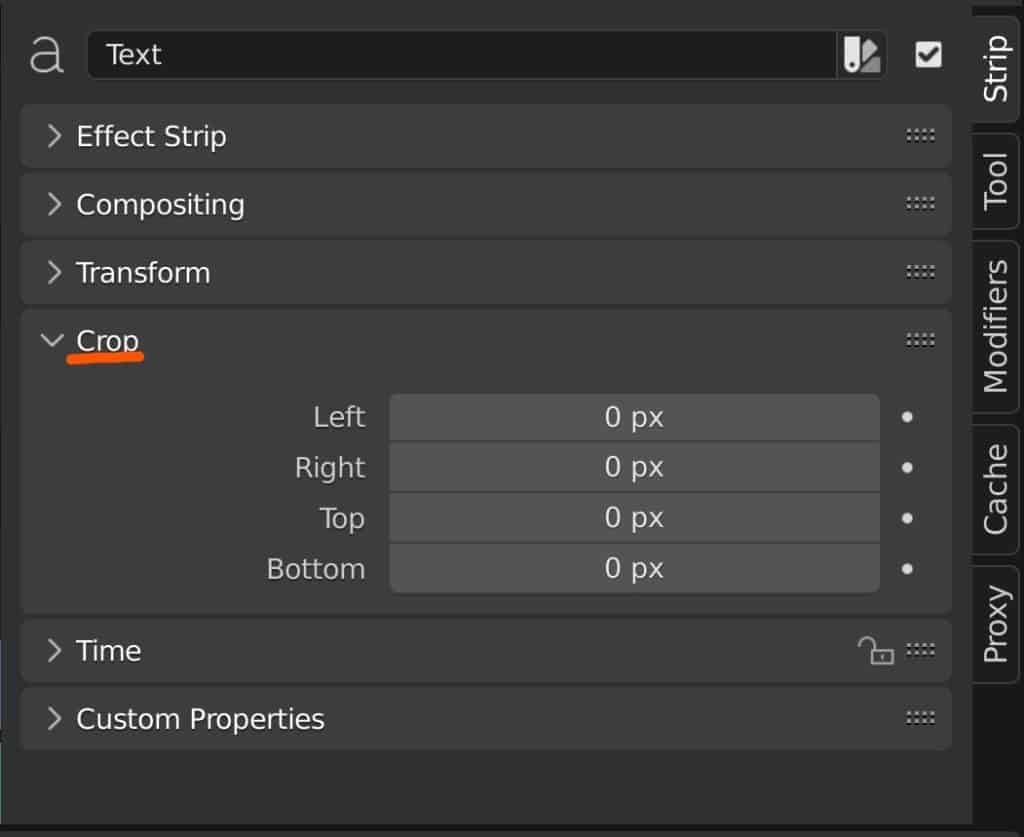
Crop
With the crop tools, you can control the size of the text box that holds your text element. You can reposition the top, bottom, left, and right borders of the text box. Doing so will impact the tools used in the layout branch, as making the text box larger will allow greater freedom of movement for the text inside that box.
Adding Transitions To Your Text Elements
One thing that editors will nearly always do is add a transition for any text elements that they create, regardless of the purpose for that text element. Just having text pop up out of nowhere on the screen creates a very low-quality look for the video and is uncomfortable for the human eye.
Using transitions makes it all just that little bit more professional and there are a variety of ways in which you can create these transitions.
In Blender you have transitions and you also have fade effects as two sub-menus. Both of these can be found under the add menu.
While we refer to it as a transition, we won’t be using the transition effects themselves for a single text object. This is because in Blender the transition options focus on moving from one clip to the next, but our text just overlays the main video, so these transitions are not usable here.
Instead, we can use the fade effects to create simple fade in and fade out’s to improve the look of our text elements. For the most control, position your active frame to where you want the fade-in effect to finish, then press Shift + A to open the add menu, go to Fade, and select To Current Frame.
Then for the fade out go to the frame where you want to start and then return to the frame menu where you will select From Current Frame.
In addition to the fade effects that allow for easier transitions for text, you can also create your own animated transitions by manipulating options in the side panel such as the transforms or the style options.
To do this click on the dot next to a parameter, like the text size, to insert a keyframe to that parameter. Then change to another frame, alter the setting, and press the dot again to add the second keyframe. Now if you play the clip you should see the animation created with that parameter.
Other Methods To Help Improve Your Video Content
Text elements are just one way that you can improve your video content in Blender. Another method is to add broll footage. Broll is the term used for secondary footage that is often used to enhance the story being told in the video and can appear as a shot from a second camera, or even as simple stock footage.
You can add as many video files as you need to the video sequence editor, but remember that priority is given to clips in the channel with the higher number in terms of what gets shown on top.
Another effect that you can do in Blender is adding credits to the end of your video. We already know how to add text elements but if we go back to the add menu you will see that we can also add single colors.
We could for instance add a black background after our video clip and then add text elements on top to create a credit reel, and use fades and animations to give it that professional finish. As you would be working with multiple text elements here, transitions also become an option depending on how you decide to produce it.
There are many ways in which you can improve your video content using elements and animations, always test new options to expand your own skillset as a video editor.
Thanks For Reading Our Article
We appreciate you taking the time to read through our article. Below we have gathered a small list of additional topics that we think you may be interested in.
- Is The GLTF File Format Compatible In Blender?
- Is Blender The Only Free 3D Software Out There?
- Where Does Blender Get All Of Its Money From?
- Why Do Materials Get Deleted When You Leave Blender?
- Does Blender Use The GLTF File Format?
-
Detail with Shrinkwrap: Blender Modelling
Achieving intricate detailing with Blender’s Shrinkwrap modifier.
-
Edge Loops for Hard Surfaces in Blender
Utilizing edge loops for defining crisp hard surface details in Blender.
-
Blender Kitbashing: Complex Shapes Made Easy
Simplifying complex shape creation with Blender’s kitbashing approach.