As you become more confident with Blender, you are likely to progress beyond the simple primitive scenes with flat lighting and materials but are unsure how to progress your renders to the next level. For example, you may want to create a project involving rain application as a weather effect.
To create rain in Blender, generate a plane object and position it above your scene, out of the view of your camera. Add a particle system to the plane and set the render object to a low poly icosphere. Create a glass material for the ico sphere and play an animation so that the rain falls from the plane. In the render properties enable motion blur and set it to around 0.4.
Even more complex scenes can be achieved using relatively simple objects, especially when the scene is going to be rendered as a still image or an animation with few moving objects.
Set Up The Emission Object
The first step to setting up rain in your scene is to create the object that will be used as the emitter. This is the model from where the particles will spawn from.
Because our particle system is a rain effect, raindrops will fall from above, so the emitter object should be positioned directly above the scene.
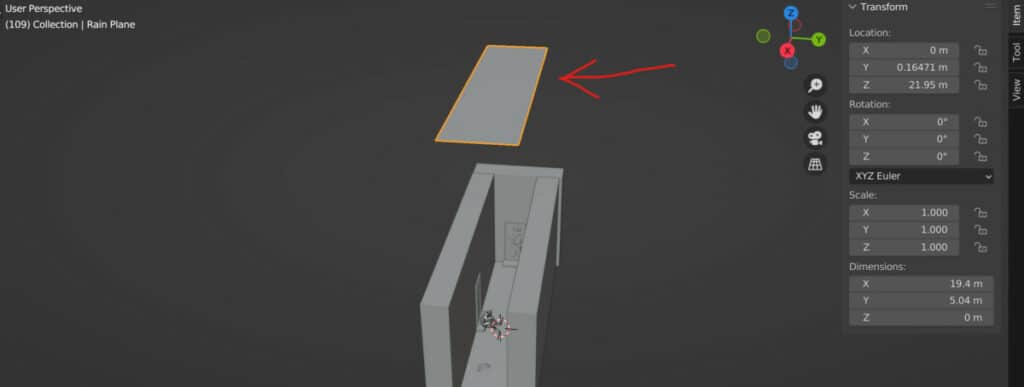
As for what mesh object works best for this setup, any model will do, but it is best to keep it simple and use a plane object.
Make sure to scale the object so that the rain falls everywhere you need it in your scene. While applying the object’s scale does not affect the simulation, applying the rotation and scale of objects you create is always best practice.
Create The Raindrops For Your Effect
The next step is creating the model for the raindrops, which again does not need to be overly complicated as the raindrops will be tiny, even those closest to the camera.
An ico sphere is a mesh type that offers a consistent geometry shape around its surface area, so create an ico sphere and reduce its size to a fraction of its original.
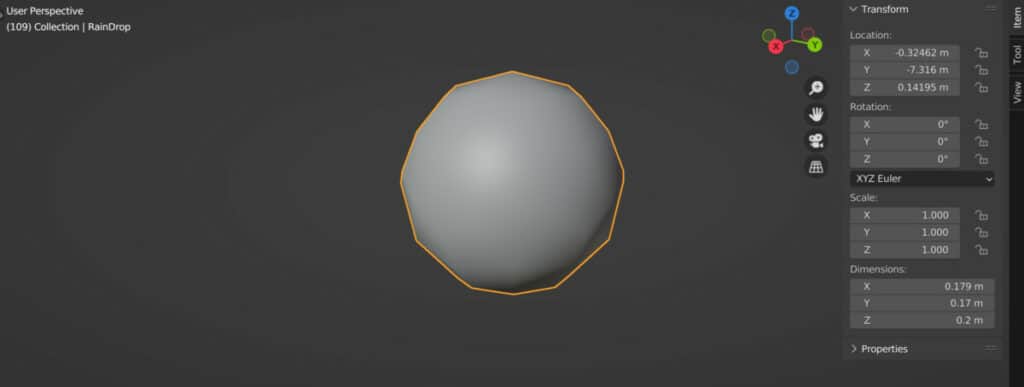
A tip here is for the size of the render object to be larger than intended, as the particle system will allow you to reduce further the size of the particles rendered using the scale value.
We then need to create a glass material that will be applied to the ico sphere, which should also be renamed raindrops while we are here.
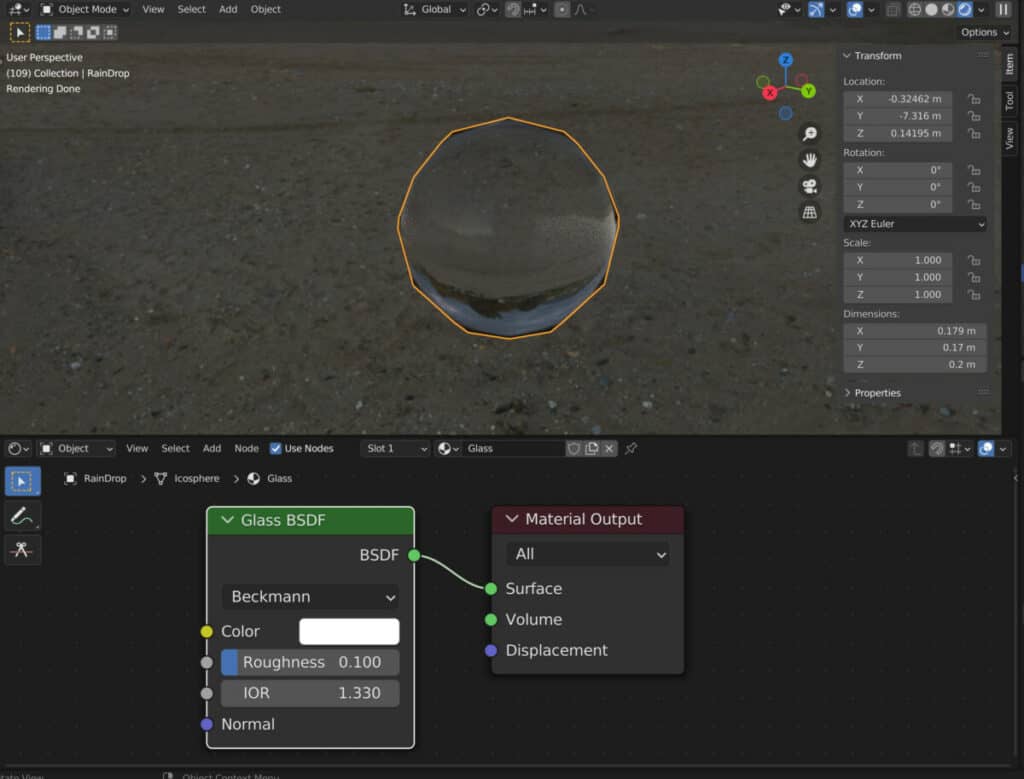
Create a simple glass material using a Glass shader instead of the principled node and set the IOR to approximately 1.33, which is the IOR of water.
Apply The Particle System To Your Scene
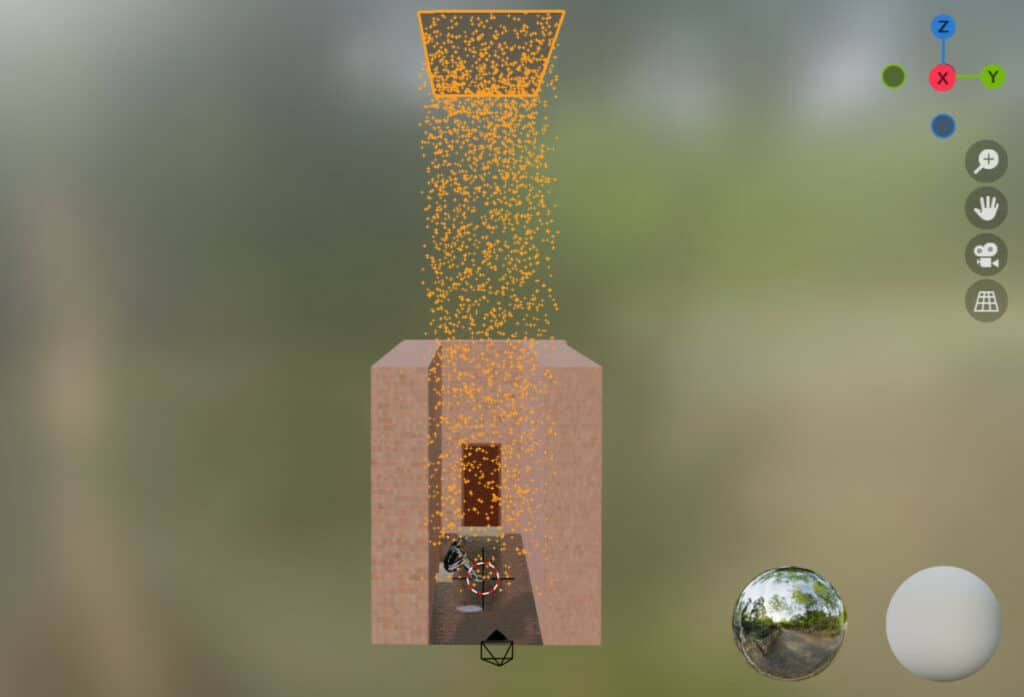
Now we can create a particle system to make it rain in our scene. Select your emitter object, which is likely your plane, and go to the particles tab in the properties panel and create a new particle system. It should already be set to the emitter, which we want.
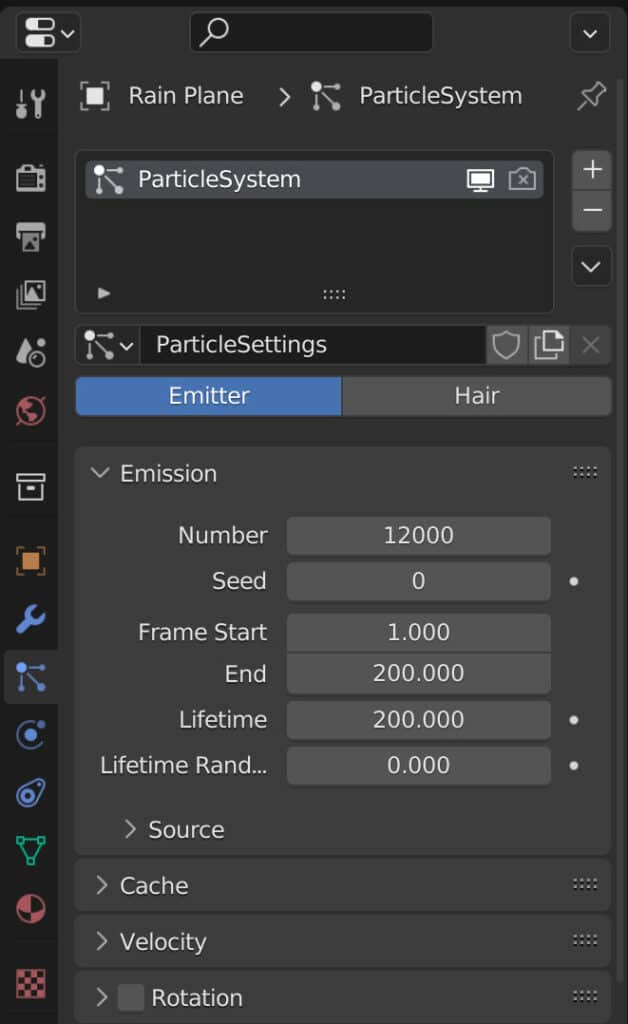
Press the spacebar to play the animation in your viewport, and you should see particles begin to fall from the plane over a set period. Set your particle system’s end frame and lifetime values so that the simulation plays for the required time.
Because this is a simulation, we need to use the timeline controls to preview the animation in the viewport, this is true regardless of whether we plan to render a still image or a full animation.
Next, we need to assign the ico sphere as the emitted object for the rain simulation. Drop down to the render section in the particles tab and change the Render As option to object.
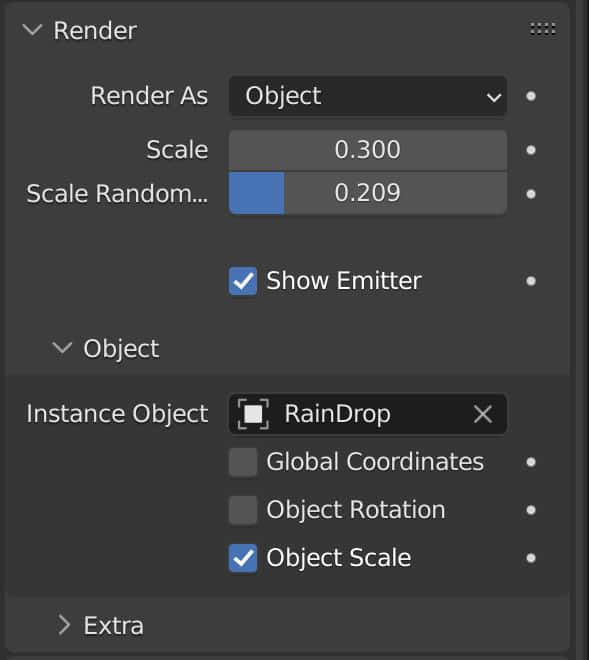
Then open the object section underneath and change the instance object to your ico sphere or raindrop object.
Preview your animation again, and the particles now appear as raindrops. The particles themselves may be too large, so in the Render section, reduce the scale value to the size that you want. Also, add some scale randomness, as not all raindrops will be the same size.
As a tip, adjust the scale values of your raindrop instances while looking through your camera’s lens, as you can get a better idea of how their sizing compares when you go to render.
Add Some Wind To Your Simulation
As a bonus option, you can alter the direction of your raindrops using wind physics in Blender. By default, all particles will fall vertically in Blender on the -Z axis, but we can control this better using force fields.
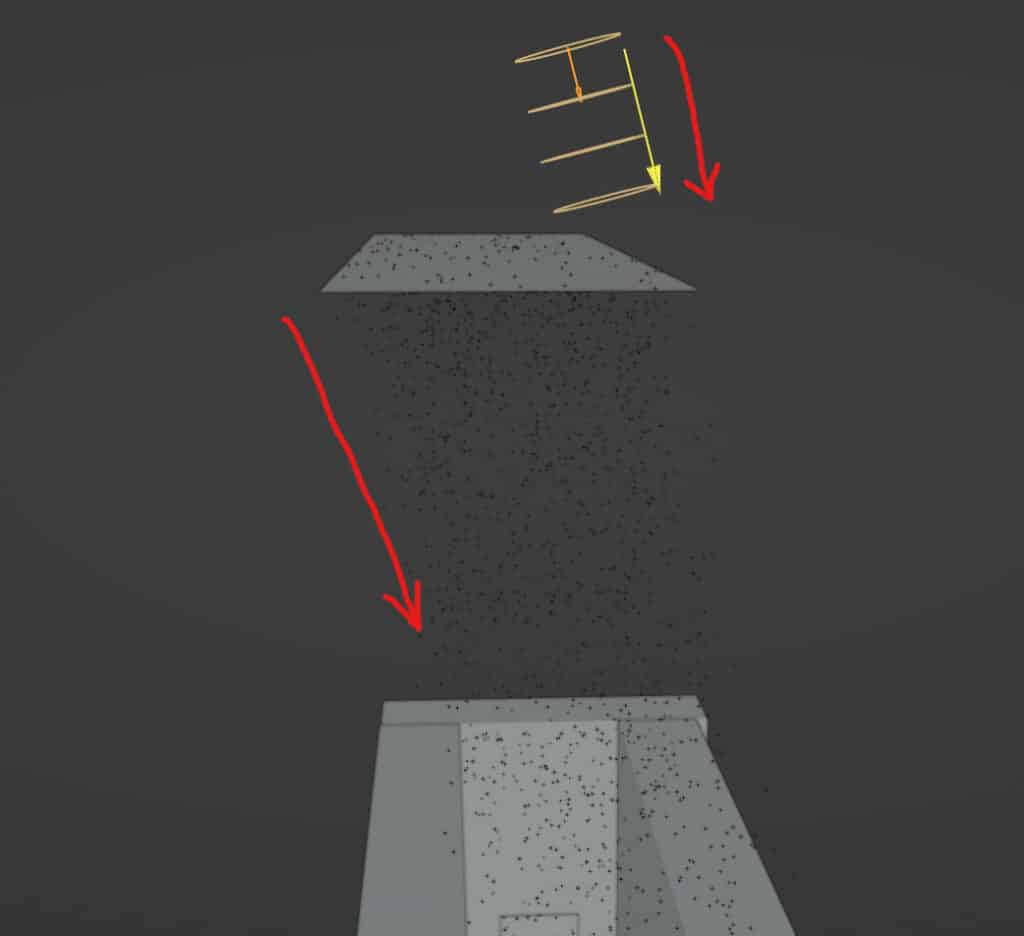
Open the add menu and choose the force field object type, then from the secondary menu select the wind object. Position the wind object in your scene and then rotate it to the direction you want the rain to follow.
Click and drag the large arrow on the wind object to increase or decrease the amount of force applied. You may also need to move the emitter object depending on the new direction.
Play your animation using the timeline controls to view the rainfall and make adjustments where required.
Add Motion Blur To Your Scene
Rain is always falling until it hits the ground, and because of gravity the typical shape of our rain drops tends to be more pair shaped than spherical.
We could use a UV sphere and proportional editing to act as our instanced geometry for our rain in place of our ico sphere, but the object itself should appear as a blur in any still image as the speed and size of the raindrops contribute to this visual phenomenon.
So while changing the geometry of the instanced raindrop is certainly one approach, we should look to apply motion blur to our render regardless.
To add motion blur to Cycles X go to the render tab in the properties panel and local the section for motion blur.
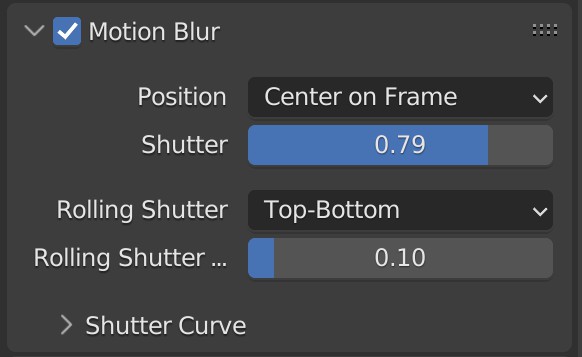
Tick the box to enable the motion blur effect and adjust the shutter speed to a value of your liking. You may need to play and preview your animation multiple times in the viewport to get the look you want.
For rain, we like to use a shutter speed of around 0.78, giving us a pleasing look for the raindrops through the animation.

In Eevee, the process is nearly identical, but we have a few more controls, such as the pixel resolution of the motion blur.
Thanks For Reading
We appreciate you taking the time to read through the article. We hope you found the information you were looking for. If you are interested in learning more about the Blender software, you can check out a few of the articles we have listed below.
- Blender Tutorial – How To Create Puddles Using Procedural Textures
- Blender Tutorial – How To Create Puddles Using Texture Painting
- Creating A Hologram Using Geometry Nodes
- How To Make Glass Transparent In Eevee
- What Is The IOR Of Glass