Most artists will typically use the default settings for the Blender UI when it comes to the color theme of all the individual elements and panels, as do the vast majority of Youtube tutorials and courses. However, that does not mean you cannot change your color theme to make Blender look the way that you want.
To change the color theme of the Blender UI, go to Edit > Preferences > Themes, and you can then begin manually changing the color of various elements in Blender. You can save your changes as a preset using the + button or you can select from a menu of prebuilt presets for your color theme.
While the color theme of the various UI elements does not change how we use Blender, it is always an excellent option to change the application’s appearance to something that may better suit our tastes.
How To Access The Color Options For Our Theme?
Like many of the various settings relating to the Blender software and how it works, the color theme is a setting found in Blenders Preferences Panel.
To locate the color theme, go to the edit menu in the header bar of the Blender UI and select the edit menu option.
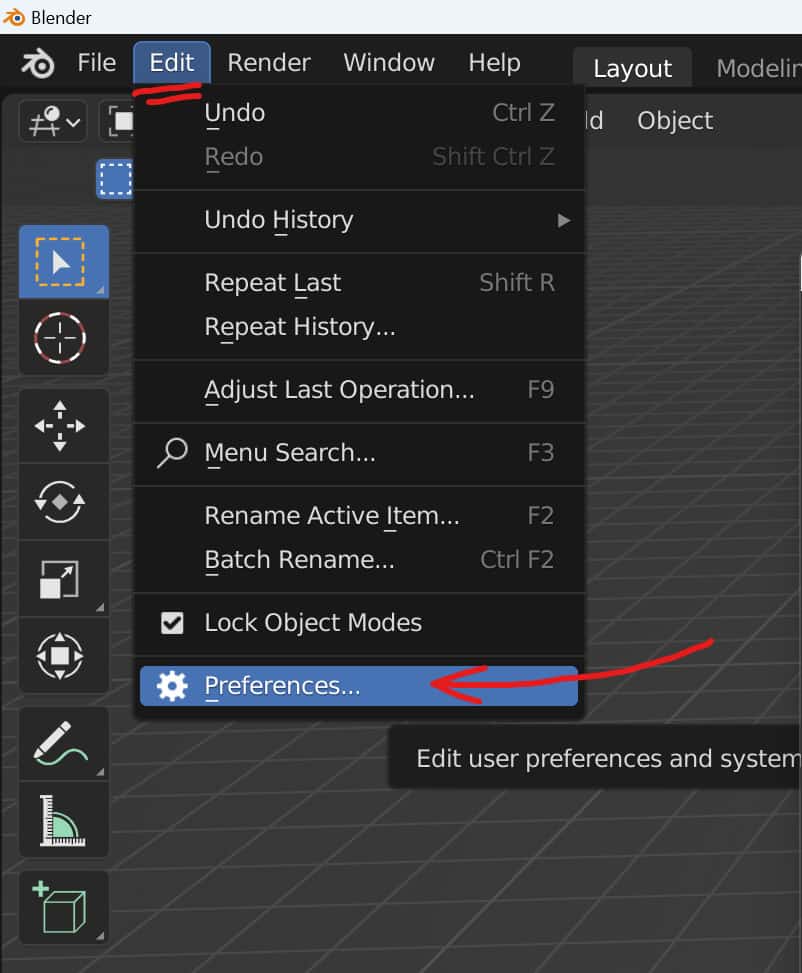
You will find the Preferences option to be the last in this menu at the very bottom. Select this option, and the preferences panel will open in a separate window.
The themes section can be accessed from this panel, which will be the second option in the column of tabs to the side of the panel.
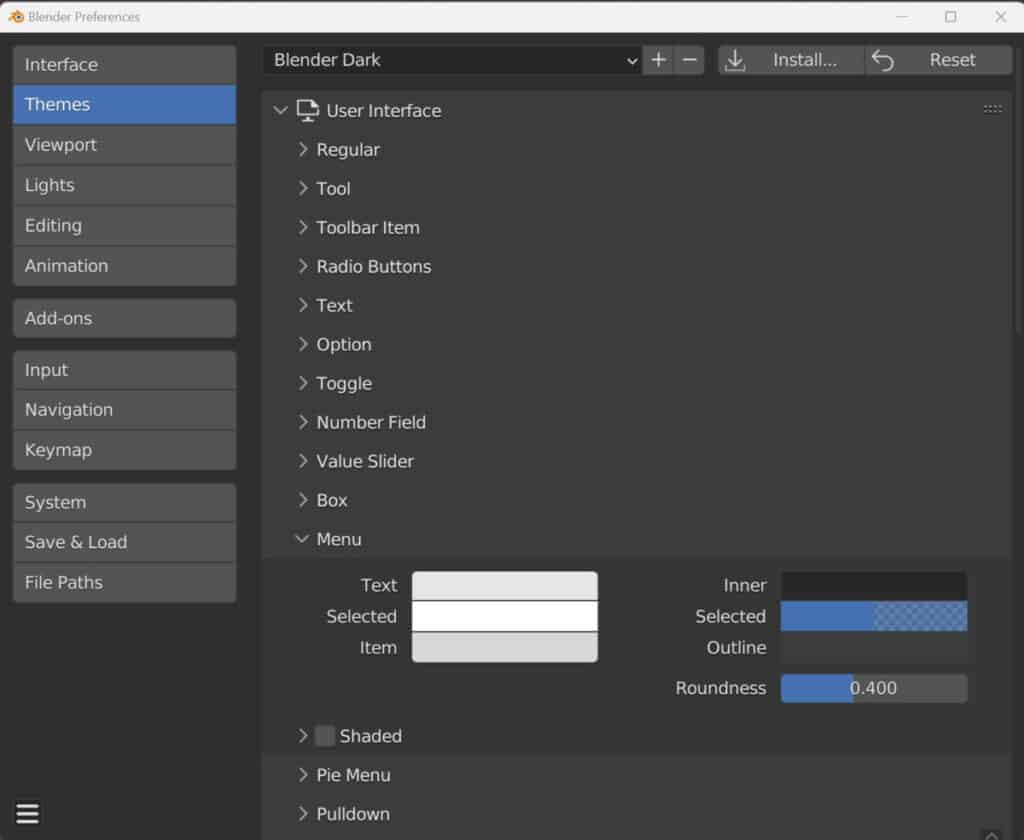
This tab is exclusive to the various tools used to change the color theme in Blender, including the ability to change individual elements and create new theme presets.
Changing To Another Color Theme Preset
The simplest method to change the color theme of the Blender user interface is to select another theme presets.
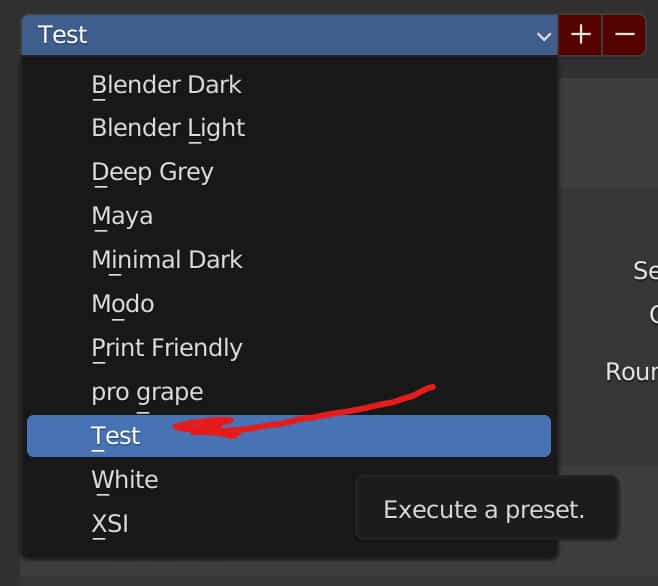
At the top of the panel, we have a menu labeled ‘Presets.’ Left-click to open the presets menu and access the various prebuilt color themes in Blender.
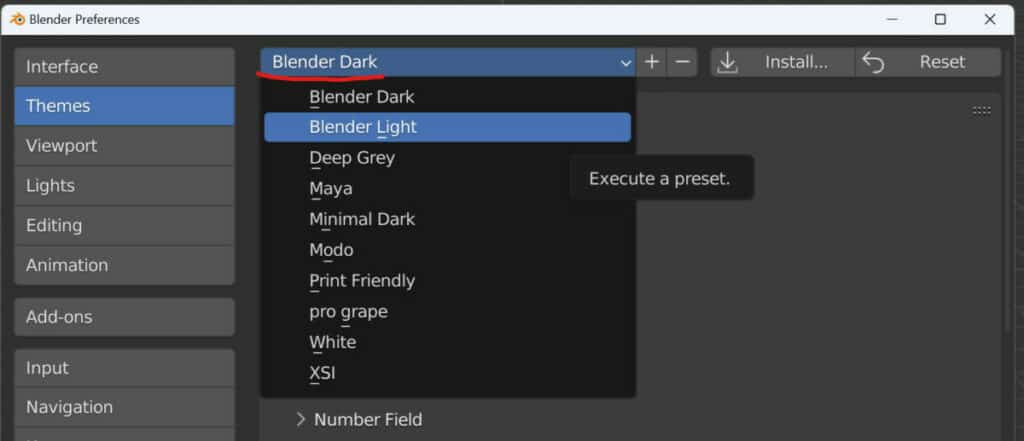
Presets are applied automatically, so you can select a preset from this menu, which will automatically apply to the entire Blender UI.
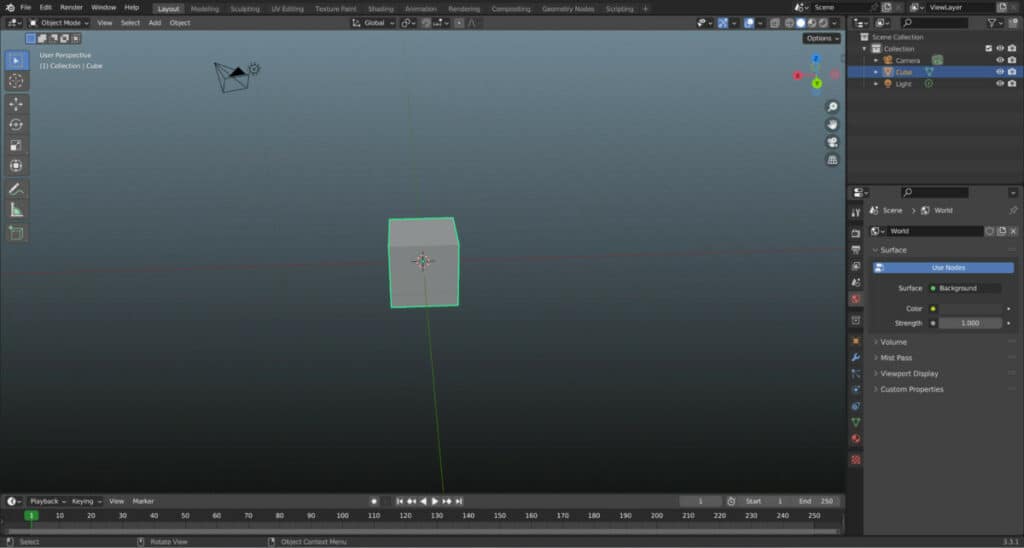
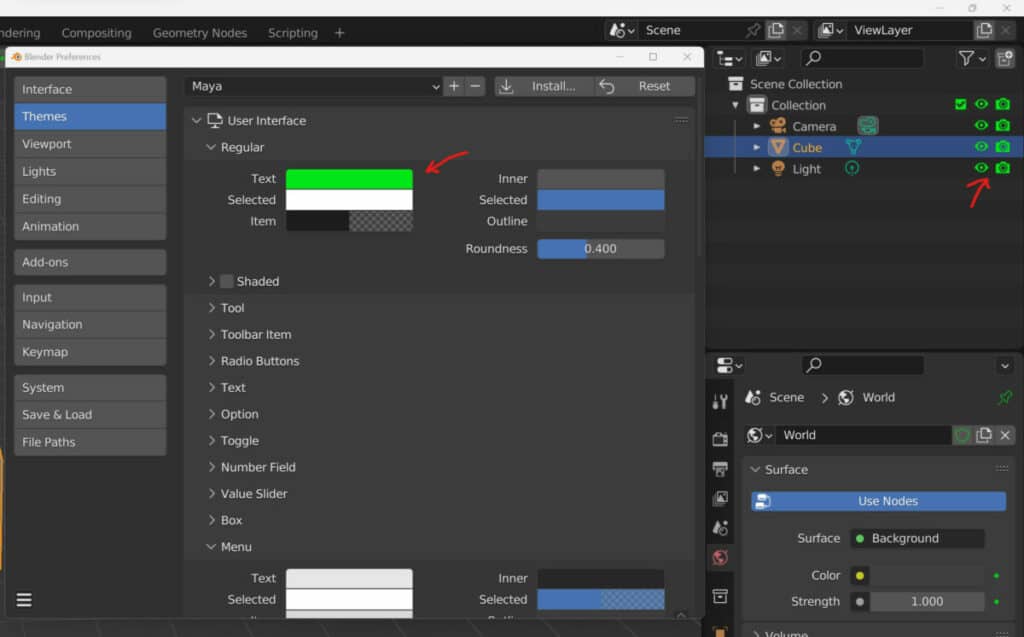
For example, you can make the Blender UI look a bit more like Maya by choosing the Maya preset from the menu.
If you want to revert to the default look, you can choose the Blender Dark theme from the menu or select the reset button.
Manually Changing The Theme Of Individual Elements
If you want to customize the Blender UI’s look completely, then you will be able to do so in the themes panel.
There are so many individual elements and areas within Blender that this article would end up being 30,000 words long, maybe more, if we covered every setting.
So instead, we will highlight how to change some of the more common UI elements within the typical Blender UI.
Toggle Buttons
The first option you can change is the color of the toggle buttons, such as the lock icons for the transforms or the hide and render display buttons in the outliner.
This is found in the user interface section under the regular tab. The text color changes the color of these toggle options. Just left-click on the color bar to open the color wheel and choose a new color.
The selected option changes the color of these options when turned on or off. For example, a locked transform can be made to have a sky blue icon when changing the selected option.
Other areas in Blender that are affected by this are the scrapping button, show gizmo button, and show overlays button in the 3D viewport.
Tool Buttons
These are slightly different to the toggle buttons, as tool buttons tend to open a new panel or add other elements in.
For example, the folder icon in the properties panel is a tool button to open the file browser. The reset and install buttons in the themes tab are also tool buttons, as are any + and – buttons used to create or delete specific elements such as theme presets or material data blocks.

The Header Of An Editor
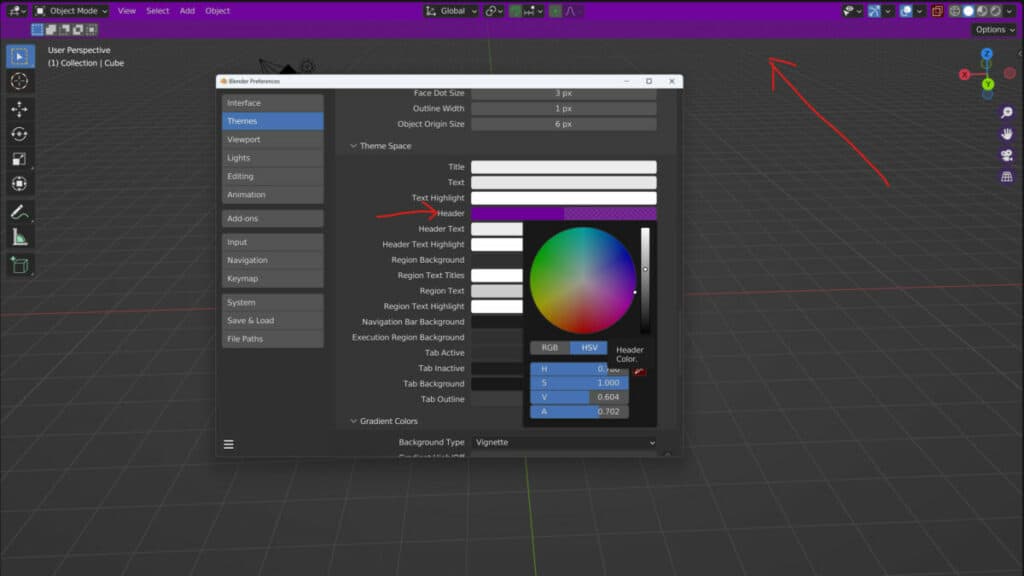
Every editor type will have its own header bar, and this header bar will have its own unique color setting. For the 3D viewport, go to the 3D viewport section in the themes tab and then open up the theme space subsection.
The heading color in the theme space will change the color of that editor’s header bar. You will find the same theme space subsection in every editor type in Blender.
The Viewport Itself
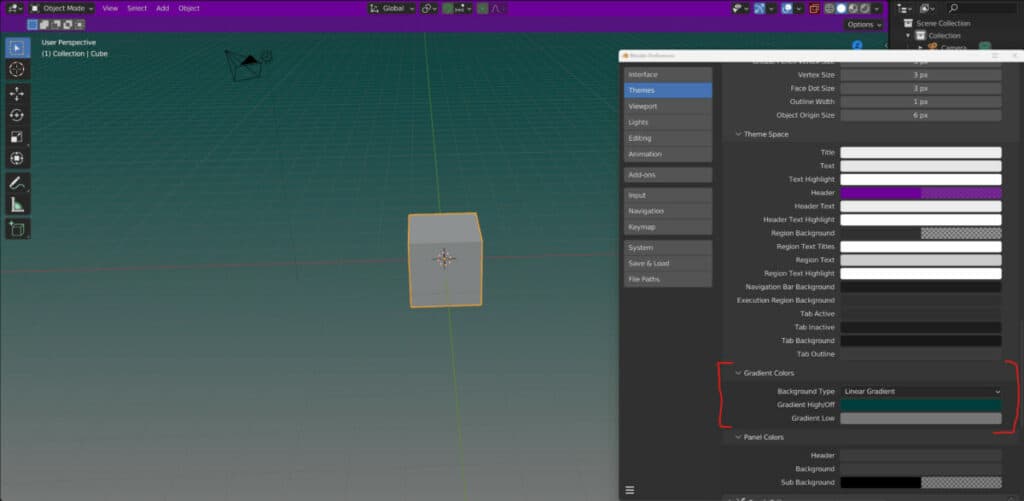
We can even go so far as to change the default color of the environment, which is useful when working in either solid view or wireframe view, where lighting, HDRIs, and environment maps are not applied.
Within the theme space section, we have an additional subsection labeled gradient colors, and here we can change the color of the 3D world, either as a gradient, vignette, or single color.
The Window Background
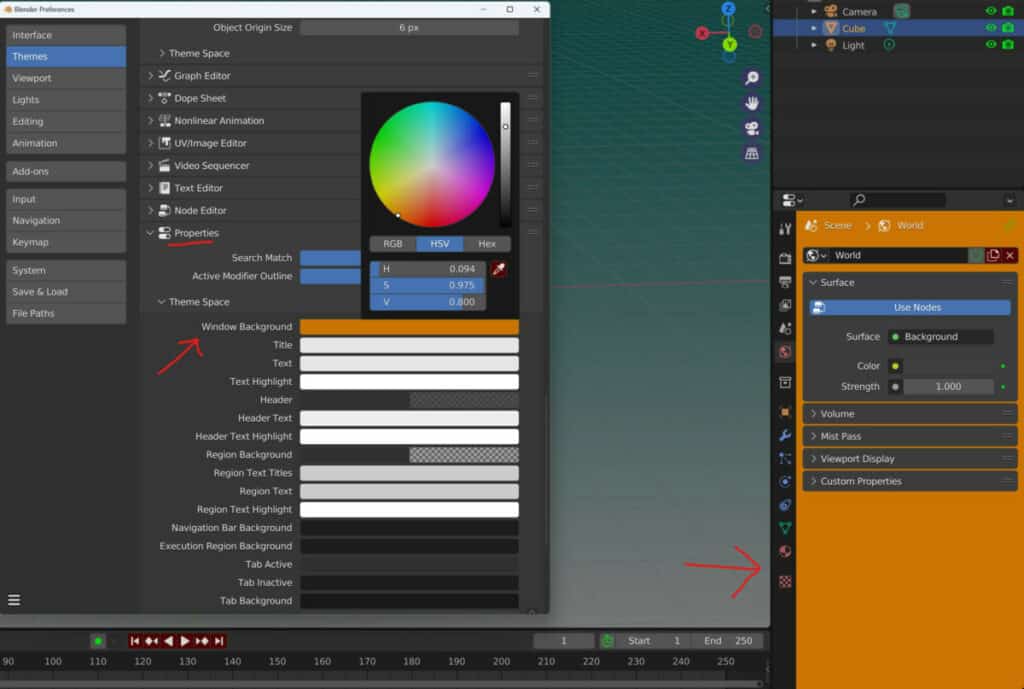
While the 3D viewport does not have a window background, many other panels, such as the properties panel, will do.
Go to the theme space section of that editor type and change the window background color to alter the overall color of that editor.
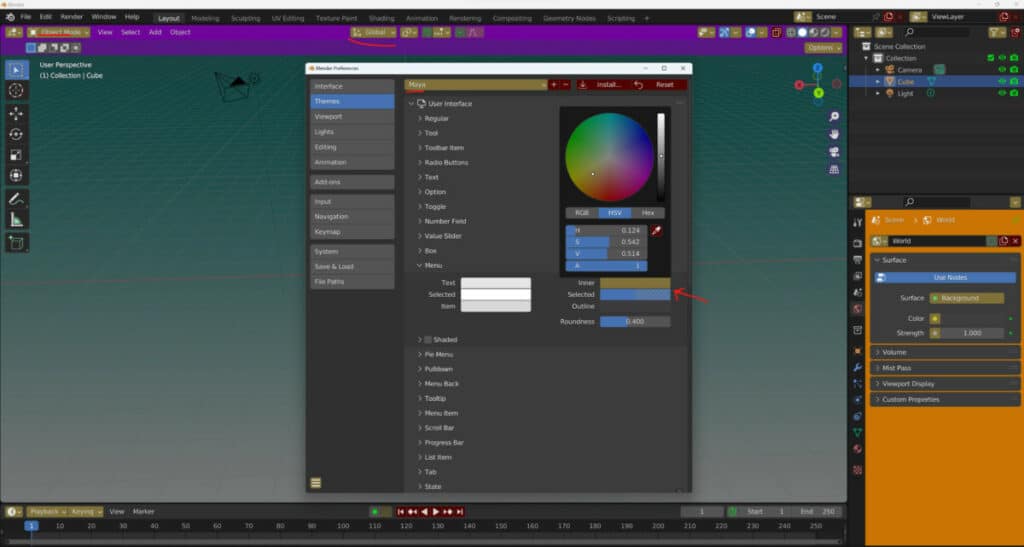
Menu Buttons
These are one of the more common elements that you will find in the Blender User Interface, and they are buttons used to open up menus that house a list of tools.
To change the color of the menu buttons, return to the User interface section and locate the menu tab, then change the Inner color to alter the menu buttons and the text color of these buttons if required.
Saving Your Changes As A New Preset
If you have made notable changes to your color theme, you can save it as its own preset. If we return to where the preset menu is, there will be a + and a – minus button. Select the plus button, and you will be greeted with a prompt to name your new preset.
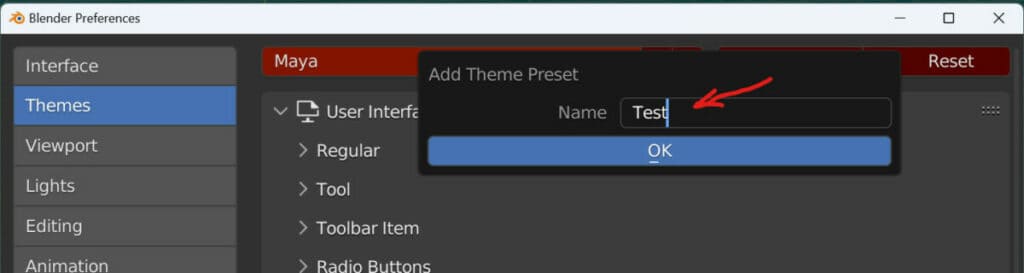
Create the name and then confirm to add the preset to your menu. You will now find your new color theme if you access the presets menu.
To delete a preset, ensure it is the active preset and press the – button to remove that preset from the list. Note that even premade ones can be removed this way, so use it with caution.
Thanks For Reading
We appreciate you taking the time to read through the article. We hope you found the information you were looking for. If you are interested in learning more about the Blender software, you can check out a few of the articles we have listed below.
- How To Use Other Artists Color Themes In Blender
- Changing The Resolution Scale Of All The Elements In Blender
- Creating Your Own Workspace In Blender
- Controlling The Line Width Between Panels
- Can A Laptop Handle Blender