With Blender, we can use modifiers to create an array of our selected objects. We can even mimic this behavior to an extent using geometry nodes to create and control our procedural arrays using instanced geometry.
To create an array of objects on any axis, complete the following steps…
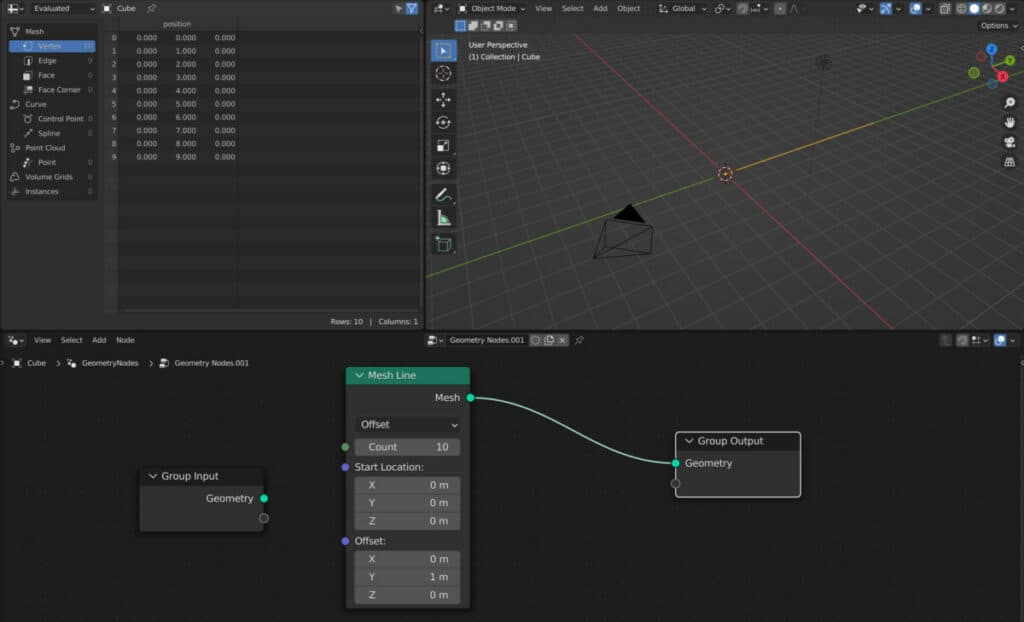
- Create a new node tree for an object and replace the group input with a mesh line node
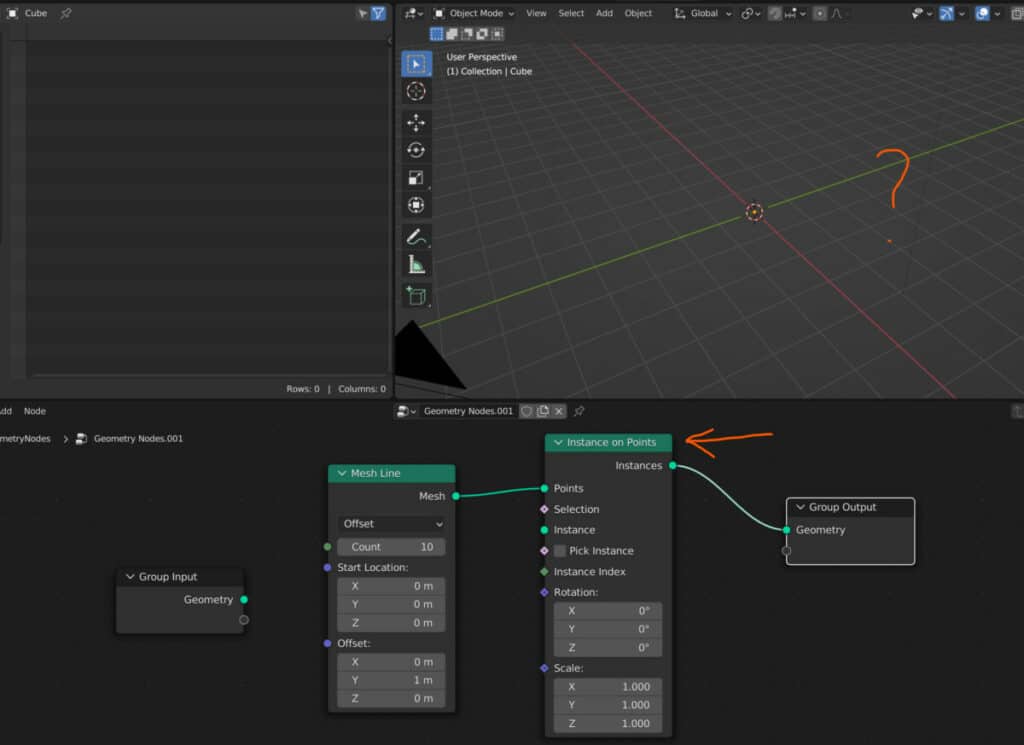
- Instance geometry using the instance on points node
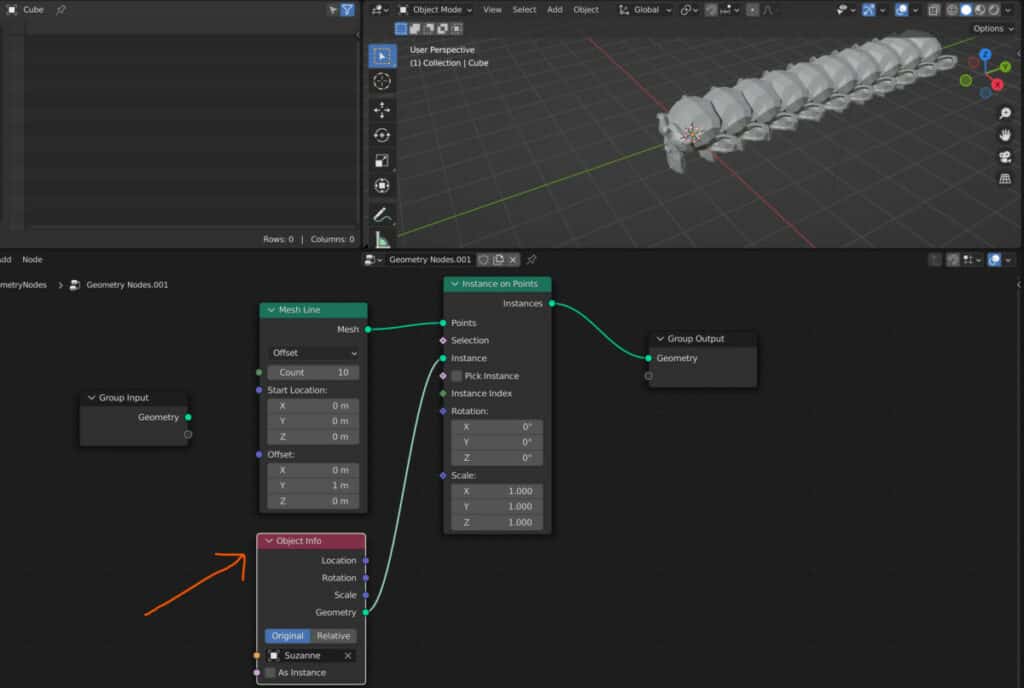
- Use either a mesh primitive or object info node for your instanced geoemtry
- Use the offset of the mesh line node to control the distance between each instance on 1 axis
- Introduce a second instance on points node and attach the previous set up to the instance input
- Use a mesh line node to control the second array on another axis
- Repeat steps 5 and 6 to create an array on the third axis
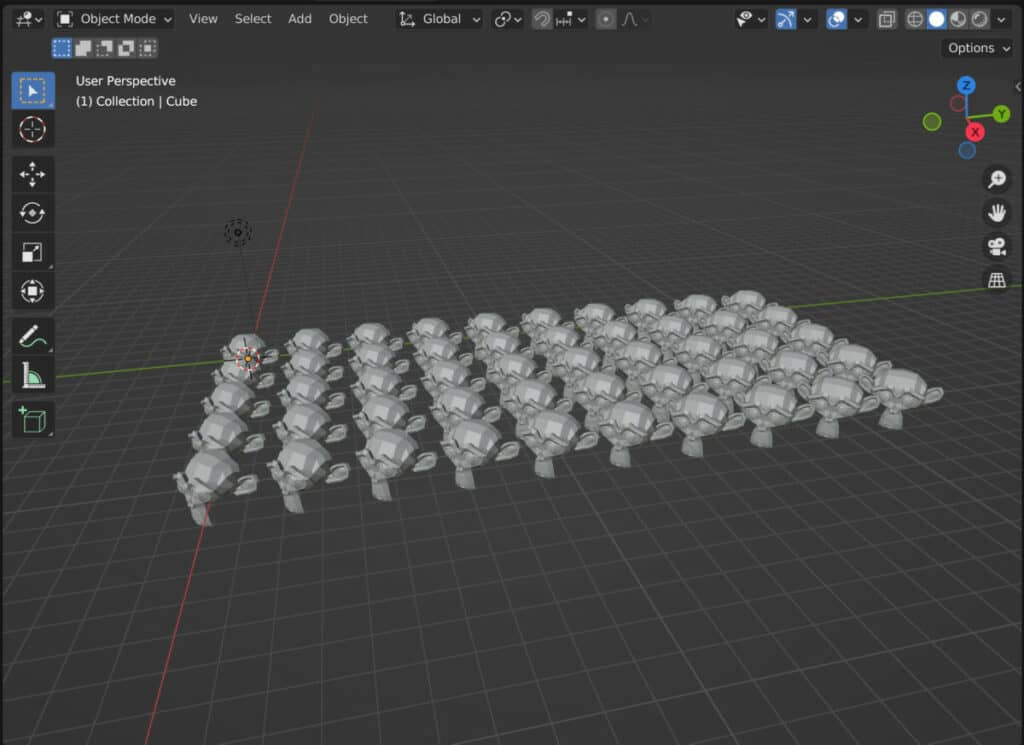
By following the steps above, we can create an array effect using geometry nodes, with the added benefit that we can replace the object used by the array at any time.
Why Should We Create An Array Using Geometry Nodes?
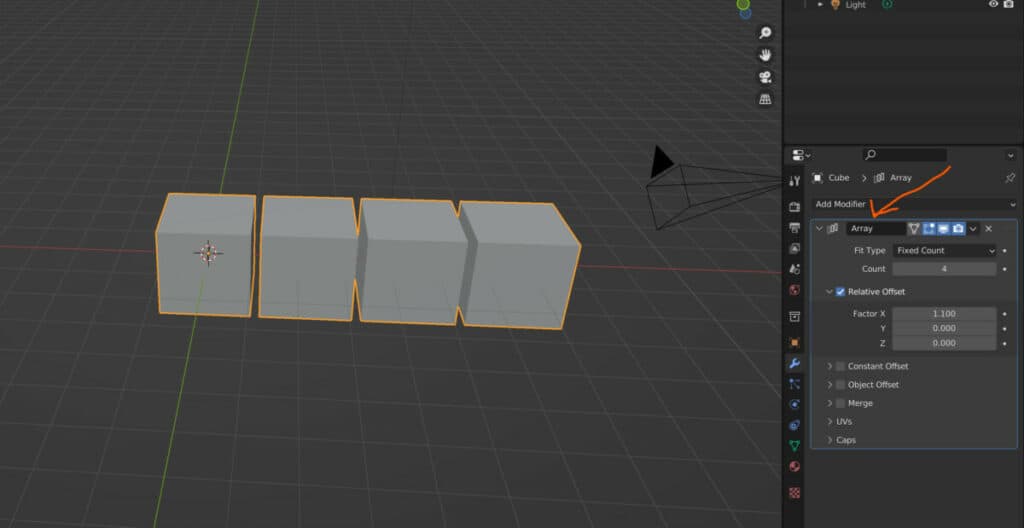
The array modifier is a fantastic tool for creating duplicates of your object at a speedy rate. You can offset the distance of your array on all three axis and can use several different offset methods, including constant offset, relative offset, and object offset.
So why do we need to look at creating an array using our geometry nodes set up instead of just using the array modifier? The answer is one word: Control.
The array modifier allows us to create an array of duplicates for the current object only and grants us surface-level control over factors like the array count and distance.
The geometry nodes system allows us to duplicate this functionality, with a bit of extra work, and even go beyond it.
With geometry nodes, we can change the object that we want to array at any time and can use many more parameters, attributes, etc, to determine how the array is going to function.
For example, you can control the positioning of specific instances in the array by using the index value to identify each instance, something you cannot do with the array modifier.
How To Create An Array On A Single Axis?
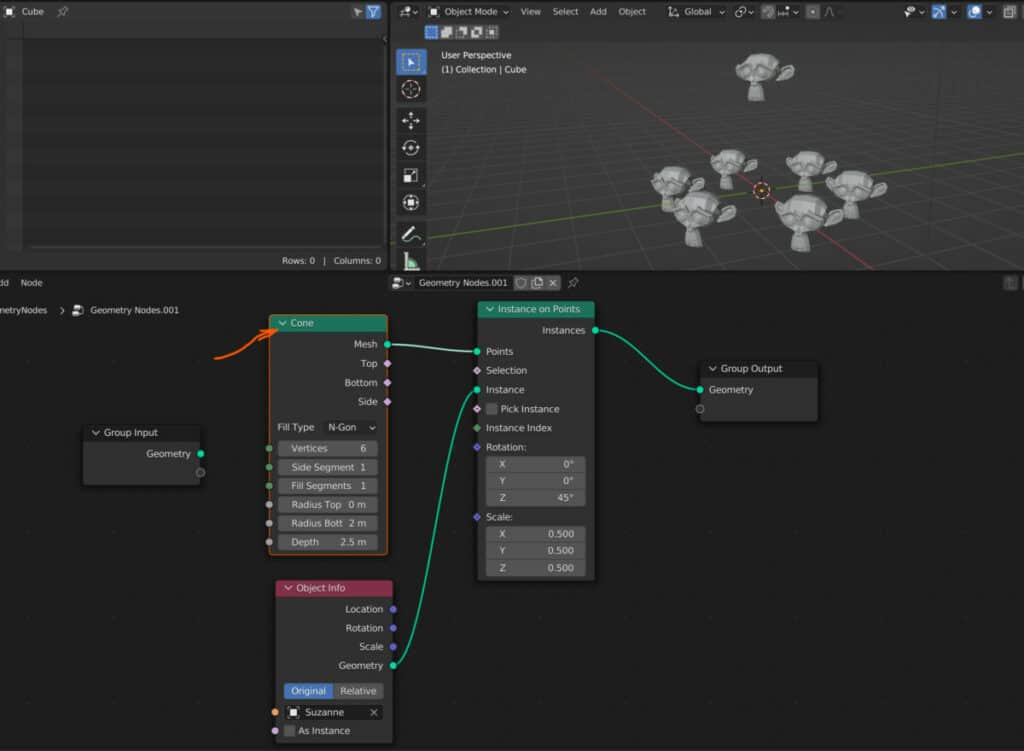
To create an array of a primitive object, you will need to create a new node system for your selection and replace the base geometry with a mesh line primitive, which will be used to control the primary count and distance of the array.
The next step will be to add an instance on point node and connect the mesh line to the points input. You will see no geometry when you make the connection, as it is now waiting for you to instance the geometry.
Now you need to define the geometry you plan to use for your array. You can use either a mesh primitive node, such as a cube or a cylinder, or another object in your scene with the object info node.
Connect the object node to the instance input, and at each point of the mesh line, you will find an instance of the selected object or primitive mesh.
By changing the count value in the mesh line node, you can control your array’s total number of instances.
Changing the offset value will allow you to create the distance that you want for your array.
Note that if you want the array to follow a specific shape, like a cone, then you can replace the mesh line node with that object or shape to create an array using the points of that shape.
Repeating The Process On A Second Axis
Once you have created your array on a single axis, it becomes easy to repeat the process in a second.
Only two nodes will be required here. The first of which will be another instance on points node, which will be connected after the first.
By default, the first instance on points node will connect to the point input of the second. However, the idea is to instance the first array to the second, so disconnect the nodes and reconnect to the instance input.
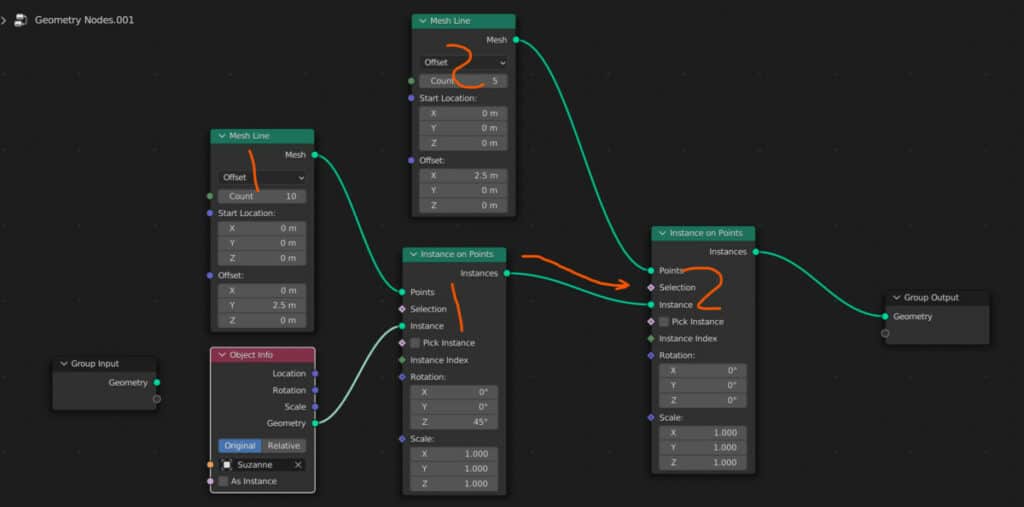
Use a second mesh line node and attach it to the now vacant point input to create a second array. Change the offset values to move the array on a different axis and increase the count to display the second array.
If you want to change which direction each array follows, you only need to reverse the axis used in the mesh line offset.
Controlling The Third Axis For A Full Array
If you can create the second array, then creating the third will be easy as it is the exact same process repeated once more.
Add a third instance to points node and attach the current setup to the instance output.
Then introduce another mesh line node and attach that to the free point input.
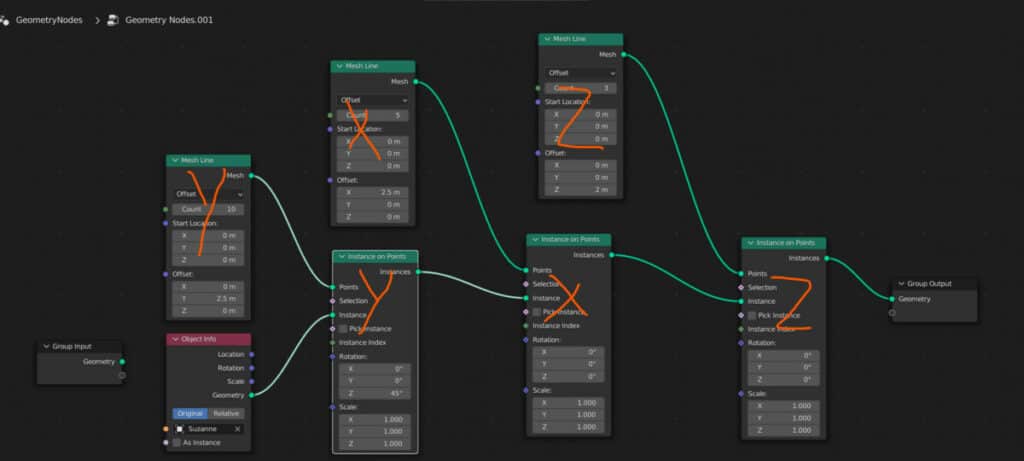
Increase the count value and set the offset to the final free axis. You will now have an array that functions on each axis.
Beyond this, you can introduce any number of nodes to manipulate the array, such as math nodes, indexing and set position nodes to control the positioning of specific instances in your array.
Thanks For Reading
We appreciate you taking the time to read through the article, and we hope you found the information you were looking for. If you would like to learn more about using the geometry nodes system, feel free to look at some of the related topics listed below.
- How To Create A Hexagonal Grid Using Geometry Nodes
- What Version Of Blender Has Geometry Nodes
- What Are The Different Types Of Attributes In Blender
- Controlling The Material Index In Geo Nodes
- What Are Geometry Nodes In Blender