One of the primary reasons why people decide to start using an application like Blender 3D is because they want to create their own animations. But once you have downloaded the software, where do you start when it comes to animating objects in Blender?
Below is a typical step-by-step guide to setting up your scene for animation.
- Set Up The Target Frame
- Adjust The Target Resolution
- Choose The Correct Output File For Rendering
- Design Your Scene
- Rig Your Model (Optional)
- Insert Keyframes To Animate
- Adjust Keyframe Behaviour To Control Animations
- Render Out Your Animation
These steps will change depending on the types of scenes that you are looking to create. For example, you might not have any objects that require any sort of rigs to be animated. However, the general process remains the same, so let’s go into a bit more detail with a practical example of creating your first animation in Blender.
Setting Up The Frame Rate
The first step to creating your animations in Blender is to adjust the critical settings for that animation, and this will occur before we even start creating the objects in our viewport.
These settings include the ability to adjust the target frame rate and the resolution of our 3D animation. This is important because we need to ensure that the frame rate in particular, is set before we add in our keyframes. The keyframes are the pendants on frame positioning and frame rate.
If, for example, we were to create our animation at 30 frames per second and then change our frame rate to 60 frames per second, previewing our animation would show us that the animation itself has doubled in speed, something that we don’t want to happen.
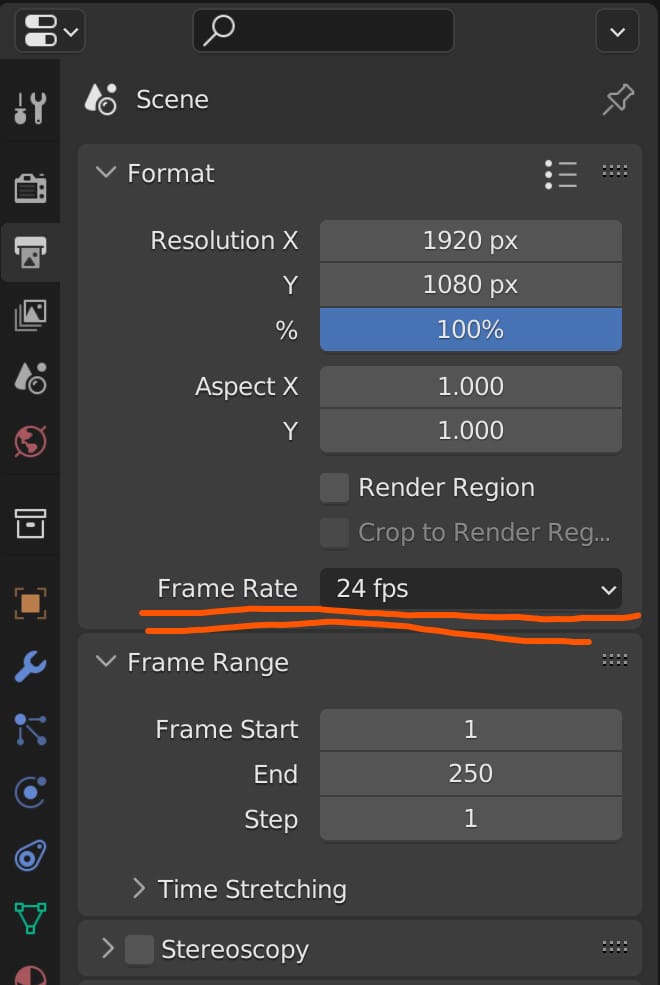
To determine your frame rate, go to the properties panel. From the row of tabs, select the second option, which should be for the output properties. The first of these settings is the resolution, but we’re going to skip over that for the moment and look directly underneath it, where we will find the current frame rate.
The default setting here is going to be 24 frames per second. Click on the button to open up the menu. Choose the frame rate that you want to use. For our example, we will go with a full 60 frames per second.
Target Resolution Of Animation
The next step will be for you to determine the target resolution of your animation. This is something that can be done at any point in the process as it won’t have any adverse effects on your actual keyframes or your frame times.
However, because we are already in the properties panel, it will be beneficial for us to determine our target resolution here.
As previously noted, the target resolution is going to be located in the output tab and is the very first setting that you can manipulate.
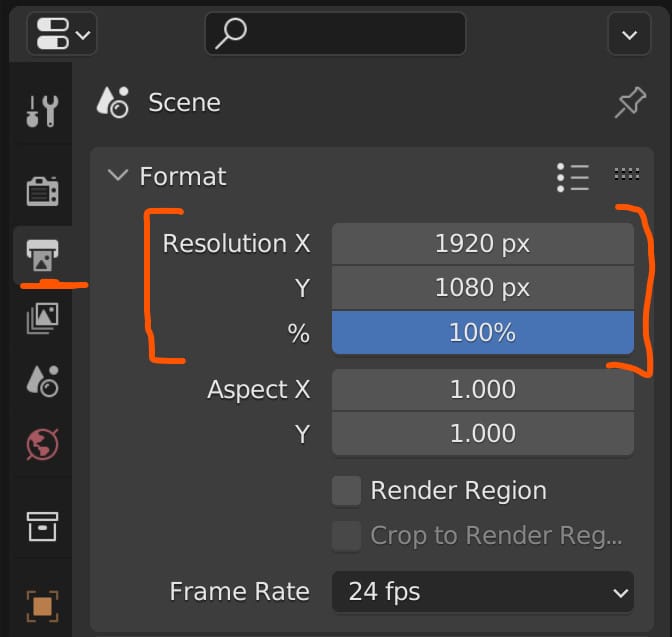
The default resolution is set to 1080P, which will be standard for most animations, especially when you’re starting out. Notes that the resolution can determine the render times for each frame.
For example, setting the resolution to a full 4K will improve image clarity. However, it’s four times the number of pixels to be rendered, so the amount of time it will take to complete the animation is proportionally increased by about 4X.
With our example, we will keep the resolution at 1080p, but if you want to change it, click on the list icon just above, and you will be able to select a range of preset resolutions based on industry standards.
Choosing The Correct File Output For Rendering
How we want to render our animations is going to be an important step that we could take towards the end of the process, but again since we are in the properties panel, it would be best to set this up now.
Before we do that, though, you will see below the frame rate setting we have the option to determine the frame range. This represents the number of frames in our animation.
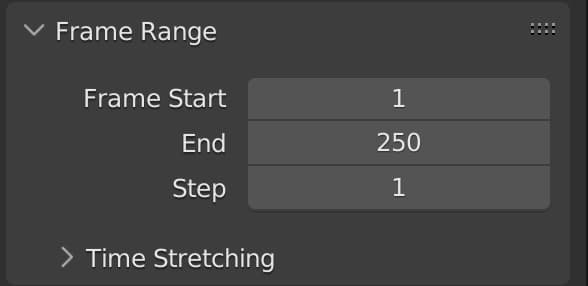
If your goal is to create a four-second animation at 60 frames per second, then your target frame range will be 240.
However, if you are instead going with a four-second animation at 24 fps, then you will only need to set the frame range to 96.
With that out of the way, we need to ensure that our output file format is the one we want to target. Below the frame range, we will be able to access the settings for the Output. This is where we can select our file container and file format you the render of the animation.
We can also determine the location of the rendered file here, which will be directed towards a temporary folder by default.
We don’t want it to be directed here, so press the folder icon to open up the file browser, and we recommend creating a folder dedicated to your animation only. Call it whatever you like, click the Blue button to close the file browser, and it will now point to that folder.
Next, we will be looking to change the file format. By default, this will be set to a PNG image file. This is useful for creating animations, especially if you believe there is a chance that the animation can fail.

Some animators will render using the PNG file format. This will render out each frame as its image, and then you can import the entire list of images as an image sequence and then convert it into a movie file.
Because this is a little bit beyond the scope of just creating a simple animation, we will change the file format to a more traditional choice.
Click where it says PNG and then choose FFmpeg video. An additional option will appear, allowing you to choose the container for your file format.
It will be listed under encoding, so open this up to view the container options. There are many to choose from here, but we prefer to go with a Mpeg-4 container.
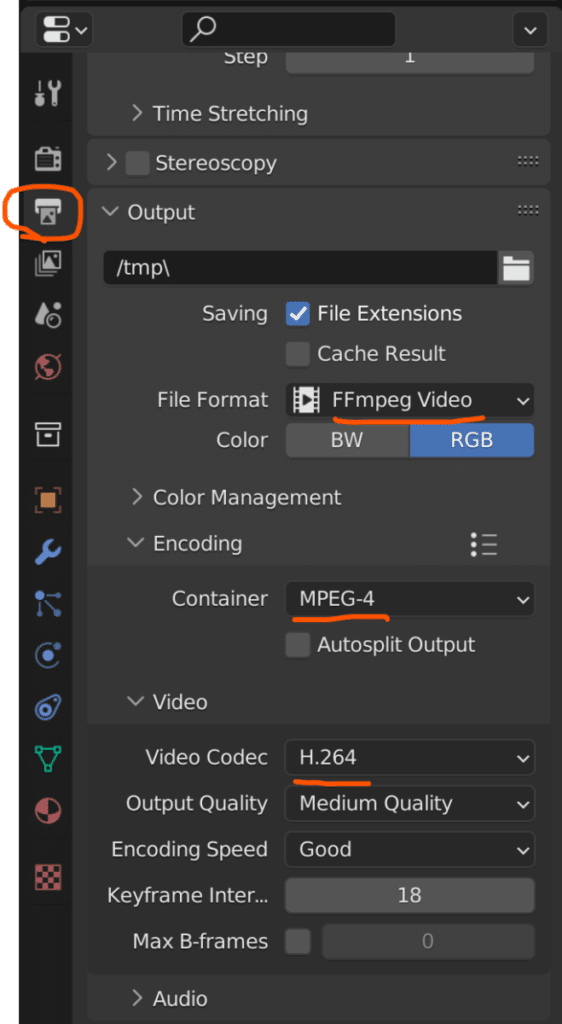
You can also open up the video editing settings, which will now appear underneath encoding, and change the Video codec. By default, it will be set to H264, our preferred video codec anyway, so we’re not going to change it.
Design Your Scene
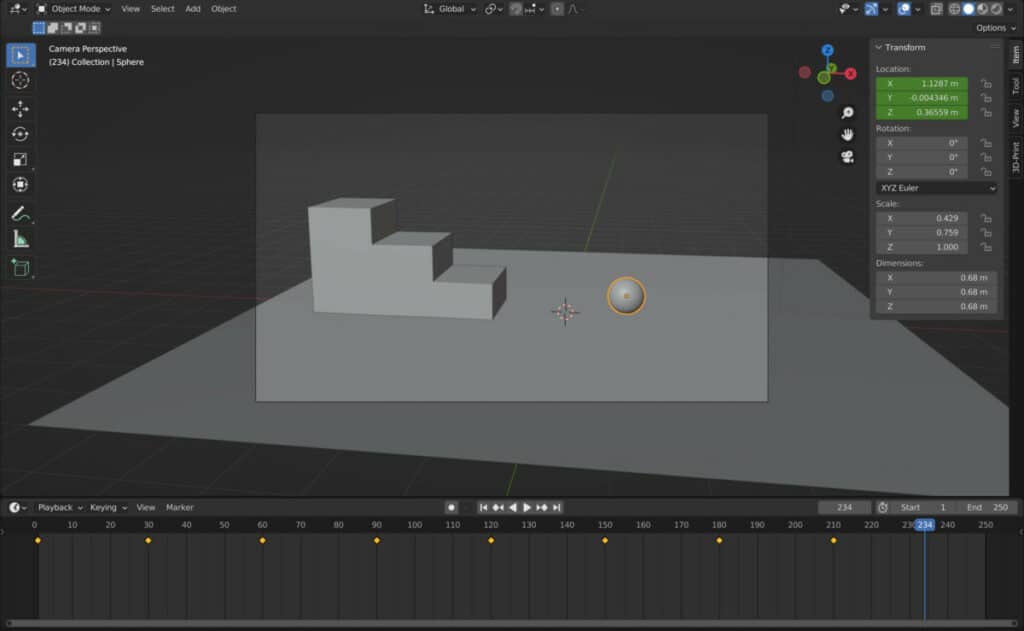
With all of the key render settings in place, your next step is going to be actually to create the objects for your animation. Now, this is going to defer in an infinite number of ways. For our example, we will create an animation of a ball bouncing off some steps onto the floor.
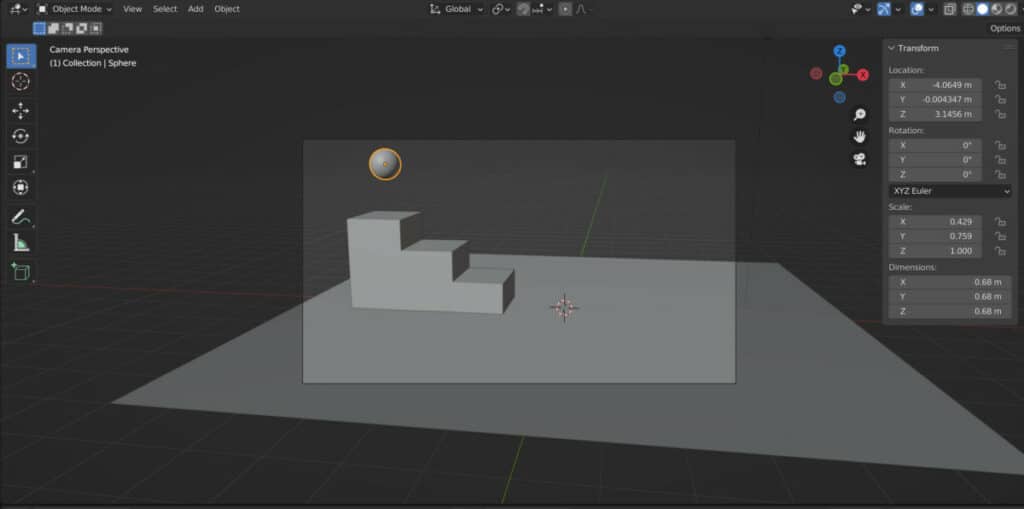
This simple animation will easily demonstrate exactly how the animation process works within this short article.
When To Rig Your Model
When working with more complicated objects, such as human characters, you will be required to rig those models to prepare them for animation.
The rig’s main purpose is to control the various parts of your models by using what is known as an armature.
This is Blender’s equivalent of a skeleton and is constructed by bones that are either directly or indirectly connected to each other.
We can manipulate and rotate these bones, which will be used to control our model, similar to the strings of a puppet.
For our demonstration, no rigging is required, so we’ll skip this process. However, once you begin to create more complicated models, rigging will be required if you want to animate them a certain way.
Inserting Keyframes To Animate
The main way we create blender animations is to insert what are known as keyframes. A keyframe is where we assign a point within our animation. The keyframe is not for the model as a whole but rather for a specific parameter that can be changed to affect the model.
For example, our bouncing ball animation requires changing the location of our ball. Before we change the location, we need to insert a keyframe at the starting point. To do this, select the ball but do not change its location. Instead, press the I key on your keyboard to open the keyframe menu.
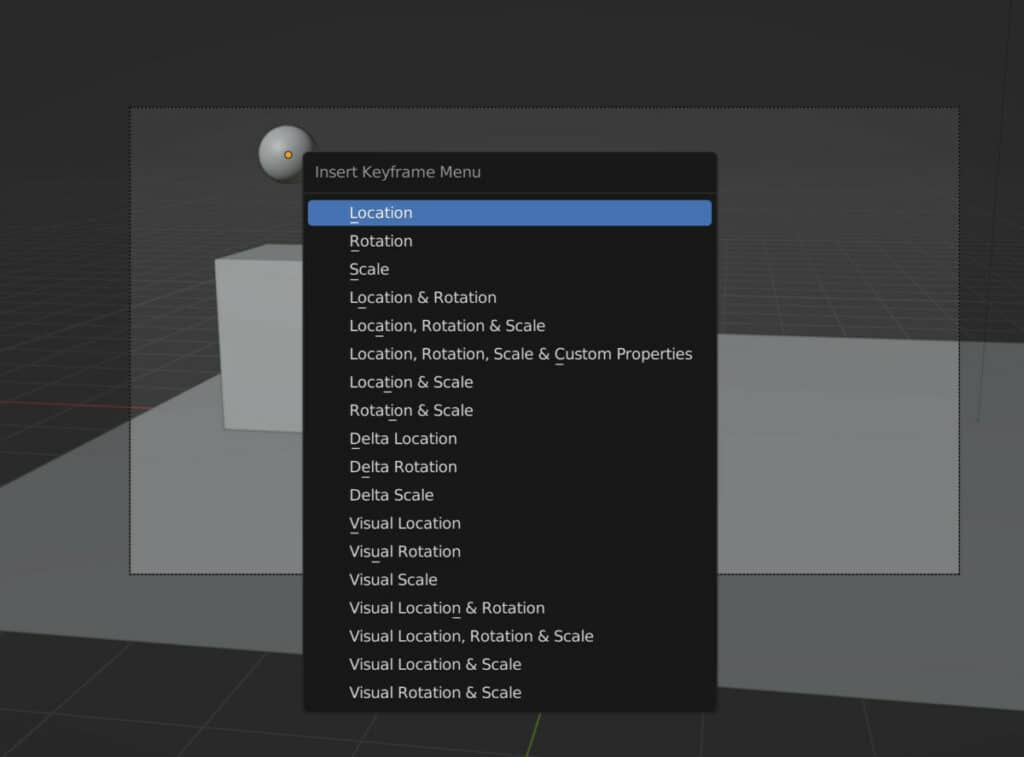
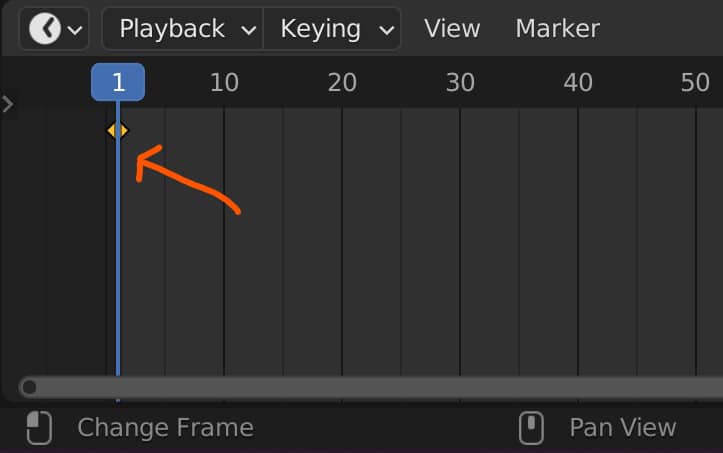
You will have a range of options here, but the one we’ll choose is the location. This will add a location keyframe to the ball. Looking at the timeline, you will see that we have a yellow diamond shape in frame one. Or whatever frame was the active frame when we created the keyframe.
This brings up another point. If you want to create your animation starting at frame one, make sure in the timeline that you’re active frame is set to frame one.
If you press the N key to open up the side panel, you will notice that the location values of the ball will be highlighted yellow. This indicates that a keyframe has been added to those values.
The next step will be to add the end keyframe where we want the ball to end up. Our ball will be bouncing a couple of times, so we will want to create a keyframe where it bounces on the first step.
For this, we’re going to go to frame 30, and then we’re going to select our ball. And change its location so that it is resting on the first step.
When we change our frame from 1 to 30, we will notice in the side panel that the color of our location values changes from yellow to green.
This indicates that while none of the values have been changed, the frame has. It’s a visual marker that tells us that we can make a change here to create a full keyframe.
In our example, we are going to grab the ball, and we’re going to move it down on the axis until it’s resting on the top step.
This will change the Z value from a green color to an orange color. This indicates that only the Z value has been changed. We have a different see value to what it was before, highlighted by the orange color, but it is not yet confirmed as our keyframe.
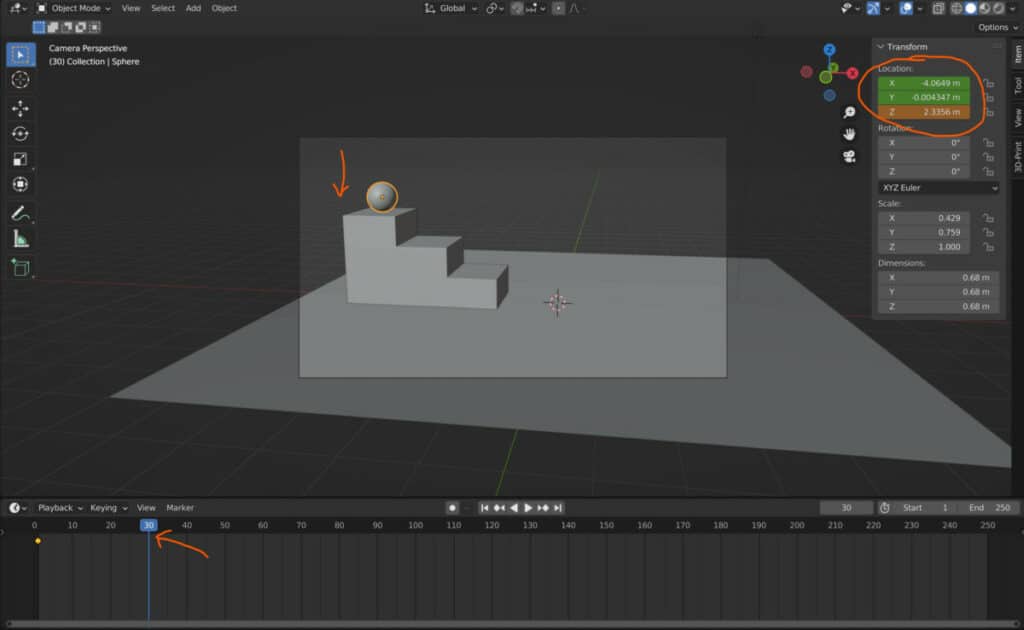
Hover over the location values and press the I key. This will confirm changes to the location values as a new keyframe on frame 30.
Go back to frame one in the timeline and press the play button. The ball drops from its original height onto the first step. At this point, we have created the first part of our animation.
It is then a matter of completing the process so that it bounces off the second and third steps before resting on the floor.
If you are following our example, consider it an exercise to create the full bouncing animation. The process remains the same. Every time you add a bounce, you want to add a keyframe at each bounce’s high and low points.
Here is what our timeline looks like after we have created all of the bounces across our animation, with the ball ending up on the floor.
Adjusting The Behavior Of The Animation
Just adding in keyframes is often not going to be enough because you might find that the behavior of those keyframes appears rigid and, at times, unnatural.
Fortunately, Blender offers several ways in which you can manipulate the behavior of your keyframes.
The timeline where we have been viewing our keyframes is the best location to preview our animation within the viewports because it has timeline controls.
However, if we look at our workspace tabs, we will have access to an animation workspace.
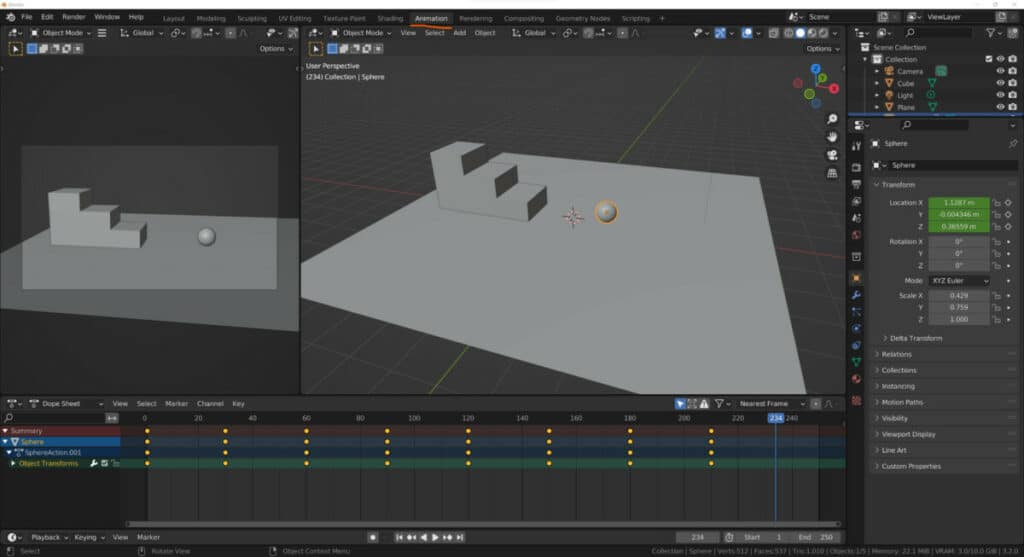
Within this workspace, we will be able to view our 3D viewports both in terms of the viewport camera as well as the scene camera, which is going to be useful because we can then select our camera, lock the camera view, and then move it so that we can position the camera for rendering.
We also have immediate access to the dope sheet, which looks similar to our timeline but allows us to dive deeper into the various elements of our keyframes and begin manipulating them. The easiest way to manipulate a keyframe is this. Simply select it, grab it and change the frame that it is on.
Doing so is going to change the speed of that action. So if you want to make an animation appear slower, you will want to increase the distance between two keyframes. Alternatively, if you want an animation to appear faster, you can select one of your keyframes and bring it closer to the next one.
Another useful panel that we can bring into our animation workspace is the graph editor. This would allow us even more control over the behavior of our keyframes and the relationship between them.
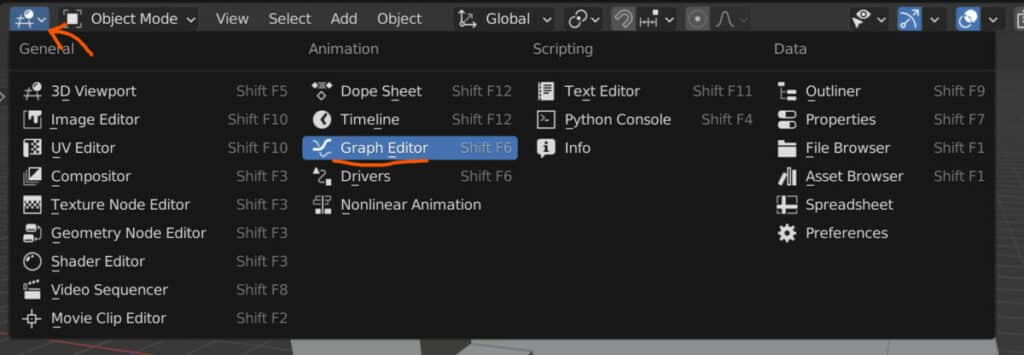
To access the graph editor, go to the top corner of any of your panels, for example, one of your 3D viewports, and then open up the menu, which will allow you to change the editor type. Select graph editor from this menu, which will change your viewport to the graph editor.
Select the ball, and then you will see that we have a series of points and colored lines on our graph editor, which we can manipulate to change the behavior of our keyframes.
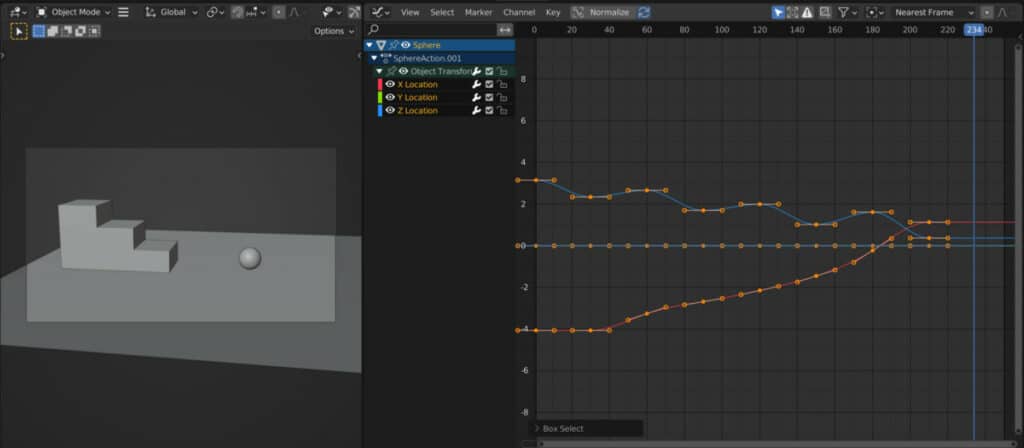
For example, you can select one of these points and then move it around to change not only where in the timeline the animation occurs but also by how much.
In other words, we can change the positioning of a keyframe in the graph editor. More importantly, we can change how that keyframe affects those parameters.
Some of the menus in the header of our graph editor would allow us to make more sophisticated changes to the behavior of our keyframes. For example, if we go to the key menu, we can change the interpolation type to constant or linear. And this will change the behavior of the bouncing ball.
Experiment with some of the different functions within these menus and see how they affect your models’ animations differently.
Test Renders And Final Render Result
When you have finished all of the stages of your animation and can preview it within the 3D viewport, the time will finally come to do a test render.
Test renders are important because rendering a full animation requires a significant amount of time, and often we don’t spot if anything is wrong with our animations until we render the scene.
There are a couple of ways that we can test render. One method is to isolate a period of the animation in the timeline and then render a small section of the animation.
We can do this by going to the timeline and then selecting what our start and end frames are going to be.
If we select frames 30-90 in our animation, the render will start at frame 30 and finish at 90. Any frames outside of this range will not be rendered.
This way, we can get a good idea of how the animation will look and save time on the render.
Using the Cycles render engine, you can change the sample count and the noise threshold. The lower the sample count, the lower the max quality of the frame, but render times are improved.
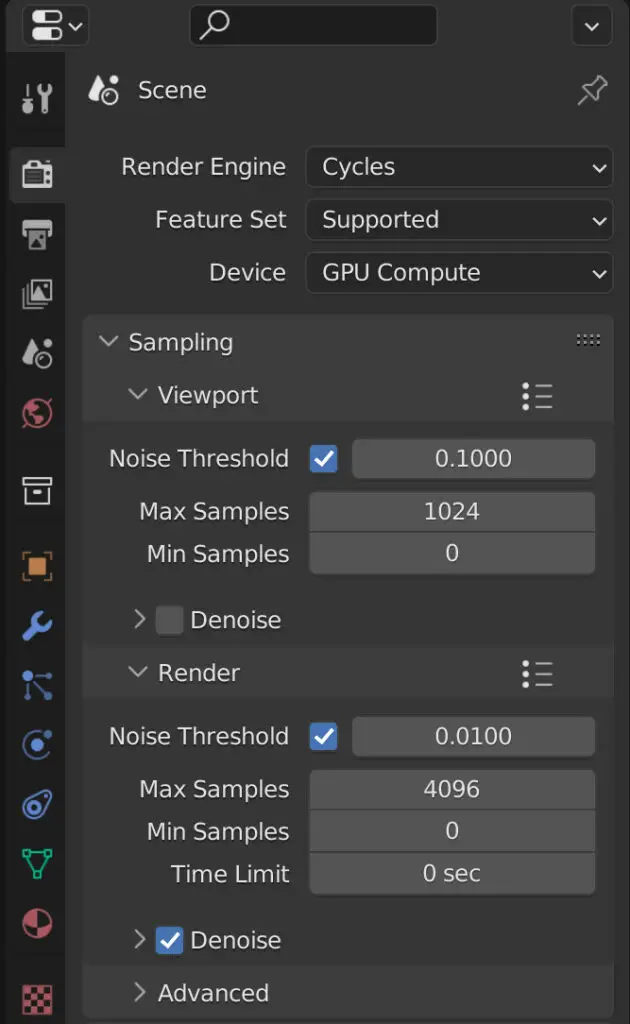
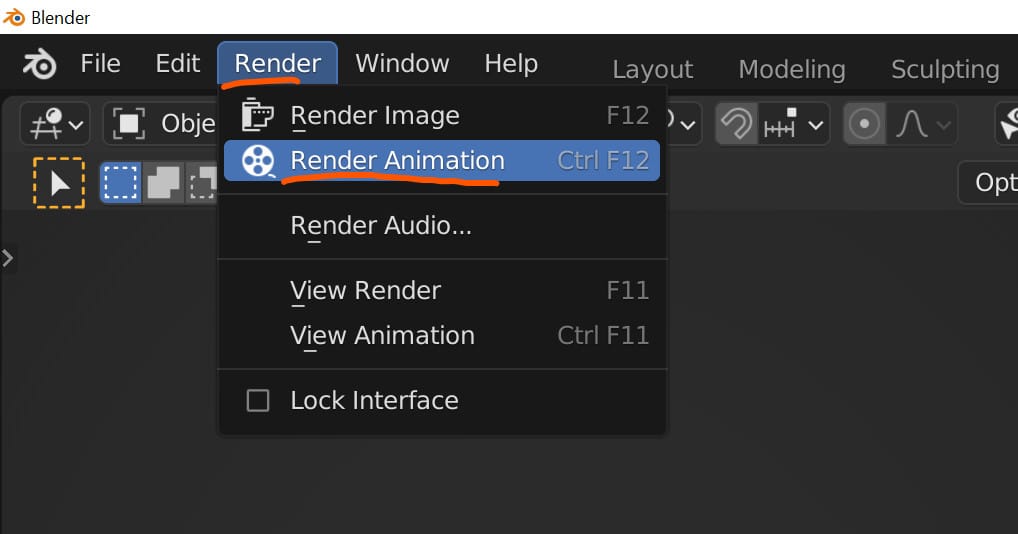
The noise threshold limits the level of adaptive sampling. A higher value here will result in more noise but lower render times. When done, render in the Blender header and select render animation.
To offset this, you can enable image denoising, which slightly adds to the render time of each frame.
Once you are happy with your results, turn up the settings to maximize the final render quality, and then select render animation again. Make sure you reset the frame range to cover the full animation before doing so.
Thanks For Reading The Article
We appreciate you taking the time to read through the article, and we hope you found the information you were looking for. If you are interested in learning more about using Blender as an animation tool, check out some of the articles listed below.