Just about anything that has a changeable value can be animated in Blender 3D, going far beyond just animating 3D objects. You can animate material properties like the base color and roughness values, and you can even animate text objects in the 3D viewport in various ways.
You can animate the properties of 3D text by creating a keyframe next to that property, changing to another frame, and then creating a second keyframe with a different value. You can animate things like the text transforms, font size, and even material properties for text.
There are a lot of different ways to animate your text objects in the 3D viewport as well as in the properties panel. By learning how to animate text you can learn how to create things like Youtube intro videos and animated logos, to name a couple of examples.
How Do I Add An Animation To 3D Text In Blender
As 3D text is an object that can exist in the 3D viewport, it does share some attributes with the various other object types like the mush and curve objects. In particular, we can change the transform values of our 3D text to manipulate the location, rotation, and scale of the text.
Our example below is a single text object where the only changes made have been the word used and that it has been slightly extruded to become 3D text. Starting with the transforms we have a lot of different ways to animate our text.
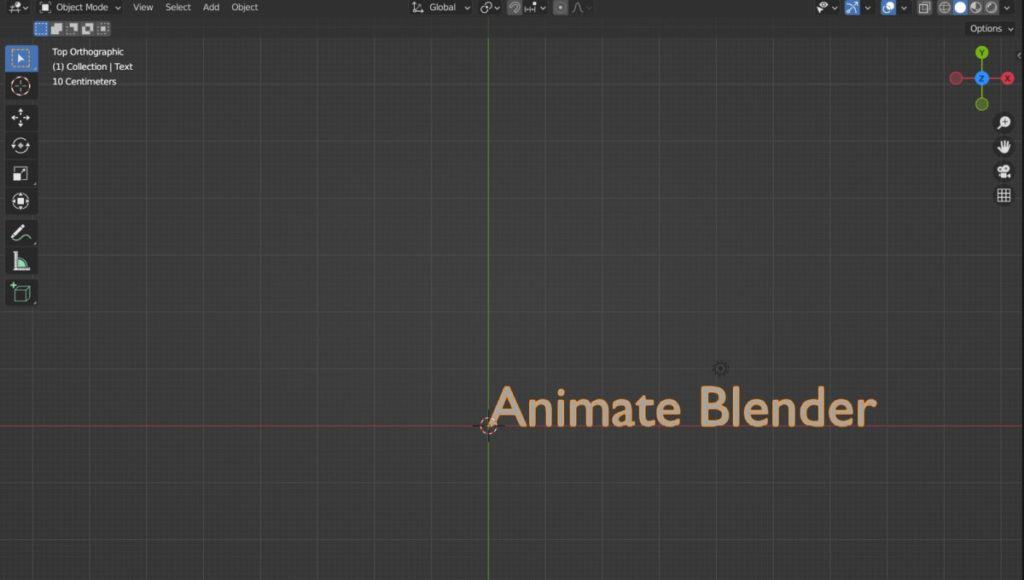
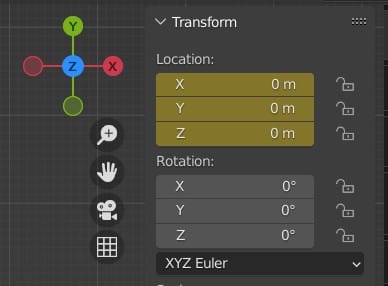
To animate the location of your text, select your object and then press the N key to open up the side panel in the 3D viewport. Hover your mouse cursor over your location values and then press the I key on your keyboard.
The three location values on each axis should now appear as a yellow color to indicate that we have a keyframe active for that attribute.
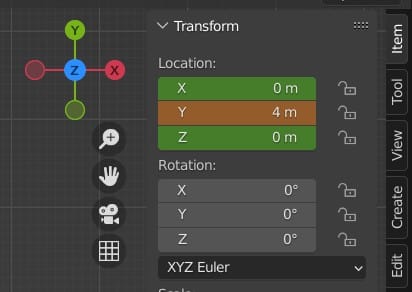
Next change the actual frame in the timeline to another value. If you started on frame 1, change it to frame 30 by left-clicking on that frame or by typing in the frame number in the timeline as seen below.
When you change the active frame the color of the location values changes to green, indicating that a keyframe exists but not at that specific frame and that you should change the value here to something else.
So we are going to change the value on the Y axis to 4. Changing the actual value will change the color to orange, which means that a change has been made but is not confirmed.
Warning, changing your value, and then changing your frame without confirming will undo the change made to the value, reverting it back to its original value. Confirm the change made by again pressing the I key.
You should now have a couple of keyframes to indicate the start and end of your animation. Return to frame 1 and then play your animation using the play button to test
Animating Your Rotation Values
The process of animating your rotation is identical to that of animating the text location. Create an initial keyframe to indicate the start of your animation, then create an end keyframe with a different rotation value to create your animation.
If you want to delete any other keyframes, like the location keyframes, all you need to do is select the keyframes in the timeline and then press the delete key, and select delete keyframes. When you delete your keyframes the value will remain at whatever keyframe you were on. So if in our location example we delete the animation on frame 30 then the text will remain in that location.
A good starter animation for rotation is to rotate your text 360 degrees to create a full circle. Attempting to do this with our text does present a small issue, as the rotation occurs at the location of the object origin, which is to the side of the text.
Rather than changing the origin’s location though, we can change the location of the text to align it better to our object origin.
In the properties panel, locate the object data tab, which will be a green a icon. Here we can control the attributes of our text-specific objects, and many of these can be animated.
In the paragraph section, we have the ability to change the alignment of the text based on the object origin.
By default, the horizontal alignment is set to the left-hand side. Open up this menu and change the alignment to the center. This will move our text across so that the origin is now more central.
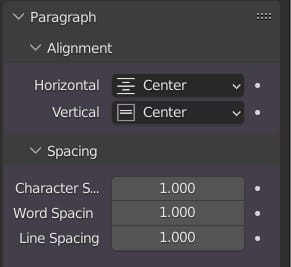
However, it is just below our text, and we need it to be right in the center. To do this select the option for the vertical alignment.
There are a couple more options here, but we still need to set it to be the center option. Now the object origin will be right in the middle of our text object, meaning it is ready for our rotate animation.
In our example, we are looking at our text from a top-down view, so we will want to rotate on the Z axis in the side panel.
.
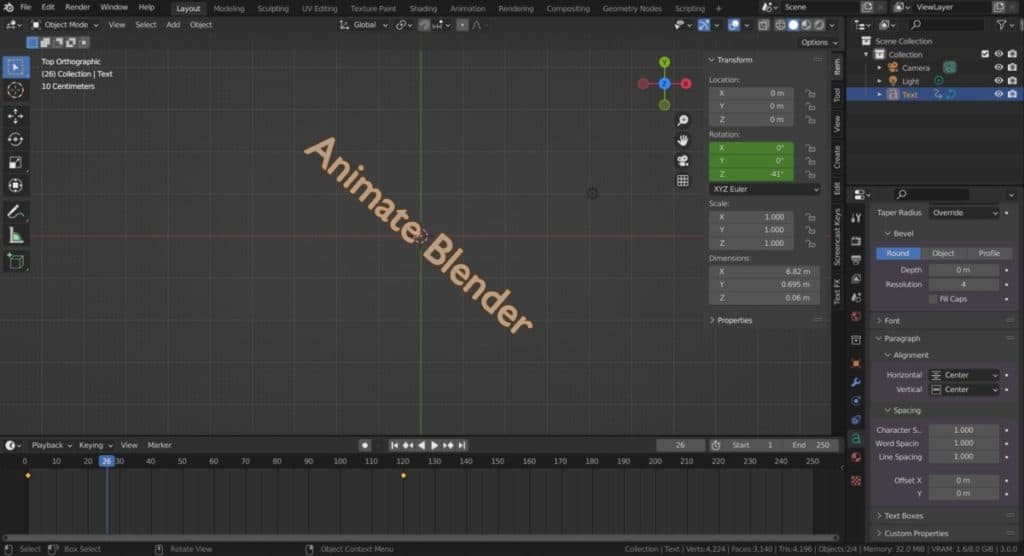
Set the start frame to a rotation value of 0 and then insert the keyframe, followed by the end frame which is set to 360, and insert that keyframe.
Now when we preview the animation the text will rotate around the center point a fall 360 degrees.
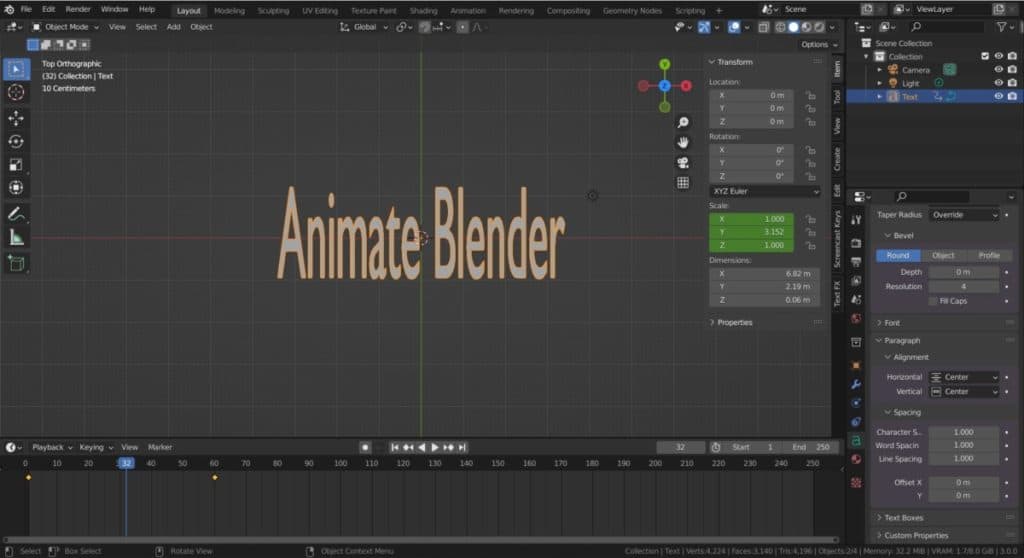
Animating The Scale
Just like the rotation transform, adjusting and animating the scale of your text is largely influenced by the position of the object origin, unless you are using other objects as your pivot points.
The process is very similar, creating the start and end frames of your animation with different scale values and then previewing your animation using the timeline controls.
Below is an example where we created a stretched text animation by scaling the text on a single axis, but there are many different ways in which you can animate these values to create different effects.
How To Create Text Effects For Animation
Beyond the standard transform animations, there are many other properties that we can animate to create so amazing looking text effects.
In the same tab where we change the alignment of our text to the object origin, we can find all of the other text-specific attributes that we can control to edit our text objects, and the large majority of these can be animated.
Let’s take a look at a few examples of the different ways that we can animate the text using these attributes.
Extruding The Thickness
To create 3D text we need to first create the text in 2D form and then use the extrude tool that is found in the properties panel to give it thickness.
This same attribute can be animated, allowing us to control how much our text is extruded throughout an animation.
For example, we can begin an animation where the text has no extrusion at all and then have the extrude value increase over time.
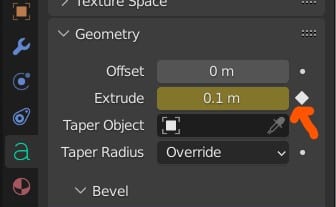
If an attribute can be animated, then pressing the I key will create a keyframe for that attribute, working in exactly the same way as animating the transforms.
Note that next to that extrude option is a little white dot. Clicking on that dot will add a keyframe to that attribute, much like using the I key. It will change to a hollow diamond shape when it has worked.
Switching The Alignment
In what may come as a bit of a surprise, you can animate the alignment of your text to the object origin by using the white dot to the side to create a keyframe.
However, this is one of several attributes here that does not really make a lot of sense to animate by itself, as the different options are fixed choices with no in-between.
For example, you add a keyframe with the alignment set to the left side, and then you add a second keyframe that aligns the text to the right.
The text will not gradually move from one side to the other, and instead will simply stay in place until the next keyframe, where it will ‘jump’ to the new alignment. Not very useful as far as animations go.
If you want to learn more about Blender you can check out our course on Skillshare by clicking the link here and get 1 month free to the entire Skillshare library.
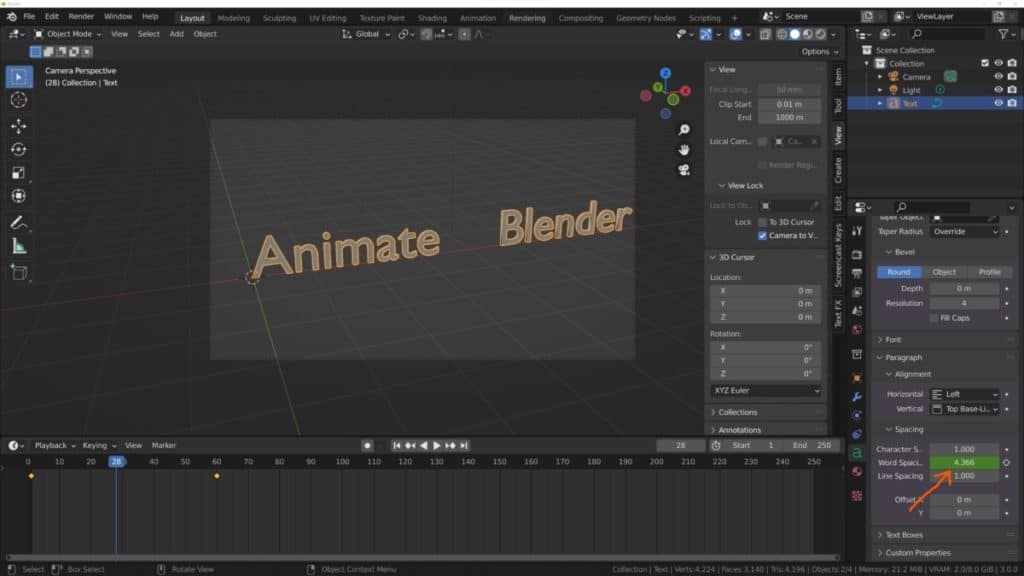
Spacing Between The Words And Letters
This is a hand one for creating title sequences to videos, as you can animate the distance between both individual letters and entire words.
In the paragraph section, you will wind the spacing options which will allow you to animate these distances.
For example, we can create an animation where the second word moves in towards the first word in our phrase by setting the word spacing to be high and then reducing it at the end keyframe.
Size And Sheer Of The Text
While you can adjust the scale of your text object as an animation, you can also adjust the size of the text without impacting the scale.
This is a single value that can be found in the font section of the properties panel under transform and allows you to adjust the text size across all three axis, keeping the shape of the letters in tack.
You can also change the sheer attribute of the text, which creates an effect where the text can lean to one side or the other.
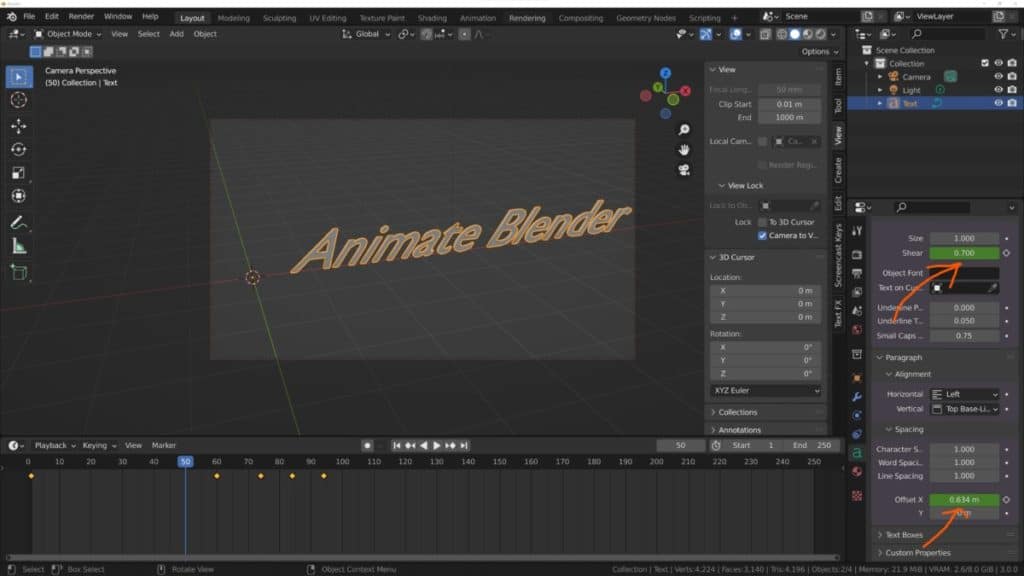
This almost looks like setting your font to an italic style, and is good when used in a sliding animation where the text slides into the view of the camera.
Material Attributes Of The Text
Not only can animate the physical attributes of the text, but you can also edit the material attributes as well.
For example, we can create a fade effect where our text becomes transparent over time. To create a simple version of this, combine your principled node with a transparent node using a mixed shader as seen below.
Have the mix factor set to 0 so that it exclusively favors the principled node, then set a keyframe for the factor value using the I key.
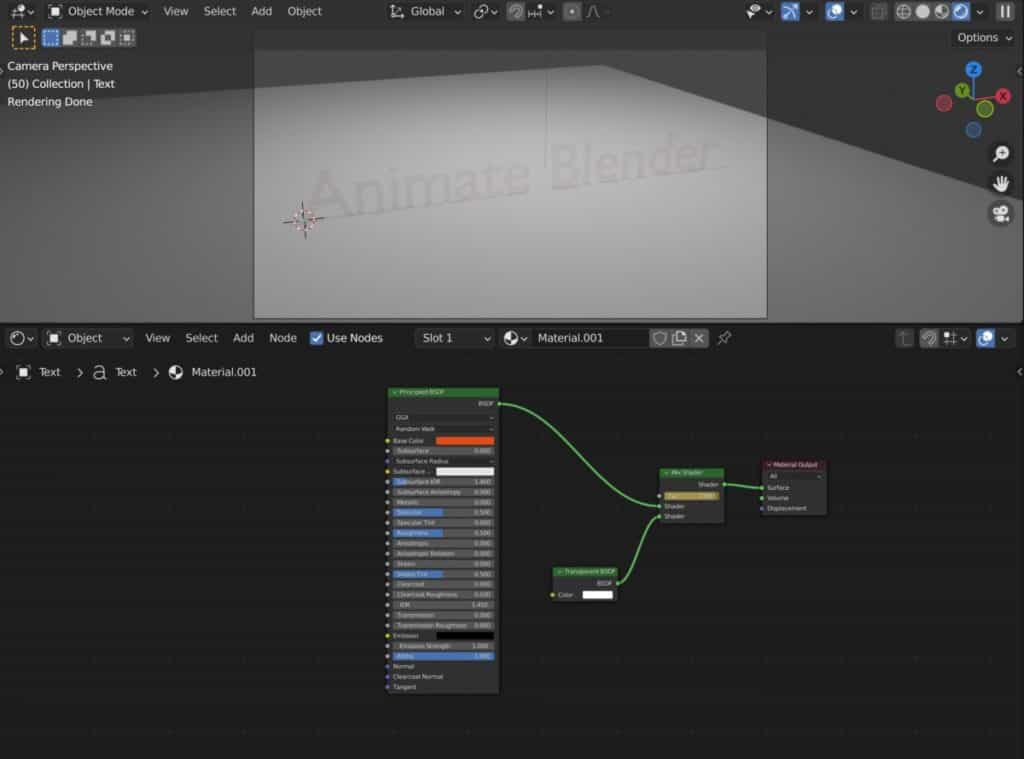
Then change your active frame in your timeline and set the mix factor to 1, inserting the end keyframe at this point.
Now if you preview your text animation using the rendered view shading, you will see that a fade effect has been added to your text.
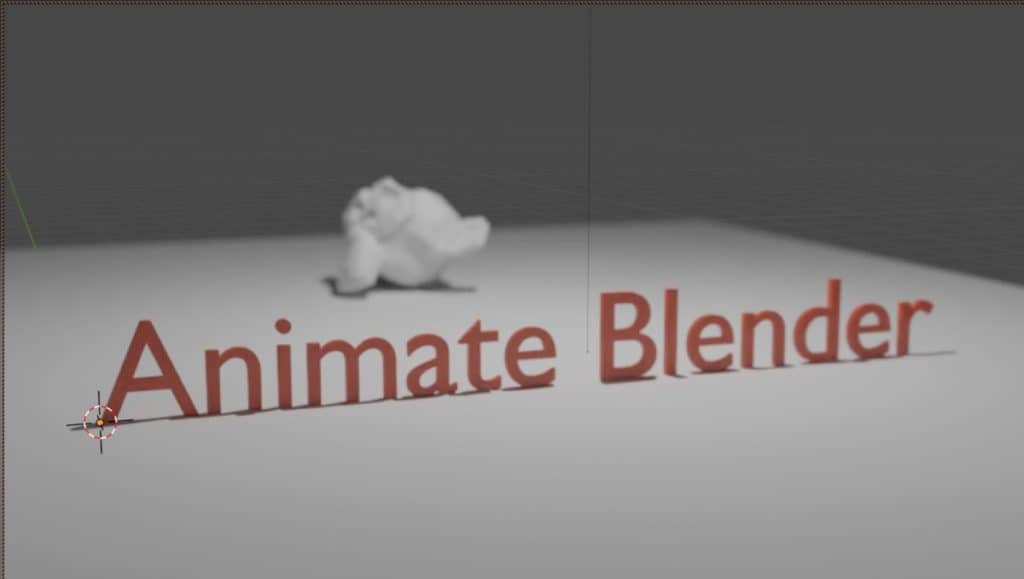
Animating The Lighting Of Your Scene And The camera
Sometimes you need to think outside the box when it comes to animation and 3D modeling in general. Your text may be the crucial aspect of your scene but it is not the only object that you can animate.
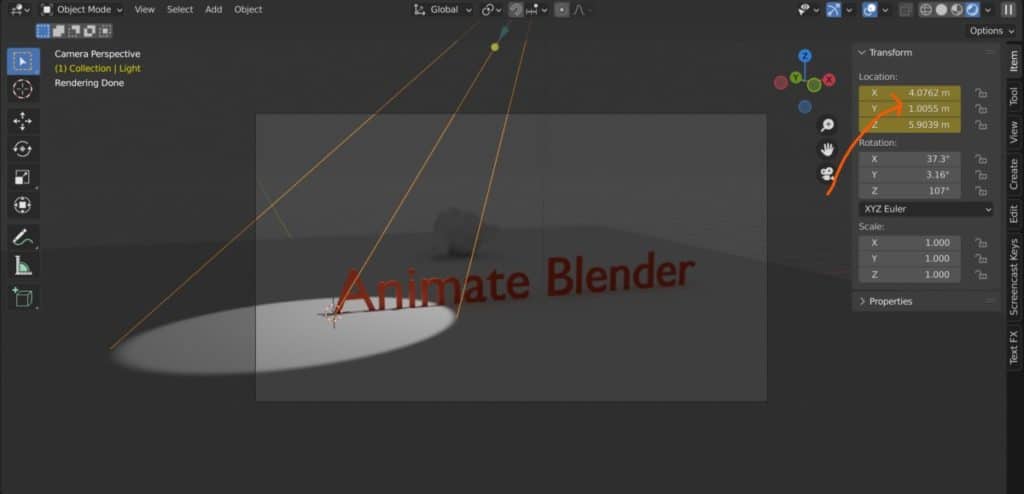
At a minimum, there are at least two more objects that you can animate asides from the text object, and these are your scene camera and your light object.
Your camera for example can be moved around your scene, capturing different viewpoints of your text. Rather than moving the text object, you could just move the camera instead.
There are also camera-specific attributes that you can animate in the properties panel, like the depth of field, which can allow you to create an out-of-focus to in-focus effect for your animation.
Lighting on the other hand can be edited in various ways. You could for example animate the positioning of the light source or the direction of the light itself. An example of this is using a spot lamp and moving it from side to side.
Another example is adjusting the strength of the light source, for example, we could create an animation where we add a noise modifier in the graph editor to create a flickering light effect.
Creating Animations For 2D Text Instead Of 3D Text
While you are likely to want to animate 3D text you may also want to animate 2D text for certain scenarios. But is there a difference between animating a 2D text object compared to a 3D one?
The answer is no, there is not really much of a difference between animated a 2D text option compared to a 3D one, aside from the fact that the 2D object will only scale on two axis instead of three and you won’t be using the extrude tool as a part of your animation.
Many of the other effects that you create can still be used regardless of whether or not your text is 2D or 3D.
Character and word spacing can still be animated, as well as your materials, lighting, camera work, and general transform minus scale on one axis.
The Best Way To Moving Individual Letters Around In The Blender Viewport
A not-so-obvious animation technique that you may want to try is the ability to move your letters around your scene independently from each other.
What is the best way to create an animation where a single letter falls into place perhaps? One method is to have the letters as individual text objects and then animate one object falling into a word. By breaking up your word into objects per letter, you can create more complex animations by isolating those letters.
Adding a text object for each individual object is a tedious approach, however, and you then need to line up your letters correctly after adding each one.
A better way is to create the full word as a single text object and make changes where required to the font, font size, etc.
Then you will need to convert the text object into a mesh object. Select your text object and then go to the Object menu in the header bar of the 3D viewport. From here you will want to highlight convert and then select mesh from the menu.
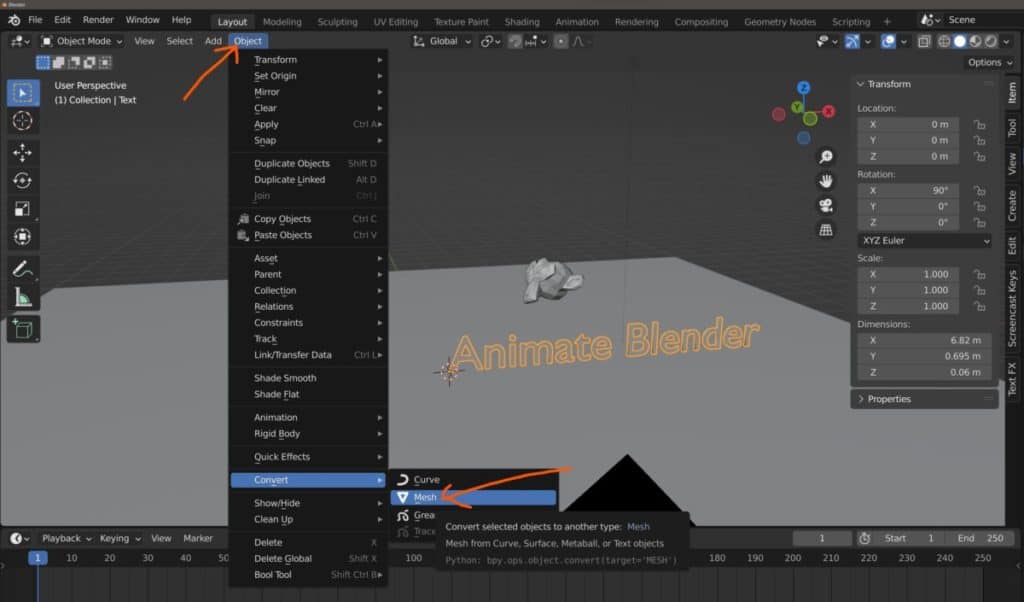
This now converts your text object into a mesh object with actual geometry, allowing it to be animated like a mesh object.
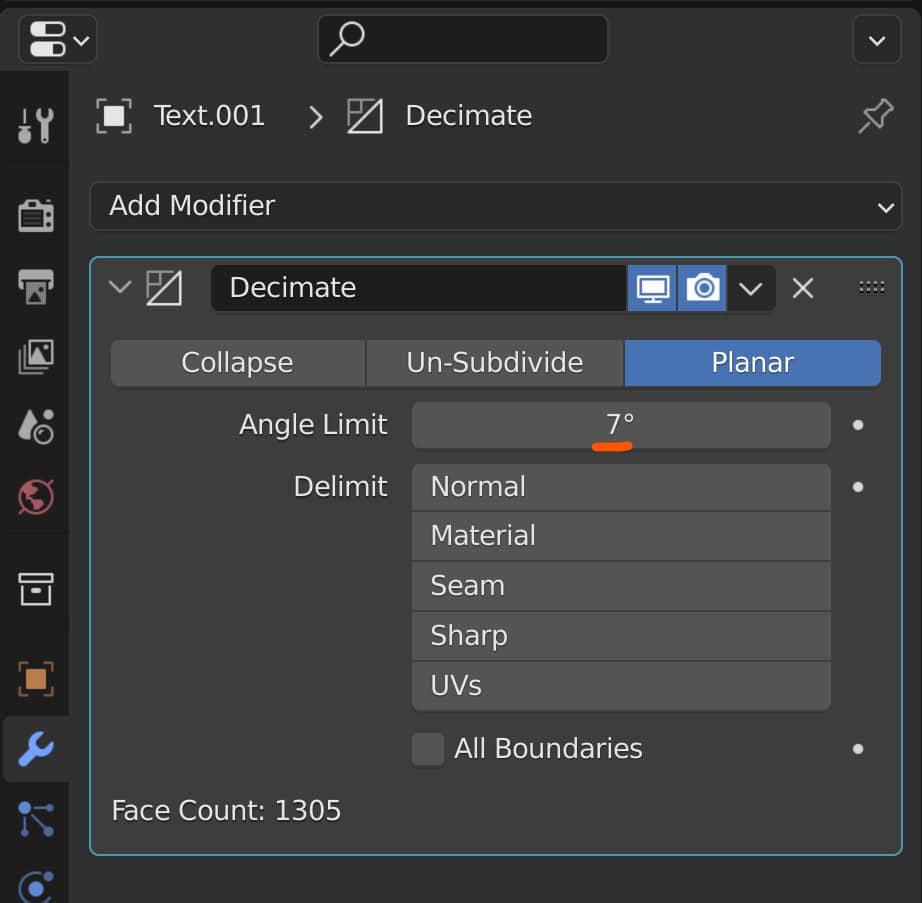
The conversion is rarely seamless, however, and you will have a few issues with the geometry. First, add a decimate modifier and set the type to planar. This will clean up the topology of each letter. It will not be perfect, but it will certainly be an improvement.
Second, if you extruded the text you may find that the ends are disconnected, and some of the vertices are still very close together. Hit the M key to enter the merge menu and then select the merge by distance option.
Increase this value slightly so that you merge some of the geometry together and restore the letters as full islands, but make sure not to go so high that you begin to distort the shapes.
The letters are still a part of the same object, so enter edit mode and make sure that all of your geometry is selected by pressing the A key.
Then press the P key on your keyboard to open the separate menu. Each letter is an island or a loose part, that is disconnected from the rest of the model.
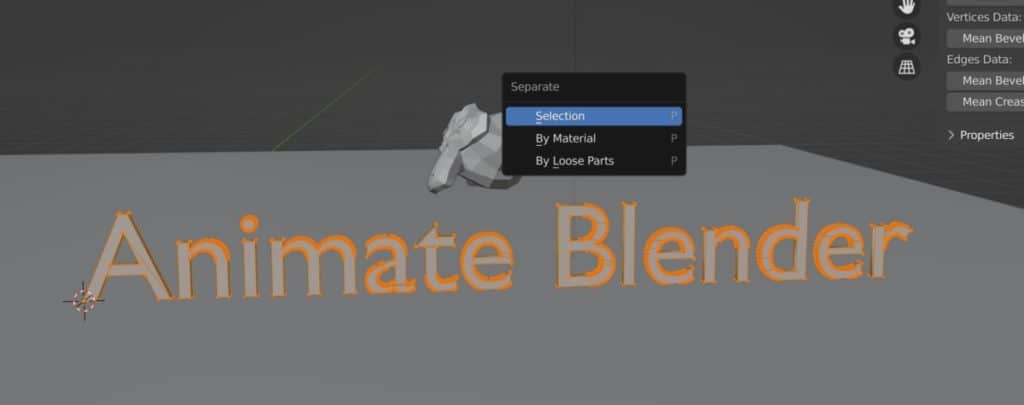
By selecting the loose parts option from the separate menu we are able to divide each individual letter into its own object, and therefore are able to be animated independently. One last problem exists though, in that the object origin of each letter remains in the location of the original object, which will affect how transforms work for each letter.
Select all of your letters in Object mode, and then go to the object menu. Highlight Set Origin, and then select the origin to geometry option to reset the origin point of each individual letter.
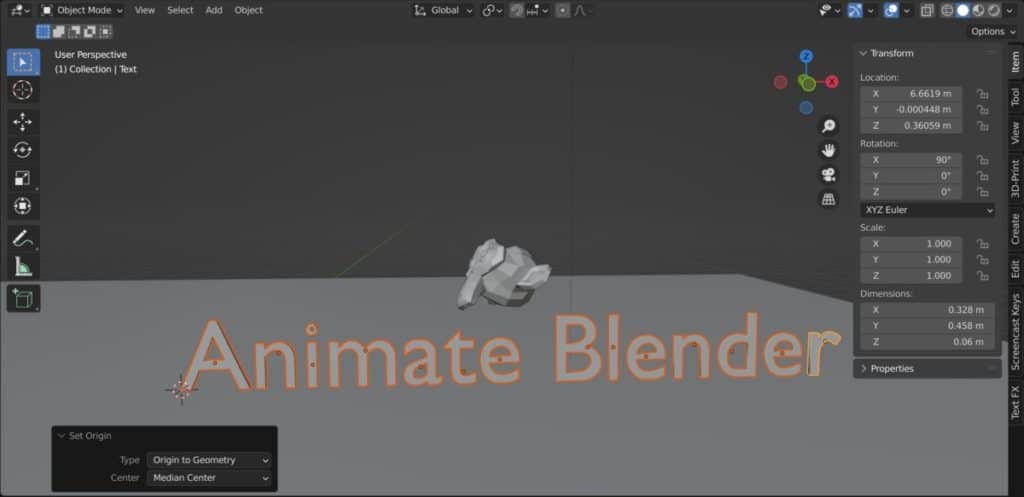
You should now be able to animate your letters individually of each other and can do so in a variety of ways including transforms, shape keys, and more.
Using The Text FX Addon
If you want to employ a more streamlined approach to creating text-based animations in Blender, then there are several add-ons that you can try.
My personal favorite is the text fx addon, which is a simple but effective plugin that allows you to create and animate your text objects from the side panel.
You cannot do everything from the addon, but it offers enough functionality to perform some decent text-based animations.
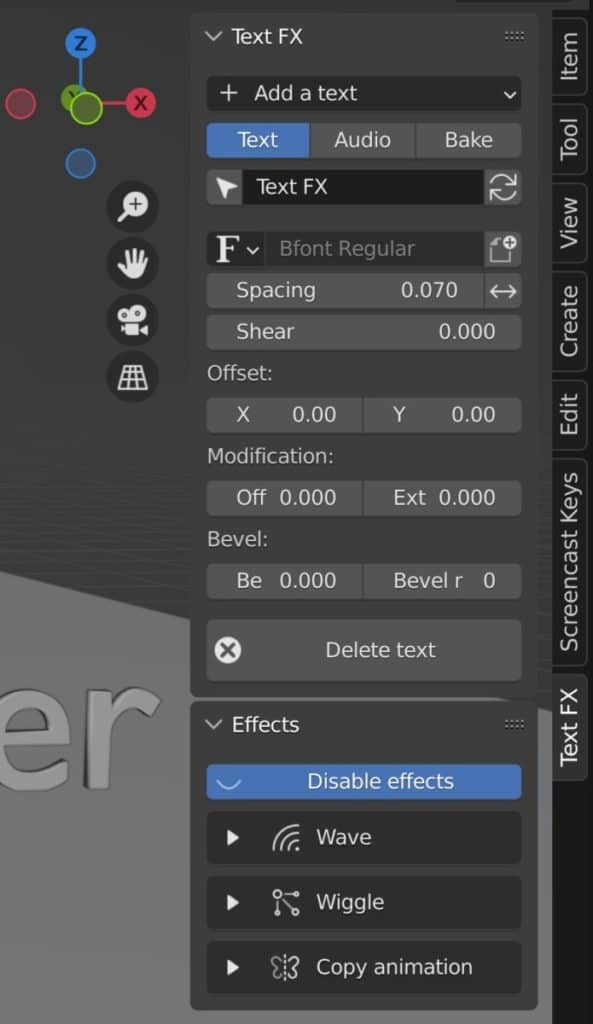
My favorite thing about the addon is the ability to create a countdown timer that actually counts down to 0 from any value that you want and at any rate.
You can also use the scramble feature to create a decode-style animation and even employ basic effects like wave motions.
You can download and begin using the text fx addon here.
Thanks For Reading The Article
We appreciate you taking the time to read the article. We hope that you were able to find the information that you were searching for. Below we have compiled a list of additional topics that you may be interested in reading.
- Making your Background Transparent In Your Renders
- Exporting A Game Asset From Blender To Godot
- Can I Learn Blender On My Own
- Is Blender A Good Option For 3D Animation
- The Best Marketplace To Sell Assets On
-
Sharp Edges in Blender with Crease Sets
Utilizing crease sets for maintaining sharp edges in subsurf modeling.
-
Bevel & Chamfer: Blender’s Edge Mastery
Mastering the application of bevels and chamfers for sharp edges in Blender.
-
Non-Destructive Workflow in Blender
Embracing a non-destructive workflow for flexible modeling in Blender.