Blender 3D is an application that prioritizes 3D modeling, but that does not mean that 2D images don’t have an important part to play. They can act in various forms, such as reference material or backgrounds to our scenes.
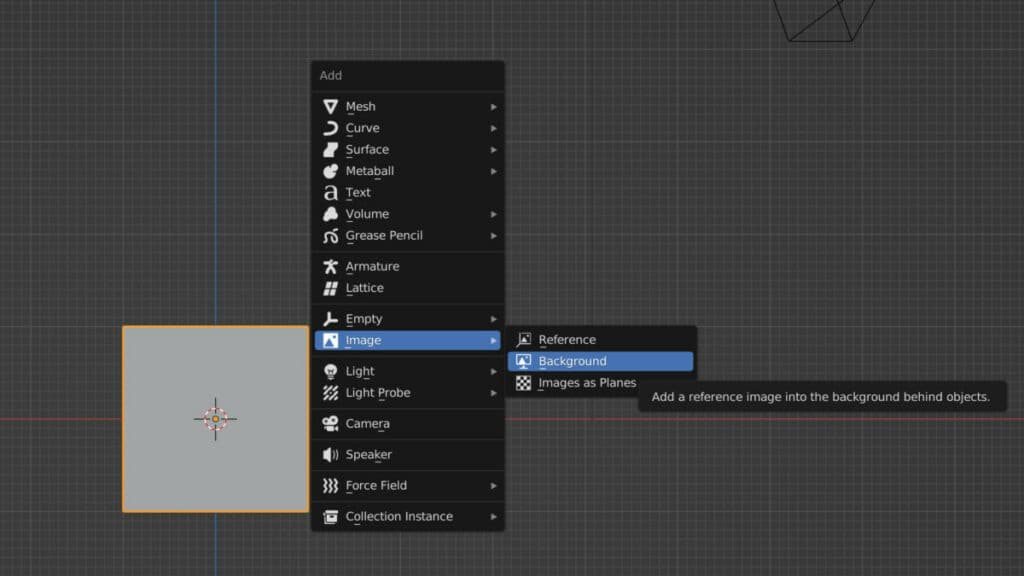
To add an image as a background in your 3D viewport, open up the add menu by pressing Shift + A. Form the add menu, and go to where it says images and highlights. You will then get options for either reference or background. Choose the background option, select the image you want to import, and then click on the blue open image button.
There are a couple of reasons why you would want to use a background image in your project. But the main reason is going to be as a form of reference material, unlike reference images.
What Is A Background Image Used For?
The primary purpose of the background image in Blender is to act as a direct reference material that can be positioned in front of or behind an object while still being able to view the model.
You could use the background Image to trace the outline of your design, allowing you to get the dimensions that you require based on that image.
How To Add A Background Image?
If you want to add a background image to your 3D viewport, go to the add menu in the header bar of the viewport or bring it up by using the hotkey Shift + A.
From here, you will want to highlight images, and then with the additional menu that pops up, choose background.
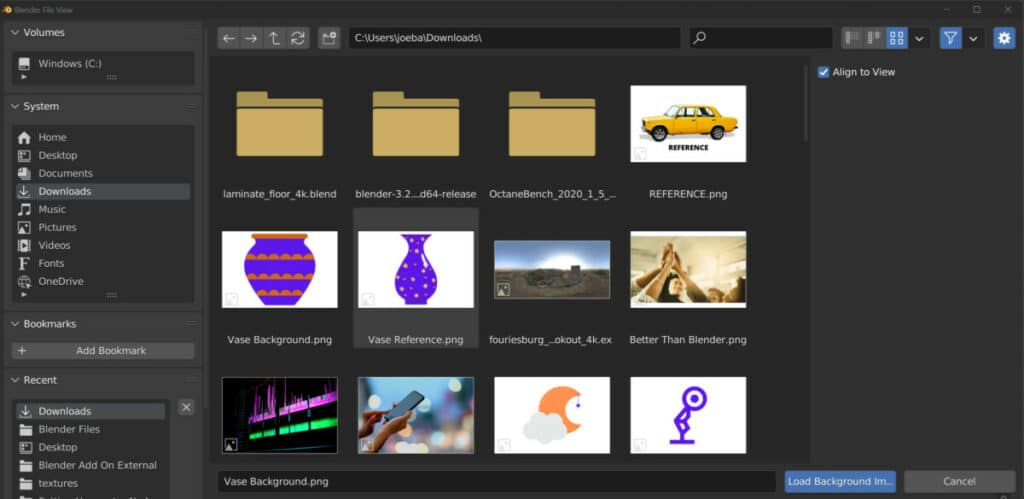
This is going to open up the file browser in a separate window. Use the file browser to locate the image you want to import into your project. Select here, and it will highlight blue.
With the background image selected, you will then need to select the Load Background Image button in the bottom corner of the file browser.
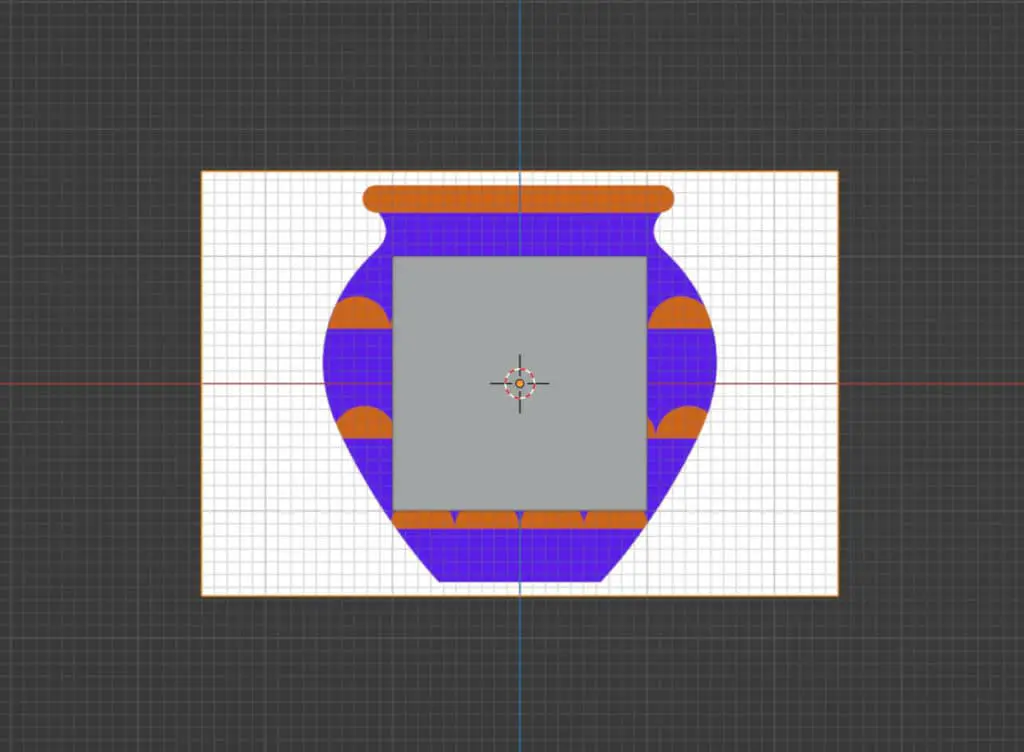
Once you do, the file browser will close, and the image will be imported into your scene. Its orientation will be based on your scene orientation from your viewport camera.
Getting The Right Position
A background image is a specific reference material that usually holds the likeness of the model we’re trying to create. It, therefore, needs to be positioned correctly to be of any use.
Usually, a background image will be positioned so the object can fit within the image’s outline.
It is best suited to have the main object at the center of the viewport where the image is likely to be added.
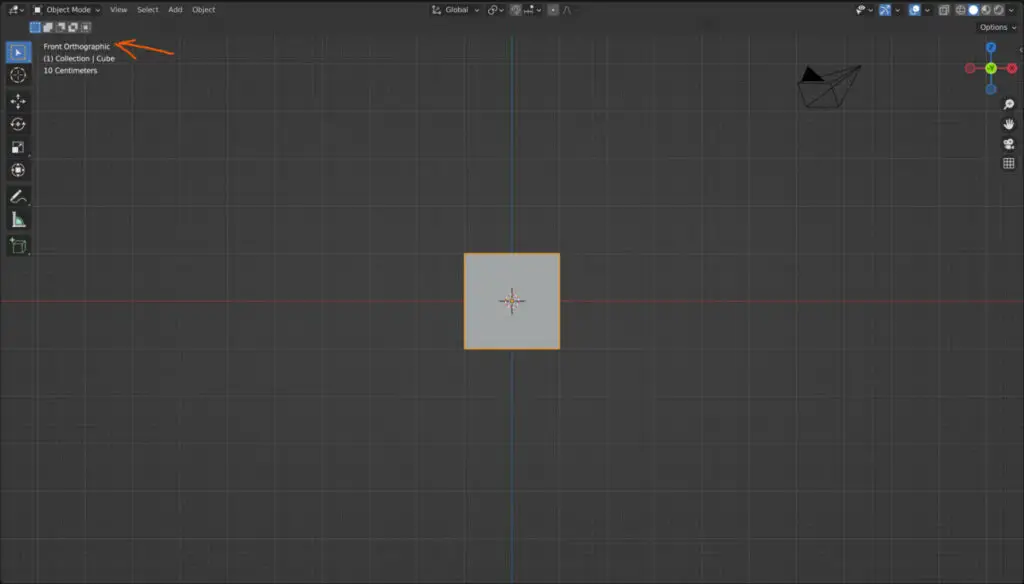
Another recommendation is to set your viewport views to a 2D orthographic view like the front orientation.
This means that when we add our image, it will face directly forwards within our viewport, making it easier to use for the modeling process.
What Is The Difference Between Reference And Background?
If you attempt to import both a reference image and a background image, you may be hard-pressed to tell the difference between each initially.
The reason why is that these are effectively the same kind of objects. They are images that are imported as a form of empty, which means that neither type can be rendered.
Even the options associated with these two different image types are the same. What’s different is the settings associated with these options. The default settings of the background image defer to that of the reference image, but the general options are the same, so it’s easy to turn one into the other.
For example, when adding in a background image in a 2D view, the option for the perspective view is turned off. So when you navigate your scene camera to orbit, then the image will disappear.
Other settings that change between the two image types include the depth. With background images, the depth is set to the back so that it would be viewed behind the objects.
One method for 3D modeling is to either go into wireframe mode, or turn on X-ray, so that you can see through your model. This allows you to better line up the model’s geometry with the objects in the background image you are trying to create.
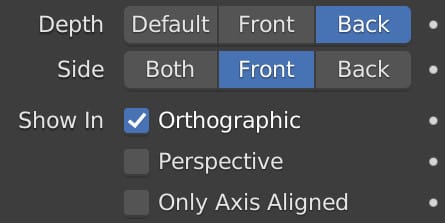
The side option is another setting that is different between a background and reference image. With the reference image, this is set to both, which means you’ll be able to view the reference material from either side of the image.
With a background image, only the front option is selected. So if you were to navigate behind your background image, you would not be able to see the reference material.
This is useful because with background images. We will want to add a few of these based on the different 2D perspectives of our object, such as the front, side, and top views.
This way, every time we go into another two-dimensional view, we can trace based on a different image that views the model from that perspective.
Thanks For Reading
We appreciate you taking the time to read through this article, and we hope you found the information you were looking for. If you are interested in learning more about how Blender uses image files for its projects, then look at some of the blog posts we have listed below.