When working with the Cycles X render engine, we sometimes need to use the image denoiser to clean up our image, especially when we are using a lower number of samples. But where is the option for denoising located when working with the Eevee render engine?
Because Eevee uses rasterization techniques to render its images, a denoising tool is not required for this render engine. The only way to apply image denoising to renders generated from Eevee is to do so in the compositor using the denoise node after the render has initially been completed. However, in most scenarios, this is not going to make any difference to the final result.
So, you will probably ask how you can use image denoising in Eevee because there are no settings within the properties panel that allow you to denoise your image during your rendering process.
Is There A Denoising Tool In The Eevee Render Engine?
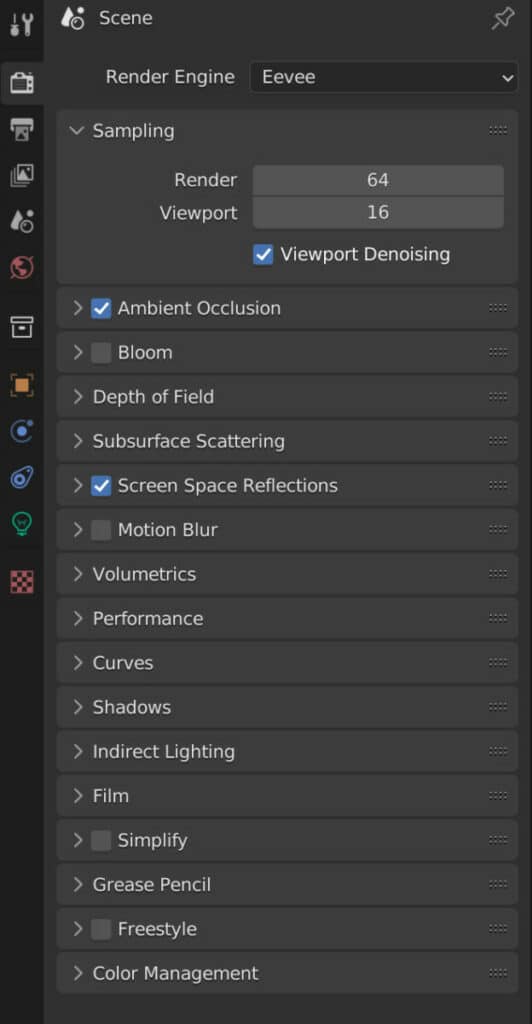
While there are many rendering effects that can be enabled and/or disabled in Eevee, such as screen space reflections and subsurface scattering, there is no denoising tool currently available when using Eevee.
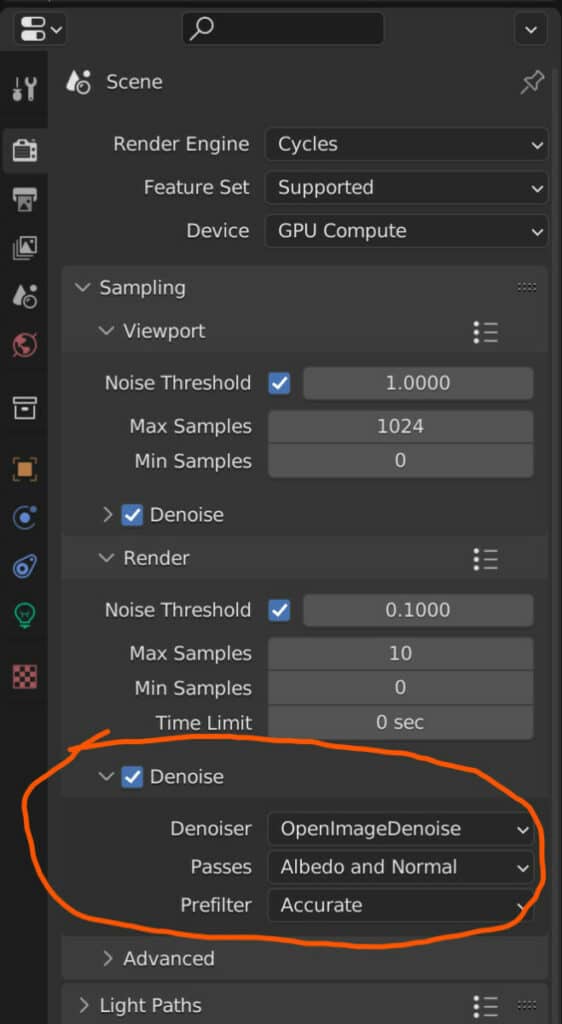
By contrast, the Cyles render engine has an image denoiser for both the 3D viewport and your rendered images. You can choose whether you want to use image denoising and how by using a CPU-powered process or a GPU one.
So why does Blender Cycles X have its own denoiser while Eevee does not?
Why Is There No Denoiser In Eevee?
The main reason why there is no image denoiser in Eevee is that it is not required for the render engine. This comes down to how images are rendered using each render engine in Blender, as the process is different with each of them.
When working with the Eevee render engine, we are using a process known as rasterization to map out the scene for our render.
The process that involves rasterization consists of mapping the polygons of the geometry of your scene and converting them into individual pixels used to construct the image.
As a result, all that Eevee is doing is mapping geometric data to pixels, a process that can be done in real time and allows us to generate renders at a lightning-fast speed. This mapping is so simplistic that the result is nearly always a clear representation of the geometry mapped out, with no noise or grain in the render to speak of.
And because the image is always clear, there is no reason to use image denoising since the purpose of denoising is to clean up the noise of a render.
By contrast, the Cycles X engine uses path tracing to map out the scene using light paths that hit the various objects in our scene and are sent back to the camera for mapping.
This process requires a degree of sampling to improve accuracy, and low-quality renders can result in noise and grain being present, which could then require denoising to clear.
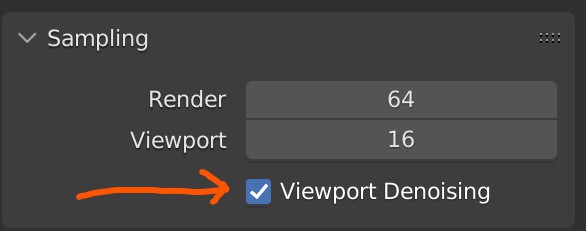
It should be noted that when using the Eevee render engine, there is a tickbox for denoising in the viewport itself, located at the top of the render properties tab.
Using The Compositor To Denoise Images In Eevee?
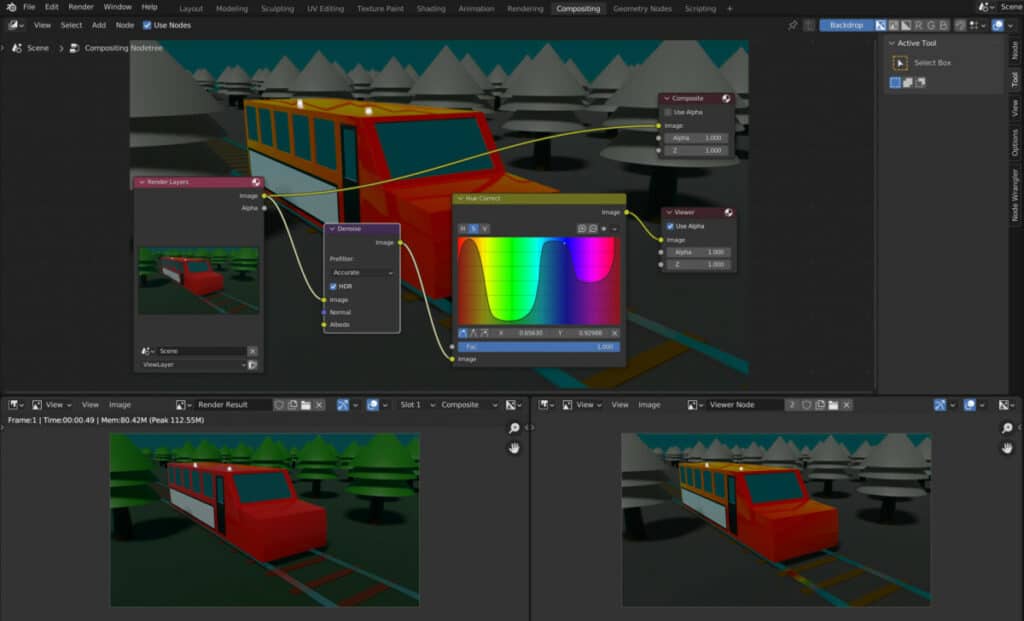
While it is often not required to do so, you do have the option of using the denoise node that is found in the compositing workspace.
If you wish to use the denoise node, you can render your image first and then go to the compositing workspace.

Click on the use nodes button and then use the hotkey Shift + A to open your add menu. Go to the search bar and type in Denoise to select and bring the node into your setup.
This will automatically begin to denoise the image for your composited result, which you can then save and use elsewhere.
Thanks For Reading
We appreciate you taking the time to read through the article, and we hope you found the information you were looking for. If you are interested in learning more about rendering in Blender, check out the articles we have listed below.