Creating a text object in Blender is as easy as creating any other type of object, just go to the add menu and select your text object, then edit the text in edit mode. But the point of having text in a 3D scene may be for it to be a 3D object itself. So how can we convert it from a 2D plane of text to a 3D object?
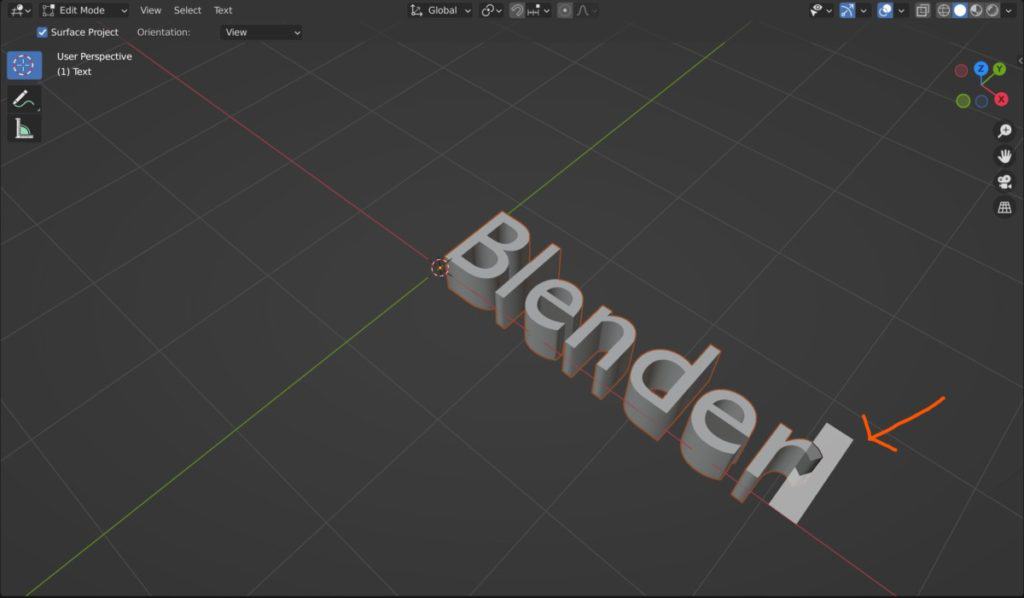
Text in Blender can be made 3D simply by extruding it, and there is no need to convert the text object to a mesh object to do so. Extruding text cannot be done in the viewport, instead, it is a parameter located in the object tab of the Properties panel. Simply assign a value other than 0 to give the text thickness.
It is very easy to extrude a text object in Blender, but in what use cases is the tool even necessary, and can we do anything else to out text objects to make them more unique to fit our project?
Using The Text Properties Tab To Extrude Our Text
3D text is an editable object, which means you can change more than just its location, rotation, and scale. However, the process of editing is very different to what you would expect from a mesh object. When you enter edit mode for a text object, you will be able to edit one parameter only, and that is the actual text that is written. You can use backspace to empty the word, and then type in what you actually want.
So how do edit some of the other settings, like the font or line spacing? Well, you can do these and extrude your text in the properties panel. The tab that you are looking for is the object data tab, not to be confused with the object tab, which is universal among all object types. The object data tab houses the settings specific to that type of object. For a text object, the icon of the tab is a green a.
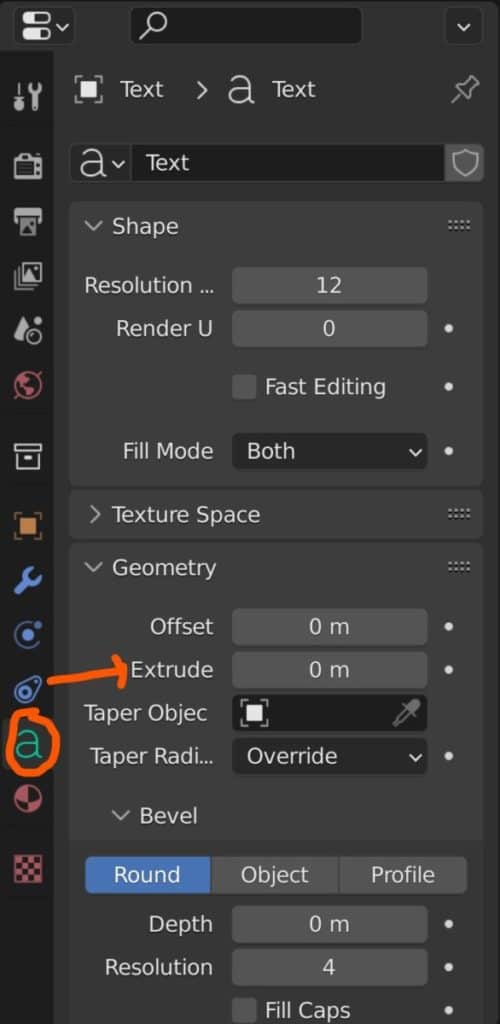
Here you will be able to adjust your text in all sorts of ways, but the main one that we are looking for is the extrude option. You will find this option underneath the geometry branch, so click where it says geometry and you will see the option to extrude.
The value will be set to 0 by default, so either click and drag to adjust or click and type in the value that you want to extrude it to. Setting to a number greater than 0 will give your text actual thickness.

Note as well that there is a small dot next to the extrude option in the properties panel. With this, you can animate the amount of extrusion for your text.
Can I Not Just Extrude In Edit Mode Like For A Mesh Object?
As we mentioned above, you cannot extrude your model in edit mode for a text object. You may think to try and use the hotkeys to extrude but this will not work either, as while in edit mode for a text object your keys will behave in a way similar to traditional typing applications like Microsoft word.
This is not the case for all of the buttons though, mainly for the alphabet and numerical buttons that will likely be used for the actual typing. The TAB key though will still change from edit mode to object mode for example, and F12 can still be used to render, but you cannot use hotkeys for tools like extruding in this mode. Therefore you will need to rely on the properties panel to perform these actions.
Is It Possible To Convert A Text To A Mesh And Then Extrude it?
Yes, it is possible to take your text object and convert it into a mesh object, but there are a few things to consider before doing so.
First, when we decide to convert our text to a mesh we will no longer be able to edit the actual words that make up the object. This can only be done for a text object and is far more difficult to do with a mesh object where each letter would need to be modeled.
Second, while we are able to convert a text object to a mesh object, we are not able to perform the reverse operation, as a mesh object cannot be turned into a text object. This highlights the other factors more so as to once you convert you cannot switch back unless you use the undo tool, which will cancel all operations after converting to a mesh in the first place.
Then you have the geometry that will actually be created. Blender is not very good at retopologising text on conversion, and so the individual letters will be messy in terms of their geometry. This is not the biggest issue if you are simply looking to extrude, as it all goes in the same direction anyway, but makes using other tools more difficult.
Finally, you need to consider if the purpose of the object requires you to convert it into a mesh. If it is for a render or an animation, then there is little reason to make the swap.
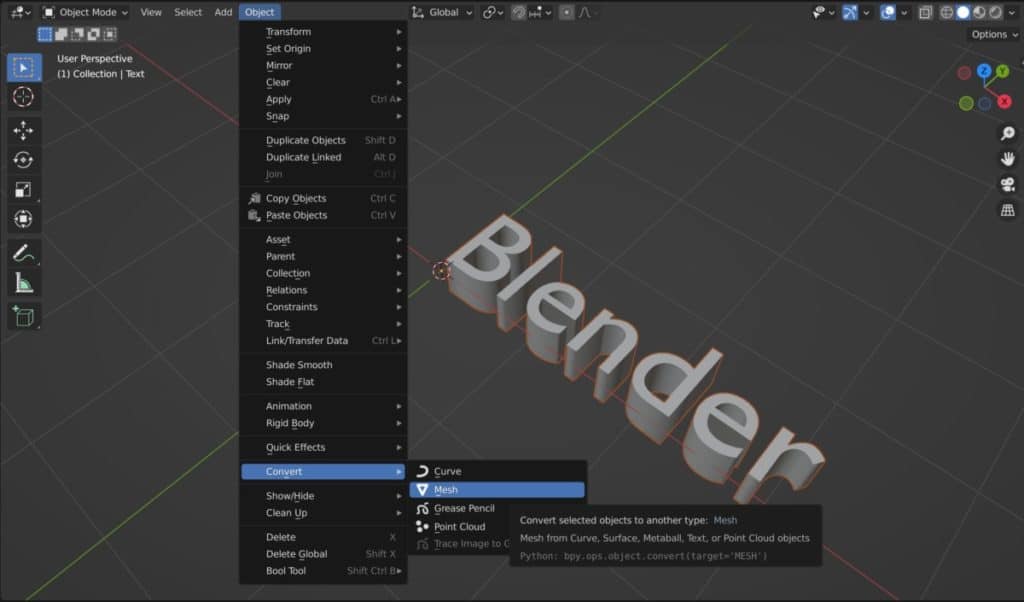
If however, you decide that are still going to convert to a mesh object you can do so by selecting your text in object mode and then pressing the RMB to open the object context menu, going to convert, and then selecting mesh.
What Else Can I Do With My Text Object?
In addition to simply extruding your text and transforming it into a three-dimensional shape, there are other tools that you can use as well to customize your text the way you want. Along with the extrude option, you also have the ability to create an offset effect for your text in the geometry settings for the text.
The Offset Tool
This effect changes the thickness of the letters themselves and its effectiveness depends on the font that you choose to use. You should have small offsets for your letters as this is an easy way to distort the shapes if you are not careful.
Tapering To Another Object
This is the process of having your text thickness influenced by a curve object, allowing for some interesting shapes to be created with your letters.
The Bevel Tool
With the bevel tool, you can smooth out the sharp edges on your letters after you have extruded them, which makes the letters a bit easier on the eye.
Thanks For Reading Our Article
We appreciate you taking the time to read through our article. Below we have gathered a small list of additional topics that we think you may be interested in.
- Is Blender The Only 3D Software Out There?
- Is Blender Taking Over As The 3D Software Of Choice?
- How To Identify Normals?
- How To Render An Animation?
- How To Paint Transparency Onto Your Image Texture?
-
Mechanical Parts: Blender Modelling Guide
Detailed guide to modeling mechanical parts with precision in Blender.
-
Subsurf Modelling: Hard Surfaces in Blender
Achieving high-quality hard surfaces with Subsurf Modelling techniques.
-
Sharp Edges in Blender with Crease Sets
Utilizing crease sets for maintaining sharp edges in subsurf modeling.