One of the most common tools used in 3D modeling is the subdivide tool, which is used to create more geometry across the entire object without disrupting either the topology or the shape of the object. But can you do the reverse in Blender and unsubdivide your model.
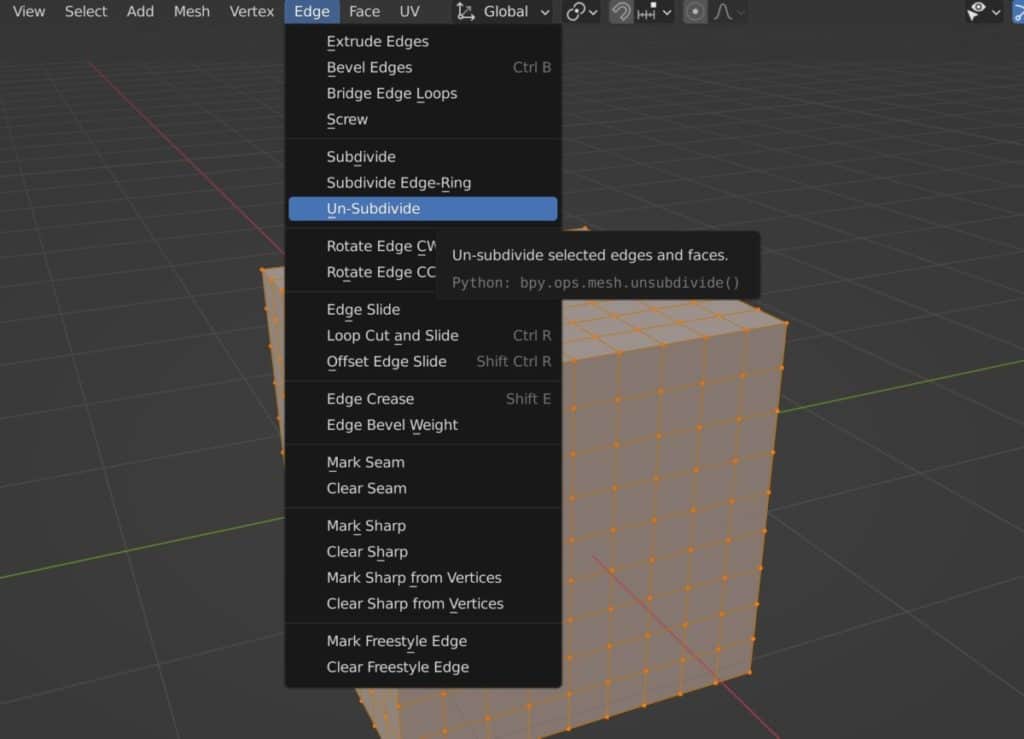
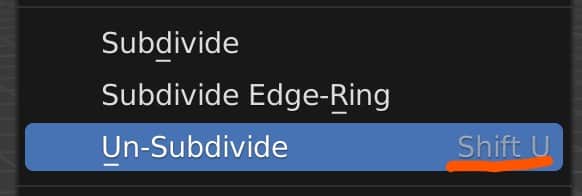
The unsubdivide tool can be accessed from the edge menu in the 3D viewport while you are in edit mode for your selected object. It does not have an assigned hotkey to it. When using the unsubdivide tool, the number of subdivisions assigned in the operator panel is used to define the topology, with odd numbers often creating a cross pattern to replace the square pattern of the object.
There are a few quirks that come with using the unsubdivide tool, but it is not used as often as you would expect. There are also other methods for lowering geometry that is perhaps easier or more effective.
How Does The Unsubdivide Tool Work?
In some ways, the unsubdivide tool works the same way as the subdivide tool but in reverse. However, this is not always the case.
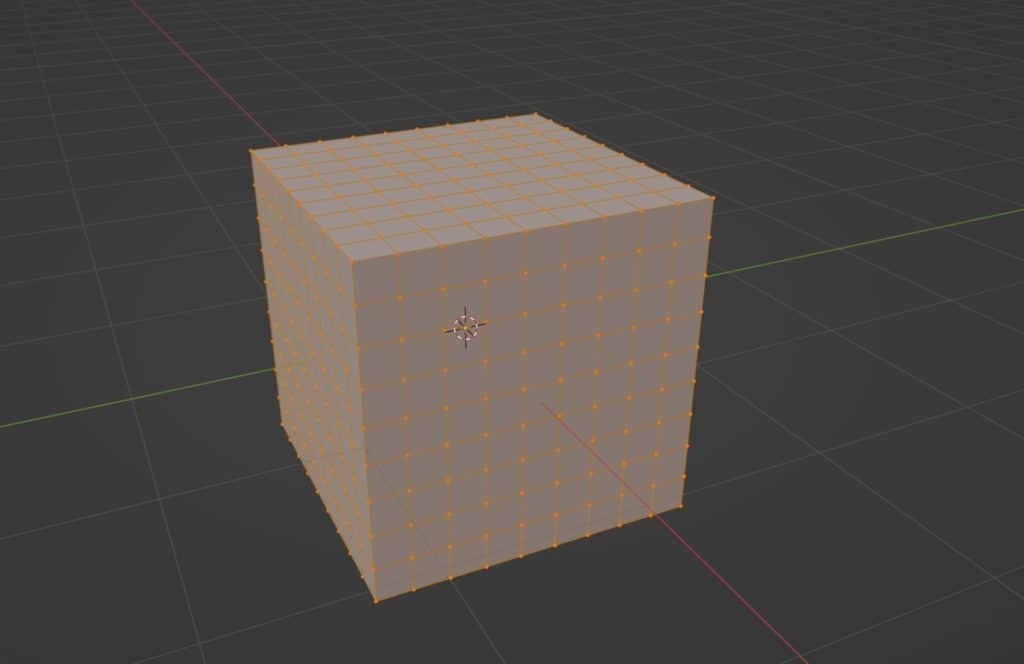
Say you have a cube that has been subdivided a couple of times, giving it more geometry than it needs. You can use the unsubdivide tool to reverse the operation and reduce the geometry of the model. When you initially use the subdivide tool you will notice that it has a very distinctive effect on the geometry.
If your geometry uses quads, which it normally will in standard practice, then you will notice that your quad-based geometry switches to more of a cross pattern. We are still using quads here, but now the topology flows in a diagonal direction rather than horizontal or vertical on the model.

This is a quirk that always occurs whenever you use an ODD number of subdivisions. As with most tools, an operator panel will appear in the lower corner of the viewport after you activate the tool.
Open this up and you will see only one option for the tool, the number of iterations that you can apply. This is the of times that the tool unsubdivides your geometry, and the higher the count, the more your geometry is reduced.

If you want to make sure that the flow of your geometry remains as close to the original as possible, set the number of iterations to an even number.
Go too far though and your geometry can quickly begin to unravel as the geometry is of course what defines the object’s shape. When using this tool we find that 2 is normally the magic number to use so that we don’t lose too much detail.
Even when using an even number though keep an eye out for any nonmanifold edges on your model, like on a hollow drinking glass, as the topology here can be altered to allow the tool to work, and may still need further editing manually.
What Can You Create With The Unsubdivide Tool?
How much does the unsubdivide tool disrupt the shape of the model? Well, that depends on how heavily you use it, but it will nearly always change your topology to some extent.
We can however use this tool’s nature to our advantage, as there are objects that we can create more easily with the help of the unsubdivide tool.
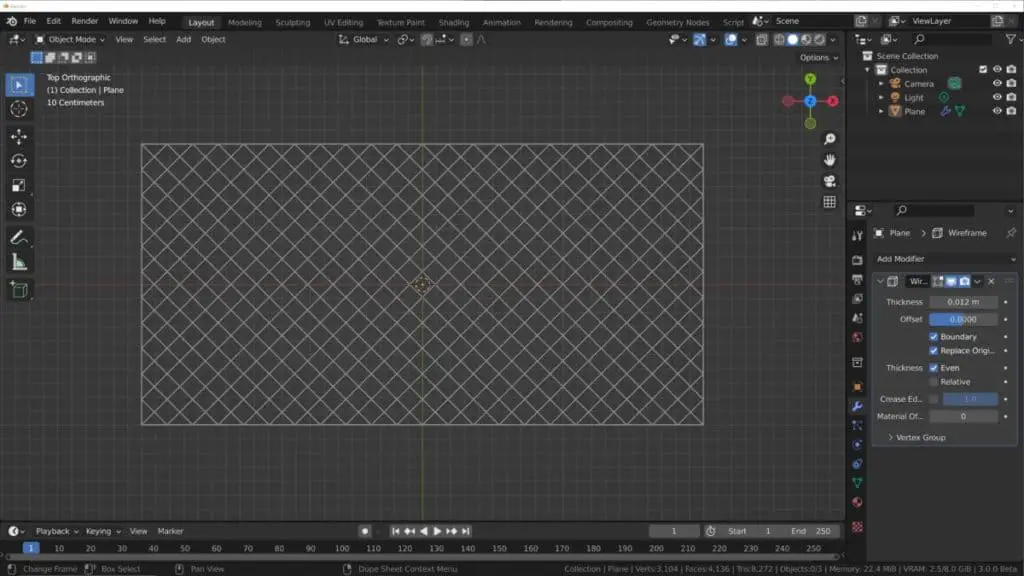
For example, a gated mesh tends to have a cross pattern, so we could use the unsubdivide tool on an already subdivided plane object, then add a wireframe to create to mesh.
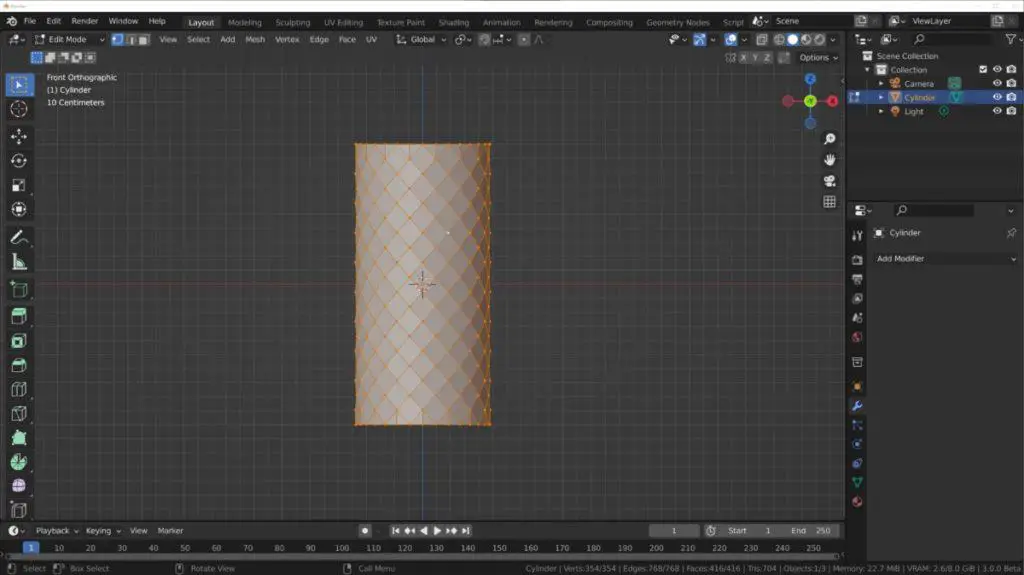
Another example is when modeling any object that needs to mend or twist using either the rotate tool. the spin tool, or the screw modifier.
The cross pattern geometry is actually better suited in combination with these tools and can be used to prevent your geometry from losing its shape when these tools are used.
Adding A Hotkey To The Unsubdivide Tool For Faster Access?
Many of the editing tools in Blender have their own hotkeys that are assigned to them so that you don’t need to travel to the menus to use those tools, however, the unsubdivide tool is not one that has been assigned its own shortcut. That means the quickest way to access the unsubdivide tool is to press Control + E to open the edge menu and access it from there.
If you want to be able to access the tool faster, then we need to either assign the tool to our quick favorites menu or give it its own shortcut.
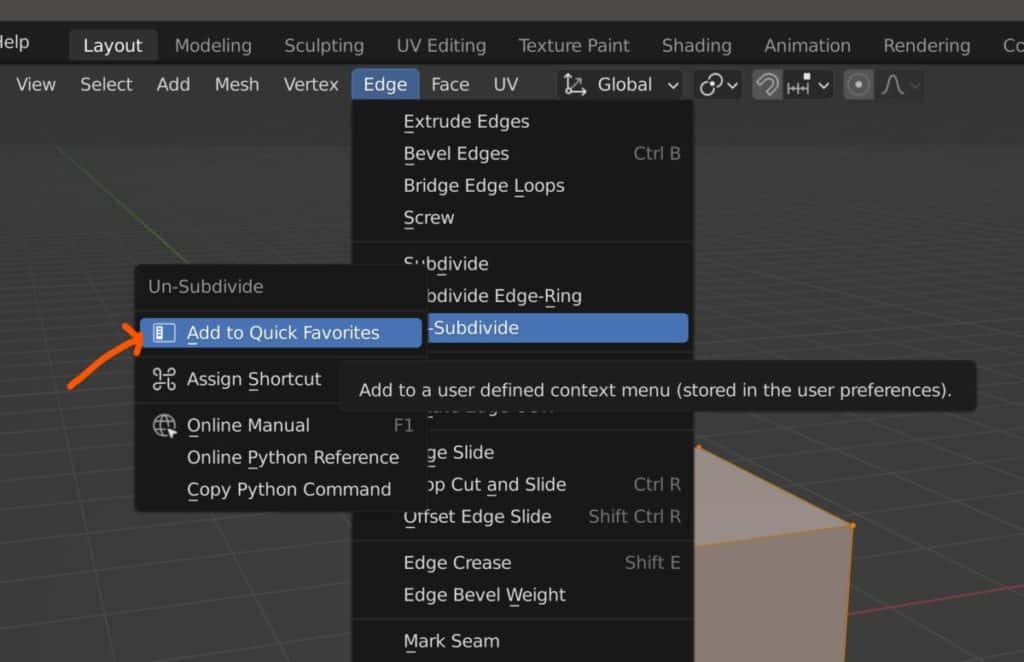
The quick favorites menu is accessed using the Q key and stores all of the user’s favorite tools. This is best kept as a small list so that the tools are always easy to locate. To add your tool to the quick favorites menu, right-click on the tool name to open the context menu, then select add to quick favorites.
Adding your own hotkey is also just as easy. Again you will need to locate the unsubdivide tool in the edge menu and then right-click on the tool name to open the context menu.
Select the second option which should be to assign a new shortcut. You will then be presented with a prompt to add the hotkey that you wish to assign. Type in the hotkey how you want it to be used, such as Shift + U, and then the hotkey automatically connects to the tool.
If you want to change or remove your hotkey down the line, you can return to the context menu where it will give you both options.
Other Methods To Reducing Your Geometry
The ability to lower your geometry count is just as important as being able to increase it. Sometimes we need to lower the geometry density so that we can ADD detail, like creating windows in a building by deleting faces. Reducing geometry can also allow us to alter the topology of our models more easily.
There are a few other methods that we can use to reduce the amount of geometry and simplify our 3D models.
- Deleting And Dissolving – The manual method of reducing your geometry count is to select the geometry that you want to get rid of and then either delete or dissolve it. Both techniques are accessed by pressing X in edit mode to open the delete menu. deleting geometry will remove that geometry from the object, as well as the geometry that is dependent on it. For example, deleting a vertex will delete all faces that surround it. Dissolving also gets rid of selected geometry but then merges the remaining geometry so that no holes are filed. This is the better option for maintaining the objects.
- Retopology – This method is commonly used in game asset design and involves creating a simple low poly version of a mode by using the high poly version as a base. This is suitable for when the object has lots of fine details as we can bake those details onto the lower poly model.
- Multi Resolution Modifier – One of two modifiers that you can use to lower the geometry density of your model, multi-resolution is used to both increase and decrease the density of your model and has options to both add and subtract with subdivide and unsubdived respectively. Note that the unsubdivide option will not work if the modifier cannot maintain the base shape when used.
- Decimate Modifier – This option is the modifier version of the unsubdivide tool, much as the subdivision surface is the modifier version of the subdivide tool. Using the decimate modifier will allow you to reduce the geometry count using one of three methods. Collapse begins to merge edges that are closest together, unsubdivide is the uniform method and works the same way as the unsubdivide tool, and planar uses the angles of the faces to determine where to merge the geometry.
Other Articles That You May Be Interested In
We appreciate you taking the time to read through our article. We have gathered a list of additional topics that we think you may be interested in reading below…
- Why Does The Boolean Modifier Not Fill In The Holes Of The Model?
- How To Overlay A Transparent Texture Or Decal In Blender Using Planes?
- Boolean Tool Fast Vs Exact Solver
- What Are The Hotkeys For Navigating In The 3D Viewport?
- Learn To Use Tools Faster With The Help Of Blender Shortcuts
-
Align Perfectly with Blender’s Snap Tools
Aligning objects perfectly with Blender’s advanced Snap tools.
-
Mechanical Parts: Blender Modelling Guide
Detailed guide to modeling mechanical parts with precision in Blender.
-
Subsurf Modelling: Hard Surfaces in Blender
Achieving high-quality hard surfaces with Subsurf Modelling techniques.