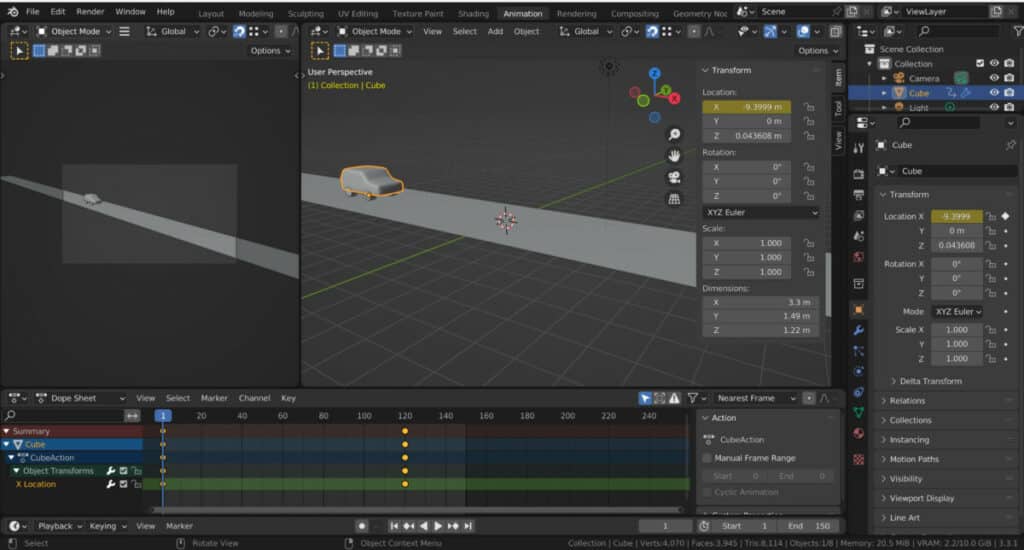
Animation in Blender requires using keyframes to define the start and end points of an animation based on a changed value. The graph editor allows us to control the animation’s behavior in between these keyframes. One way that we can control this behavior is to change the interpolation method.
Interpolation in Blender is how a specific value is affected before and after a keyframe. The graph editor displays a colored line to indicate the change of a value over time. The curvature and shape of this line can be controlled using the interpolation method. There are three primary forms of interpolation: Bezier, Linear, and Constant.
Adding keyframes is just the first step to creating 3D animations. Once our keyframes are positioned, we need to consider how they interact and how our keyframe’s values are affected over time.
How Does Interpolation Affect Animation?
There is a layered process to creating animations in Blender. Depending on the project, the first step may be to create a rig used to animate more complex objects in Blender based on the positioning of its various parts.
Then we need to create keyframes that change specific properties and parameters relating to our object, geometry, material, etc.
To animate any property, we need to create a start point for the original value and an endpoint for the target value.
In between the start and endpoint, the value in question will gradually transition from its original value of the start point to the target value of the endpoint. How this value makes that transition can be referred to as the interpolation of the keyframes.
For example, you can have the change in value run at a consistent speed from one keyframe to another, or you can change the interpolation so that the change slows down as it reaches the target value.
A moving car is an excellent example of this. When you start a car, you accelerate to your target speed, starting at 0 and increasing your speed.

A similar process can be imitated using interpolation in Blender, where we can start slow and then increase the speed of our animation as we get closer to the target value.
By comparison, a bouncing ball will move quickly on the keyframes where it bounces on the ground. However, it will slow down considerably as it reaches the keyframes, where it reaches its high point and gravity starts to take over.
By controlling the interpolation between our keyframes, we can mimic the behavior of these entirely different objects and how they move.
Changing The Method Of Interpolation In Blender?
There are three locations where we can change the interpolation of our keyframes in Blender; we can change interpolation methods in the timeline, dope sheet, or in the graph editor.
Of these three options, changing the interpolation method within the graph editor is recommended. This way, we can see visually how the interpolation changes using the F-Curve in the graph editor.
Looking in the graph editor, our keyframes are connected by lines representing the value that these keyframes affect.
By changing our interpolation method, we can also change how our parameters transition before and after these keyframes.
To change your interpolation method, go to the graph editor and select the keyframe you want to effect. The keyframe is the target of your values and is, therefore, the reference point for the interpolation tool.
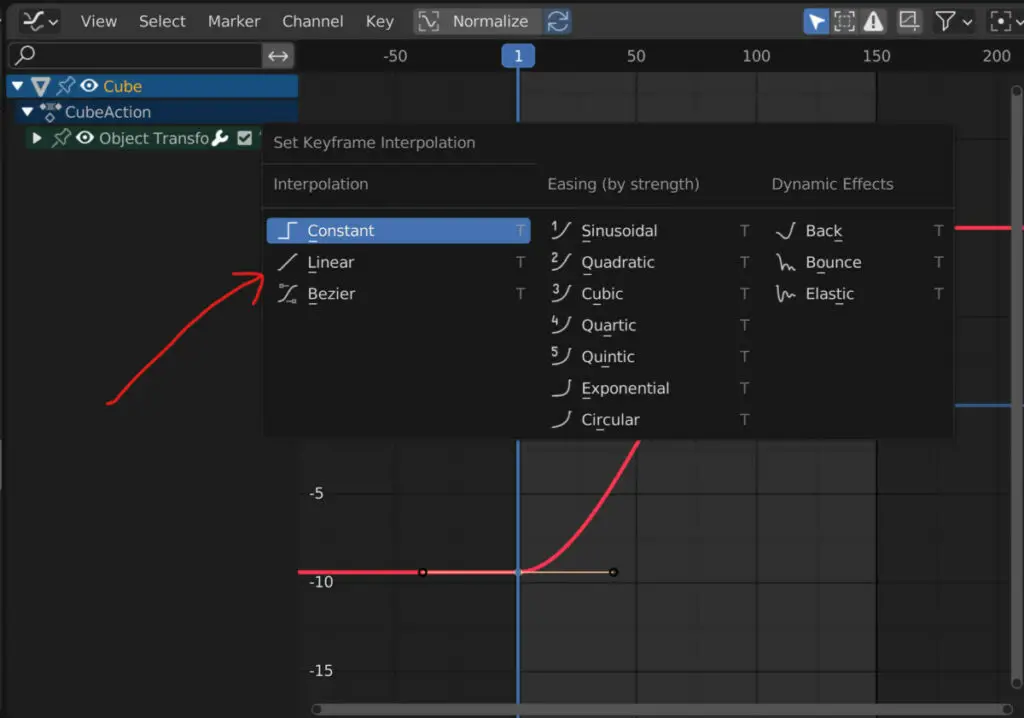
Press the T key to open the keyframe interpolation menu, where you will have multiple options divided into three categories.
Alternatively, we can access the same menu by going to the key menu in the graph editor header bar and then locating interpolation. Here you will find a couple of other options similar to changing the interpolation, including the handle type and easing effect.
The Three Main Methods Of Interpolation
While there are many options available in this menu, only three actual interpolation methods exist. At the same time, the other categories are used to recalculate that method of interpolation in the form of easing or dynamic effects. Let’s look at the three main methods of interpolation used in Blender.
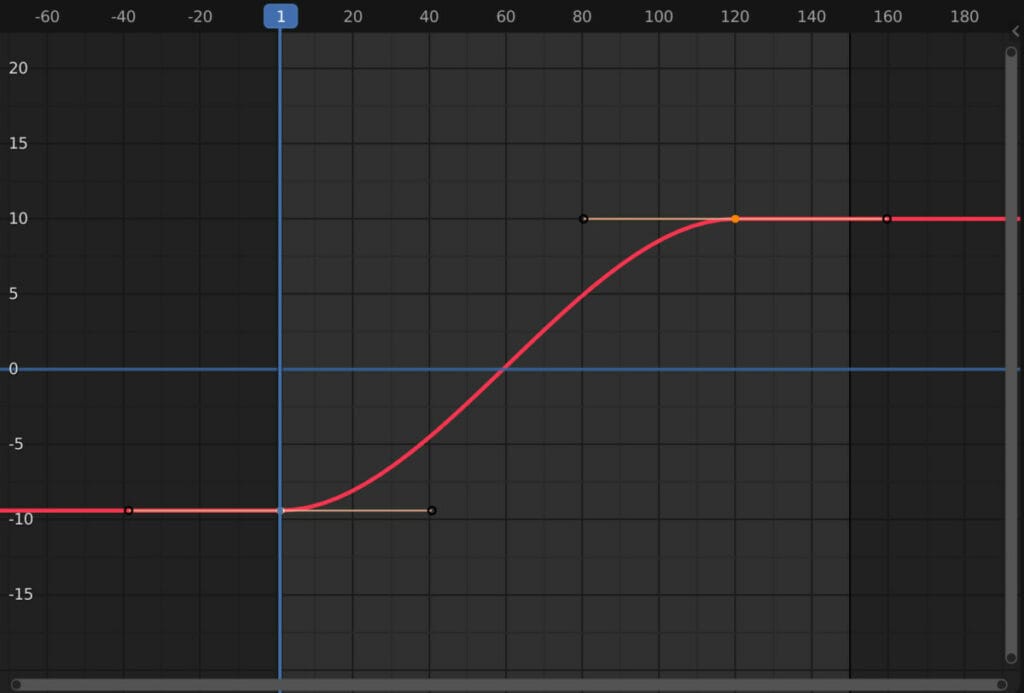
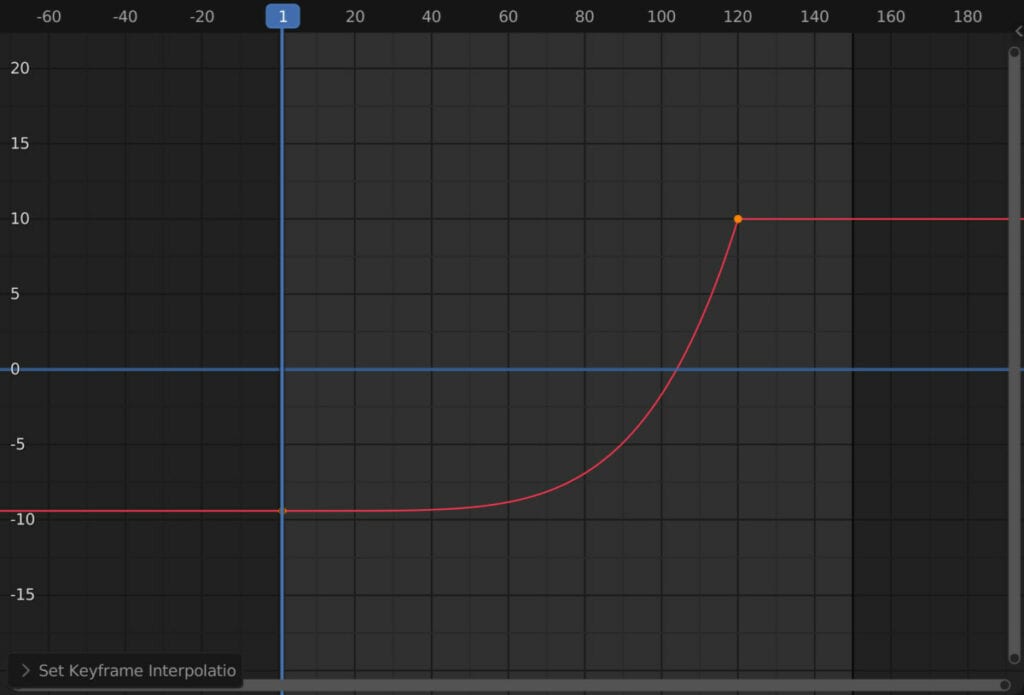
Bezier – This is the default option of the three that will be applied whenever you add keyframes to a new project. This form of interpolation uses a method of easing so that the value undergoes little change after the start point and immediately before the endpoint.
This mimics the effect of both acceleration and deceleration between the keyframes and is used in most animations that involve some form of movement.
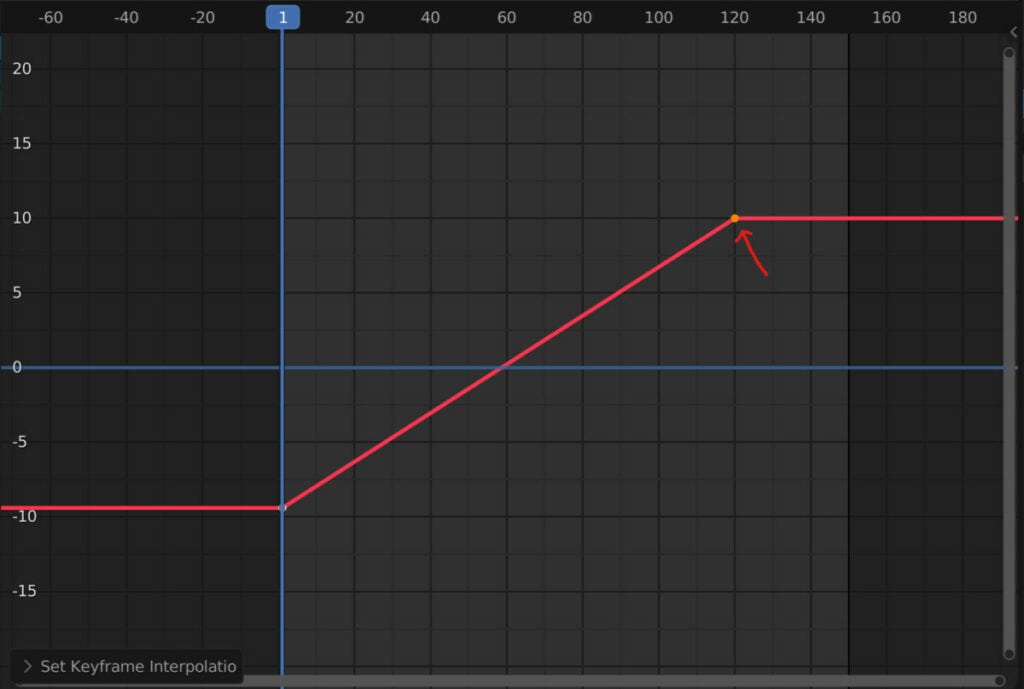
Linear – The second method is a simplified version of the bezier where no easing is applied to the animated value on either end. The line between the keyframes will appear dead straight in the graph editor, and the object’s speed is consistent from start to finish.
This is ideal in animations where you do not see the start or end of the motion of an object, where it continues to move throughout the clip at a single speed.
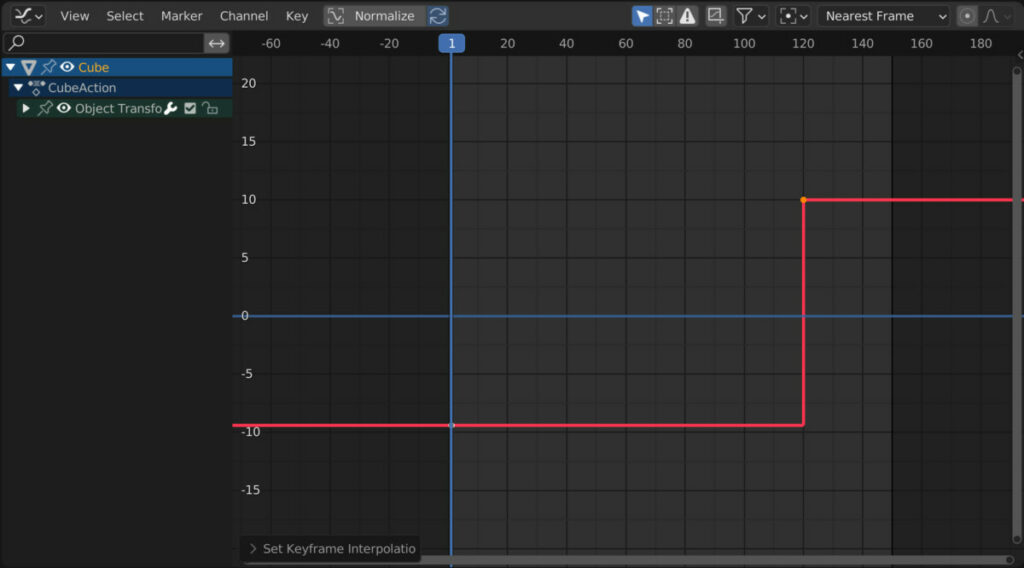
Constant – Think of this as the best option for when you want to turn something on and off, like a light or a switch, requiring little animation beyond that.
This method does not change the value between the keyframes and sticks to the value designated at the start point until it reaches the next keyframe. Once it does, the value immediately switches to that keyframe.
Using The Easing By Strength Options
The next category has a broader variety of options representing the same form of interpolation at different strength levels.
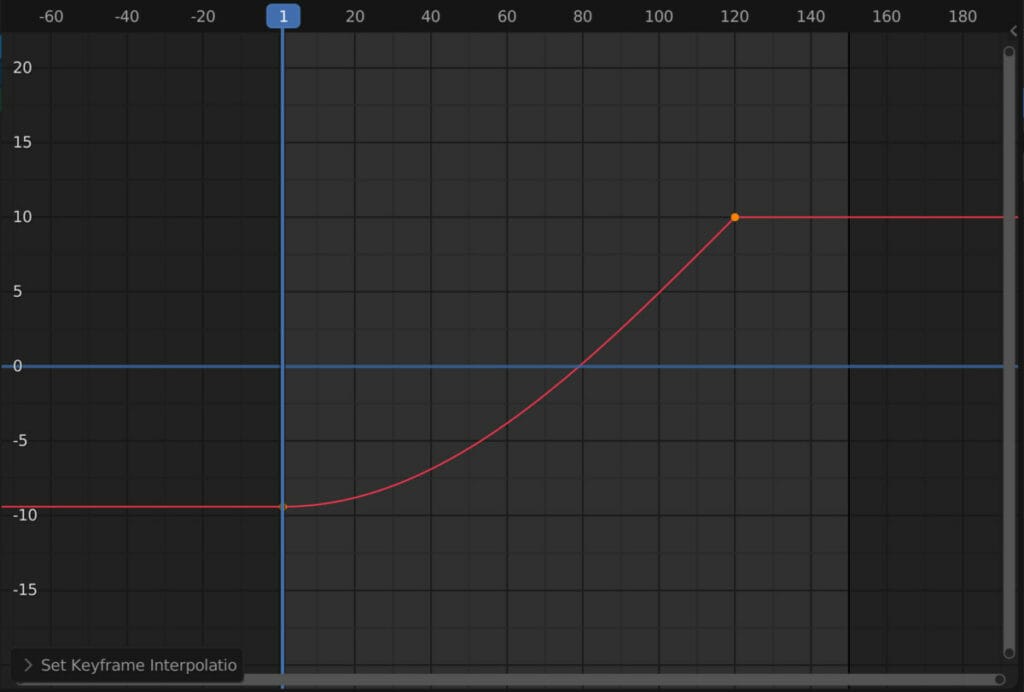
These are a combination of the Bezier and Linear forms of interpolation. A bezier form is used at the start of the keyframed value, while a linear interpolation is preferred when the value reaches the endpoint.
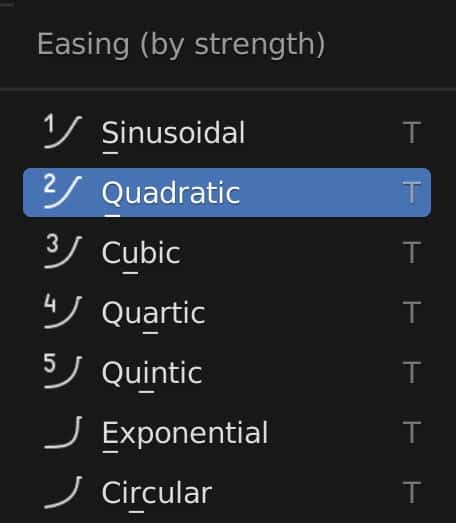
The strength levels are easy to determine as the menu is formulated in descending order, with the weakest bezier type being the first option.
In practical terms, the more easing is applied to the curve, the longer it takes for the motion to accelerate from the start point.
Adding Dynamic Effects
The final category allows for the implementation of more advanced effects commonly used in animations like Blender.
The Back effect is used when you want the value to overreach the endpoint before regressing to that value.
For example, you could have a start value of 0 and an end value of 4 on an axis. Using the back dynamic effect, the animation can rise to a value of 5 before returning to 4 when it reaches the end frame.
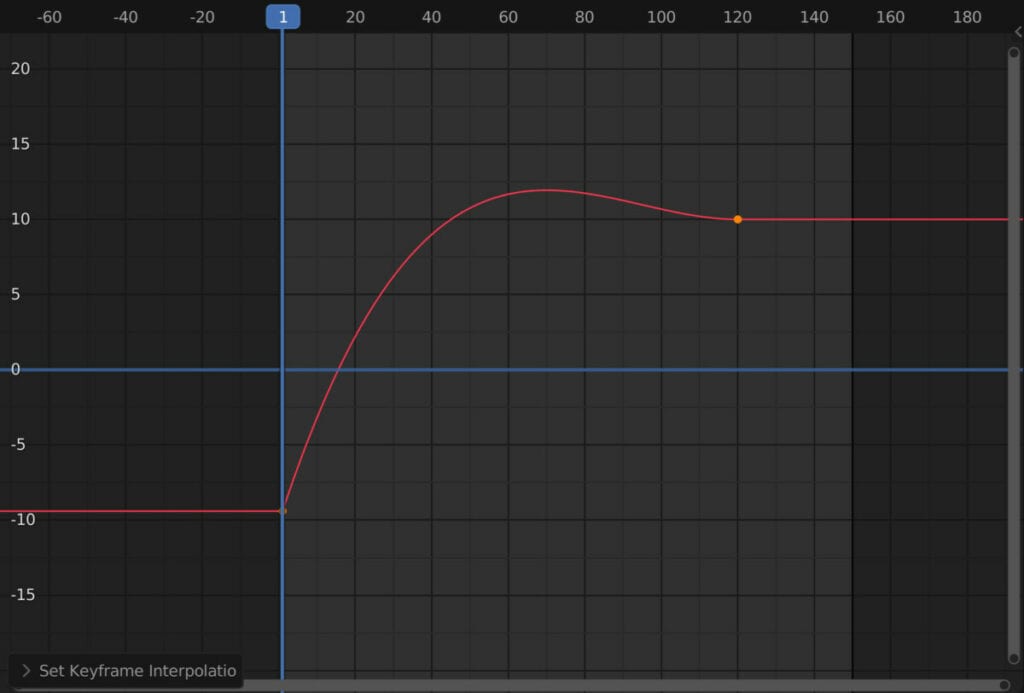
Back Dynamic Effects are best used in animations where you need your object to snap back into a position.
The Bounce effect creates a natural bounce animation between two keyframes, which eliminates the need to use keyframes for the highs and lows of each bounce, as it is all calculated within the interpolation.
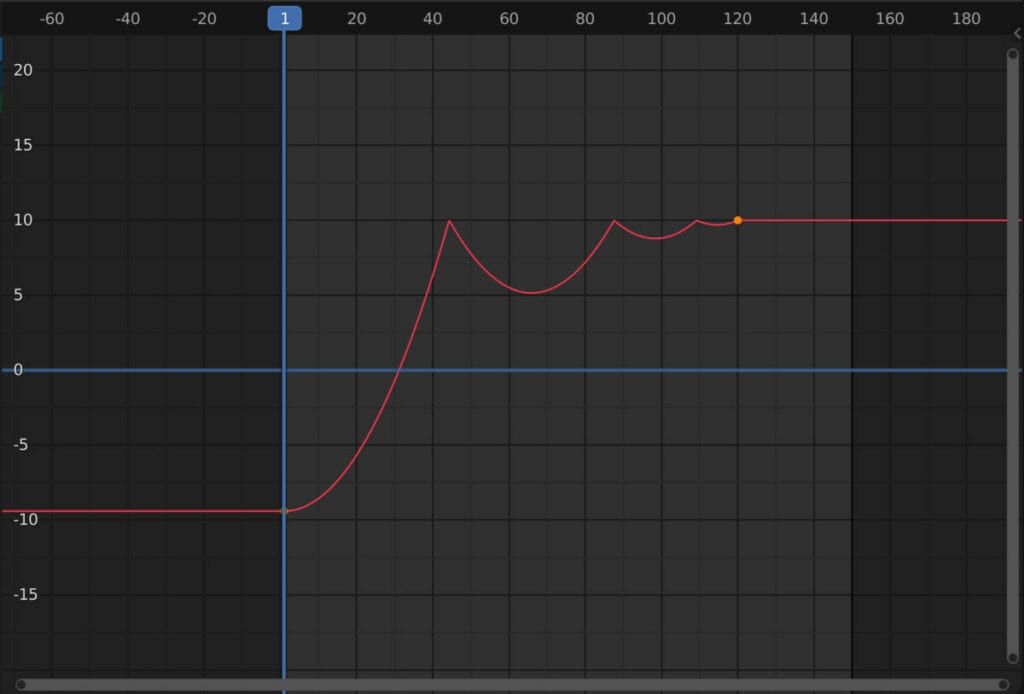
It even reduces the height of the bounce naturally each time, meaning minimal editing is required.
The Elastic effect uses a sine wave as the formal for calculating its interpolation, mimicking the appearance of highly elastic objects in motion, such as when pulling and releasing an elastic band.
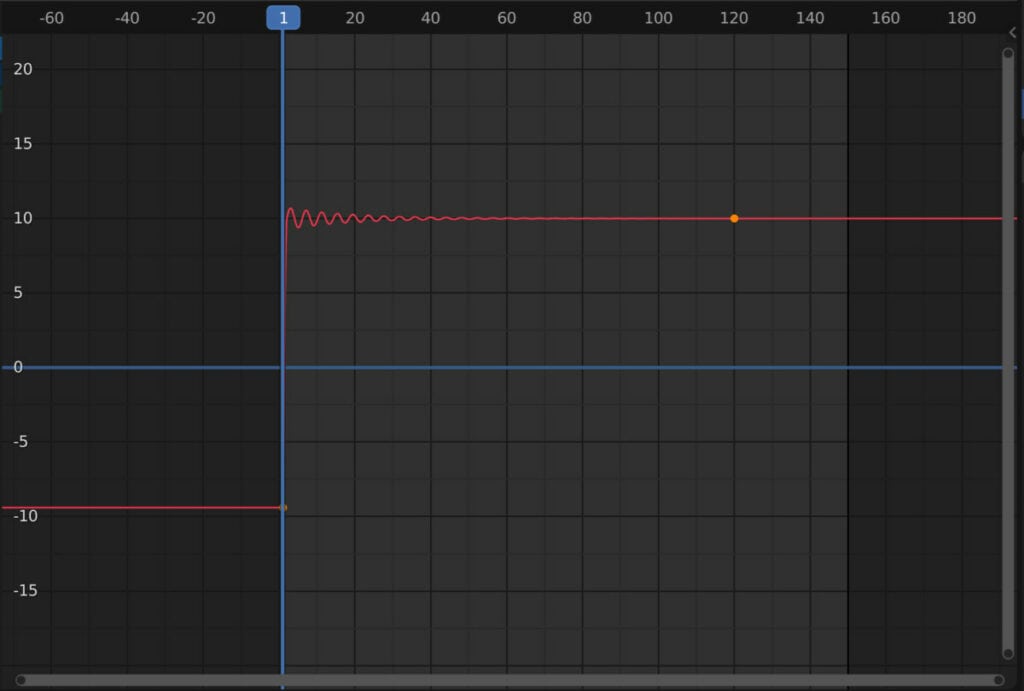
Another example where we could use this effect would be in a cartoon where a character receives an impact, and his head shudders back and forth at speed.
Thanks For Reading
We appreciate you taking the time to read through the article. We hope you found the information you were looking for. If you are interested in learning more about the Blender software, you can check out a few of the articles we have listed below.
- Creating A Bouncing Ball Animation In Blender
- Create Keyframes With Ease Using The Auto Key Tool
- Converting An Image Sequence To A Movie File
- Setting The Output Of Rendered Animations
- Improve Preview Performance Using The Render Region Tool