If you follow YouTube tutorials, then at some point, you will have learned how to apply the transforms of your object, which involves setting the current parameters of your transforms as the new defaults. However, there is a similar option that allows you to clear your transforms, so what’s the difference between the two?
To clear your transforms in Blender, go to the object menu in the header of the 3D viewports, then select the clear option. Here you have the ability to clear either the location, rotation, or scale settings for your objects. You can also access these options individually by using their respective hotkeys.
So accessing the clear options is almost as easy as accessing the applying options. But how does clearing your transform defer from work applying it, and how does this affect the other tools that you use in Blender?
How To Access The Clear Menu?
While clearing your transforms is not that different from the process of applying them. There are still some key differences even when accessing the clear options.
Unlike the apply menu, there is no default hotkey set up to access the clear menu. Therefore, the only way to access the clear menu is through the 3D viewports header bar.
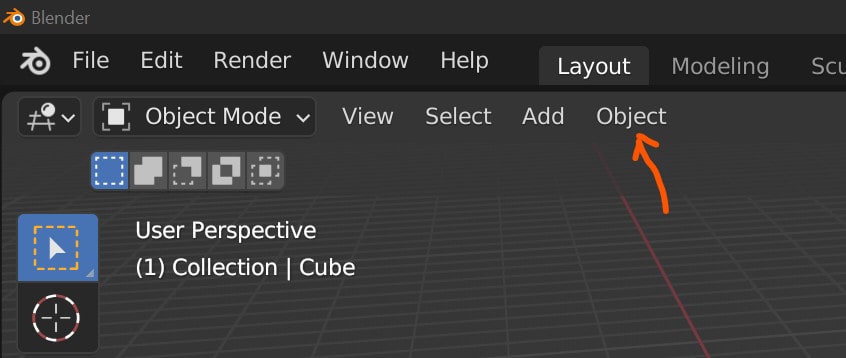
In the header of the viewport, go to the objects menu and open it up. If you locate where the apply menu is found, you will notice the clear menu settings are found just above it.
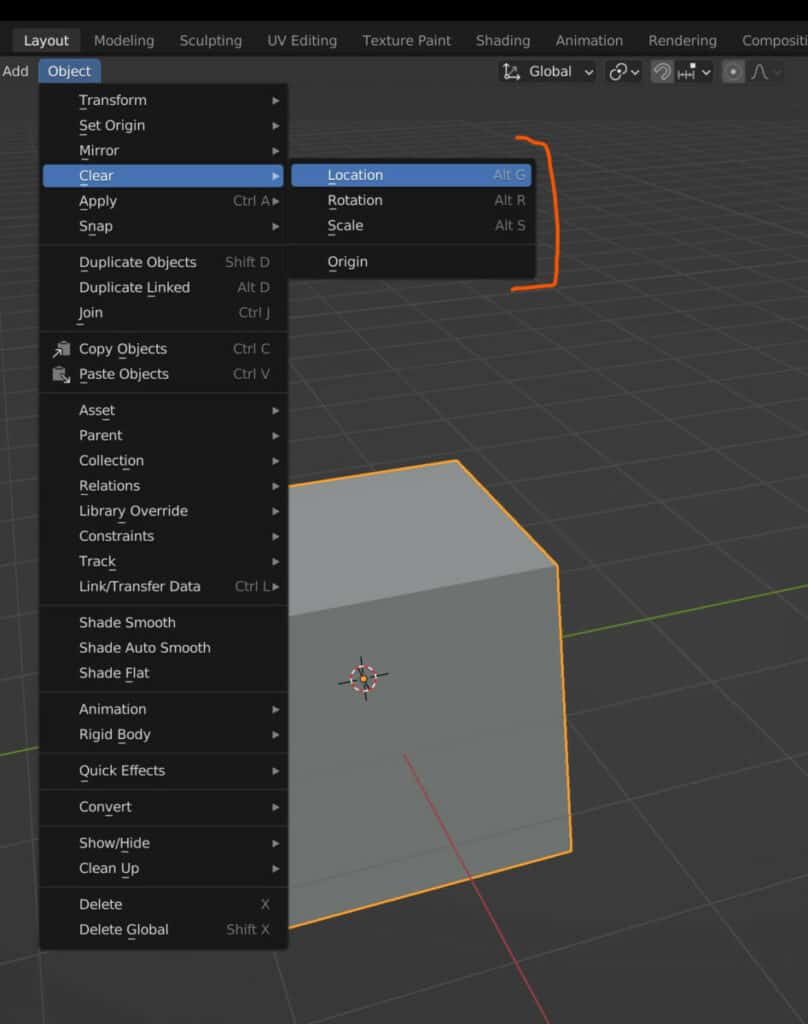
Highlight the clear menu and you will gain access to the secondary menu with the following options.
- Clear Location
- Clear Rotation
- Clear Scale
- Clear Object Origin
Using Hotkeys To Access Specific Tools
While the apply menu has a hotkey that grants you access to the entire menu, the clear menu has hotkeys associated with the options within that menu, allowing you to use the tools directly.
For example, if you want to use the clear Location tool, then you can use the hotkey Alt + G to clear the location values of your selected object.
If you want to use the clear Rotation tool, then you can use the hotkey Alt + R to clear the location values of your selected object.
If you want to use the clear Scale tool, then you can use the hotkey Alt + S to clear the Scale values of your selected object.
Note: There are occasions in Blender version 3.3 where these hotkeys do not work, in particular the clear rotation tool. In this case, revert to accessing the tools from the clear menu.
How Do The Clear Tools work?
The functionality of the clear tools is straightforward. By using a clear tool, we revert the transforms of an object to its default values while also reverting the object in the viewport back to its default state.
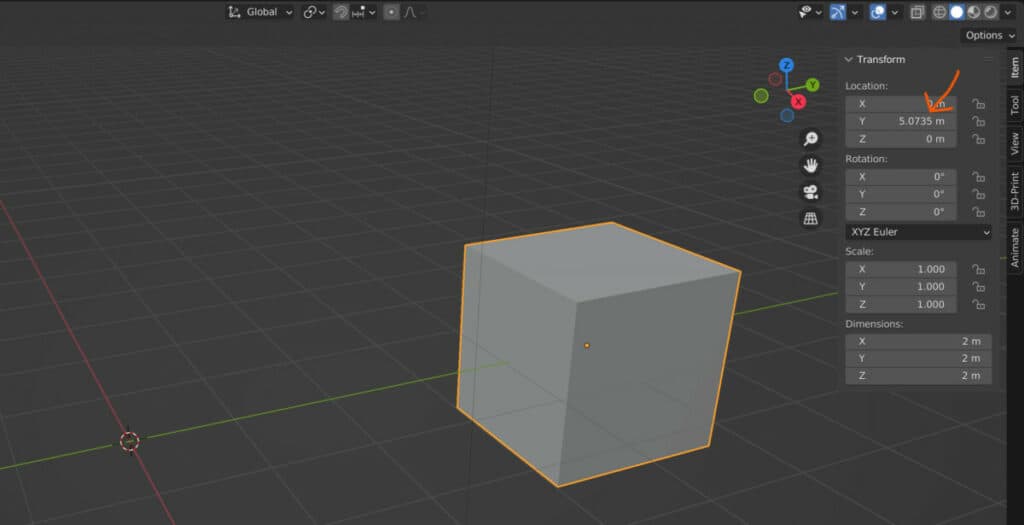
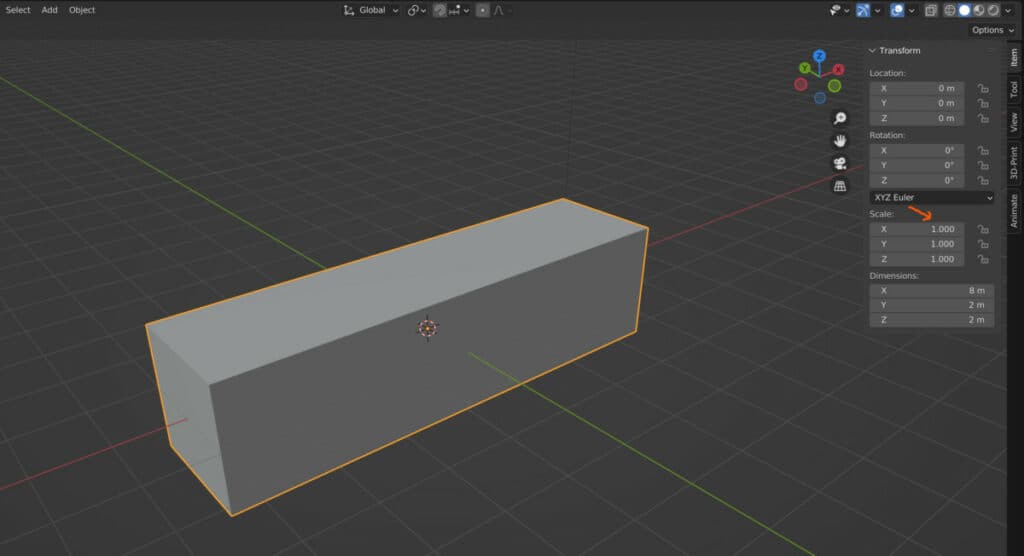
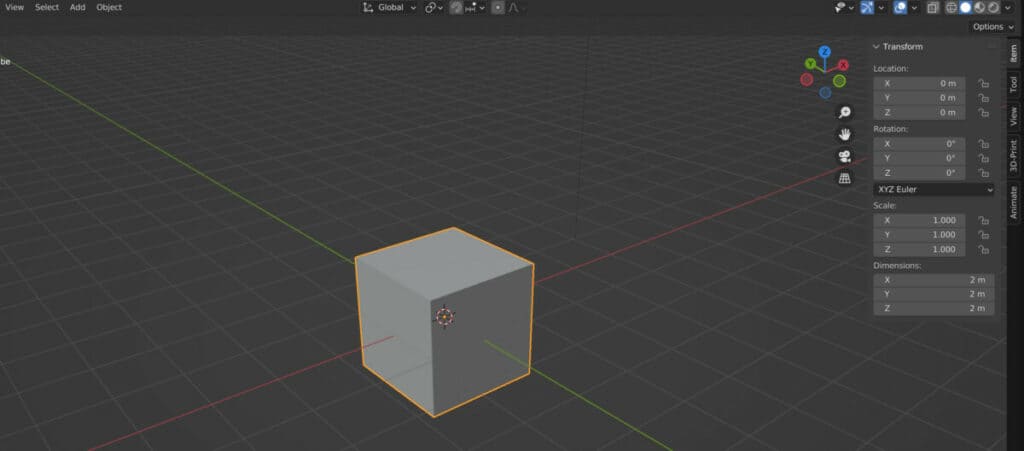
In the case of the location, the clear location tool will revert the coordinates back to 0,0,0.
In terms of rotation, the clear rotation tool resets the rotation values on each axis to 0,0,0.
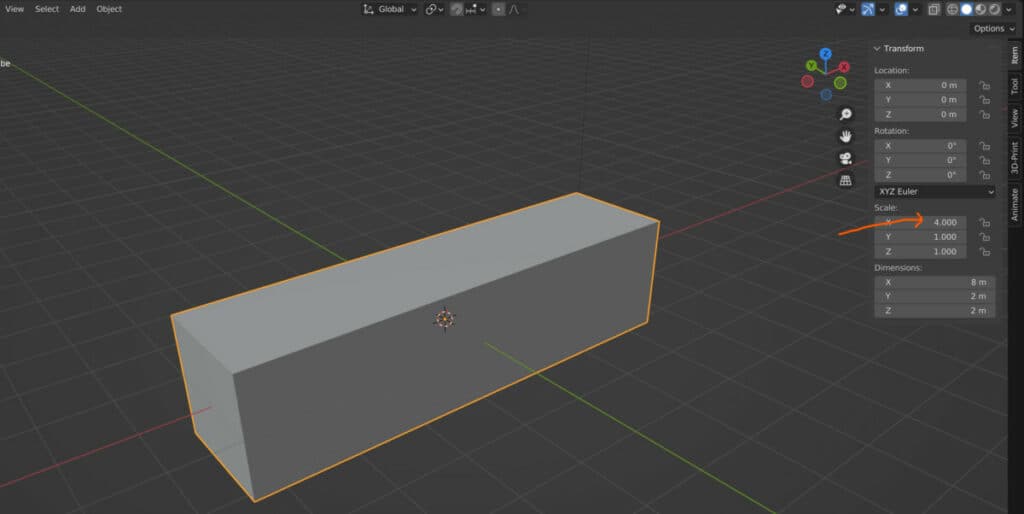
As for the scale, the scale transform resets the parameters on the scale back to 1,1,1.
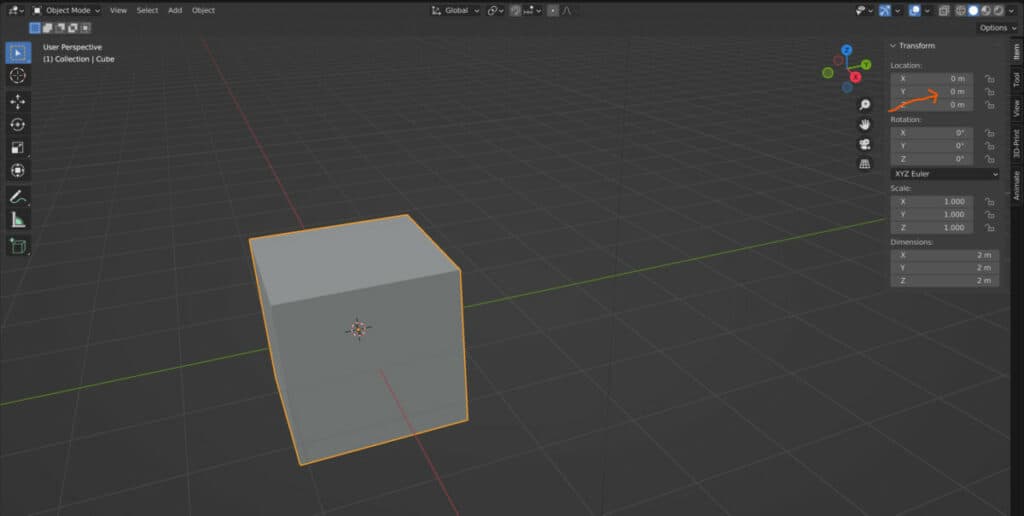
For all transforms, the appearance of the object also reverts to match the transform values in the viewport.
The clear object origin rests on any changes that you have made to the object origin. For example, if the object is the child of another object, it will be moved to the same location as the parent while its coordinates are set to 0,0,0.
The Difference Between Applying A Transform And Clearing It?
Aside from how the tools are accessed, there is one key difference between applying your transform and clearing it.
Both will reset the transform parameters in the side panel. However, when applying, you are setting the current positioning as the new normal, so any change to your scale, for example, becomes the new default.
Clearing the scale, on the other hand, resets the scale parameters back to the default setting and the scale of the object itself, so you effectively undo the change made to that transform.
Thanks For Reading
We appreciate you taking the time to read through this article, and we hope you found the information you were looking for. If you are interested in learning more about transforms and essential modeling tools in Blender, then look at some of the articles we have listed below.