The traditional way of creating materials in blender for our 3D objects is to go to our shading workspace and then create a new material using a node system. That material is automatically applied to our base geometry. However, when working with geometry nodes, we can use different geometry from the base set.
In geometry nodes, we can either assign our materials directly using the set material node, or we can control where our materials go by defining the material index. By assigning an individual index value to each material, we can swap between materials using our node systems.
For beginners, it can be a tad confusing when your material is not being shown on your geometry after using your geometry nodes. That’s why we need to use special nodes such as the set material node in order to assign materials to the node set up so that we can view those materials on our model.
Can You Control Your Materials Through The Geometry Nodes System?
If you were to create a 3D object in blender and then replace that geometry with a primitive mesh node in the geometry node system. Then you would create a situation where your materials would not be applied to your object any longer, at least in a visual sense.
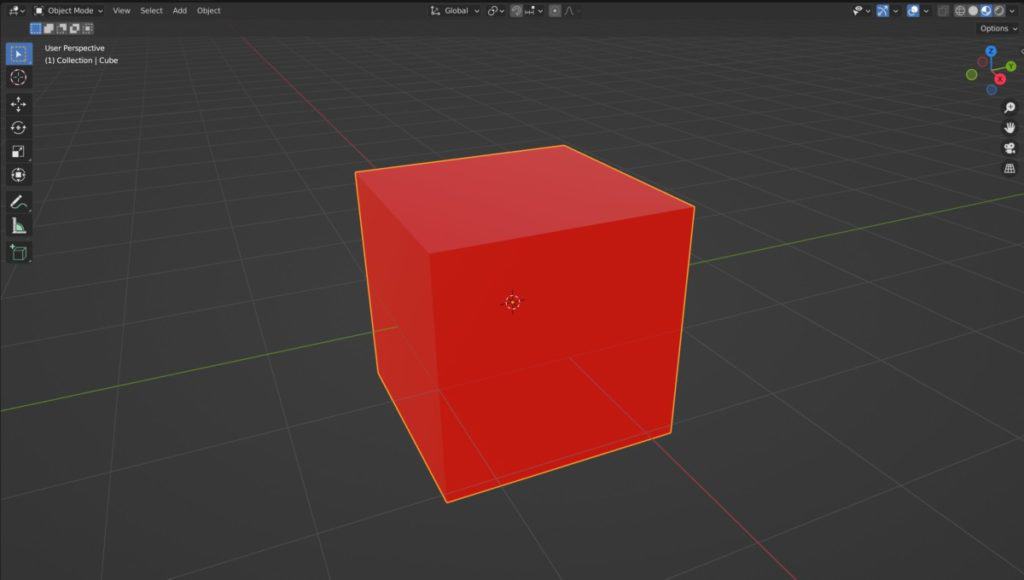
For example, let’s say you had a default cube and she created a red material for that cube. If you were to go to the Material Preview tab for your 3D viewport then you would be able to see the colour of your material on the cube.
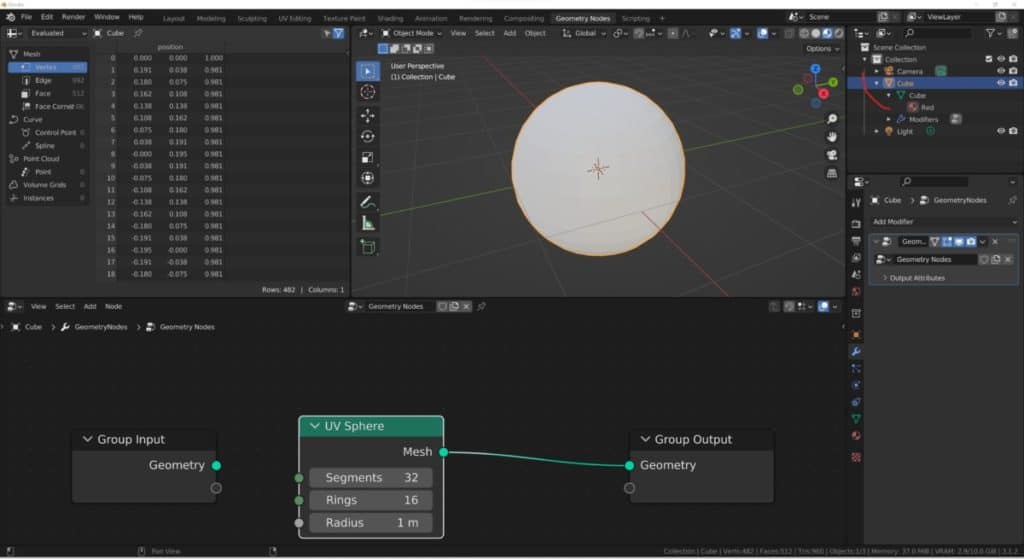
If you then go and create a geometry node system and replace your cube geometry with a UV sphere as your primitive object. Then you will find that the primitive object has become the UV sphere. However, this sphere does not have the material that was assigned it to the objects initially.
This is because of how data blocks work in blender. The traditional method of creating a material is to create a data block in which that material is stored. The material is then connected to the mesh data of our 3D object.
You can see this hierarchy if you go to the outliner panel. Where we have the object data as our main container and stored within that we will have our mesh data and then connected to the mesh data. We will have our material data.
Since geometry nodes is a modifier that is effectively making changes to the geometry of the object. Then our material is no longer going to be connected to that mesh data. So long as we are using a geometry notes system.
We will therefore need to reassign our material to the node system directly, which we can do so using several different material nodes. The most commonly used is the set material node.
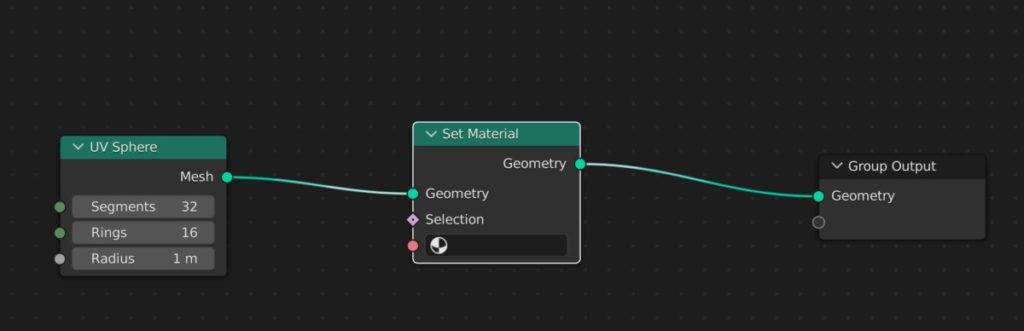
If we want to add this material to our node setup, we can introduce a set material node and then position it towards the end of our node setup.
While the box remains blank, no material is going to be assigned to this node and so no changes will be made. However, if we were to click in this box, we would be able to view all of the materials that we have created. We can then choose the material that we want to set to that geometry.

Another layer to this is the fact that when geometry nodes we use data flow to transfer our data from left to right. And in our geometry note systems, we can create various paths that all go towards our group output.
Below is an example where we have created several instances of a UV sphere by adding a transform node to create each instance. We can then introduce a set material node after each of these transforms before joining them together using a joint geometry node.
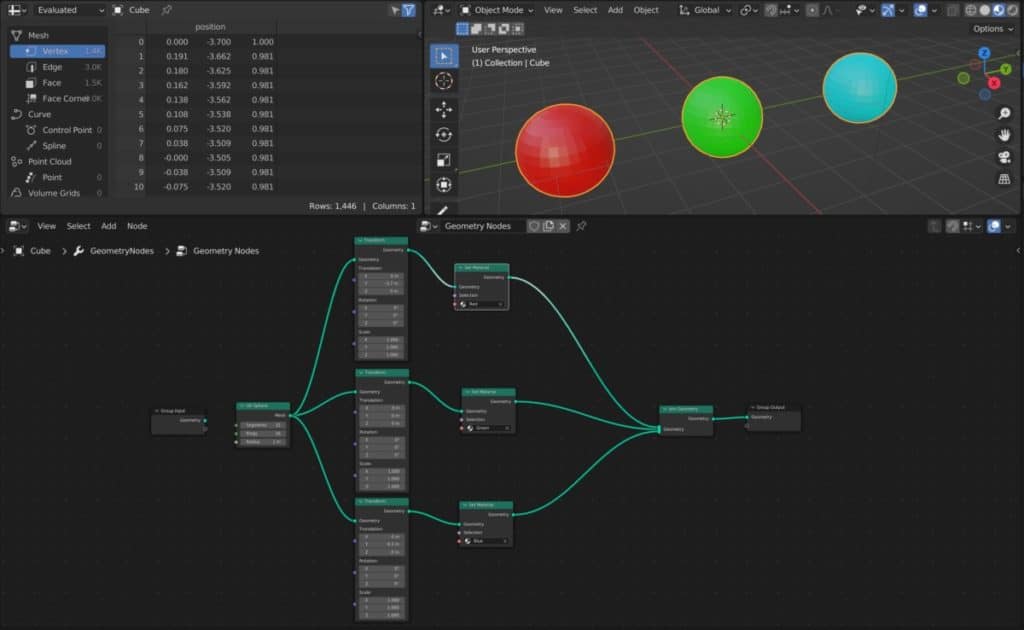
Because each set material node is based in a specific path, it will only affect that part of our geometry. So in our example we are able to create a separate colour for each instance of the UV sphere that we create.
What Is The Material Index?
Information in Blender has to be stored in various blocks or containers. And so we need various methods to distinguish between these different containers so that we can use our data appropriately. For materials, we can assign a material index value to distinguish it from other materials that we can create.
If you want to assign an index value to a material, you will need to go to the properties panel and then go to the materials properties tab.
You will then need to go down to these settings sub menu for our materials tab where you will find the option to define the pass index. This is your material index and you can set this to be any value that you want.
If we take a look at our spreadsheet in our geometry nodes workspace, we will see that if we go to our face domain, that material index is in fact an attribute that is associated with our faces of our geometry.
This means we are able to assign our individual faces their own material index values. And we can use specific nodes to control how these material index values affect the faces of our geometry using the geometry node system.
In order to control our material index value in geometry nodes, we will require the use of the set material index node.
If you want to learn more about Blender you can check out our course on Skillshare by clicking the link here and get 1 month free to the entire Skillshare library.
How We Normally Use The Material Index Value?
The material index is an attribute that can be used to distinguish materials from each other using integer values. For example if we were to create materials for each of the 7 colors of the rainbow, then we can go to the settings of each material and then assign a new material pass index value to each one.
What does this allow us to do with materials? Well it can allow us to edit materials after we have rendered an image using the cycles X render engine.
If we create a pass index for a material, we can then go to the view layer tab in the properties panel and under passes tick the box for the material index.
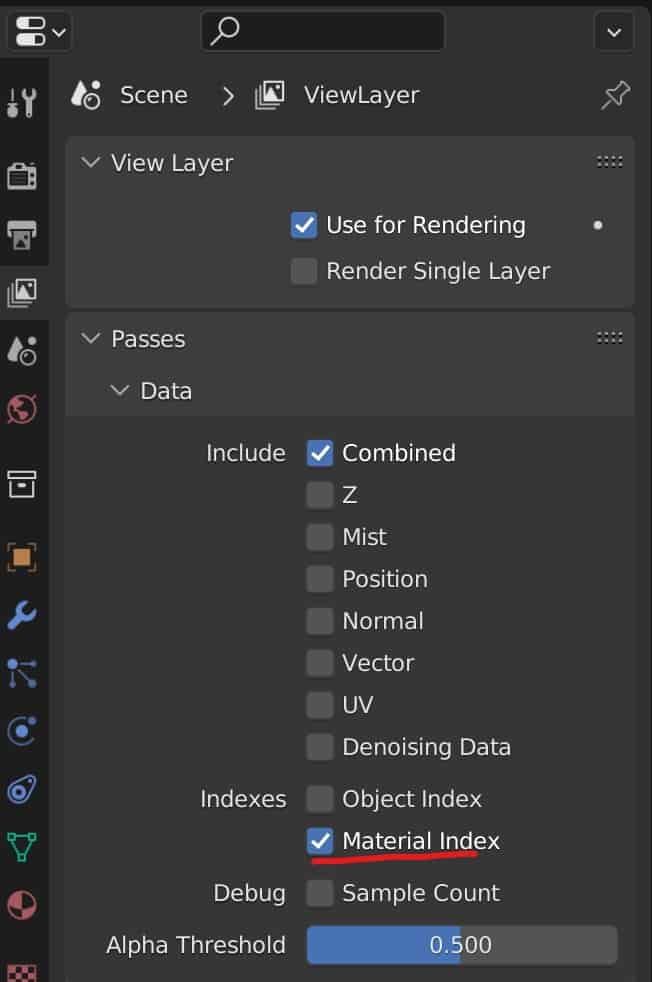
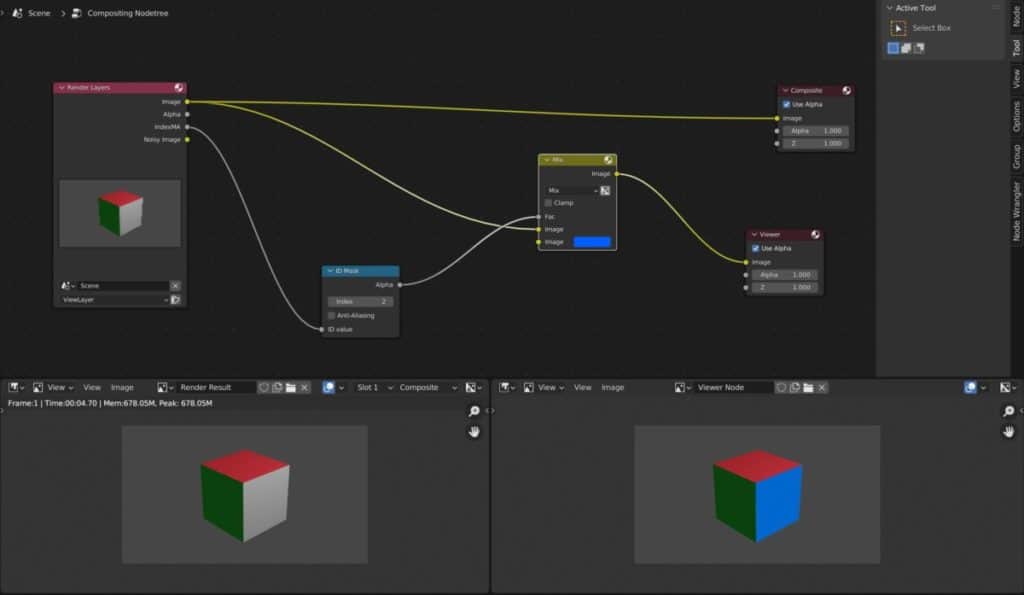
Then you can render your image and once the render has been completed you can go to the compositing workspace and enable a node tree for your render.
By using an ID mask you can change the way a material is displayed in your render. The image below is an example where we make the Blue material on a cube blue after forgetting to give it color beforehand.
Some monitors do not come with their own speaker system, so many of us need to find a good pair of speakers for our audio if we don’t want to use headphones. We use these as our daily speaker system as they offer great quality for the price point.
Controlling Your Material Index Through Geometry Nodes
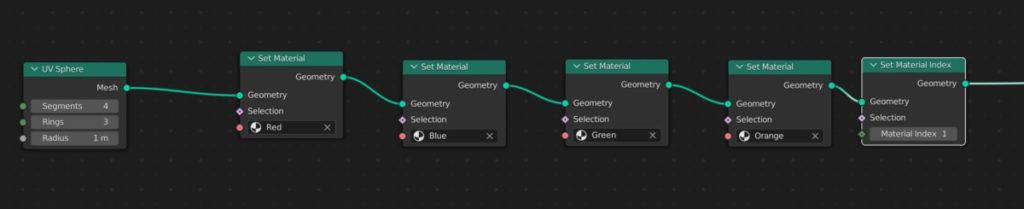
With geometry nodes we can define the material that we wish to use via the material index that we created. For example below we have a setup where the base cube has been subdivided to increase geometry but little else.
We could use a set material node and assign a material directly or we could use a set material index node instead.
The key difference here is that we can change the value of the node to change the material that is being used rather than always going to the menu. However all materials need to be first connected to node tree before the material index can take effect.
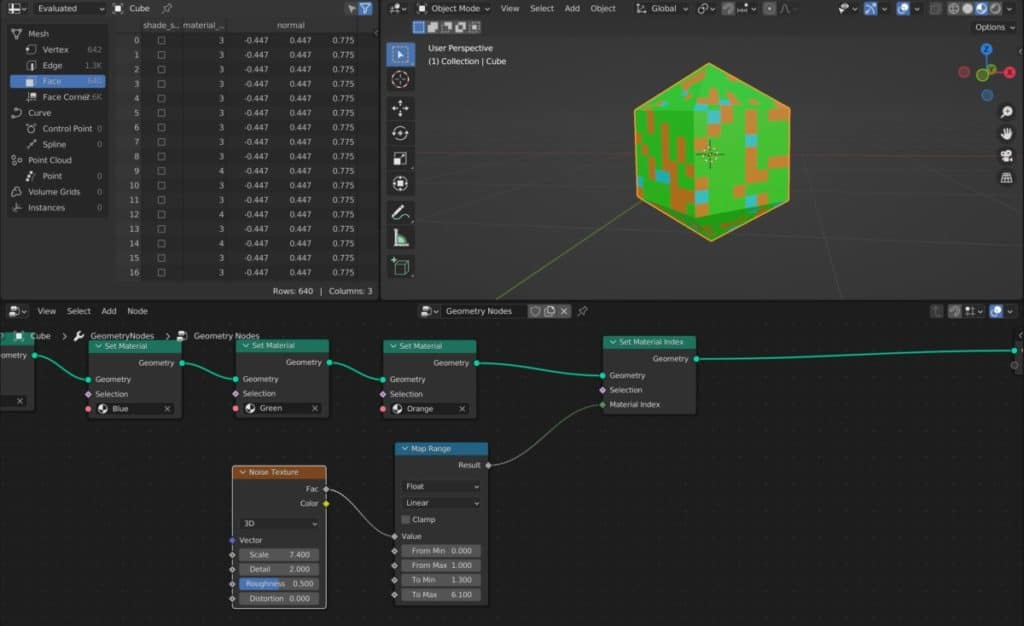
A more interesting example is when we want to use the material index to help randomize how the materials are projected onto our geometry.
The set material index node, not to be confused with the material index node, has the adjustable index parameter.
We can add a texture node to the material index input to map out your materials based on the texture pattern.
However, we require a utilities node to convert the texture into data that the index can display, so using something like a map range node and then adjusting the values can be used here.
This index value will also allow you to control your materials after rendering by using compositing nodes just as you can trough traditional modelling.
Thanks For Reading The Article
We appreciate you taking the time to read through the article and we hope that you have been able to locate the information that you were looking for. Below we have compiled a list of additional topics that are available for you to view and learn more about Blender.
-
Rigging Weights: Blender Painting Guide
Techniques for accurate weight painting for Blender rigging.
-
Expressions with Shape Keys in Blender
Creating expressive characters with Blender’s Shape Keys.
-
Stylized vs Realistic: Blender Techniques
Comparing stylized versus realistic sculpting techniques in Blender.