Before we can begin creating the keyframes that build up our animations in our 3D scenes, we must first go through the process of setting up the animation itself.
These settings will define how our animation is going to be rendered. This can include the animation’s resolution, frame rate, and range. The frame range is an integral part of the process because it will define how long your animation will be.
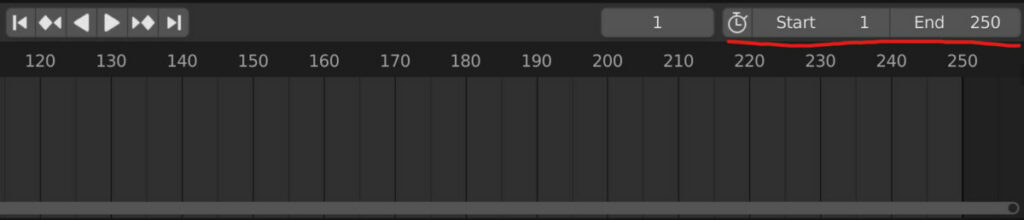
To change the frame range, go to the timeline, and you will notice the start and end frames in the corner of the time frame panel. By increasing the value of the end frame, we can increase the total number of frames in our animation and therefore increase the length of the animation itself. You can also manipulate the frame range from the output tab of the properties panel.
When combined with the frame rates, defining your frame range will determine the actual length of your animation in seconds and minutes. So it’s a crucial part of the setup process for any animation we create in Blender.
What Is Frame Range In Blender?
The frame range is a selection of frames with a start and end value. For example, you could have a start frame on frame one and an end frame on 250. This means that the frame range is set to 250 frames.
When starting a default project, the frame ranges the total length of the animation starting from frame one and finishing on frame 250, but it can be easily edited to increase and decrease the frame range.
When you render an animation, you’re going to be rendering out the selected frame range, so it also represents the total amount of time in frames that your animation will take.
How To Increase And Decrease The Frame Range?
There are several easy methods for increasing or decreasing the frame range. The first method is to locate the start and end frame values in your timeline.
These values should be located at the end of the header bar of the timeline panel. You can manipulate which frame your frame range starts on and ends on.
For example, if we wanted to increase the frame range to 400, we could take the end frame and set it to frame 400.
Alternatively, we can decrease the frame range by reducing the end value. We may want to create a simple 4-second animation and, therefore, would reduce the frame range to approximately 120 frames, assuming that we are creating our animation with 30FPS in mind.
The second location where we can manipulate our frame range is in the output tab of the properties panel.
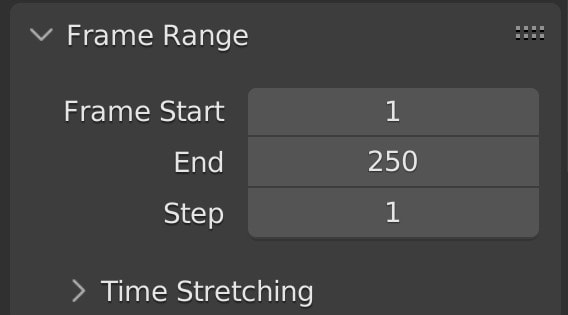
You will find the frame range section underneath the format section, where we have the resolution and aspect ratio.
The exact start and end frame values can be found in this location. You can edit them the same way as you would in the timeline.
Does The Frame Range Always Have To Start From Frame 1?
The start frame is not always fixed to frame one in your timeline; we can start our animation from any point we wish.
For example, we could set up several different animations in our project. We may want to render each of these animations separately. We could have an animation if we have 120 frames, so we could create an animation using the frame range of 1 to 120.
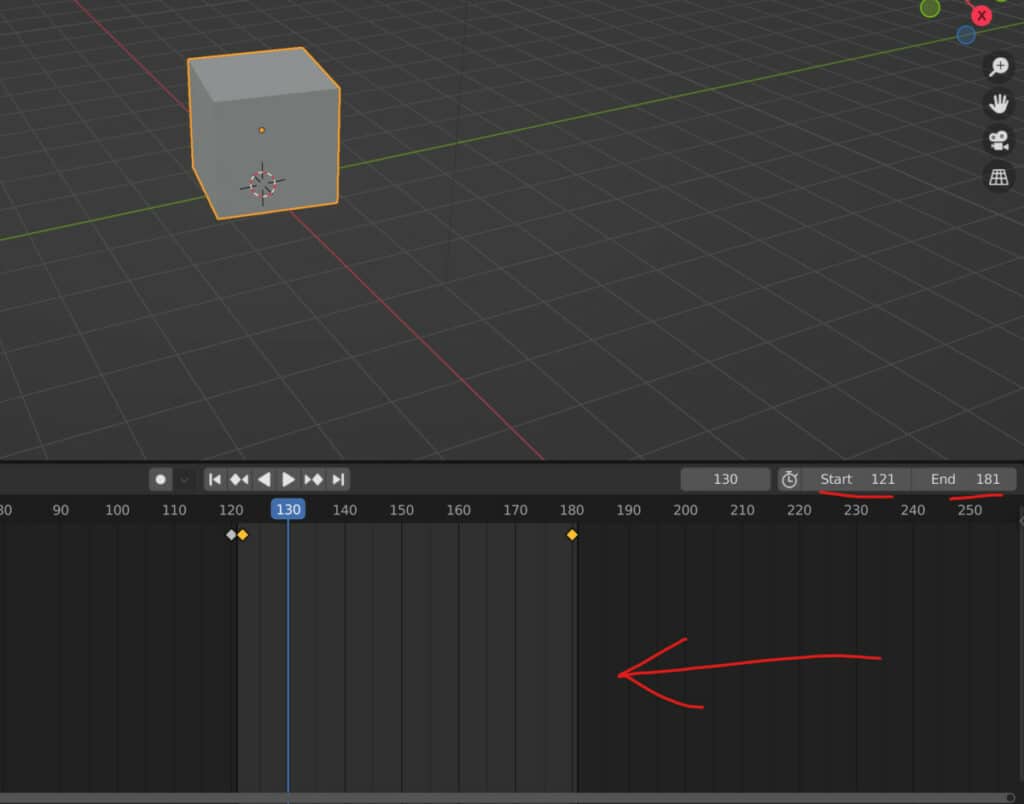
We would then render out that animation and all of its frames. Then we would position our timeline on Frame 121, where the following animation would begin. We could then render out that frame range as a separate video.
Remember that the fine range is the section of your timeline that will be animated when we click on the render button. This means we don’t render every frame because that would take forever. Instead, we define our frame ranges, which can be separate from each other.
Using The Frame Range Value With The Frame Rate
When we are determining our frame range, we also have to take into consideration the frame rate. Both of these values are going to be dependent on the overall target time of our animation.
We should always have an idea of how long the animation will be before starting any project phases.
Animations are never 90 minutes long. They are a combination of multiple clips that are only seconds long at a time. These short clips are then compiled together using video editing software.
Blender itself has its own video editor known as the Blender VSE. To learn more about the VSE, look at our article here.
If the goal is to create a four-second animation, we can use that as our target time for defining the frame rate and range.
The frame rate should come first before defining the frame range. You will animations may require a specific FPS value, short for frames per second.
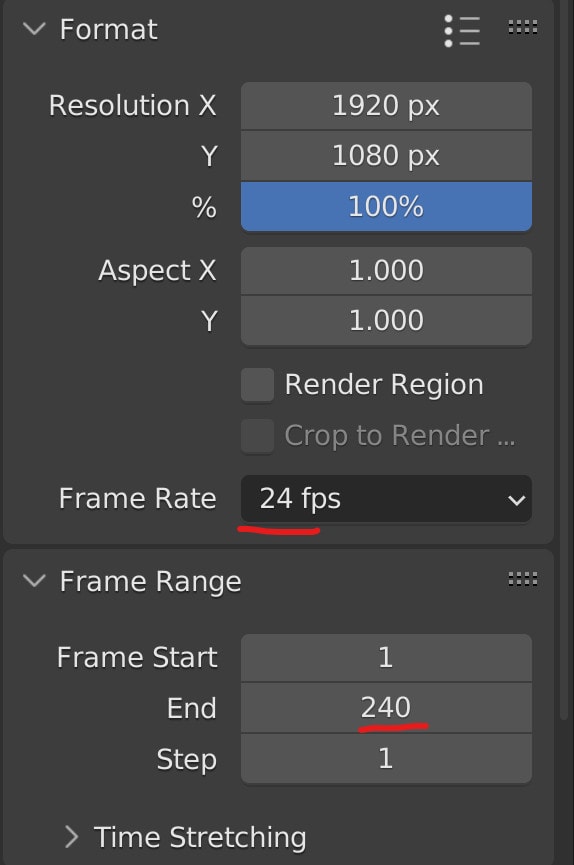
It could be that a 30FPS target is required. We would then go to the output tab of the properties panel and change the active frame rate to 30FPS.
We then use the FPS value and our target time frame to determine our frame range. A four-second animation at 30 frames per second is the same as using the mathematical equation of 4 * 30. The answer to this, of course, is 120. Therefore 120 frames will be required as our frame range.
This process is universal. For all 3D animations, you will create in Blender, define your animation’s target time and frame rates. Then multiply the frame rate by the target time in seconds to get your frame range.
Thanks For Reading
We appreciate you taking the time to read through the article. We hope you found the information you were looking for. If you are interested in learning more about the Blender software, you can check out a few of the articles we have listed below.
- Changing The Frame Rate For Your Animations
- Selecting The Correct Resolution For Your Project
- How To Set Your Output File For Your Animations
- Is Animation Hard To Learn In Blender
- How To Render An Animation In Blender