Most 3D artists will use reference material when designing new objects in 3D modeling applications like Blender. This can be done in different ways, So what is the simplest method to get started with when designing your 3D model using a reference image?
To design A model based on an image, open up the add menu, go to images, and then select background. Next, choose the background image you wish to import, which will appear in your scene. You can then use that background image to create your 3D model using a tracing method to create the object shape based on the image’s outline.
Regardless of your level of experience, you should always use reference material in some form when you are preparing to create new models in Blender. After all, our memories are not as good as we think regarding the more specific details of what we know and see.
Importing A Background Image
The first step toward being able to model a 3D object from a 2D image is to bring that 2D image into Blender. Blender uses two different image types. The first is a reference image, and the second is a background image.
These are very similar, but the key difference is in their use cases. Reference images are reference material that you typically place to the side of the 3D viewport or in the image editor. They act as a reference to the general model you are trying to create.
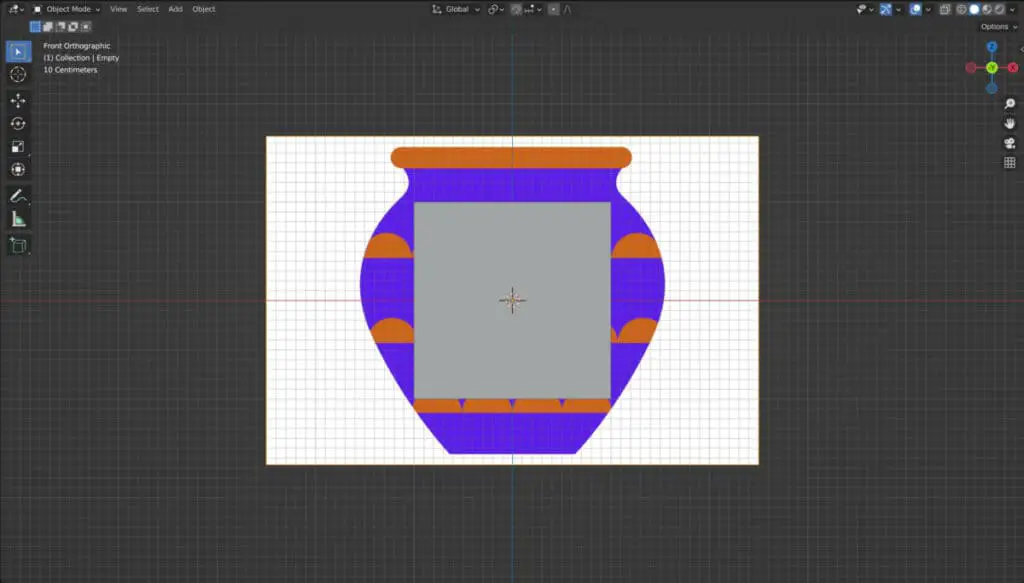
For example, if you were to create a vase as a 3D object and wanted to use reference material, you would bring in three or four images of different vases so that you could use that reference material to determine the shape of your design.
By contrast, a background image is placed directly behind the primary model based on your viewpoint so that you can use the image itself to construct the design. In other words, we use a background image when we want our 3D model to look like a specific image reference.
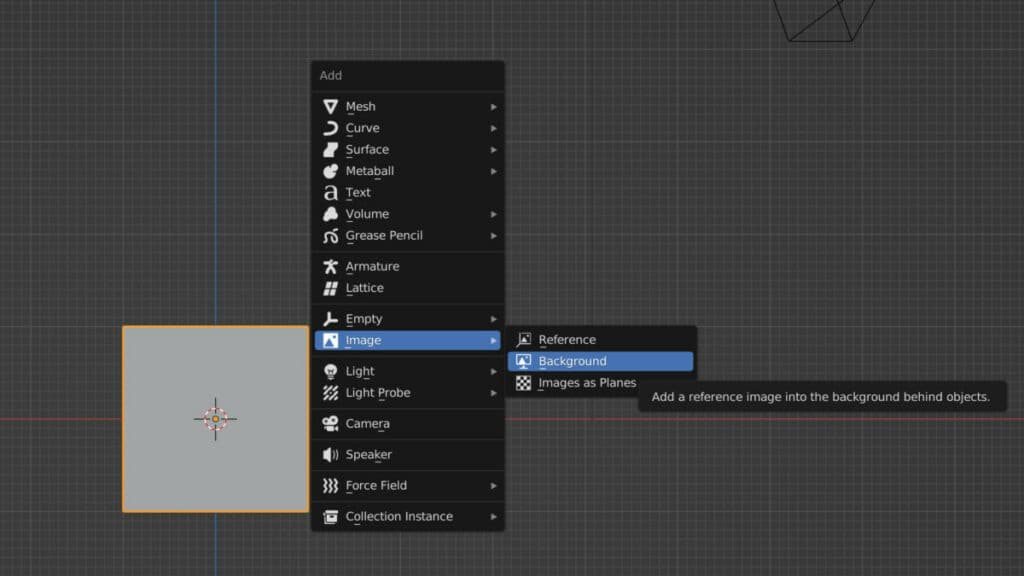
To add a background image to our scene, we, first of all, need to. Open up the add menu by using the hotkey Shift + A. From this menu, locate the image objects hipe and highlight them. You will see the options for the reference and background images. Select background, and then it will open up the file browser.
You can locate the image you wish to import for your background material in the file browser. Select it so that the file appears blue in the file browser, and then click on the load of background images button, which should also be highlighted blue in the bottom corner of the browser to import the image.

Before you import your image, you will notice settings to the side of the file browser. For the background image, the only setting here will be to align your object to the current view, which is excellent if you are already orientation your view to where you want to see the image.
If you untick the box, then the background image will be visible in the +Z axis, which is the top orthographic view.
If the image is of the model facing the front, go into the front orthographic view before you add the image, then keep the align to view box ticked.
Click on that blue button to import your background image into the viewport.
Choosing The Correct Primitive
An important thing to note with any model is how you start the process. In mesh modeling, we typically start by using one of the many primitive objects available to us. The default object is the cube. However, in our example, we are trying to create a vase, and with many designs, a cube will not be a very good starting point.
A much better option here is to use a cylinder. So we will delete our cube by selecting it and then pressing the X key. We will then open up the add menu again with the Shift + A hotkey, go to mesh and import a cylinder into our scene.
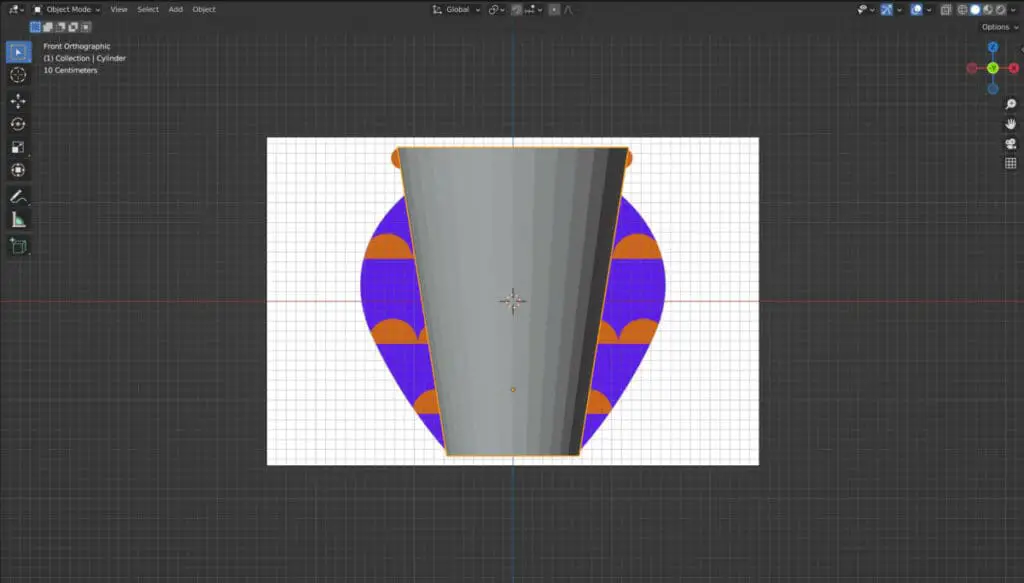
We can then manipulate the sizing of our cylinder so that it roughly matches what we can see from our background image. Because the background image is typically behind the model, it’s difficult to see the exact dimensions of our design, so that will be the next step once we have brought in the correct primitive object.
Enabling X-Ray Or Wireframe
When you have your primitive object loaded in, you will notice that the object itself gets in the way of the background image. However, if you were to position the background image in front of the object in the 3D viewport, then the same thing would occur because of the base settings of that image object.
These base settings can be found in the object data tab of the properties panel, and if we look at these settings, we will see that the depth setting has been set to back. This means that the background image will always be positioned behind the model regardless of where it’s positioned in the viewport.
We could change this setting, so the background image appears in front of our model. However, this would then mean that the model itself would not be visible from our view.

One option available to us if we were to do this would be to activate the opacity setting located in the same area of the properties panel. We would then reduce the opacity to add some transparency to the image design.
A better method, however, would be to keep our background image as the background. Instead, we would look to activate the x-ray option in the top corner of the viewport so that the object itself becomes semi-transparent.
This will allow us to view both the design and the model at the same time, thus making it much easier to model based on the image in the design.
Instead of the X-ray tool, an alternative option is just to change the viewport type to wireframe. This option is found directly next to the toggle X-ray button and is one of the primary viewport methods you can select.
With this method, you only see the edges of your designs and can look straight through your model if it’s not highly dense with geometry.
Each method works as well as the other. Our preference is to use the X-ray option, which allows us to view the faces of our model still but makes it transparent enough to continue to base our design on the reference image.
Creating Your Model
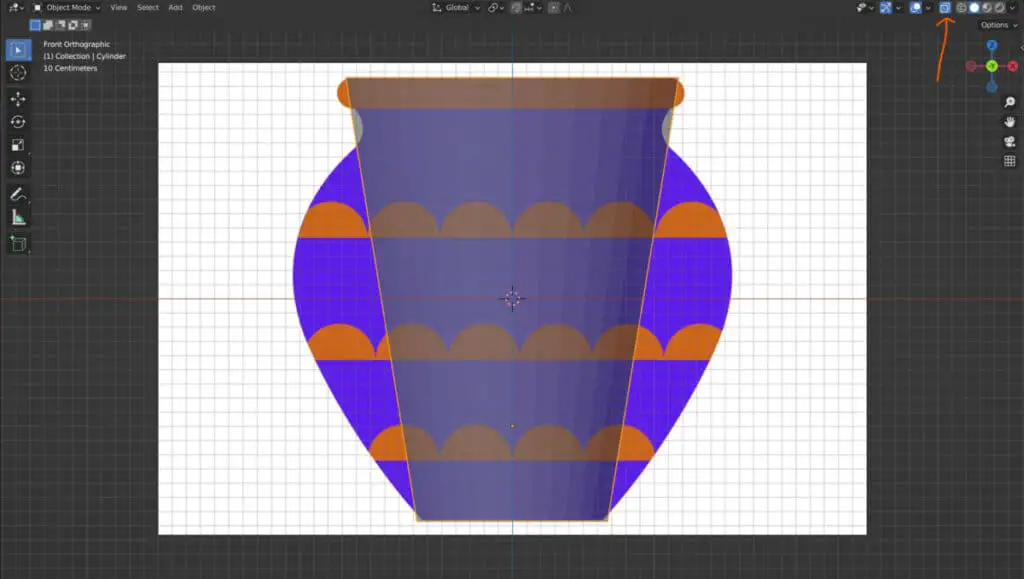
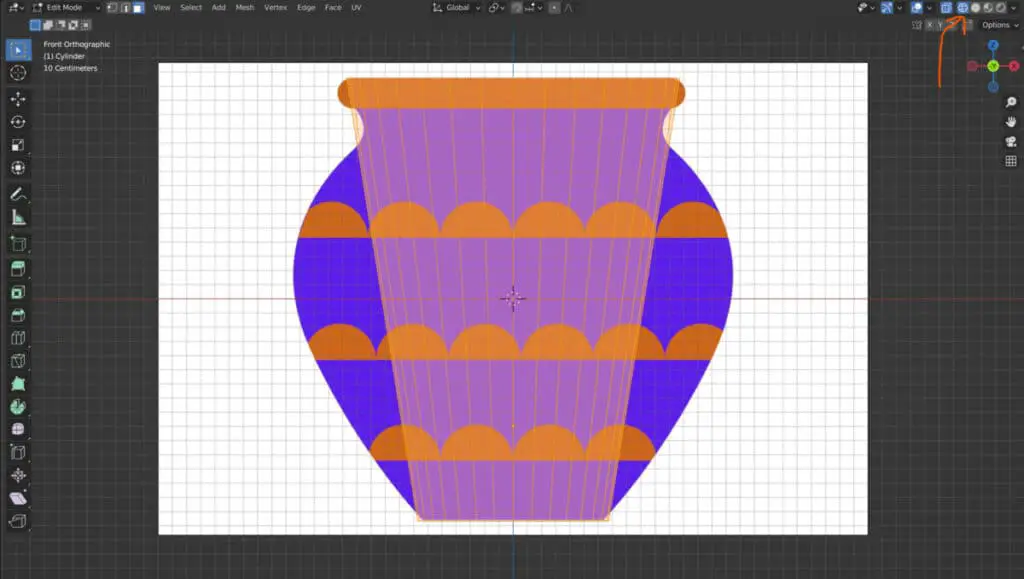
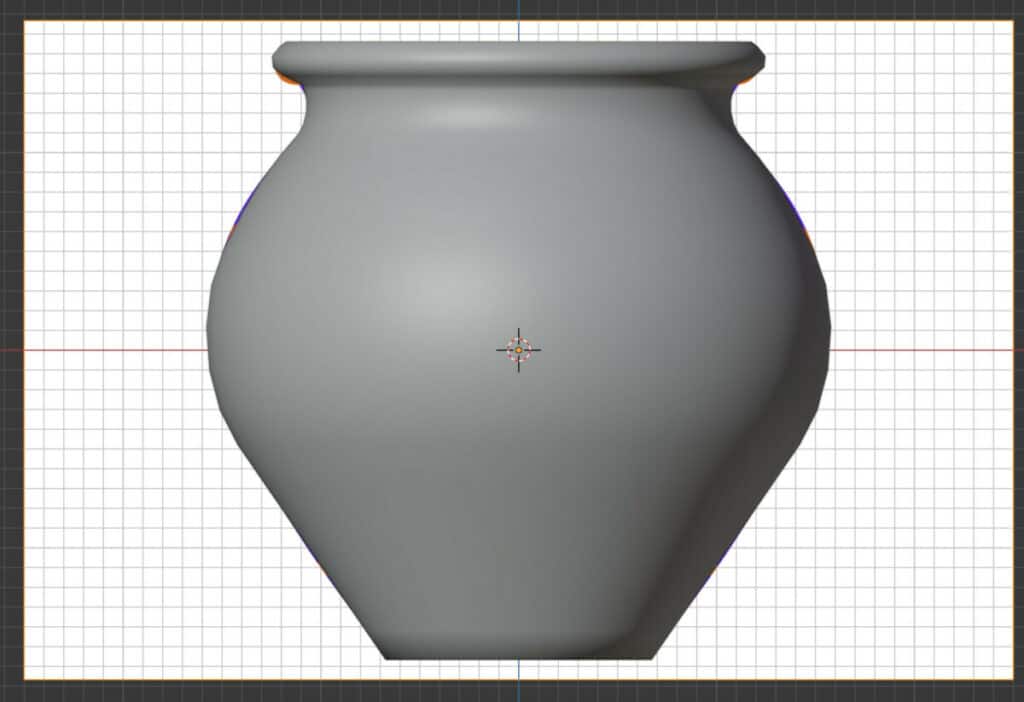
When you finally have everything set up the way you want, you can begin creating your model by using the image object as your outline.
For our example of creating a vase, we started with a cylinder object where we would scale the top and bottom of the cylinder to match the top and bottom of the vase design of our image.
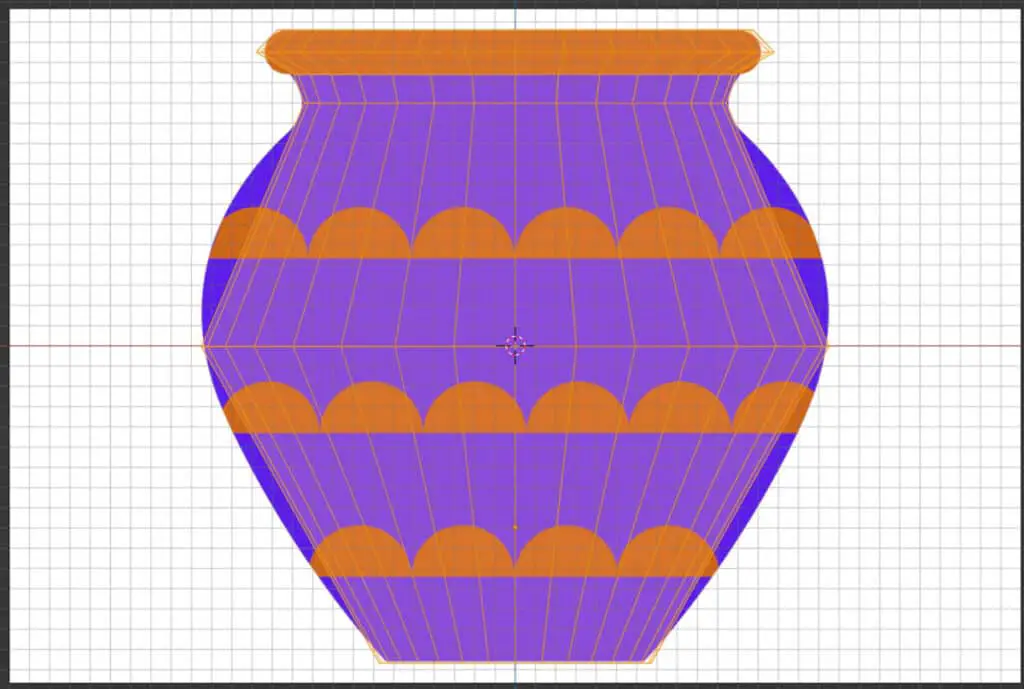
It then becomes a matter of adding in the appropriate geometry and then scaling it appropriately to match the design of the image.
This is a fairly simplistic example, but the same principles apply to almost any shape. Because the vase is an object which looks the same from any angle, only one background image is required.
However, if we were to create a more complex object like a vehicle, you would require three background images.
One to design at the front of your model, one to design the side of the model, and one to design from the top. And potentially even want to design the model from the rear so that you can design all areas of the model using your reference material.
This would mean going back to what we mentioned earlier about adding different background images based on the different viewpoints of your design and positioning them on different axes so that they can be viewed from the correct viewpoint.
Thanks For Reading
We appreciate you taking the time to read through this article, and we hope you found the information you were looking for. If you are interested in learning more about how images are used in Blender, then look at a few of the other articles we have listed below.