Text-based objects in Blender can be used in many different scenarios from title sequences, to credit reels, to pages of a 3D book. There are many ways in which you can edit your text in Blender and one of the most useful changes that you can make is altering the font of your text to encourage a certain style for your scene.
The best way of accessing custom text fonts is to use a text library site like dafont.com or font space. Go to the website of your choice and then locate the font that you wish to use, then download it. In Blender go to the font options in the object data tab and locate your downloaded font on your device to change your text to that font.
New fonts are added all the time to these websites and so you will have access to more font styles than you will ever need, although keep in mind that when downloading fonts each one has a license that indicates what it can and cannot be used for.
Does Blender Come With Its Own Fonts To Use?
Using fonts found on the internet will require you to check if those fonts are usable for your projects, as there are many fonts that are licensed for personal use but not commercial use.
Is it a requirement though to access fonts over the internet by using one of these library sites or do you already have some fonts that you can use that come preinstalled with Blender?
Other than the default standard text font, Blender does not have any additional fonts that you are able to access. However, your operating system on the other hand is likely to have its own font library that you can access.
The windows operating system for example has its own font library that can be used with your blender projects, and all of these fonts are available for both commercial and personal use.
To make it easy to access the font library, we will need to direct Blender to the library whenever we want to use a new font for our project.
Directing Blender To The Windows Font Library?
Start off by going to the edit menu in the header bar of the 3D viewport and then accessing the preferences option from the menu.
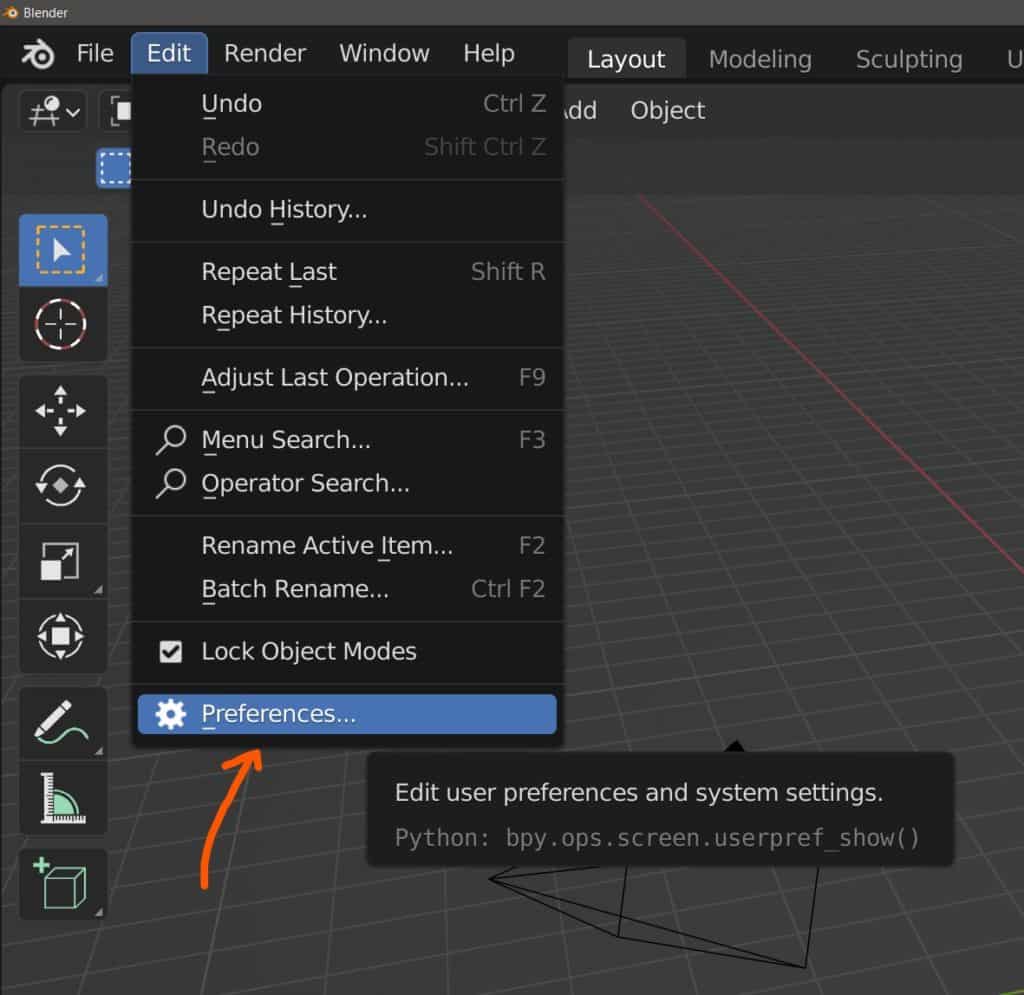
This will open up the preferences panel in another window. You will see numerous tabs in the side column for the various settings. The one that we want to select is the File Paths section.
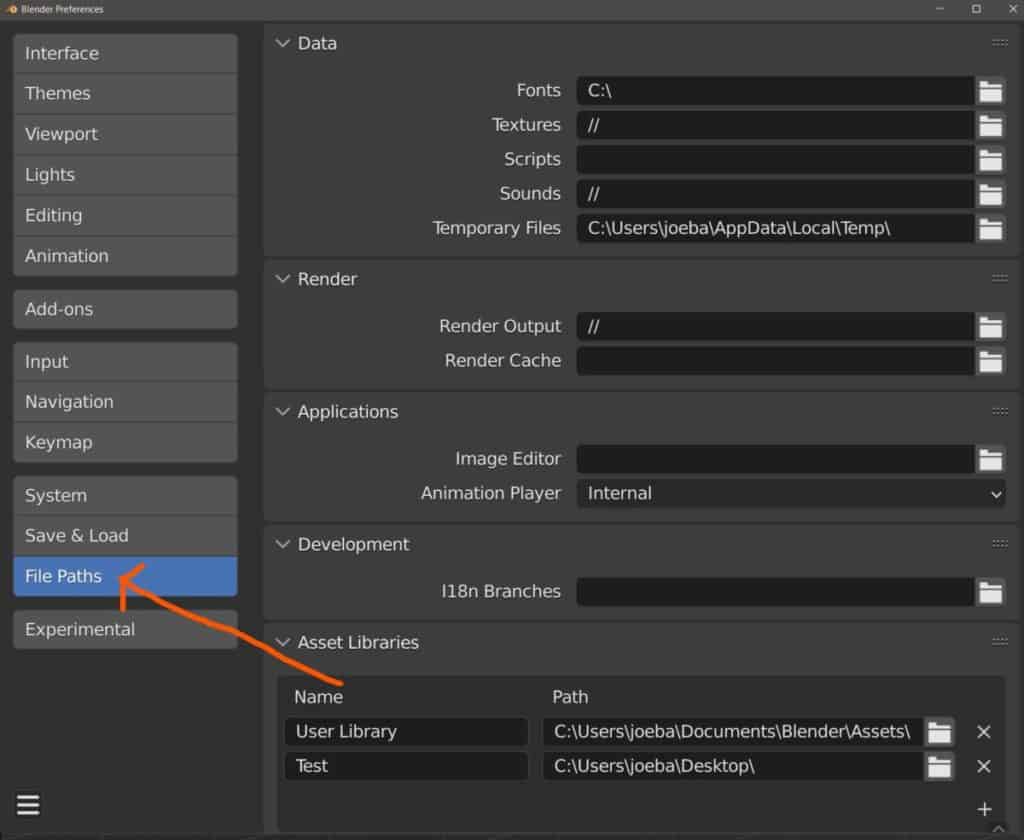
Here you can direct Blender to various external locations on your computer based on what it is that you want to use in your project, and the very first option is for the fonts.
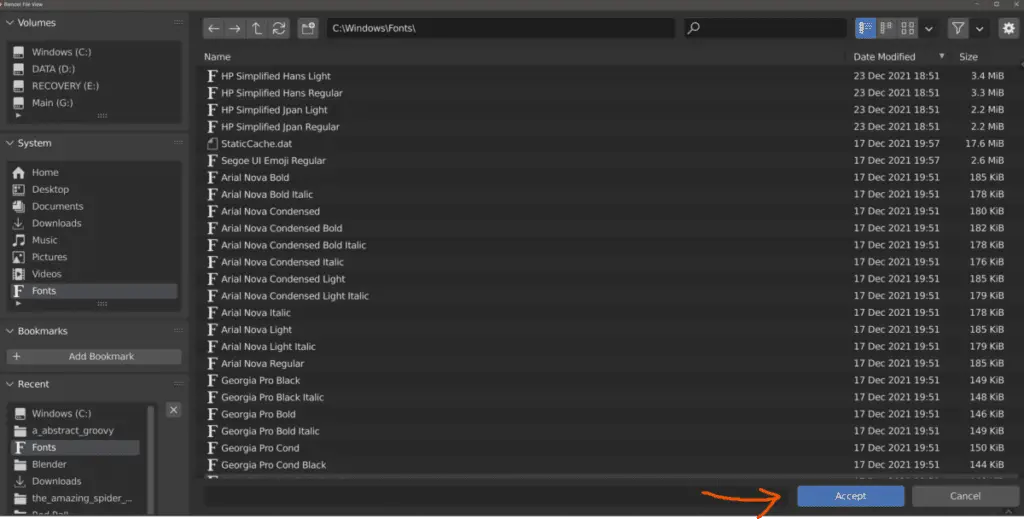
Click on the folder icon for the fonts option, which should be blank by default, and then the file browser will open up in another window.

The font library is actually very easy to locate, and it will be on your main drive that the operating system is installed to, so select that drive from the menu.
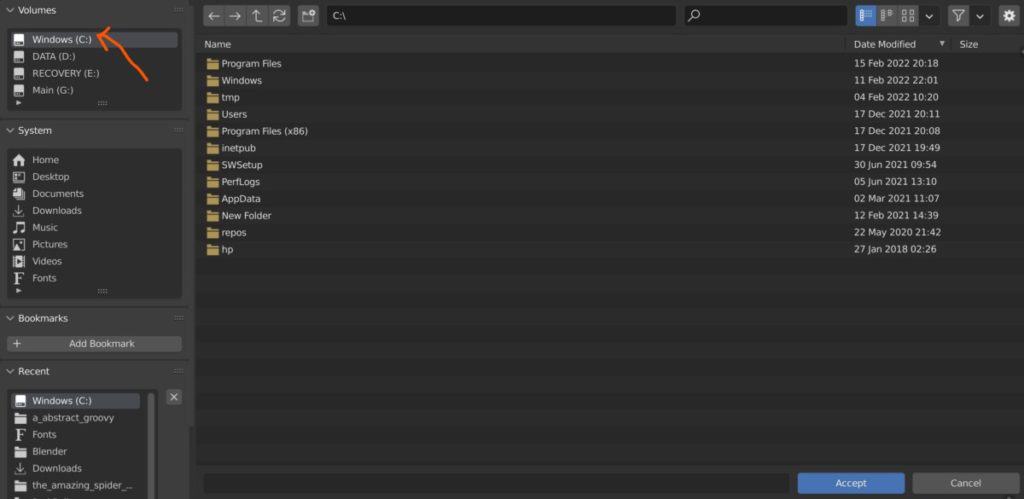
In the list of various locations available to you on your main drive, you will need to double click on the windows folder.
In the windows folder, you will need to locate the folder that is titled as fonts, which when opened will view all of the fonts that are accessible in the font library.
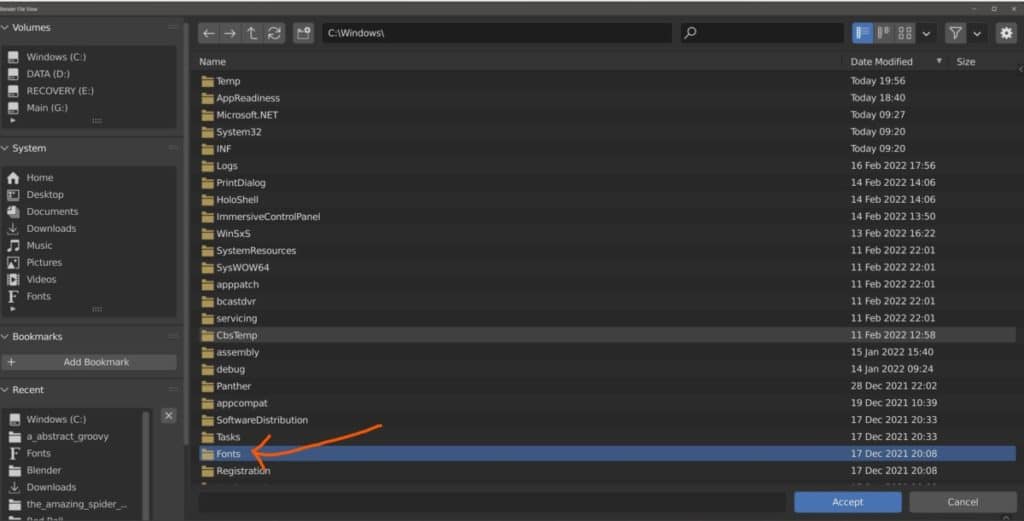
While viewing the fonts, just click on the blue accept button at the bottom of the file browser to confirm the font library as the location for your Blender fonts.
Alternatively, just copy and paste C:\Windows\Fonts\ into the search bar at the top of the panel and then press accept, it is the exact same location.
If you return to the preferences panel then you will see C:\Windows\Fonts\ as your selected location for your font files.
Now go to the properties panel for your text object and select the object data tab that has the a icon. In this tab scroll down to the fonts section and open it up. You will see that you have the option to use your font in various ways, including regular, bold, italic, and a bold + italic combo.
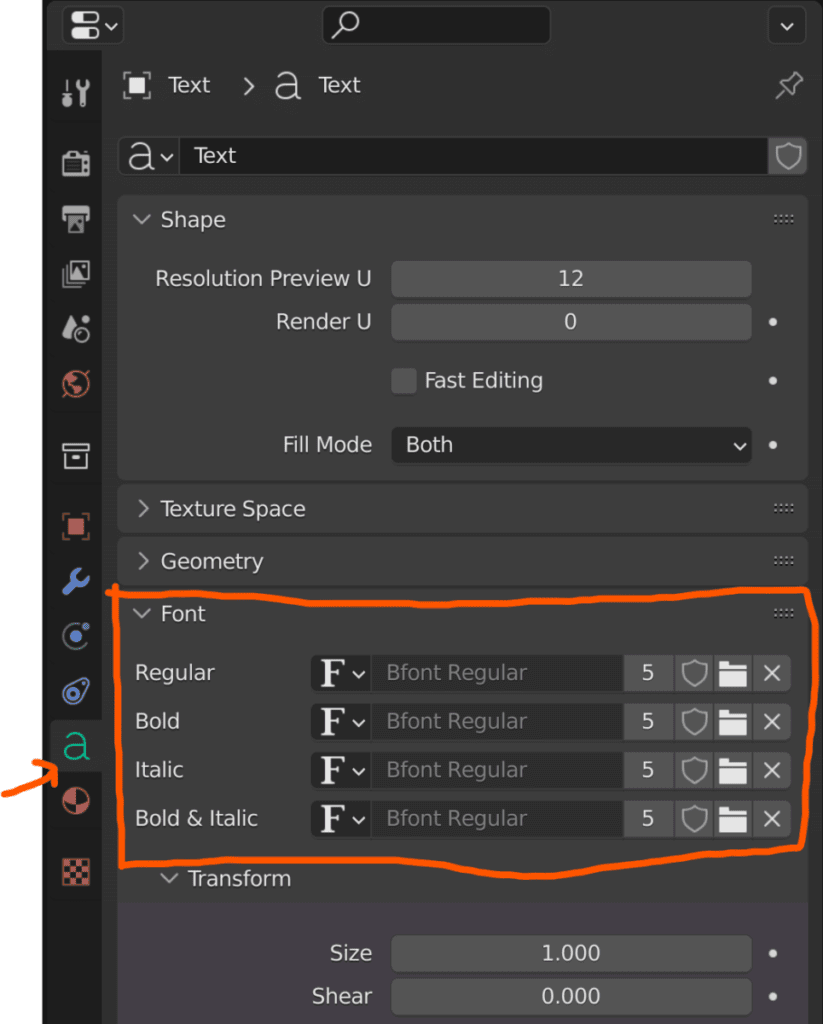
Select the folder icon for the regular tab if you are looking to add a regular font, and it will take you to the Windows font library.
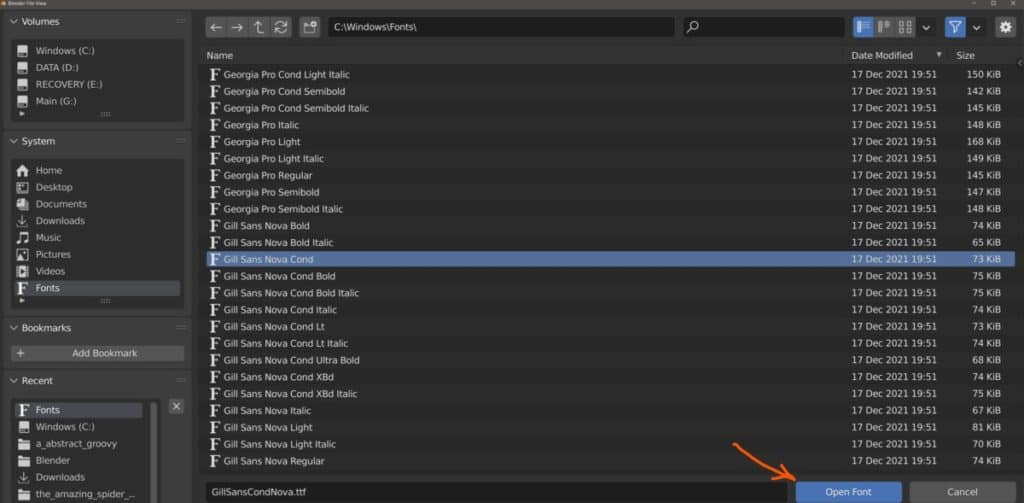
You can now select the font that you want to use from the font library, and then click the blue button to import the selected font into your Blender project.
The text object itself will instantly change to the new font, and you can test as many different fonts that you wish to find the one that is best to use.
Where Are Fonts Stored On A Mac?
Not everybody who uses Blender will use it on a windows device, and many of you will probably be using a Mac instead with the MacOS.
Much like the Windows operating system, MacOS also has its own font library that you can access if you want to use the fonts in Blender.
The process of directing your Blender software to the fonts folder is very similar, so follow the same steps as above with the Windows example.
The only difference of course is going to be the actual location of the font library. A good shortcut to the press is to paste in /Library/Fonts/ to the blank area for your fonts to direct it to the correct location.
What Are The Issues With Using A Traditional Font Library?
There are two small issues with using the font libraries that come with your operating system. The first issue is that many of the fonts are subtle and considered to be more traditional fonts to use for writing and long texts.
In 3D projects, it is likely that your use of text objects will be limited to single words or small phrases, so you may be more interested in looking for fonts that have an added character to them to fit the theme of your project.
The second issue is that you cannot view what these fonts look like, and so you will need to actually import each font into your Blender project to view how it looks, which can be tedious and time-consuming to continuously change the selected font.
Where Can I Find Custom Fonts To Download And Add Into Blender?
So if you want to use unique and stylized fonts for your projects and you want to see how they actually look before importing them into Blender then you will want to use an online library instead.
We have several options available to us for accessing new fonts and it should be rendered that these fonts are created by everyday artists like you and me.
As such many of these fonts may surprise you with just how artistic and creative they all are, but regardless of how they look, they always work when imported into Blender. At least the 150+ fonts that we tested worked without issues.
The following is a shortlist of some of the sites that we have found that allow you to download and see custom fonts.
- dafont
- fontspace
- 1001fonts
- GoogleFonts
- AdobeText
Our favorite site for accessing custom fonts has to be dafont as it has the greatest selection of creative font types that you just won’t find in the more traditional font libraries.
As with many sites that allow you to access fonts created by other people, you will need to ensure that you can use the font for the purpose that you have in mind.
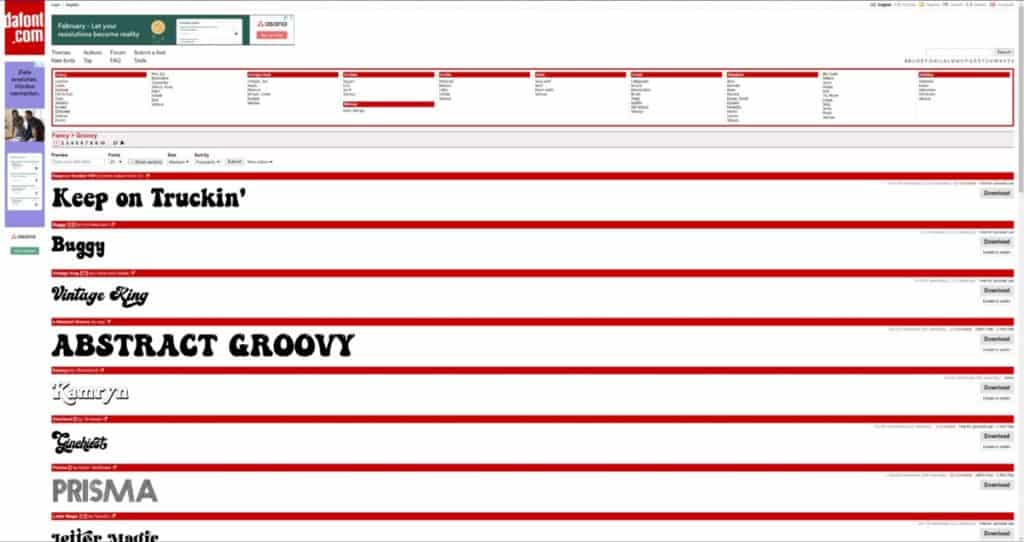
Each font will tell you if it can be used for commercial projects or if it is for personal use only. Below is an example of a selection of fonts where most are free for personal use. Any that are listed as 100% free to use can be used for either commercial or personal use.
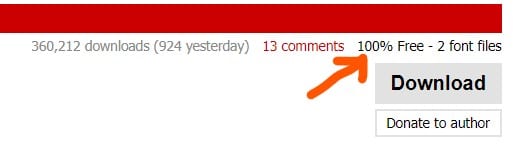
If you want to use a font for commercial use but it is only available for personal use, then you may have the option of purchasing a single license for that font.
Not all fonts will have this option, so click on the font that you want to use and read the description to see if there is a link that allows you to buy a license.

A word of warning, however, as these are assets created by artists and so the license to use them commercially can be quite expensive for a single font, and a license will only cover that one font. So purchasing multiple fonts will require multiple licenses and that can get expensive.
On dafont, there will be a button labeled as download that will allow you to, of course, download that specific font onto your device.
When it has been downloaded, return to your Blender project if you have one open and press the folder icon for your font.
Then instead of choosing a font in the font library, go to your downloads page and then select the font file that you just downloaded, then select the blue button to import it.
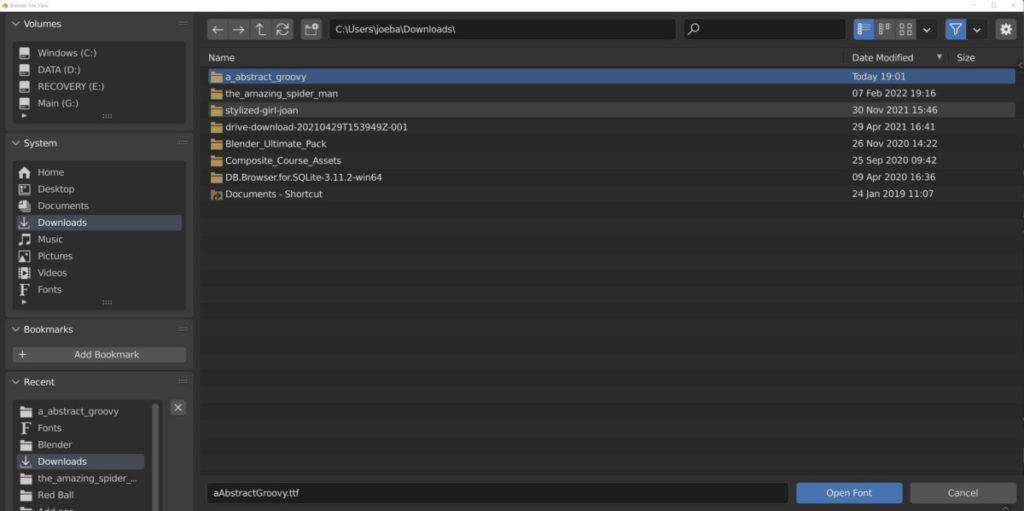
You now have the ability to use any font that you want for your Blender project.
Can I Add Subtitles In Blender?
The are many reasons why you would use text objects in Blender, and one reason would be to add subtitles to an animation.
Adding subtitles though to the actual scene does mean that those subtitles are a permanent fixture of the animation and not something that can be turned on and off.
Subtitles are not always the display of spoken words in the form of text, and if creating subtitles for this purpose then consider using a software that will allow you to create what are known as srt files, which house subtitles.
You can also create subtitles to annotate your video at various points. If creating an educational video text is a good fallback to help describe the content. But this text is more suited as a 2D overlay rather than being incorporated into the scene.
As such you are better off adding the text as a text overlay to your rendered animation in the video sequence editor.
How Do I Add Fonts To The Blender Video Editor?
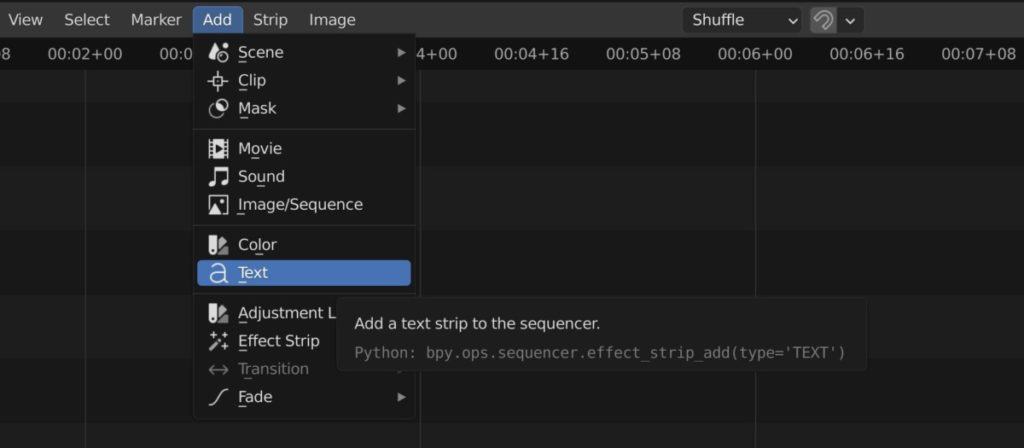
Adding text in the VSE, or video sequence editor is a different process from adding a 3D text object as we are adding an element to a video instead of an object to a 3D scene.
To add a text element to your video, go to the add meu in the VSE and then select text. Position the text to the correct location in your timeline.
Even though this is a different process to adding text you are still able to change the font of the text amongst other properties.
Much like the 3D viewport, we have access to the side panel in the VSE which holds many of the settings for our selected elements.
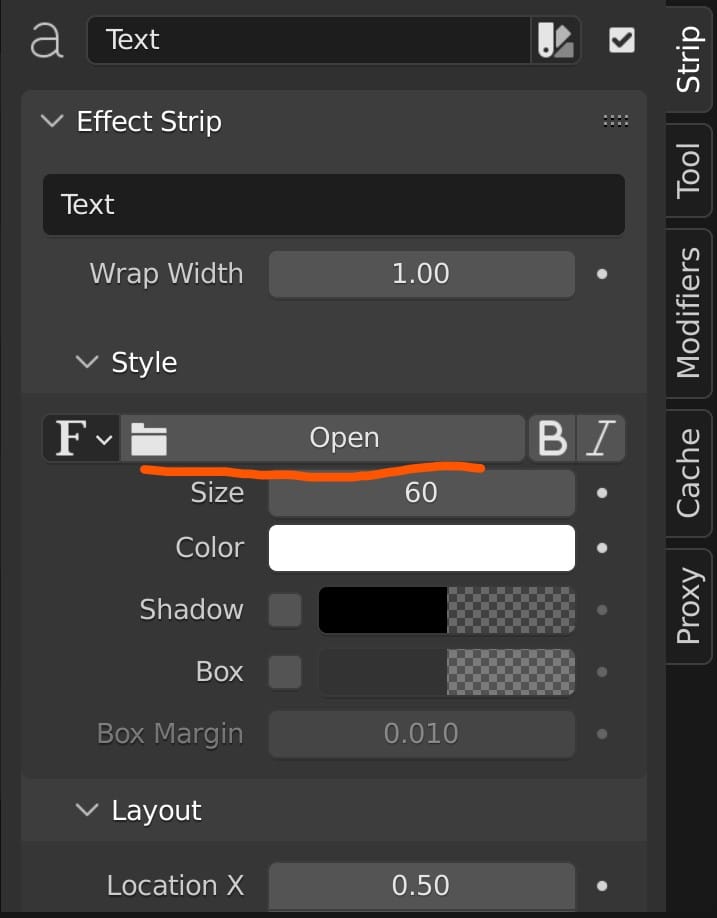
In the case of a text element, we have access to the text itself, sizing, color, and text font. All you need to do here is select the open button and then select your font from either the download folder or the OS font library, then import it into your project to begin using it.
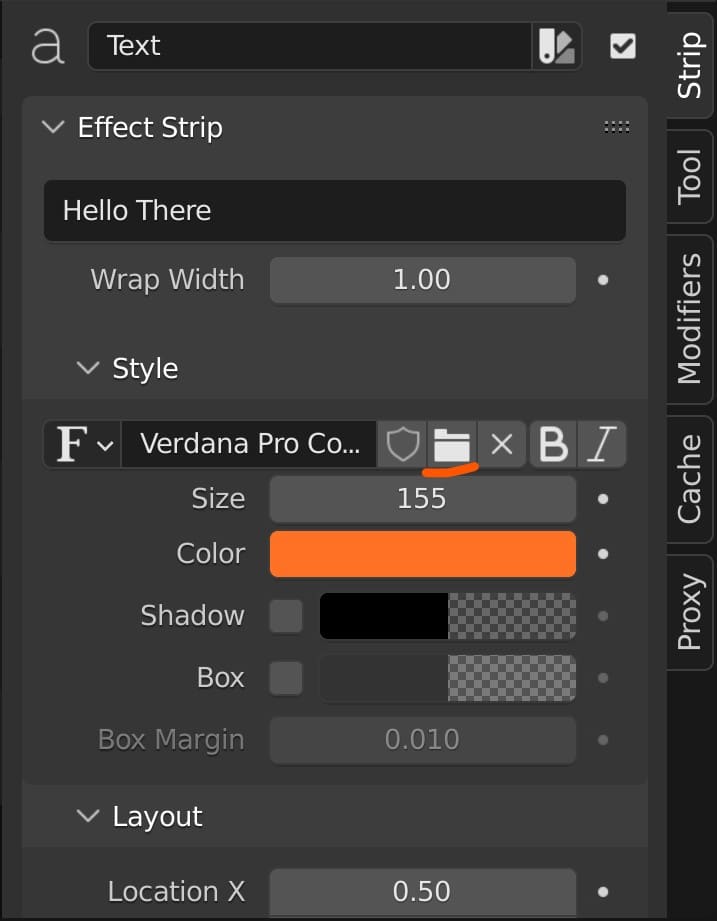
Unlike the viewport, you can use the B and I buttons to easily make any text either Bold or Italic, providing it does not have either attribute already.
Thanks For Reading The Article
We appreciate you taking the time to read the article. We hope that you were able to find the information that you were searching for. Below we have compiled a list of additional topics that you may be interested in reading.
- The Shortcuts For 3D Modeling
- Why Is It Called A Render Farm?
- Using Blender 3D To Earn An Income
- Which Is Better Blender Or Maya?
- The Shortcuts For Edit Mode In Blender
-
UV Layouts for Low-Poly: Blender Tips
Optimizing UV layouts for low-poly models in Blender.
-
Seamless LOD Transitions in Blender
Smooth transitions between different LODs for optimized Blender models.