There are many different workflows for creating 3D scenes using an application like Blender, and in some cases, you may want to edit a specific object in your scene, but there’s a problem. You have already built up much of that scene, and the other objects are getting in the way of your editing, so how can you work around this issue?
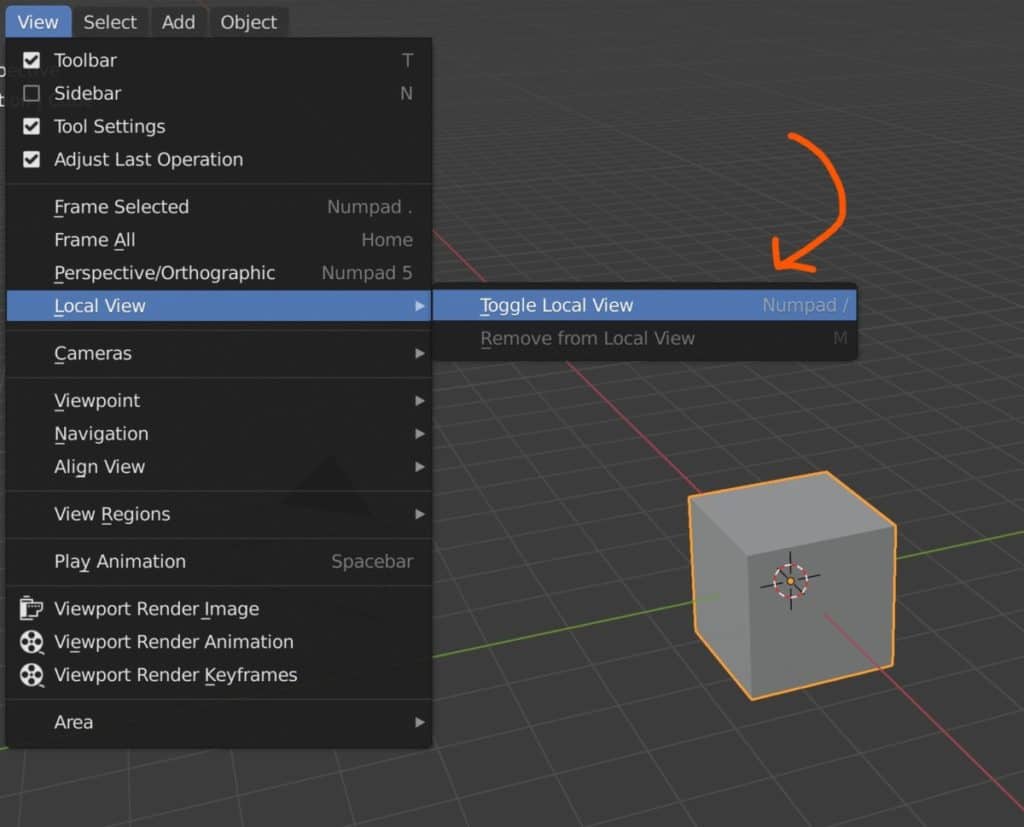
You can isolate a single object in the viewport by switching to the object local view, then focusing on that object. To enter local view, first, select the object then go to View > Local View > Toggle Local View, or select the object and press / on the number pad. Then press the period key on your number or go View > Frame Selected to focus on that object.
By using the local view option, you can make the modeling and editing process much easier, by isolating the objects that you want to edit and hiding all the other objects in your scene that would otherwise get in the way. So how else can you improve your modeling workflows by isolating objects?
Why Do You Need To Isolate Your Objects For Editing?
Working in a 3D space is a very different experience from working with a 2D UI. For example, on a 2D UI, you don’t have to worry about selecting the wrong item, as each tool has its own space on your screen. In the 3D viewport however you can have multiple objects occupying the same space where your mouse cursor is, and this creates a scenario where you can easily select the wrong object.
Another reason why you want to isolate an object for editing is to be able to see every aspect of that model from every angle. Having three objects positioned next to each other will make it difficult, perhaps even impossible, to view, select and edit certain parts of the model.
The last thing that you want to do if you have already positioned the objects in your scene is to begin moving them about again, so you will want to find a solution where you can hide certain models and focus on the ones you need to work on.
Why Local View Is Such A Powerful Tool?
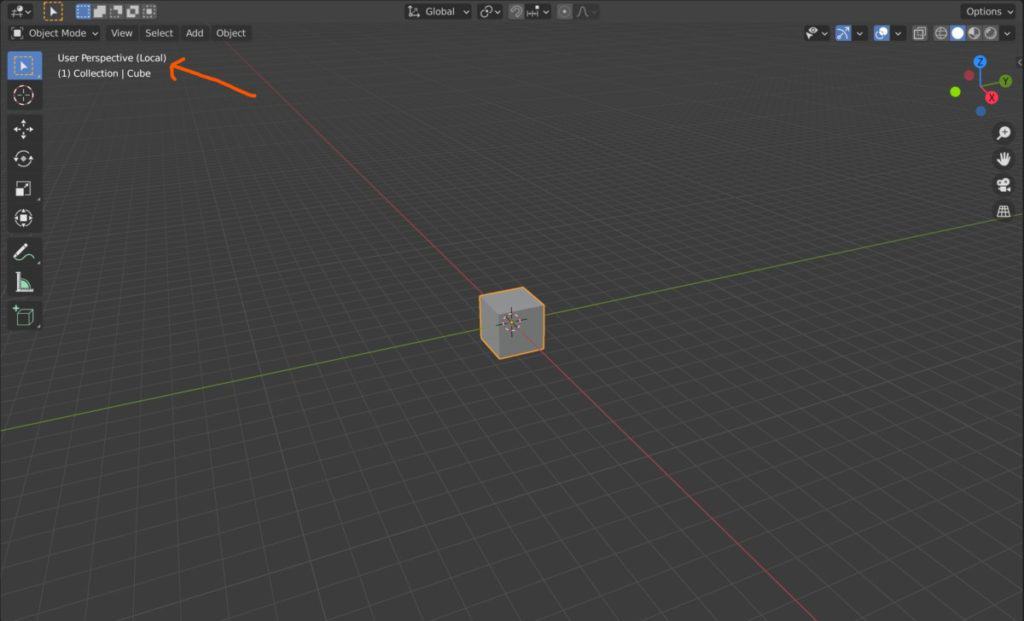
There are a few methods that we will cover that will allow easier editing of our objects but none are more effective than toggling the local view option. With this tool, you can hide every object in your scene except for the one that you have selected and then begin editing it.
With the local view, objects are not deleted, they are simply hidden as you focus your attention on your selected model. The viewer distractions you have the easier 3D modeling becomes, and with this tool you can get rid of most of the distractions on the viewport.
If you have a number pad, this is a simple as a single button press, as the tool is assigned to the / key on the number pad to toggle the view both on and off.
If you don’t have a number pad, then don’t worry as the tool is assigned to the / key as well, meaning it has two hotkeys that you can use.
For those that have a number pad, we recommend changing one of these hotkeys to another tool that perhaps does not have a hotkey assigned to it.
Is Local View Limited To A Single Object?
While it is best used for focusing on a single object in your scene, you can in fact use local view for multiple objects at the same time.
These objects need to be a part of the selection before pressing the hotkey to enable local view, but once you do, any objects that were selected will be visible in local view.
A scenario where this may be useful is when editing parts of an object, like a vehicle, where you need to edit the size and shape of one part such as a wheel, with another part that it will connect to, like the front axis of a car.
Can I Add Objects While Using Local View?
You can add new objects to your scene even if you are currently using local view, as all the local view option does is focus on what was initially selected.
Objects can be added to the scene as normal even if you are in local view put they are added as their own object, unlike in edit mode where adding new primitive objects adds geometry to an existing model.
This means that if you come out of the local view after creating a new object, and then go back into local view for the original selection, then only that object will be visible, not the one that was created.
Are There Other Options For Hiding Objects?
There are a couple of other methods that you could use for focusing on a specific model and isolating it from the rest of your scene, although none will be as easy and as effective as using a local view.
One method is to use the hide tool to make objects invisible in the scene. This literally hides them from the viewport and you will be able to see in the outliner panel that they have been hidden.
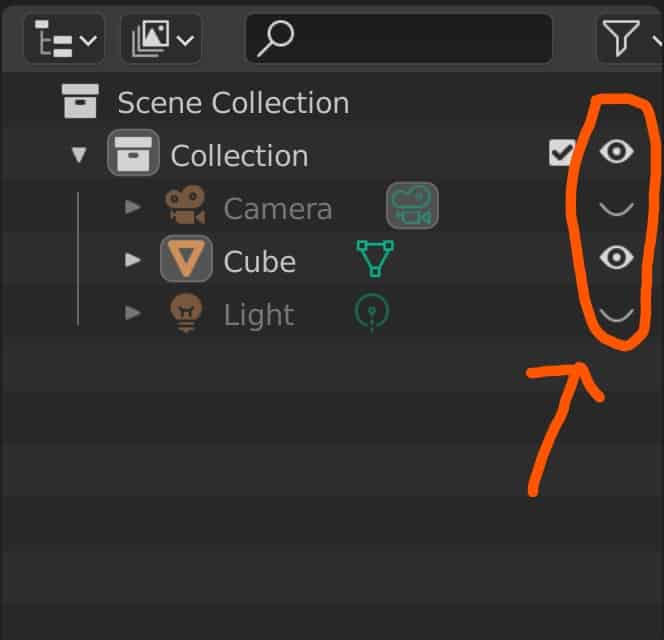
To hide an object, you can select the model in the viewport and then use the H key on your keyboard to hide. Alternatively, you can click on the eye icon next to the object’s name to both hide and unhide specific objects.
You can also hide multiple objects in the viewport using the outliner and also by selecting multiple objects in the viewport and pressing H.
The tool is referred to as the hide-selected tool, but in this case, it would be faster to hide the objects that are not selected.
So if you select the object that you want to focus on and then use the hotkey Shift + H, you will hide all the objects in your scene with the exception of the selected asset.
Here Are Some Other Articles We Think You May Be Interested In
Thanks for checking out our article. We have gathered a few more topics that we think you may be interested in….
- Is Blender Safe Or Is It A Virus?
- What Are Normals And How To Fix Them?
- Is Blender hard To Learn For A Beginner?
- Why Can I Not Zoom Into My Viewport Anymore?
- How To Remove The Overlays In The 3D Viewport?
-
Custom Normals: Blender Hard Surface Tip
Enhancing hard surface models with custom normals for realism.
-
Align Perfectly with Blender’s Snap Tools
Aligning objects perfectly with Blender’s advanced Snap tools.
-
Mechanical Parts: Blender Modelling Guide
Detailed guide to modeling mechanical parts with precision in Blender.