Regardless of what scene you are creating or whether it’s a still image or an animation, one of the most important objects will be your camera, specifically where your camera is in the viewport.
Moving and positioning your camera can be difficult, as you combine the change in location with rotation so that the camera points to the right spot. Fortunately, there’s a much easier way to position it.
You can lock the view of your camera to your 3D viewport by pressing 0 on the number pad to initially go into your camera view. Open up the side panel and then go to the View tab. Click on the lock camera to view option, and when you change the view in Blender, the camera will go along with it.
By using this tool, we cannot only directly position our camera wherever we want, but we can also preview our scene from any angle, looking through the camera as we move it.
Joining Your Camera View To Your Viewport
Navigating your viewports is easy once you’ve had a little bit of practice with it. After just a short time you look using Blender, you will be able to orbit Hannaan seem around your 3D viewport.
This functionality allows us to preview our scene from any angle and viewpoint. It can be very handy to have this kind of functionality when positioning the camera object, as it is through the camera that the scene will be rendered and not the view of the viewpoint itself.
Fortunately, Blender offers a way in which we can connect the camera view to our viewport perspective. This way, whenever we navigate around our scene using orbiting, panning, and zooming, we will also be both moving and rotating our camera.
To achieve this effect, press the N key on your keyboard to open up the side panel. There will be a column of tabs to the side; the third one should be the view tab.
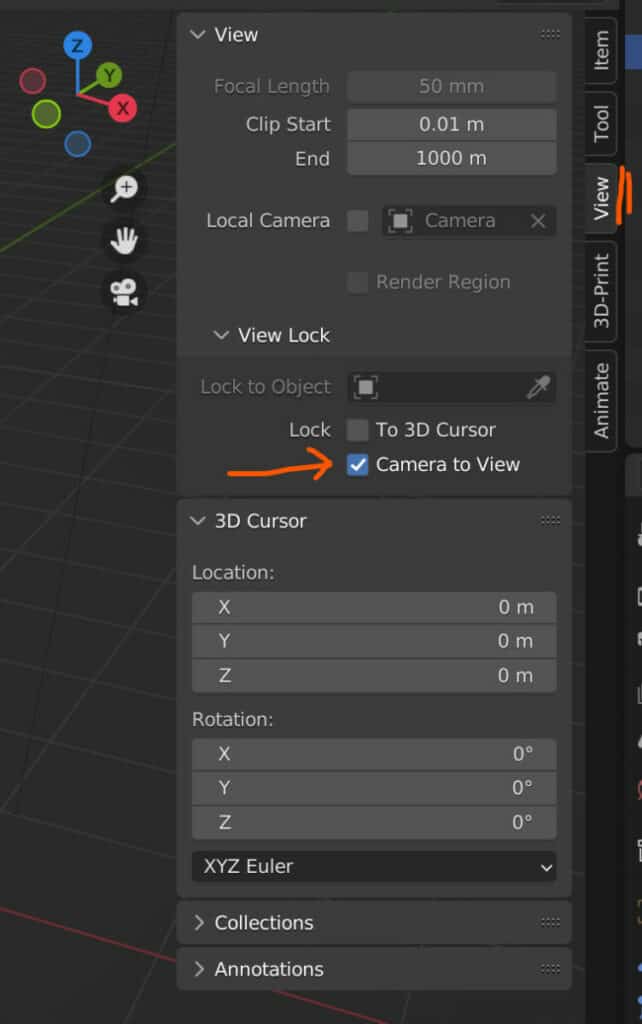
We will have several categories within the View tab, including the view category. This should be open by default, but if it’s not, just click on the little arrow to the side to open it up.
Towards the bottom of this section, we have the view lock tools. Again, this should be open by default, but tick on the little arrow to open up if that is not the case.
You should see a tick box for camera to view. Tick it to enable this functionality. Now you can press 0 on your number pad to transition into your camera’s view in the 3D viewport.
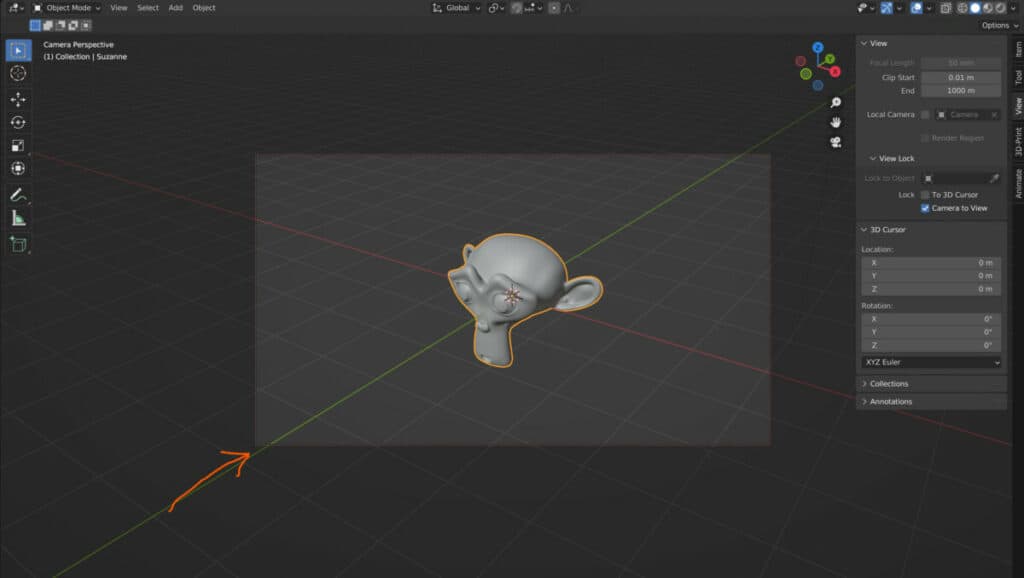
As normal, you will be able to view your scene through your camera’s lens, and there will be a border in the 3D viewport to indicate the bounds of the camera’s view.
What will be different here, however, is that the border will be highlighted red. This indicates that the lock camera to view tool is active.
If you attempt to orbit your view, you will notice the camera moving along with your orbiting. The same is true if you were to zoom or pan your view.
This is different from what it would be initially if you did not use the lock camera to view option as attempting to orbit around your scene while looking through your camera would simply take you out of the camera’s view.
To come out of your camera view, just untick the lock camera to view box and then navigate as usual. Alternatively, you can press 0 on the number pad to come out of your camera view.
Why Is The Camera To View Tool So Powerful?
To understand just how good the camera to view tool is for positioning your camera objects, try positioning the camera objects without using this tool. It requires you to select the object and then, move it into position, then rotate the camera so that it’s pointing towards your scene.
You didn’t need to go into your camera view to see exactly how your camera has been positioned. If it’s not being set correctly, you will need to come out of your camera view and reposition, then go back in, come back out, reposition, etc.
Try this yourself, and you’ll quickly realize how difficult it is to get your camera in the right spot. Something which is straightforward with the lock camera to view tool because we can always view what our camera sees as we navigate it.
So not only is repositioning the camera easier with the lock camera to view tool, but we also have the added bonus of always being able to preview what our camera is looking at.
Thanks For Reading
We appreciate you taking the time to read through this article, and we hope you found the information you were looking for. If you’re interested in learning more about how cameras can be used in the 3D Viewport, you can look at some of the articles we have listed below.
- How To Use The Camera In Blender For Beginners
- Tracking An Object With Your Camera
- Creating A Carousel Effect Easy Method
- Turnaround Add On For Camera Tutorial
- Can You Draw Blueprints In Blender