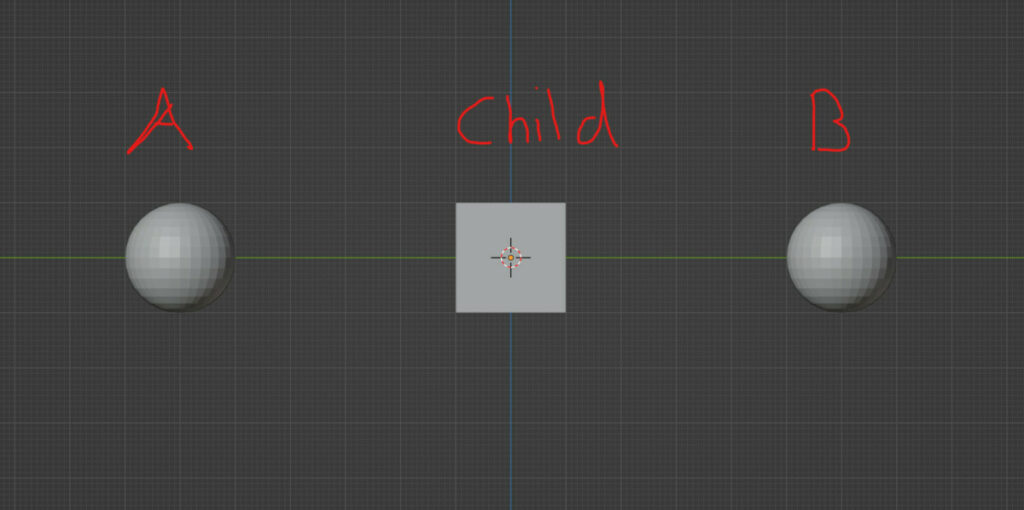
When working in object mode, we have far more variety than simply manipulating the transforms of our selected objects. For example, we can duplicate the objects or reposition them using tools like snapping and proportional editing. One of the more hidden tools is the ability to parent objects to each other in what is known as the parent/child hierarchy.
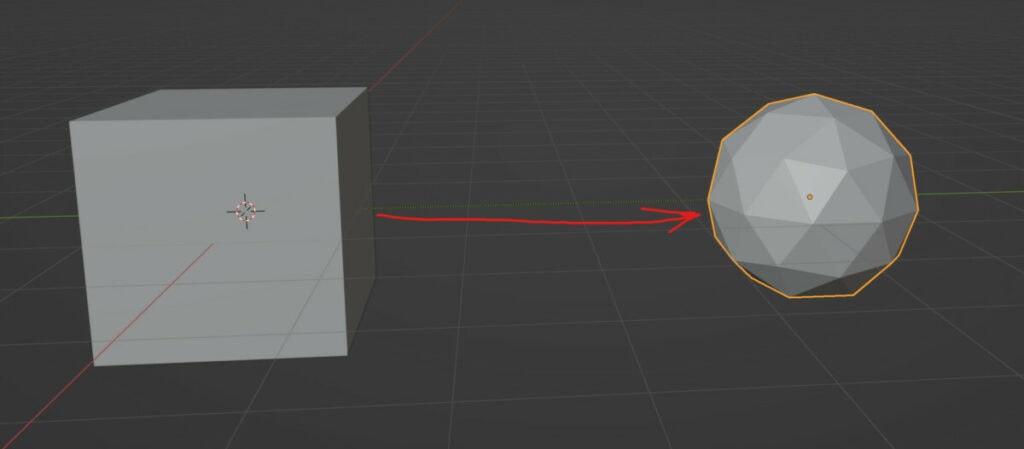
To sign one object as the parent to another, select the object you wish to be the child first and then select the parent second. Use the hotkey Control + P to bring up the parent menu and select the object option. When you manipulate the parent’s transforms, the child object will also be manipulated.
There are many use cases where this parent/child relationship can be helpful, particularly when you are building up animations where objects are dependent on each other.
How To Assign A Parent To An Object?
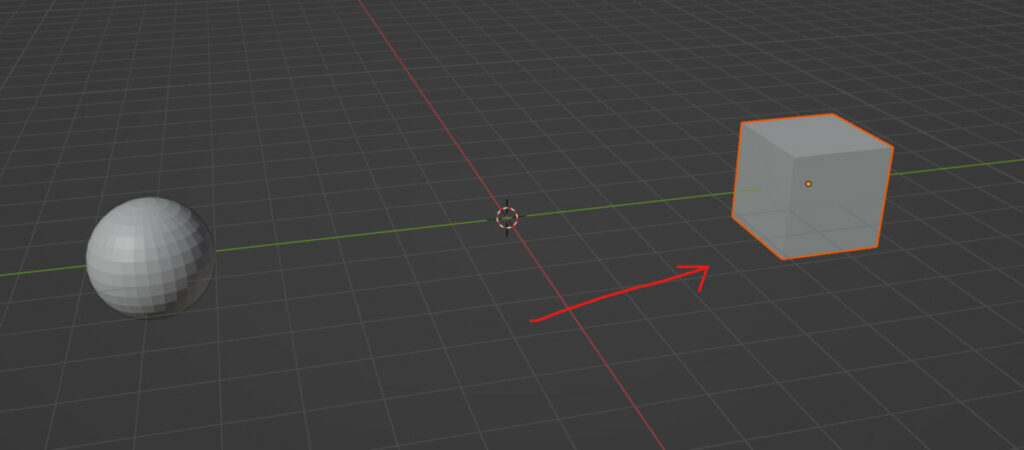
At least two objects will be required to create a parent/child relationship. The first object you need to select must be the child and then hold down the shift key to select the parents.
There are two ways in which we can reach the parent menu. The first method is to go to the objects menu in the header bar of the 3D viewport and then highlight Parent. This brings up the menu for how we wish to parent our objects together. In most cases, you will choose the objects option.
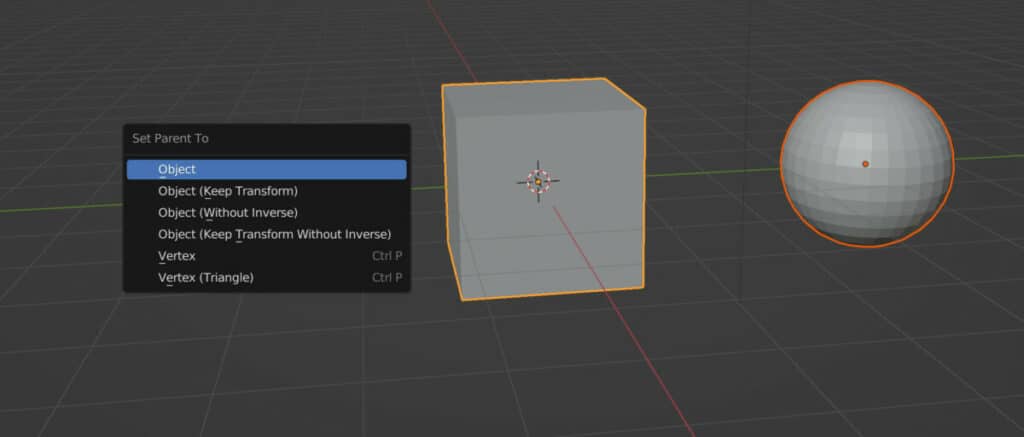
The alternative method for assigning a parent to an object is to use the hotkey to bring up the same menu. Hold down Control + P to bring up the same parent menu with many of the same options.
How To Tell If The Parent Tool Has Worked?
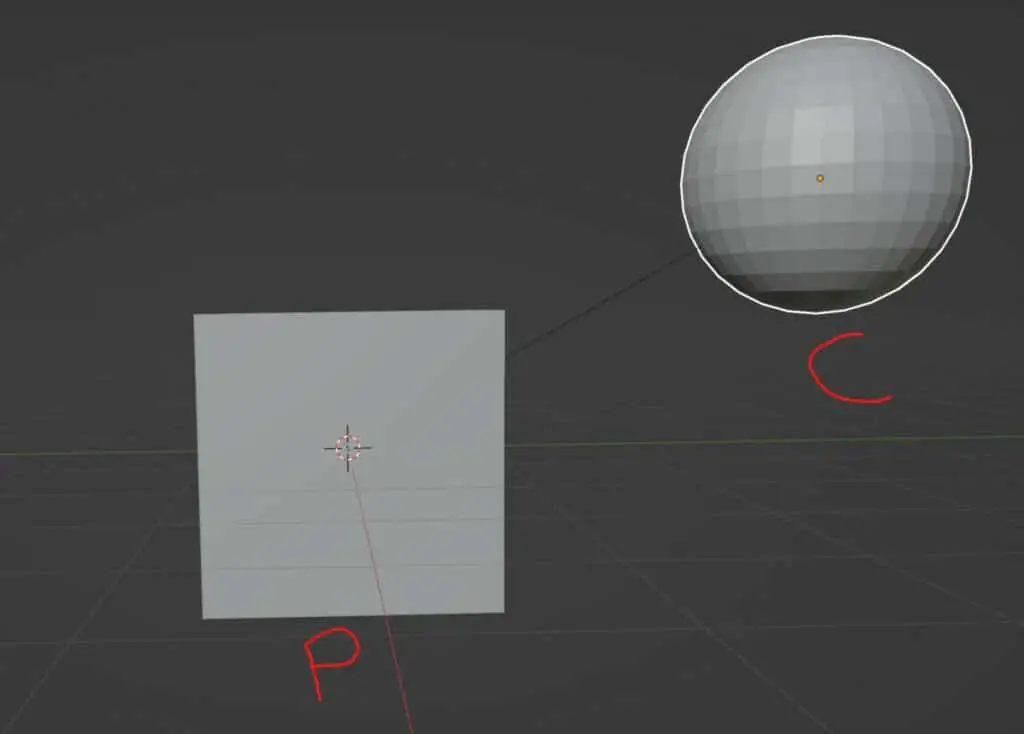
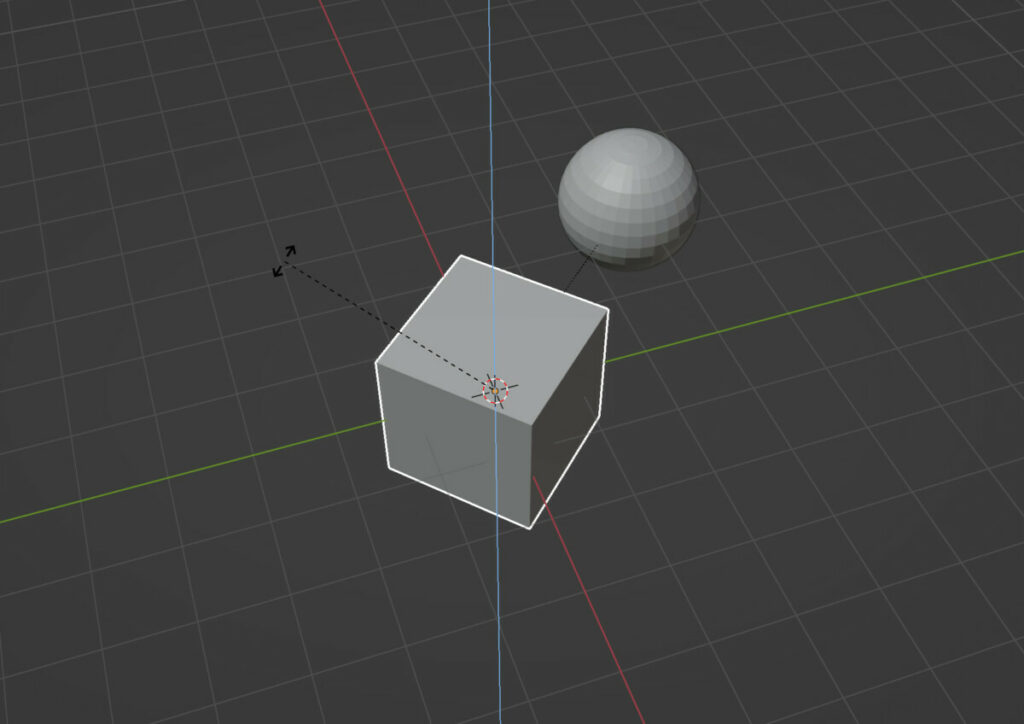
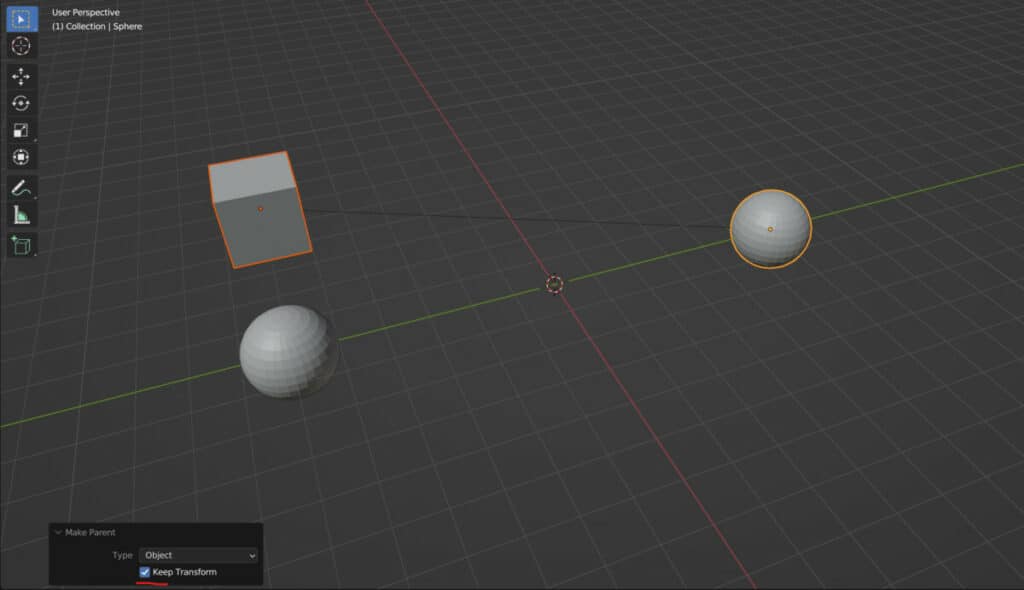
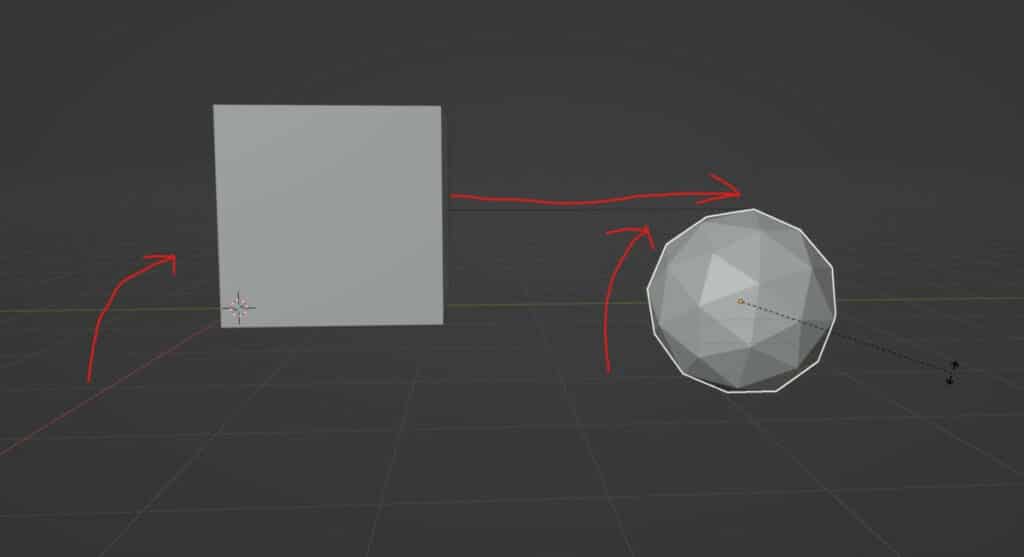
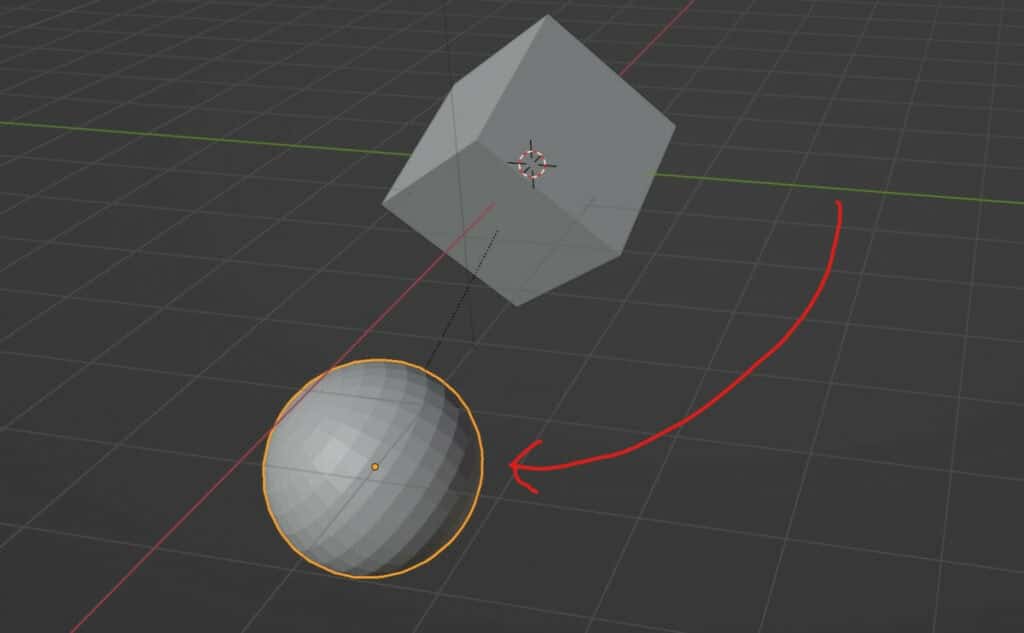
If the tool has been successful, you will notice a dotted line that connects the origin points of the parent and child objects.
This might be difficult to see, and it doesn’t indicate which of the objects is the parent and which is the child.
A more transparent demonstration of this can be found in the outliner panel. If you had two mesh objects like in our example before parenting, you might only notice one of those objects in the outliner. Parenting adds one object to another object’s hierarchy.
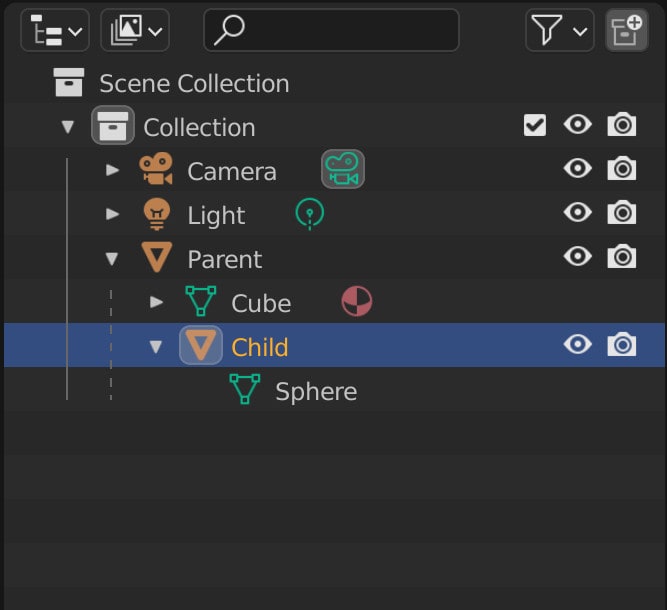
If we open up that object in the outliner panel, we can locate the second object underneath. It would be in line with the mesh data of the parent object.
How Does Parenting Work In Blender?
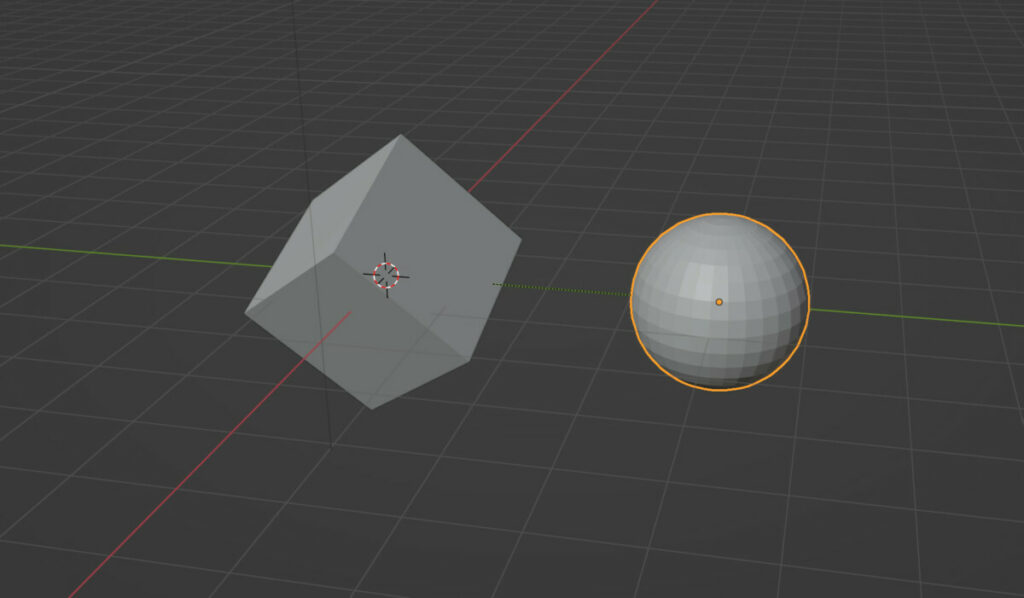
The idea of the parent/child hierarchy in blender is to have one object affected by another object transform values. For example, if we select the child object in Blender and then attempt to change its location, rotation, and scale, it would do so normally.
The child does not affect the parent object, and its transforms remain as they were if they were not parented to an object in the first place.
However, if we were to select and grab our parent object, the child object would move along at the same distance as the parents. This would also maintain the space between the parent and child objects.
If we were to rotate our primary parent object, the child objects would have packs beginning to orbit on the selected axis.
And if we were to scale our parent object, then the child objects would also scale and move depending on whether or not we increased or decreased the scale value.
In other words, the child objects would behave as if its own objects origin were moved far outside of the object itself. It uses the origin of the parent object instead of its own.
Other Ways To Parent Objects And Geometry
So far, we’ve only looked at the standard way to parent objects to other objects, but there are other options from the parent menu.
Parent To Object (Keep Transform)
This parenting method is best suited when an object is already the child of another parent, and you wish to reassign the parent of that child object.
Say a child object was parented to object A. And while object I was its parents, we rotated and moved our parent object so that our child object would be altered.
If we then decide that we want to parent the child to our second object, which is object B, we can repeat the process by selecting the child and then selecting the new parent.
Open up our parent menu, and if we select object then the child object will revert to its original position before the original parent manipulated each transform.
However, if we don’t want the transforms or positioning of our child object to reset, we can choose the keep transform option.
This will keep any changes made to our child object while it was under the influence of object I as its parent.
Parent Without Inverse
The next option is going to be a confusing one to read. This is the parent without inverse option, and you’re instantly going to ask what it means by the inverse.
When an object is parented to another, an inverse matrix is created in the background. This set of rules will determine the positioning and relationship of the child to the parent.
If we were to use this option to parent a child to a new object, The positioning of the child object would snap to the parents’ location.
This means that they would be overlapping the same space. This can be useful if you don’t want to have your child transforms manipulated before you apply the child to the parent. In other words, starting all of your objects at the same coordinates.
You can then select the child object and begin to manipulate its transforms as normal, grabbing, rotating, and scaling the model.
The main purpose of the inverse matrix is to calculate the distance between the child and parent objects when they are connected and maintain that as the base distance. By parenting without inverse, we take this wall away, and then the child object has to mirror the positioning of the parent.
Parent Without Inverse But Keep Transform
This is the same as the parent without inverse object but maintains the transform, which sounds like a contradiction to what it was for in the first place since assigning a parent without an inverse matrix, removes the distance between the objects, and this option prevents that from happening.
This is still removing the inverse matrix from the calculation, setting the coordinates back to the parent’s origin, but the added step of restoring the distance value is now added.
Parenting Using A Vertex
Instead of parenting one object to the object origin of another, we can instead parent an object to the nearest vertex of the parent, which means we parent one object to the surface of another.
We don’t need to transition into edit mode to do this. When choosing the vertex option, Blender finds the vertex closest to the child object origin and connects to that vertex.
This does not change the location of the child object, but the rotation is affected considerably as the child no longer orbits the parent.
Instead, the rotation mimics the connected vertex following a similar path over an equal distance. You will also notice that the child object is not actually rotating; all that is happening is the child following the path of the vertex so that the distance remains constant.
Why is the object not rotating? Because the parent is a vertex and not an object, a vertex cannot itself be rotated, only moved. The child object always copies this behavior.
Likewise, scaling the parent object will not scale the child object if a vertex is used. The only change that occurs is when the child moves to maintain the distance as scaling the parent object moves the parent vertex.
Parent Using A Vertex (Triangles)
Similar to the previous option, vertices are used for the parent process instead of the object origin. The key difference is that a triangle of vertices is used instead of a single vertex.
Another thing to note when using this method is how modifiers can affect the child object. Modifies are semi-procedural methods of manipulating the geometry.
Therefore, using modifiers such as a displacement texture or subdivision surface are going to have an influence on our objects when a vertex is used as the parent.
Can A Parent Have More Than One Child?
Because of how relationships work and how they affect object hierarchy in the outliner panel, there are some limitations to increasing the number of Parents/Children.
However, there is no limitation regarding the number of children a single parent can have. You can have a dozen child objects, for example, like planets that orbit around a star (Not how it works in reality but a good example for this).
All children here are found under the parent in the outliner at the same level, unaffected by each other.
Can A Child Have More Than One Parent?
This is where limitations come into play. Due to how the hierarchy system currently works in Blender, you cannot have more than one parent object assigned to a single child.
Can A Child Of One Object Also Be A Parent For Another?
Once again, going back to the hierarchy system used by Blender, we can go multiple levels down the chain.
For example, a typical object will have its object data at level one in the hierarchy. The mesh data of the object is found on level two, and material data can be found on level three in the chain.
The same concept applies to parenting. We can continue to move down the chain and any child object can be a parent of another. Of course, it cannot be a parent of an object above it in the chain even if that object is not the parent directly above.
How To Clear My Parent Data?
Sometimes you may decide that you no longer want to use the parent/child system for your scene; in this case, you would need to clear the parent data.
To remove a child or parent, select a child object and then use the hotkey Alt + P (Option + P on macOS) to bring up the clear parent menu.
The default option is to clear the parent itself, which will remove the child from the parent hierarchy and bring it up to the top level.
There are also a couple of other options that we can try when clearing our child object.
Clear Parent And Keep Transform
When we choose to clear the parent from the child, any changes made to the parent transforms are negated, and the child is returned to its original location, rotation, and scale in the viewport.
By selecting this option, the child is still removed from the parent, but inherits the same value changes as the parent, so its positioning in the viewport remains the same.
Clear Parent Inverse
This works a little different to the other options. Clear parent inverse does not disconnect the child from a parent, but instead resets the transforms applied due to the parent/child relationship.
How does this work in practice? let’s say you made changes to the transforms of the parent object before you assigned it as the parent to another model, like rotating it on all three axis.
When you clear the parent from the child object, the relationship is terminated, but when you clear the parent inverse, the child object switches its position.
The child now matches the position that it would have been in has the parent object been rotated AFTER the parenting tool had been used rather than BEFORE.
Using Empty Objects To Structure Our Scene
Parent mesh objects to each other have some significant use cases, but the real power of parenting comes from using empty objects.
An object is an object that holds very little information beyond its transform. It is not a mesh, so it does not appear in your rendered scenes, but because it’s an object, it can be used for parenting.
One of the primary use cases for an empty object is to be able to organize entire scenes or sections of a scene.
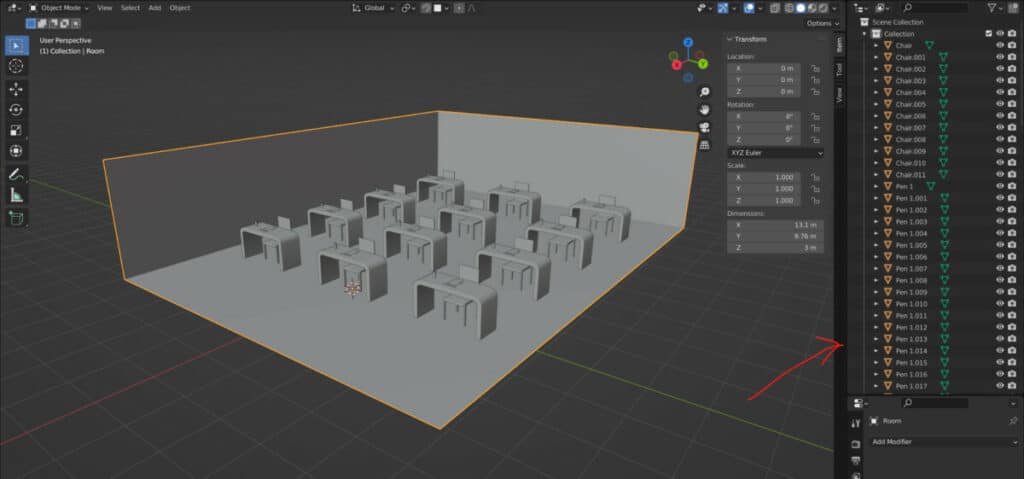
For example, let’s say we created a scene in a classroom. This classroom has a variety of desks laid out across the room. It also has some objects on the tables as well as a few desks at the back.
This scene has many objects, and we may want to perform operations such as grabbing and moving the entire scene or a specific set of objects. We may want to rotate multiple objects at once. Or we may want to scale our scene to match it to the project specifications better.
There are various reasons why you would want the functionality to manipulate multiple objects at once, and a great way of doing this is to use an empty as the parent for all of these objects.
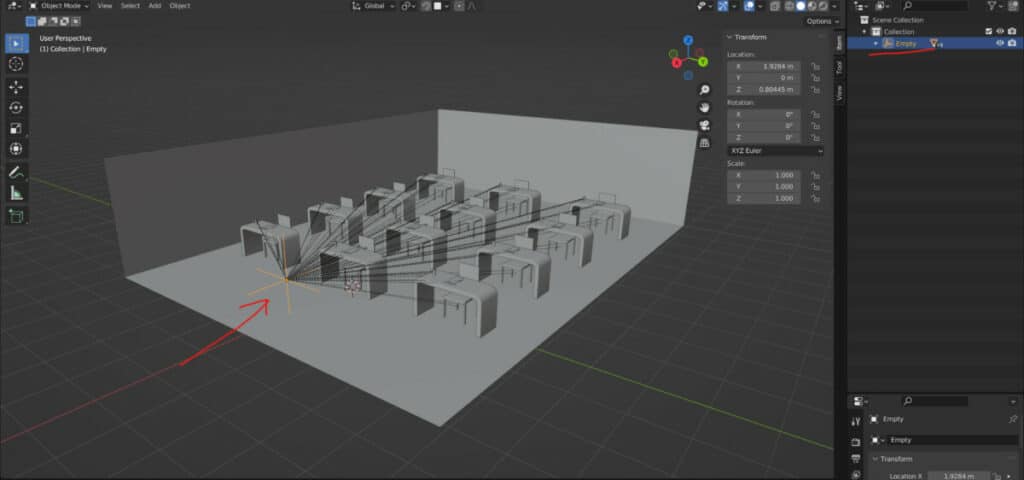
What’s so powerful here is the ability to select a single object, which in this case would be the empty, and then use it to manipulate the visual transforms of all of the objects in your scene, or at least all of the ones that are connected to that empty object.
In our example, we could use the empty to move the entire scene on the Z axis, or scale it down if the scene itself is too large.
Removing Relationship Lines
It’s not a problem to have one object parented to another. Still, it gets more complicated visually when we have an entire scene parented to a single object because of the many relationship lines formed.
If there are too many lines in your 3D viewport, you can hide the lines themselves by going to the overlays menu in the viewport header.
In this menu, locate the section for objects, which should be in the middle of the menu, and untick the box for relationship lines.
This will not alter the empty object’s ability to control the child objects in the scene and merely hides the lines from the users’ view.
Using Empty Objects To Help Animate Models
The value of using empty objects as parents goes beyond simply structuring our most extensive scenes. We can even sometimes use the empty object transforms to help animate models.
An example of an animation that sounds simple, but is difficult to achieve, is creating a rolling cube. This should be a good exercise for demonstrating how objects can be animated using parenting.
Without parenting, a cube’s pivot point would need to change every time it rolls, and one of the few things you can’t animate in Blender is changing pivot points.
To achieve a roll we require four empties, which will each be positioned at a specific vertex. This needs to be done in a precise way but is much easier to set up than you might think.
With your cube object go into front orthographic view and then add an empty object. Enable the snapping tool and set the mode to vertex.
Position your empty on the vertex at the front of your cube at the bottom where the pivot point is required for the first role. This empty will act as that pivot point for the cube.
Create a second empty and position it on the top front vertex, a third empty on the top back vertex, and a fourth empty on the bottom back vertex.
Next, we need to use chain parenting to create the roll effect. Since our first role needs to control the entire hierarchy, the first empty we added needs to be the master object, so it will be parented last.
And because all objects need to be able to influence the cube, it needs to be at the bottom of the hierarchy.
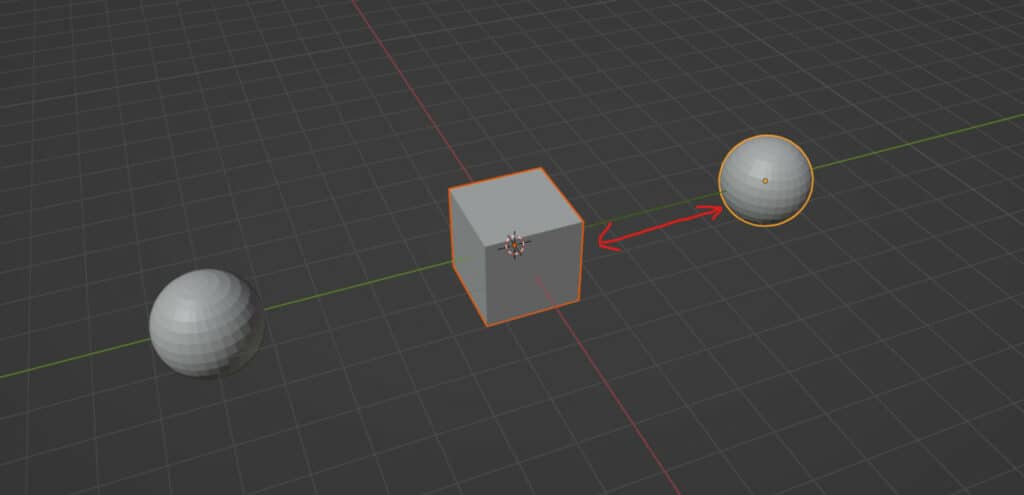
Select the cube and then select the bottom back empty, or the last one you created. Parent the cube to that empty. Then parent the empty to the top back empty, followed by parenting that one to the top front, and finally parenting that to the first empty we added at the bottom front.
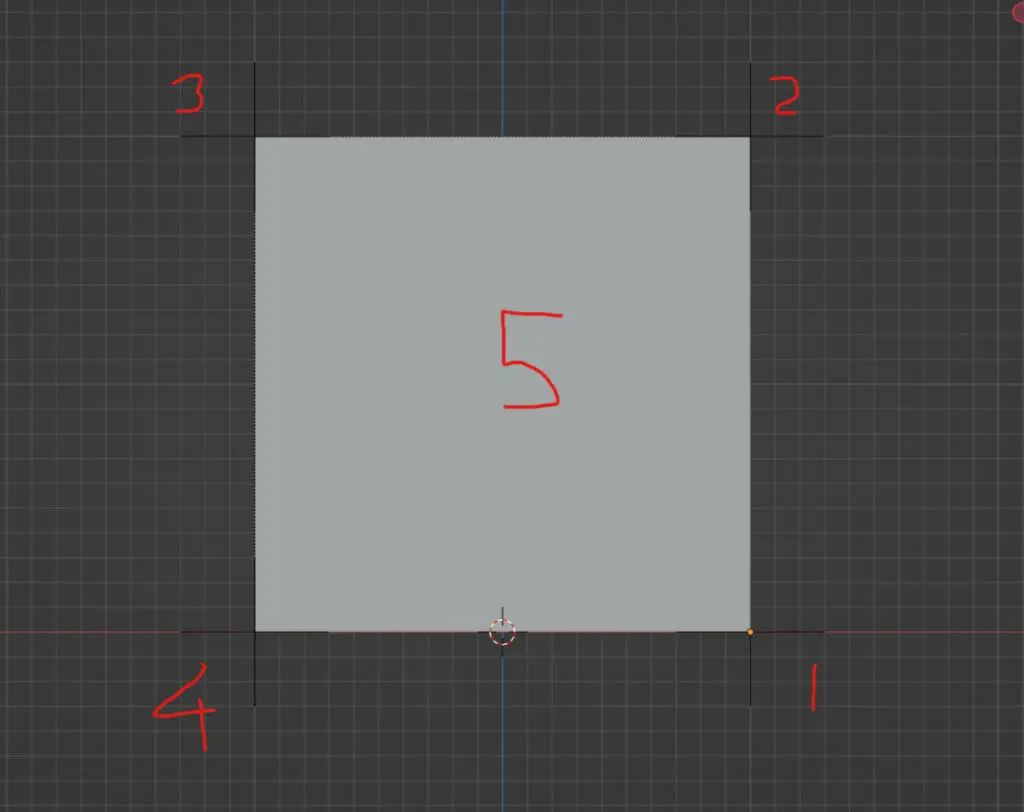
This image should help, the number of the object is the level it should be in the hierarchy. 5 will be the child of 4, which will be the child of 3, etc.
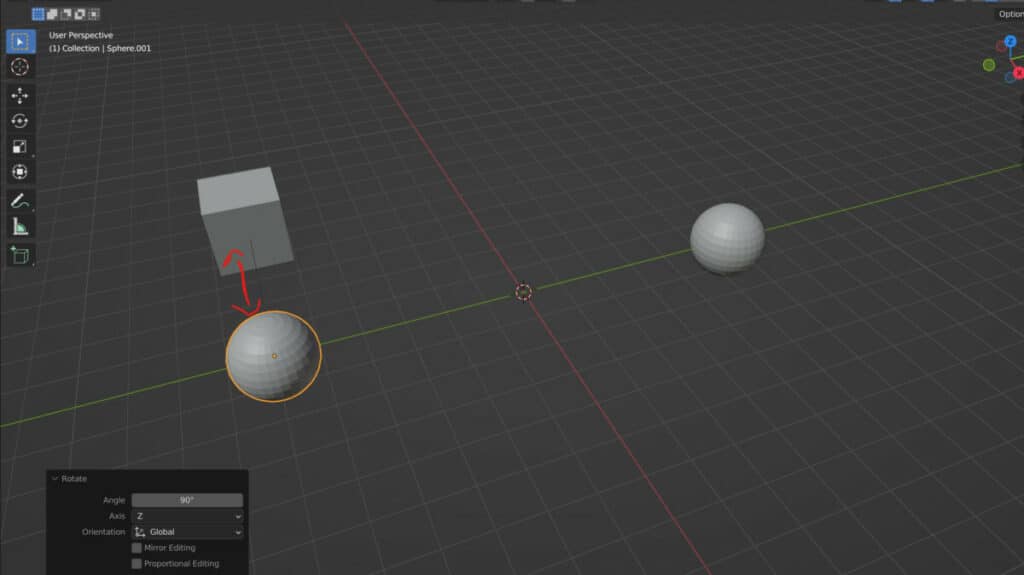
Now object 1, the first empty, should influence the rest of the objects. Rotate by 90 degrees object 1 to rotate the cube.
Then select object 2 and rotate that by 90 degrees for the second rotation, and repeat the process for the final two empties to complete the rolling cube motion.
You can use keyframes with each empty before and after you rotate that empty to build up your animation for rendering.
Thanks For Reading
We appreciate you taking the time to read through the article. We hope you found the information you were looking for. If you are interested in learning more about the Blender software, you can check out a few of the articles we have listed below.
- Joining Vertices To Edges To Create New Geometry On Our Model
- How To Use The Object Origin In Blender
- Where Can I Learn Blender For Free
- Using The Different Transform Orientations In Blender
- Using The Transform Node In Geometry Nodes