Rendering an image in Blender involves creating a 3D scene, positioning the camera, and then using the camera data to produce a rendered picture of the scene from the camera’s perspective. Rendering an animation involves the same steps but there are a few added layers on top that we need to know about to render animations correctly.
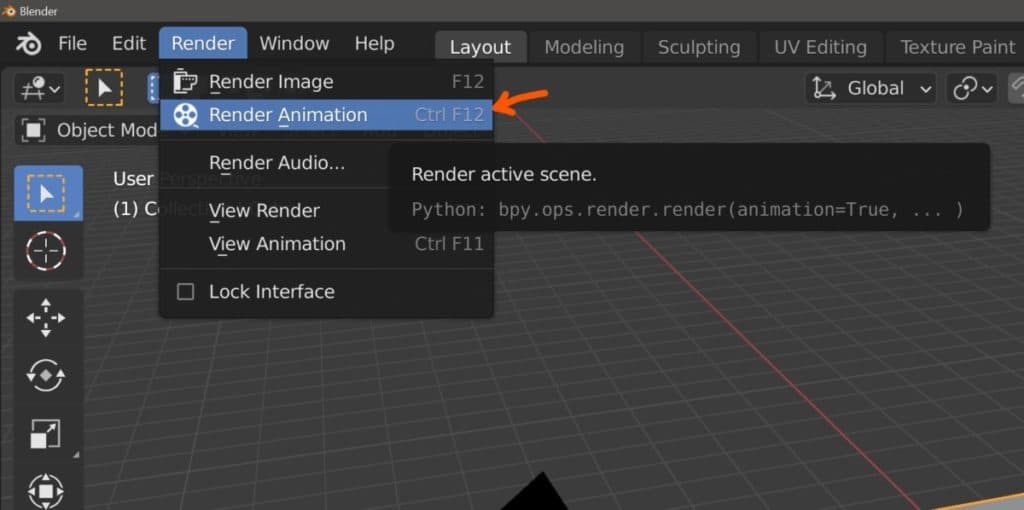
To render an animation in Blender, you can go to Render > Render Animation in the header bar of the user interface, or you can use the hotkey of Control + F12 to also begin rendering the animation. Make sure to set the start and end frames of the animation correctly, and also use the correct output settings for the render.
Simply rendering an animation is just as easy as rendering an image and can be done with a couple of button presses. But there is a lot more to think about if you want to create the ideal animation for your project.
What Is The Difference Between Rendering An Image And An Animation?
In truth, they both follow the same principles when it comes to rendering. Animation is basically rendering multiple images in a sequence, and each of these images are referred to as frames. As such the 1st difference that you will note is that animations take FAR LONGER to render, depending on the number of frames used.
For example, you render a single image of a bear sitting on a tree stump, eating from a jar of honey. The total render time is 1M 30S for the image, which is not too long. Now say you wanted to create a 60 frame animation of the bear eating his honey.
Because Blender will render each frame one by one, you have to multiply the total time it took to render a single image by the total number of frames. That comes to around 90 minutes in this case, all for a render that might only be a couple of seconds long.
The second difference between rendering single images and animations is the additional setup that is required for animations. Both require the artist to set up settings for lighting, motion blur, etc but animation also needs the artist to set up parameters related to the animation itself.
Examples of this include the total length of the animation as well as the frame rate. The output file type may also need to be changed here to fit the project.
These changes for preparing animations should always be done as early in the project as possible before you start creating the keyframes for the animated objects.
These differences add up to the need for an entirely different workflow for animated projects compared to single renders. What settings need to be changed to save time on rendering? Or do you need to consider using an entirely different render engine?
Setting Up The Frames Of The Animation?
In terms of actually setting up this is one of the first things that you should be looking to tick off your list for an animation project. There are two attributes of the animation that need to be set as soon as possible, which are the frame rate and the animation length.
The Frame Rate
The frame rate should be determined first and will define how many frames are being played through each second. For example, if you have a 300 frame animation set to a frame rate of 60fps (frames per second), then the total time of the animation will last about 5 seconds.
However, if you decide to go with a speed of 30fps, then that same animation will last for as long as 10 seconds. Deciding the frame rate early on is important, as changing the frame rate after creating the animations in the timeline will result in the speed of those animations being visibly altered.
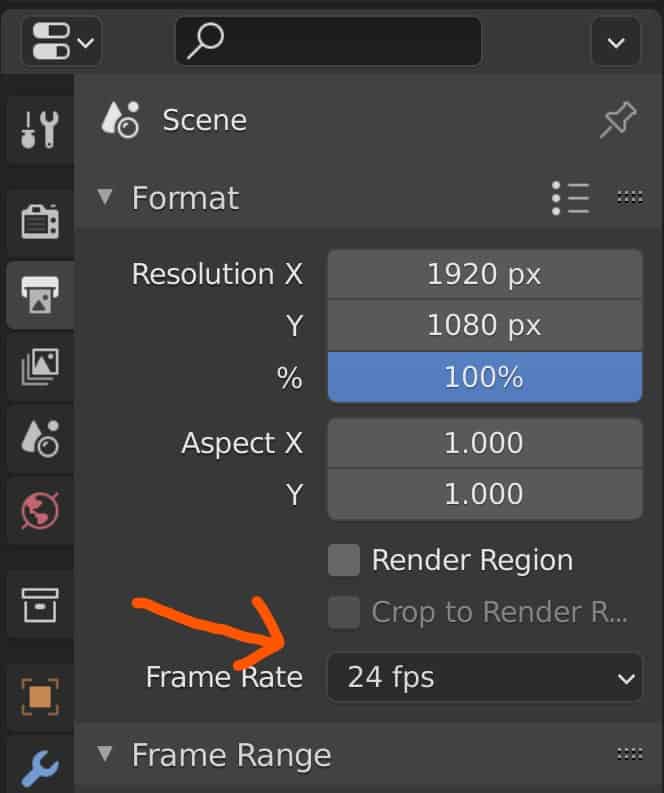
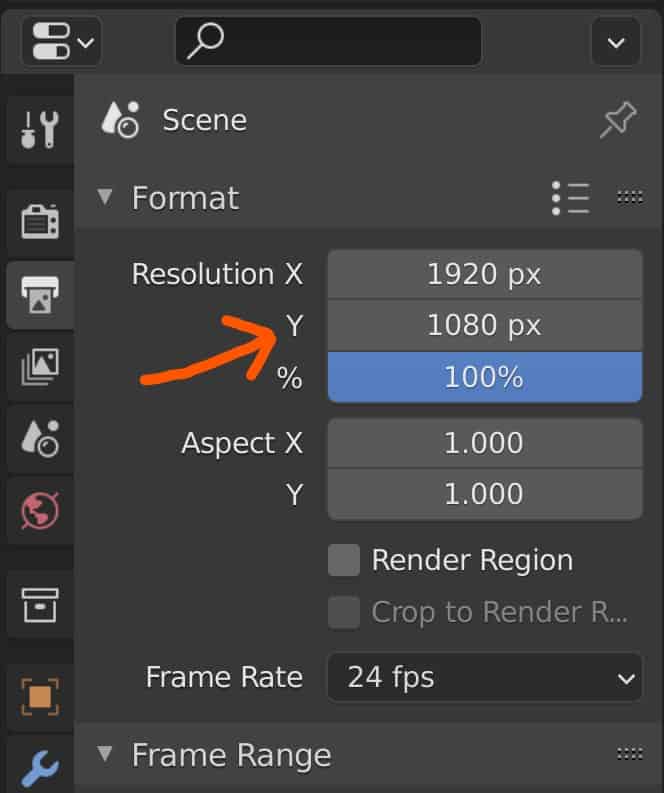
To change the frame rate for your project go to Properties > Output > Format (May be listed as dimensions on older versions) and then change the frame rate option to what you need. For beginners, we recommend setting this to 30fps, so that it is easier to calculate the total time of the animation.
The Frame Length
Then we need to determine how many frames are going to be used for the animation. To avoid confusion, when we talk about the length of animation we are referring to the total number of frames used, while the animation time refers to the actual time of the animation in seconds.
Animation Length/Frame Rate = Animation Time
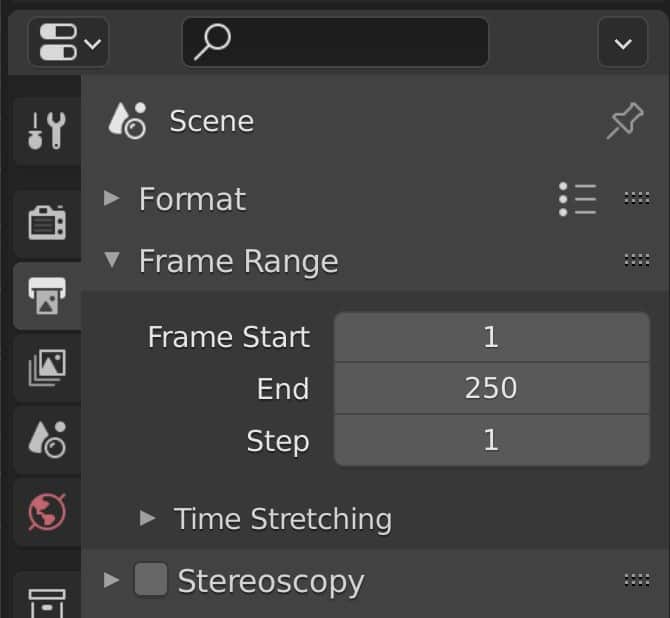
To set the length of your animation, go to Properties > Output > Frame Range and define the start and end frame for your animation. Again if you are creating a 300 frame animation then you will want to set your end frame here to 300.
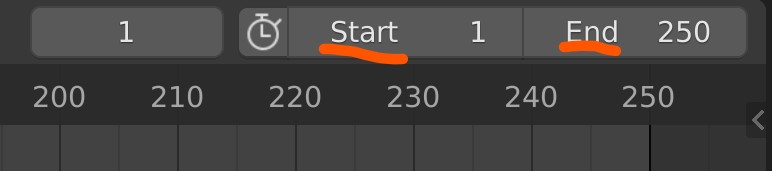
When the time comes to render blender will only render all of the frames that are found within the frame range. You can also change the frame range in the header bar of the timeline panel. The frames are labeled as start and end and you will also be able to see that range visually in the timeline itself.
Choosing Your Render Engine For Your Project
The frames of the animation are calculated regardless of the render engine that you choose, and so are normally done first. You only need to choose your render engine once you begin to work on your materials and lighting, which will likely be much later in your project.
By default, there are three render engines to choose from but in most cases, you will choose between one of two. These are the Eevee and Cycles render engines.
There are some very important differences between these render engines, and they are generally used for different purposes.
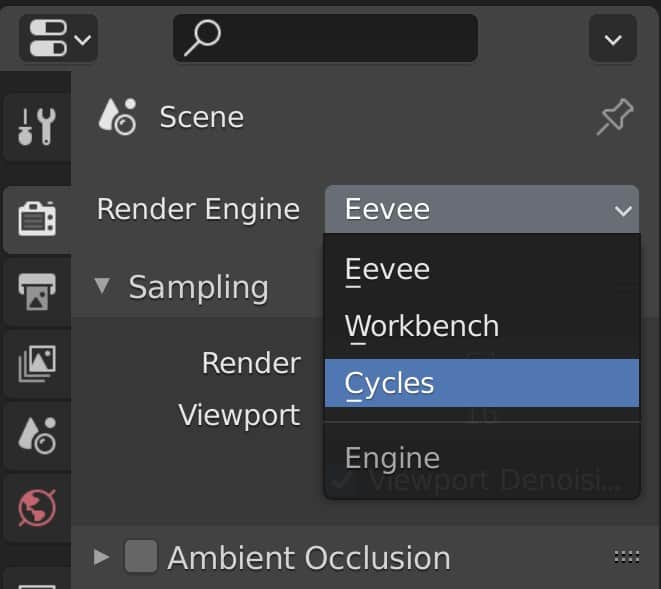
Eevee is more used for the purpose of previewing your scenes and projects as well as preparing those objects for use in other applications like game engines.
Cycles on the other hand is built for realism and is focused on producing professional-grade renders of your projects with lighting and material applications based on real-world properties.
While it may sound here like cycles being the obvious choice this is not always the case. Eevee is built for speed at the expense of quality, but can still look excellent with the right settings.
Take our example of a 60 frame animation of the bar eating its honey. that render time of 1M 30S is based on cycles, but that same scene may only need 5 seconds to render in Eevee, and that’s with added effects like ambient occlusion and depth of field.
So if we recalculate the length of the render with Eevee, that’s 5 * 60 = 300. So it would only take 5 minutes to render the animation. The longer the animation length, the more notable the impact of switching to Eevee becomes.
Ultimately it comes down to a battle of time vs quality, and which is more important to you as an artist.
Assigning The Render Settings And The Target Resolution?
The target resolution is another important factor to consider before clicking on that render button. For Starters, the resolution of the animation is one of the most notable influencers on the render time of each frame, especially when using cycles.
A 4K animation will look very sharp and is great to add to your portfolio of work but the render times will be substantial. If your project does not require you to render at an ultra high resolution then you should not.
1080p is the standard resolution for both images and animations, but consider if you can go as low as 720p depending on the project requirements.
The render settings will change depending on the render engine that you had previously selected. If you are using the Eevee engine, then the settings will focus on adding visual effects to improve the appearance of your renders.
Examples of this include adding effects such as bloom, ambient occlusion, and screen-space reflections. While enabling these options will increase the time taken to render each frame, it rarely comes close to the amount of time waiting for a cycles render.
The Cycles engine on the other hand already adopts many of the real-world lighting principles by default due to its method of path traced rendering. As such many of the parameters that you will be able to adjust for this engine are more for improving performance and reducing render times.
Examples of parameters that can be changed to reduce render times include sampling values, image denoising, and light bounces.
Be warned that by adjusting these parameters there will always be a trade-off in terms of quality. So experiment with some of the different options to see their effects on your render.
Creating The Animation Itself
The next step will be to animate the objects themselves. In Blender, we use a keyframe system to determine when an animation will start and when it will finish.
Just about any attribute of Blender that can be altered can also be animated with keyframes, from moving a car across the road to changing the base color of an emissive light.
We could write 30 articles on how to animate objects in Blender but the general process involves selecting an object or attribute and press the I key to create a keyframe.
Then move your timeline to a different frame and change the attribute that you keyframed, press I again to create the end frame for that animation.
Now if you play through your animation using the timeline, you’ll be able to preview the animated object or attribute in action.
Choosing The File Format For The Output?
The last step before you decide to render the animation is to make sure that the file output is correct. This step you can do at any point in the process but we like it to be the last step in the process.
File Location
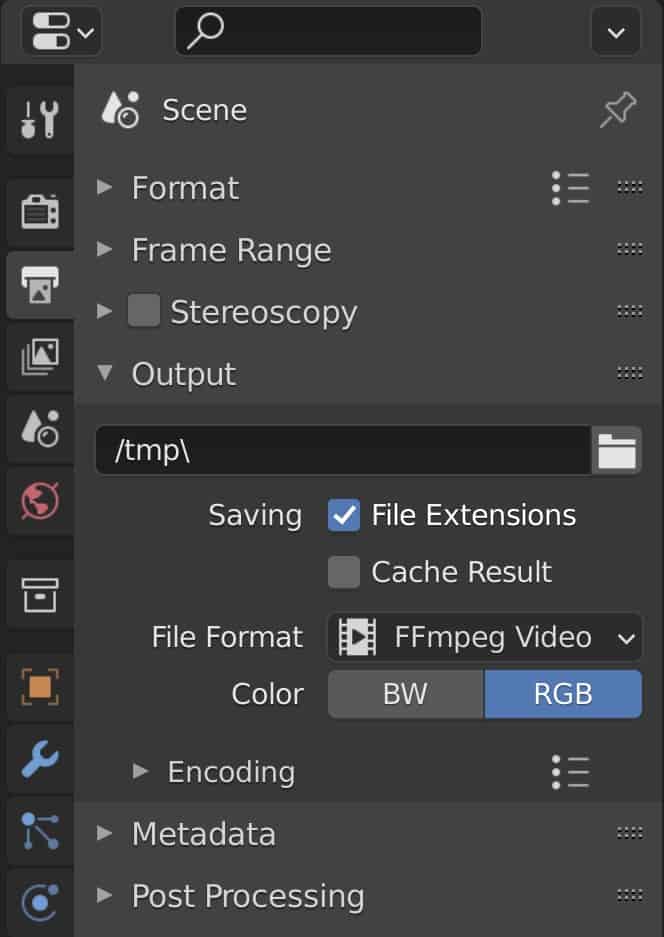
When we render the animation we need to define the location of where the animation is going to go. We also need to define the file format. You can, first of all, choose your render destination by going to Properties > Output > Output and then click on the folder icon to open up the file browser.
By default this is set to a temp folder, so redirect this to wherever you want to save the render to. We recommend creating an empty folder created specifically for that animation, with nothing else inside it.
File Type
Then we need to determine what the file format is going to be for the animation. If you are going to change it to a movie file, then you can go to Properties > Output > Output and then File Format. Normally we tend to choose the FFMPEG option.
Changing the file format will change the settings that are available underneath. When changing to FFMPEG a new tab labeled as encoding pops up.
Each setting changes the way the data is stored, and our preference is to change the container to MPEG-4 and the video codec to H.264, with the output quality set to lossless.
Rendering The Animation In Blender
With everything set up, you are then ready to render the animation itself. If you are rendering using the cycles render engine in particular, then we recommend creating a test render to see how your animation looks. For the test render, minimize your render time as much as possible.
We like to use a very low sample count of 10 samples per frame and combine that with the image denoiser. The quality is not great, but it is clear enough and fast enough to act as a good preview.
To render the animation you can either press the hotkey of Control + F12 or go to Render > Render Animation in the header bar of the user interface.
Then it’s just a matter of waiting for the render to finish and making sure that it is saved in the correct location.
Thanks For Reading The Article
We hope you enjoyed reading this article on how to render animations in Blender. Below we have created a list of other articles that we think you may be interested in reading.
- How To Enable My GPU For Rendering In Cycles
- How To Render An Image In Blender?
- Using The Scene Camera In Blender For Beginners
- What Are The Differences Between Eevee And Cycles For Rendering?
- How To Download The Latest Version Of Blender?
-
Animation-Ready Hard Surfaces in Blender
Preparing hard surfaces for animation with optimized topology in Blender.
-
Symmetry for Hard Surfaces in Blender
Ensuring symmetrical perfection in hard surface models with Blender.
-
Detail with Shrinkwrap: Blender Modelling
Achieving intricate detailing with Blender’s Shrinkwrap modifier.