In Blender, we have various modes that we can use to edit our objects, one of which is edit mode. In this mode, we are able to select the geometry of the model including the vertices, edges, and faces. But what are the different methods that we can use for selecting geometry in Blender 3D?
To select your geometry, hit the tab key to enter edit mode, then select your geometry as she would select an object. By pressing one, two, or three on your keyboard, you can switch between vertex select, edge select, and face select to vary what types of geometry you want to be able to select and use.
The ability to select your individual pieces of geometry is perhaps one of the most important skills for any 3D artist, as you will not be able to do much with your models if you are unable to select them. Their various parts. So let’s take a look at some of the various means of selecting our geometry in edit mode.
The Basics Of Selecting Geometry In Edit Mode
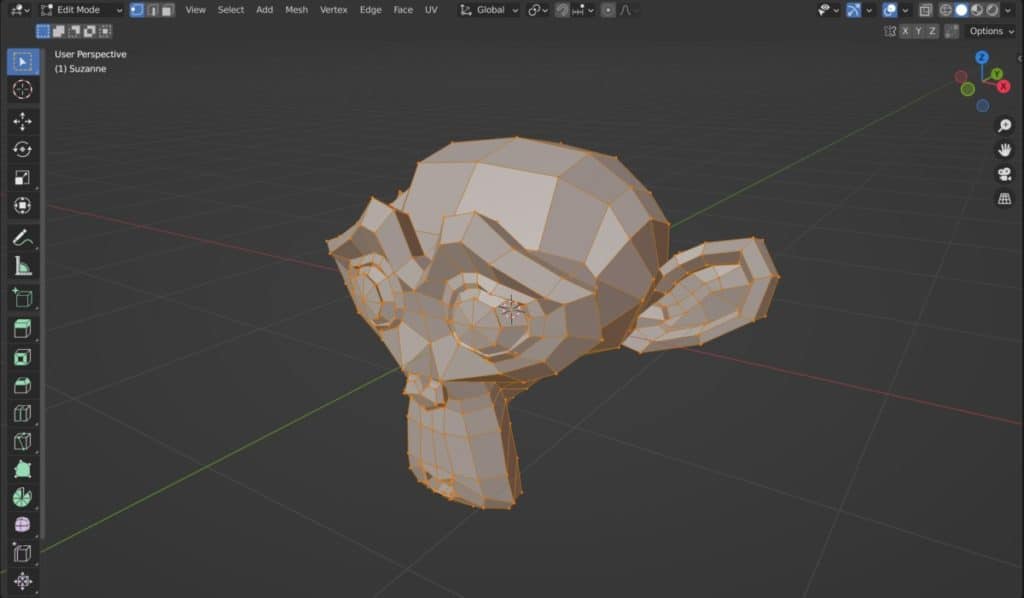
Selecting the geometry of an individual model is very similar to being able to select an entire object. You just use the left mouse button to select. Of course, in Object mode we are only able to select the objects as a whole, so we need to first select the objects that we want to edit and then hit the TAB key to transition into edit mode.
When you transition into edit mode, your geometry should already be highlighted if you added your object into the viewport. A vertex is a point on your model is used to construct the various edges which are the lines in between each vertex.
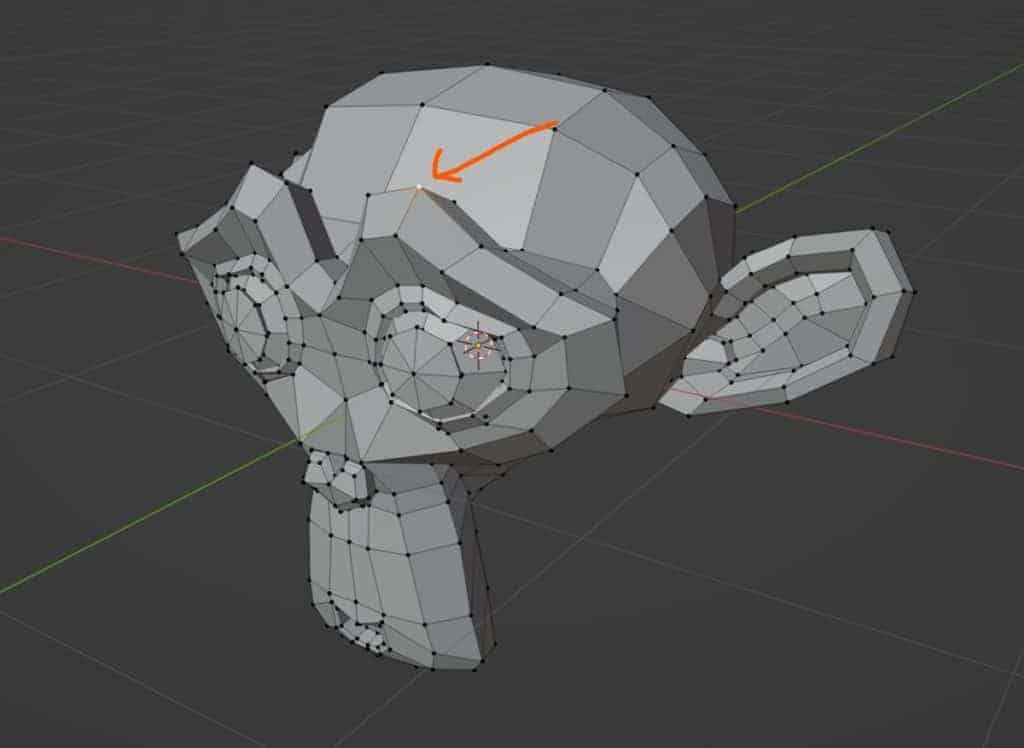
The flat areas meanwhile are the third type of geometry on your model. and these are the faces. So you have the vertices that make up the edges, and the edges that make up the faces.
If you left-click on a vertex, you will be able to select it and the rest of your object will be unselected as a result.
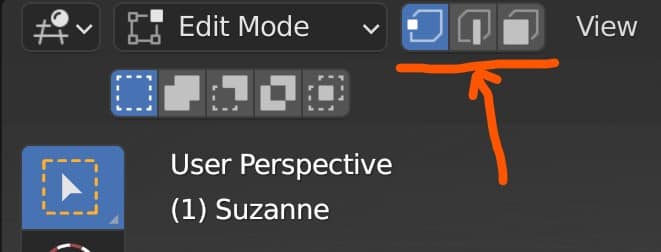
If you want to select edges instead, then you can go up to the header menu of the 3D viewport and locate three buttons close to the mode selection menu. The first of these three buttons will be highlighted blue and indicate vertex select mode.
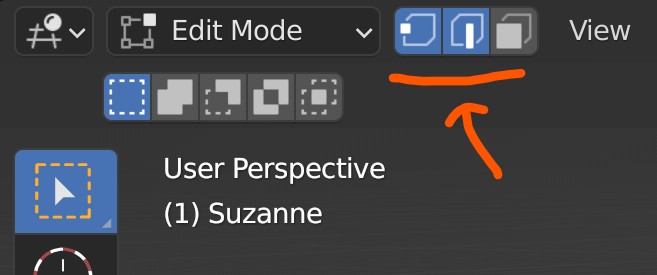
The second button indicates the edge select tool, so left-click on this button to be able to select your edges. And then the third button represents face selection which will allow you to select the individual faces on your model.
Alternatively, you can also use the 1, 2, and 3 keys on your keyboard to switch between these methods of selection.
If you want to be able to select multiple types of geometry at the same time, however, then you can do this by holding down the shift key and then press either 1, 2, or 3 on your keyboard to add or detract them from your selection.
For example, if you are currently on Vertex select mode and then you press Shift + 2. Then Edge selects mode will also be highlighted, allowing you to select both vertices and edges.
How To Select More Than One Vertex, Edge, Or Face?
There are going to be many situations where you are going to be required to select more than one vertex, edge, or face. So you need to know exactly how to select multiple vertices, edges, or faces in order to successfully edit them.
For example, let’s say on a UV sphere we wanted to delete the middle ring or edges. To do this, we would need to be able to select that entire ring, or loop, in one go. For this, we can use the secondary keys, which on a windows device are the shift, control, and alt keys.
If you hold down the shift key, for example, you can select multiple vertices, edges, or faces one by one. So select your first piece of geometry, then hold down the shift key and select the second.
The control key is the second of these three keys, and it allows you in terms of mesh selection to select a path of geometry by defining a start and endpoint.
For example, if you select one vertex on a UV sphere and then select a second vertex on your UV sphere that is far enough apart, then with the control key, you can actually create a path selection. You can do this multiple times to create more complex paths as seen below.
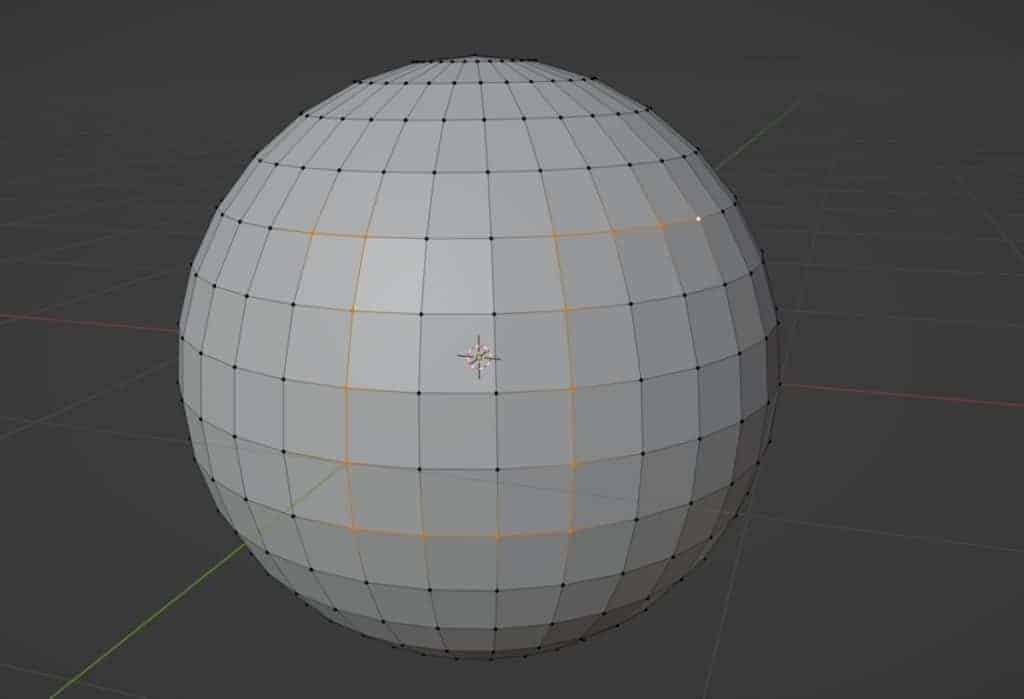
So you would select your first vertex, and then hold down control and press the second vertex, and not only with those two vertices be selected, but a selected path would be created to join them together.
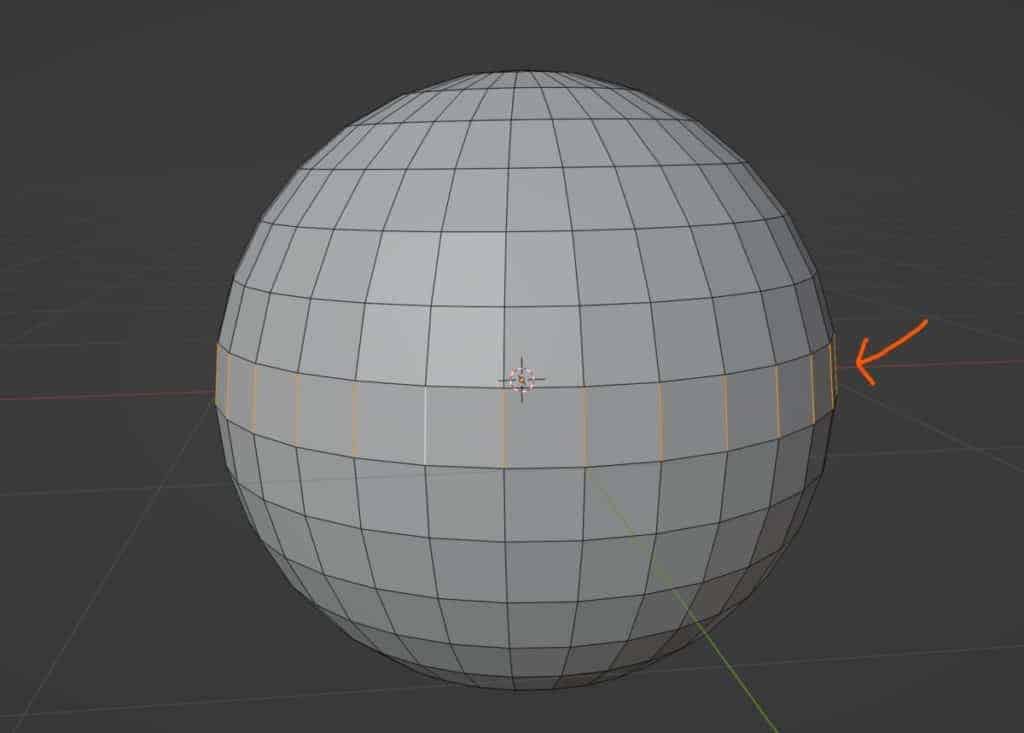
Third, we have the Alt key which in terms of our geometry would allow us to select either rings or loops. In the case of a UV sphere, if we hold down our alt key and then left-click on our edge.
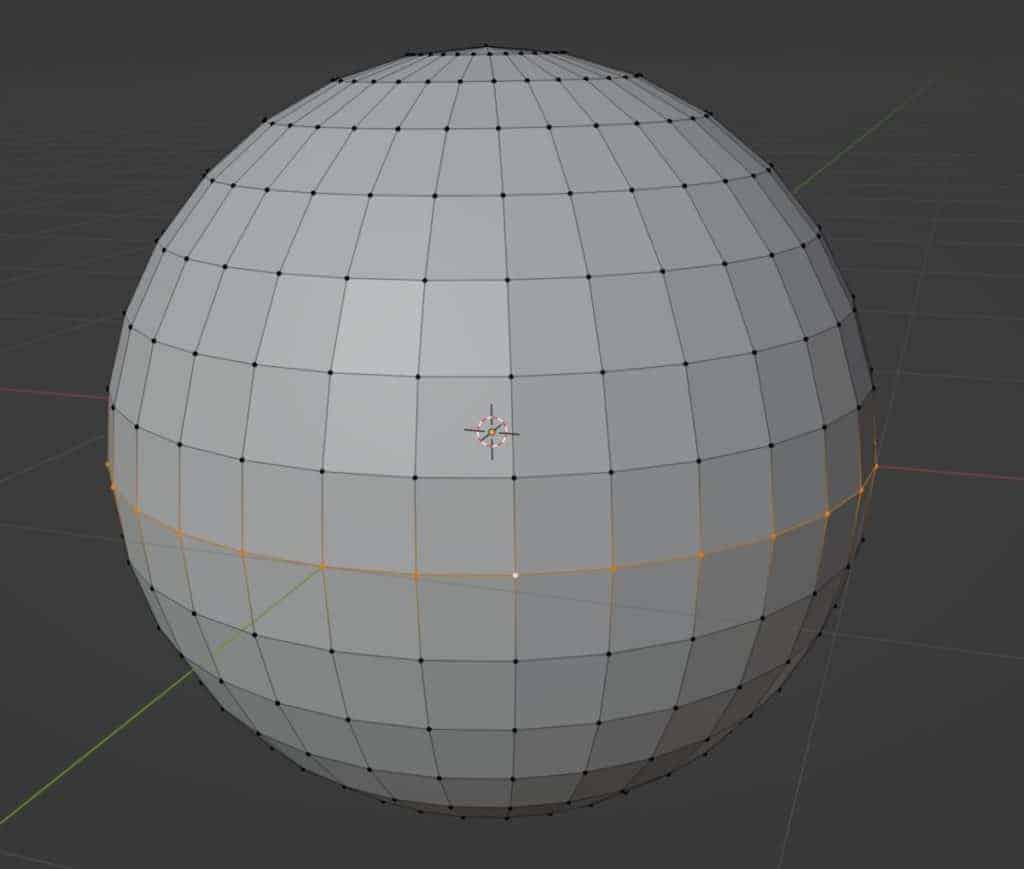
We not only select that edge, but also any edges that are connected to it that form an edge loop. Now that we have the loop selected, we can press the X key and delete that loop.

Selecting An Entire Model Of Your Object With Box, Circle, And Lasso Select
The secondary keys are normally used if you want to select specific geometry and want to maintain control. But if you are looking at a much faster way of selecting a large area of your mesh then you can try using the box, circle, and lasso select tools.
These tools can be found on the tool shelf, which is located on the side of the 3D viewport. If you cannot see the tool shelf, then you will want to press the T key on your keyboard to bring it into view. By default, however, the tool shelf should always be in view.
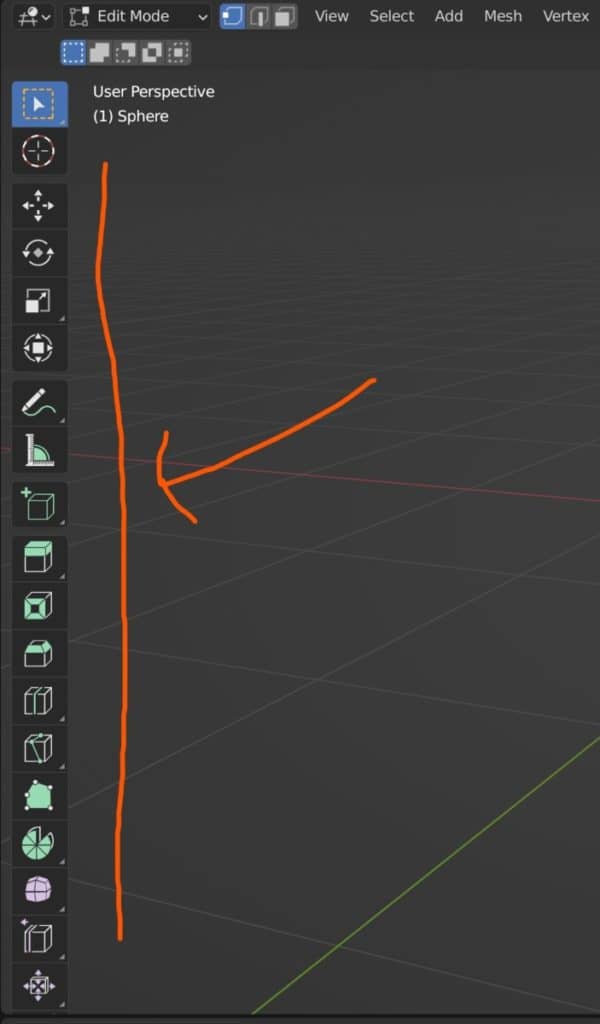
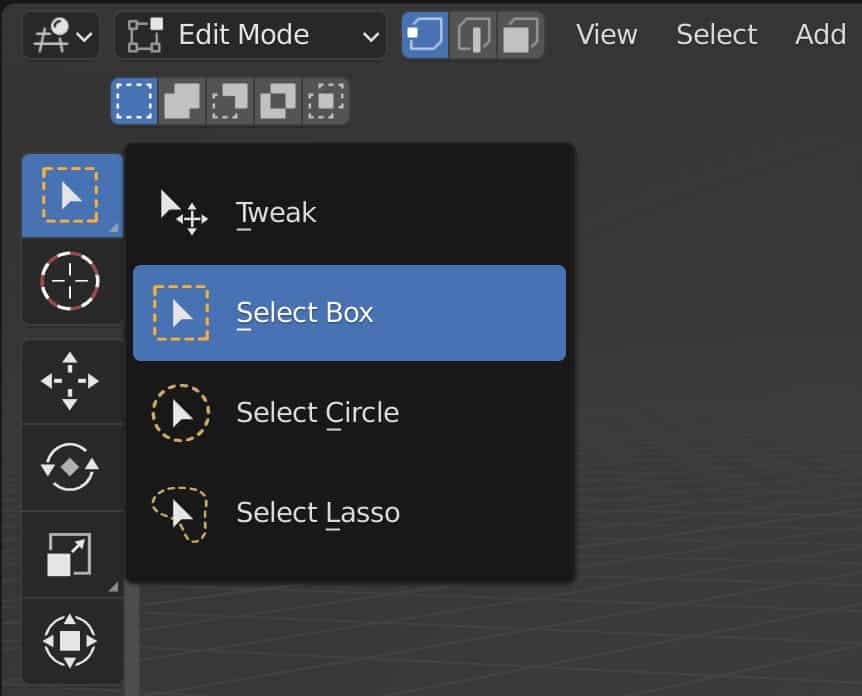
The very first icon that you will see in the tool shelf is going to be the selection icon. Left-click on this first button and hold. You will see a menu for the various methods of selection including box select, circle select, and lasso select.
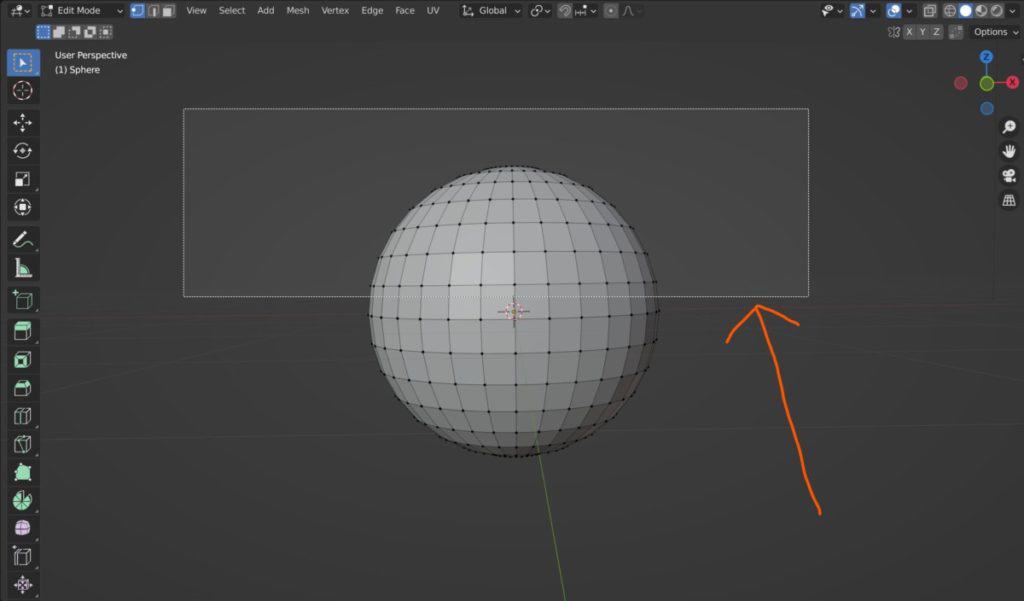
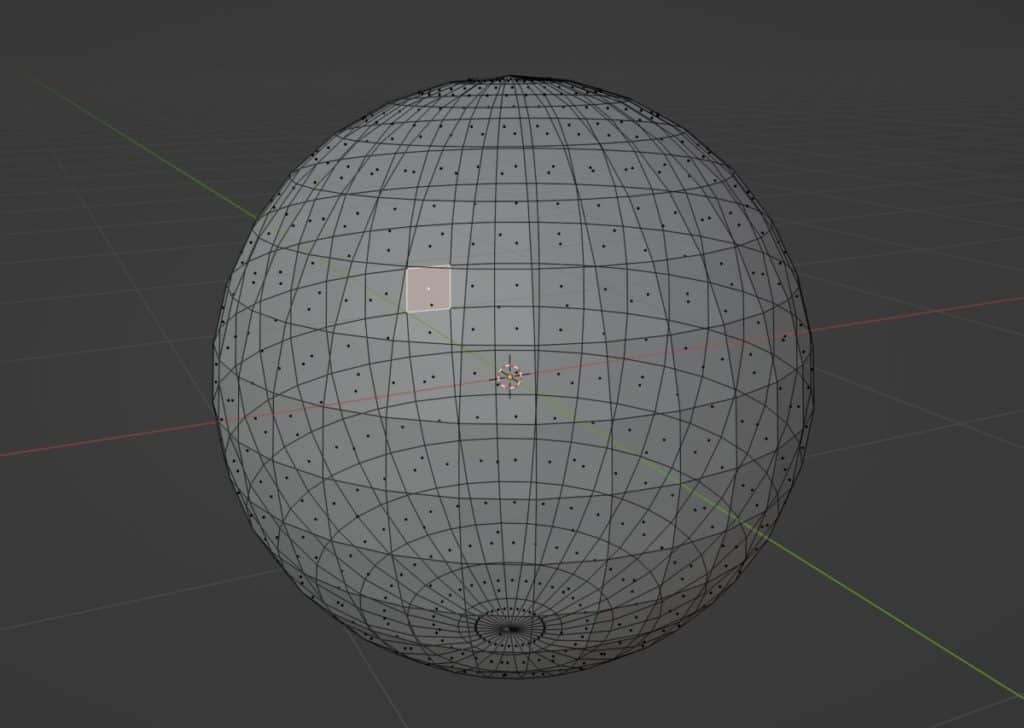
By default, we are currently on box select. If you hover over to your viewport you can left-click and drag your mouse cursor. This will create a white box that indicates your box selection. When you release the left mouse button, the box disappears and any geometry located within the box that you created will be selected.
If you want to use a hotkey to activate the box tool then you can use the B key on your keyboard.
The second option here is to use the circle select tool, so left-click and hold on the icon in the tool shelf and then choose circle select from the menu. With this tool, you will notice a small white circle hovering around your cursor.

You can then click and drag anywhere in your viewport to begin selecting your vertices, edges, and faces manually.
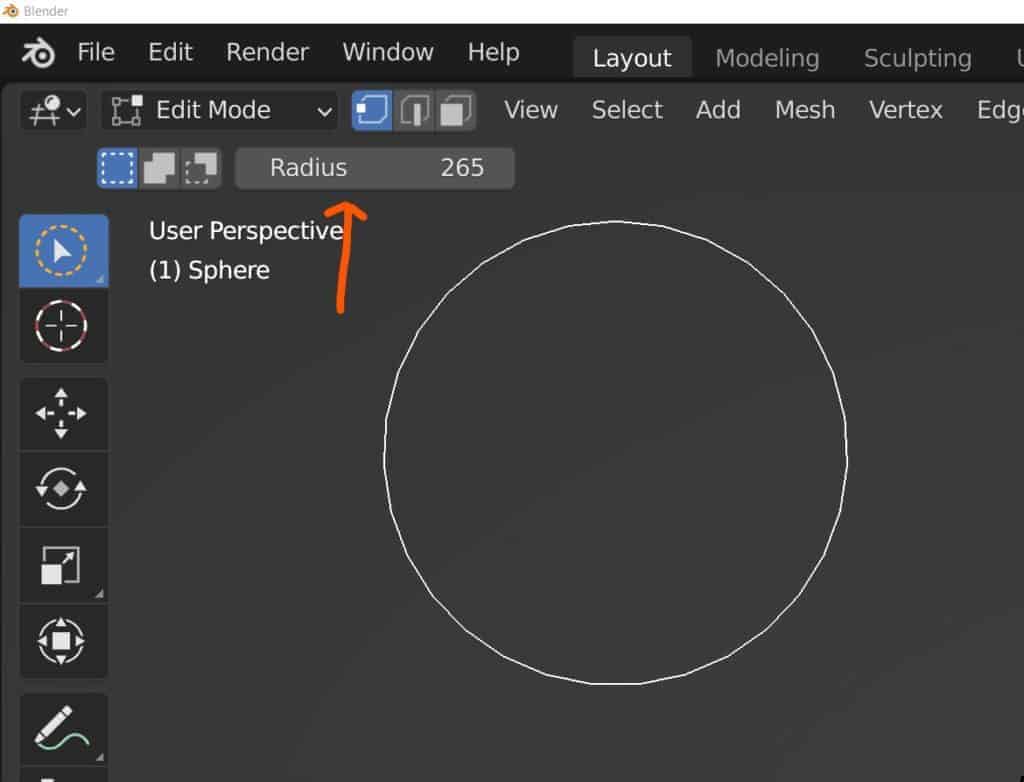
If you think the circle is a bit small for your selection, then go up to the header menu of the 3D viewport. You will see the option to adjust the circle radius. Increase this value to increase the size of the circle.
The last of these three options is the lasso select tool, which is found at the bottom of the list for our tool on the tool shelf.
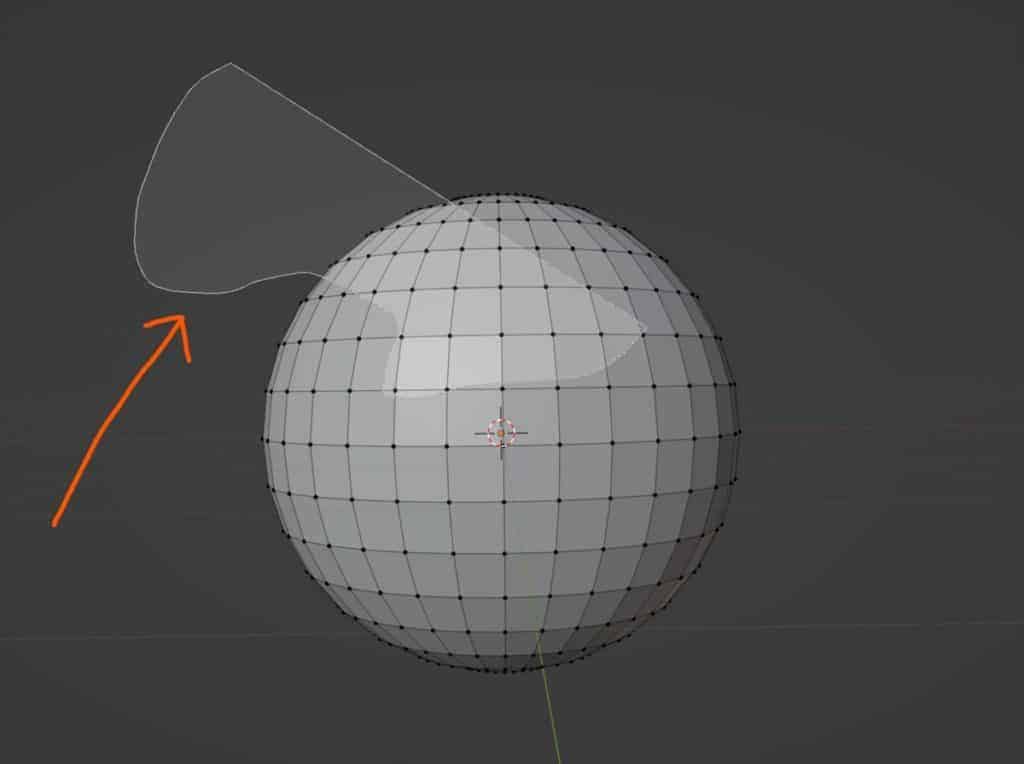
This works in a similar manner to the box select tool where we just click and drag to create the shape. The key difference here is that the box select tool will always create a box shape. The Lasso Select tool allows us to create a customized shape for our selection.
As a result, the Lasso Select tool is not used as often as the other 2 tools for selecting a lot of geometry at once mainly because it is a bit more difficult to use than the other two.
What Are Some Of The More Advanced Methods Of Selection That You May Not Know About?
The ability to select your geometry on your 3D models is a crucial ability to have for any 3D artist. Blender recognizes this and offers many other ways of being able to select your geometry. In Edit mode, go to the select menu located in the header bar of the 3D viewport and left-click.
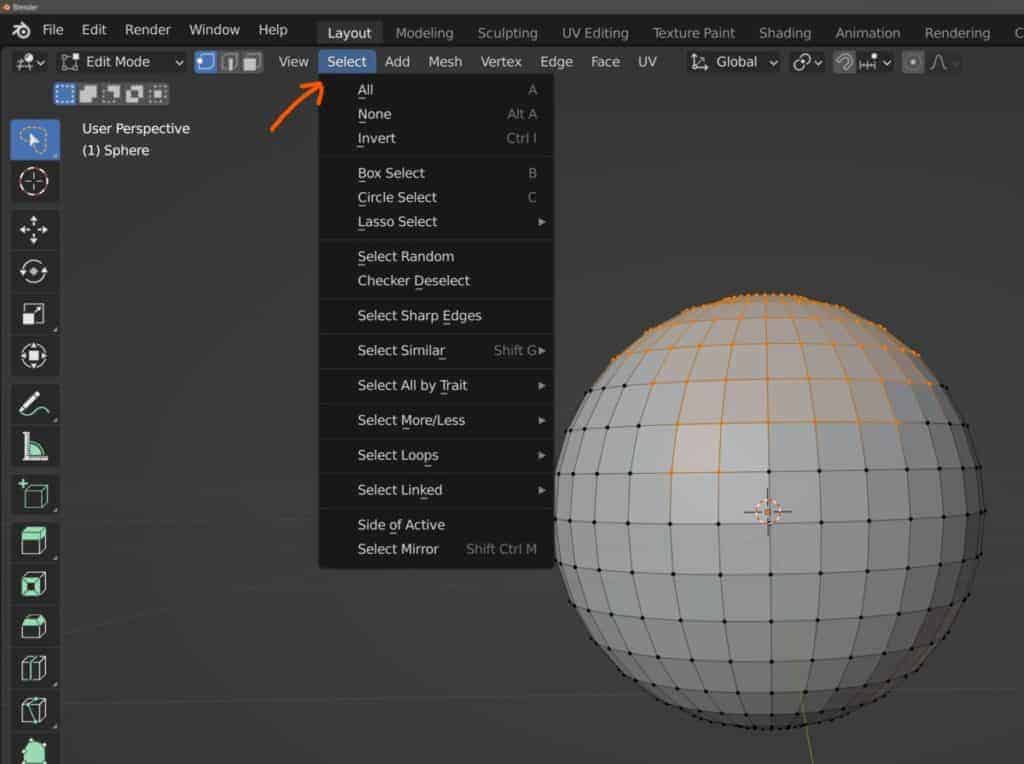
You will see that there are many other ways in which we can select the models’ geometry. For example, we are able to select all of the vertices on our model at the same time by pressing the ‘All’ option, or by using the A hotkey. Alternatively, we can deselect all of the geometry on our model by selecting either than none option from this menu or by using the hotkey Alt + A.
There are some scenarios where you want to select the majority of your object, but you may not be able to do so very easily. Instead, what you can do is select the area that you don’t want to edit first, and then use the invert selection option to reverse the geometry that you have selected. You can do this via the select menu or by using the Control + I hotkey.
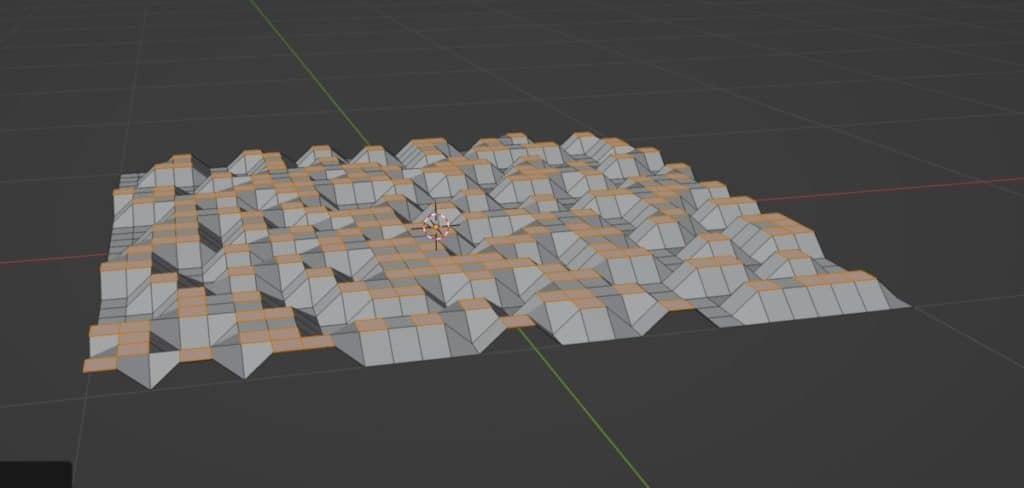
If you were looking to create a randomized selection, for example, if you were creating a mountain range landscape and you needed to select your geometry at random, then you can choose the random select option from the add menu.
If you wanted to select based on a specific pattern, such as selecting two vertices and then having one unselected, then you could select a loop of vertices and then use the checker deselect option to define which of those vertices remain selected, and which of them are unselected?
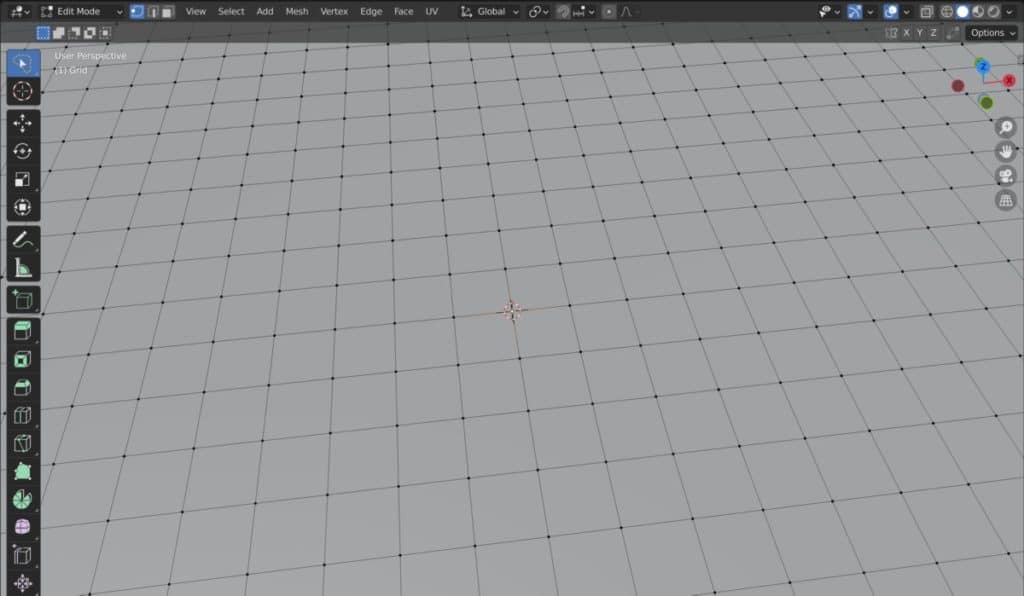
The select more/less options will allow you to have more control over your selected geometry based on the points of your initial selection. For example, if you select a single vertex and then use these select tools, then all of the vertices that are directly connected to that selection will be selected as well.
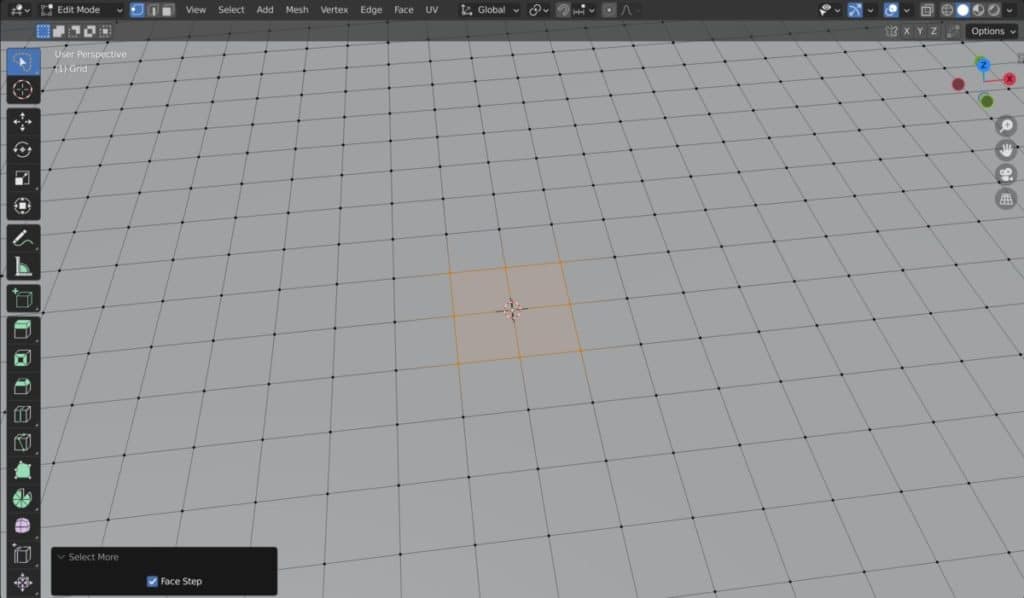
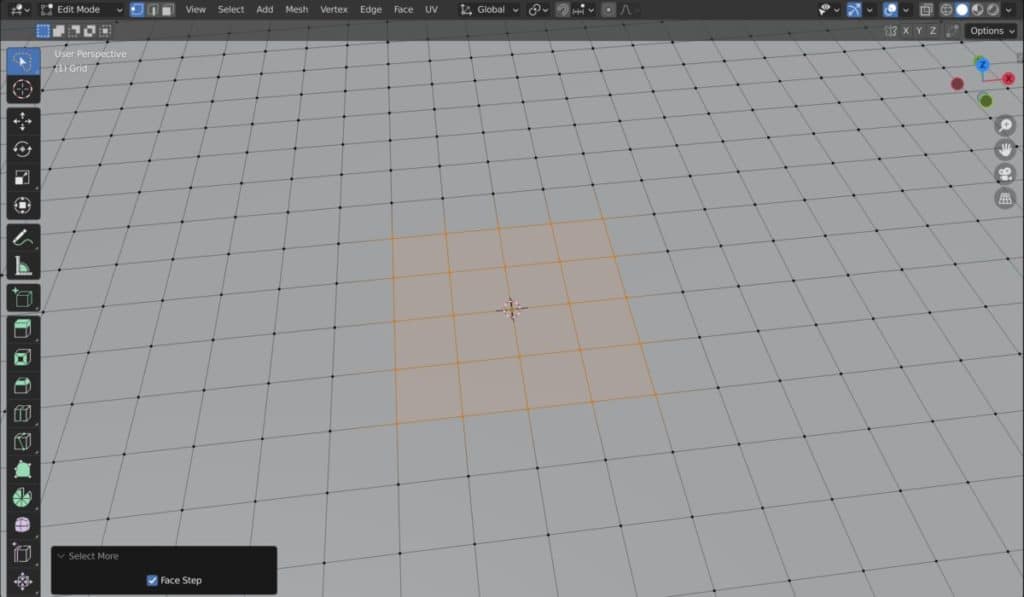
Each time you use the select more option, the area of your selection will increase. The alternative is true for the select less option. With these two tools, you can control your selections from a single point.
Another method of selection that you can use is the ability to select edge rings instead of edge loops. An edge ring is a series of edges that loop around your model, but they’re not directly connected. So for example in the case of a subdivided cube which we can see below, we have a lot of geometry.
If I use the typical Alt + left-click tool to select a loop, then the loop is going to be selected. However, if I was to hold down the control key, then hold down the Alt key, and then left-click on the same edge, Blender will select an edge ring instead, as seen below.
Finally, you have the ability to select your geometry based on certain attributes. These attributes can be things like sharing the same length or distance between them.
They can also be traits like whether or not that geometry is non-manifold. This is actually a useful tool if you want to select geometry that you want to get rid of. In the case of non-manifold geometry, which should not exist for many models, you can use this tool to select that geometry and then delete it.
As a quick bonus tip, if you want to be able to select geometry through your model without having to orbit around it all the time, then there is an option called the XRAY tool.
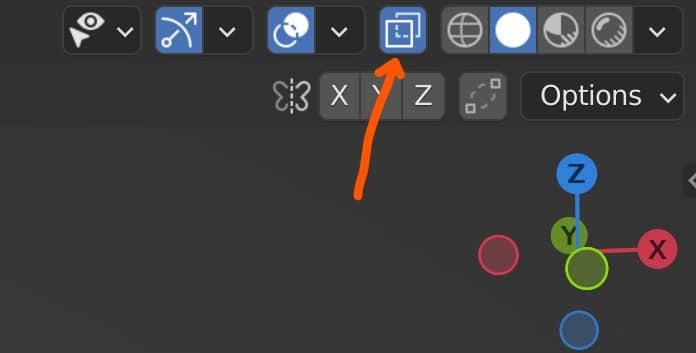
If you go to the top corner of your 3D viewport where you find the different viewport methods, then you will notice that there is another icon that is located on its own just to the side. It looks like 2 squares.
Left-click on this icon to activate the Xray tool and you will be able to see through your model and select geometry on the other side.
Alternatively, you could also just use the wireframe method for your viewport to be able to see through your model, as the wireframe method will basically hide all of your faces. Of course, because of this, using the wireframe method will make it more difficult to actually select the faces, if that’s the geometry that you’re working with.
Being Able To Select Geometry On Multiple Objects At The Same Time
Not only are you able to select and edit a single object, but you are also able to edit multiple objects at the same time.
When you select a single object, for example, and then hit the TAB key to go into edit mode, you will be able to view the geometry of that object, but you will not be able to edit the geometry of any of the other objects in the viewport.
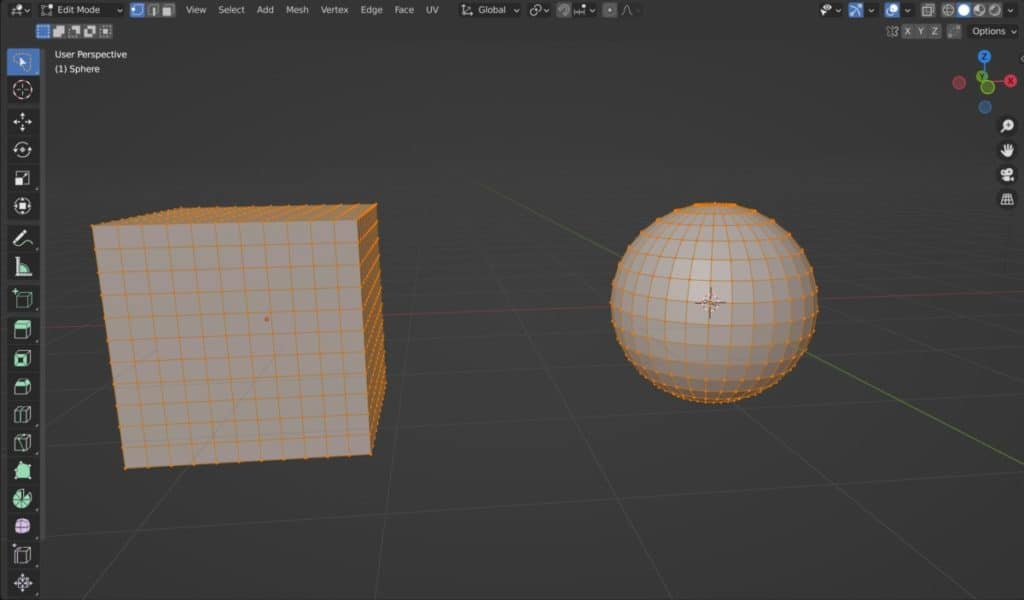
However, if you were to select multiple objects in object mode first and then hit the TAB key to enter edit mode, you would then enter edit mode for all of your selected objects.
For example, if we select both a cube and the UV sphere and then hit the TAB key, we will be able to both see and edit the geometry of both objects. There are no limits to the number of objects that we can edit at the same time apart from the impact that it may have on your system memory.
Thanks For Reading The Article
We appreciate you taking the time to read through the article and we hope that you have been able to locate the information that you were looking for. Below we have compiled a list of additional topics that are available for you to view and learn more about Blender.
- The Best Method For Improving Your Skills In Blender Is…
- The Difference Between Subdivision Surface And Multiresolution Modifier
- The Main Purpose Of The Mark Sharp Tool And How It Works
- What Are Normals In 3D Modeling?
- Is Blender Safe To Download Or Is It A Virus?
-
Custom Normals: Blender Hard Surface Tip
Enhancing hard surface models with custom normals for realism.
-
Align Perfectly with Blender’s Snap Tools
Aligning objects perfectly with Blender’s advanced Snap tools.