When it finally comes to rendering your scene, you may often find that the result isn’t as clean as you would like it to be. There are several reasons as to why this may be the case, and there are also several solutions. One powerful solution is to use a tool known as image denoising to reduce the amount of grain in your image.
To enable the denoising tool for your image renders, go to the render tab in the properties panel. In the sampling section, you can tick a box that enables image denoising for any renders. You also have the ability to enable and disable image denoising for the viewport as well.
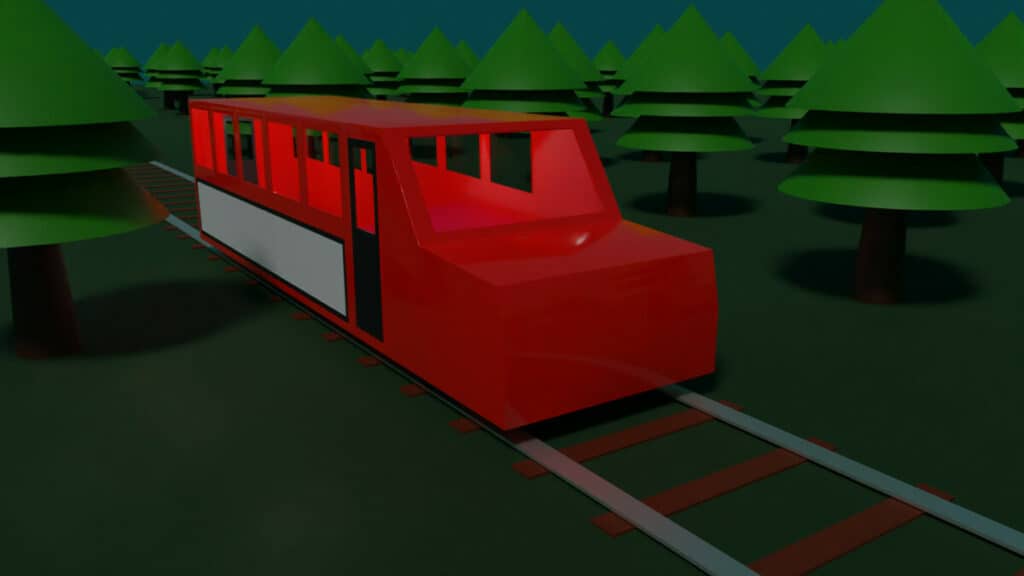
Image denoising is a fast and simple solution for clearing up grainy and pixelated images in Blender. Allowing you to preserve the clarity that your scenes require without boosting the sample count too high.
Why Is My Image Grainy?
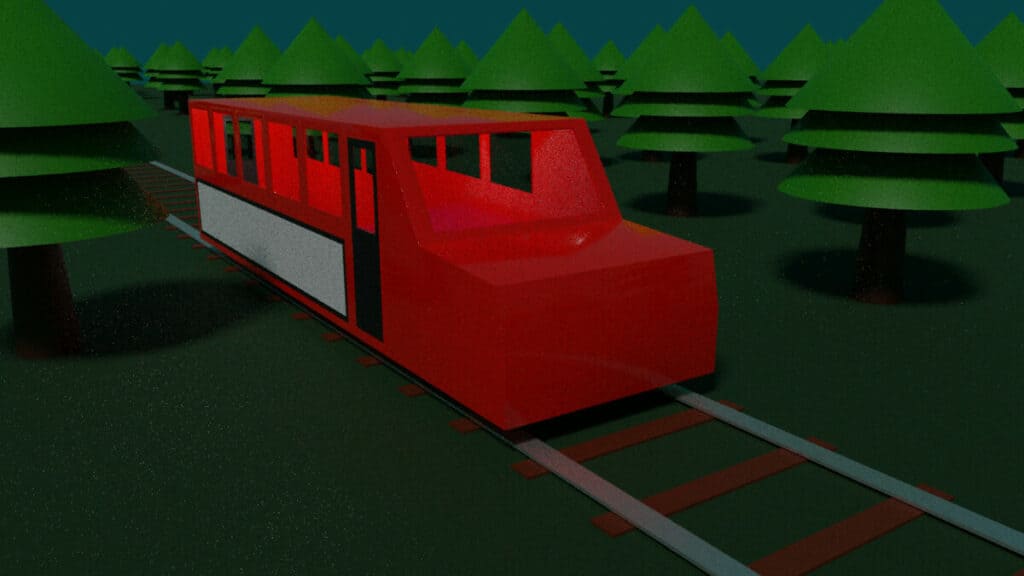
When using these cycles render engine, there may be times when your renders don’t finish off how they should. Instead of a clear image where all details are visible, you can sometimes be left with a grainy mess with a tonne of noise that prevents you from seeing all the details on your final render.
There are several reasons for this. One such reason could be that you require more light paths within your scene using specific materials such as glass. The materials and lighting you choose for your scenes can strongly impact the requirements of the overall render.
Another reason your image may appear grainy could be a low sample count or a height noise threshold.
When using cycle X, it’s a general rule of thumb that the more samples you allow for your image and per pixel, the clearer the final result will be.
Therefore, one solution to solving grainy images is just to increase the sample count for your renders, which can be done in the render tab of the properties panel.
However, the downside to this is the number of samples you determined to be your max sample count for your image will also heavily influence the amount of time it takes the image to render.
Using The Noise Threshold
A new option when it comes to improving your renders in cycles ex is to lower the noise threshold. This imposes a limit per pixel on the number of samples that can be used to clear up noise and is generally an estimation tool but is very effective at preventing Blender from using too many samples in areas where the image has already reached its best state.
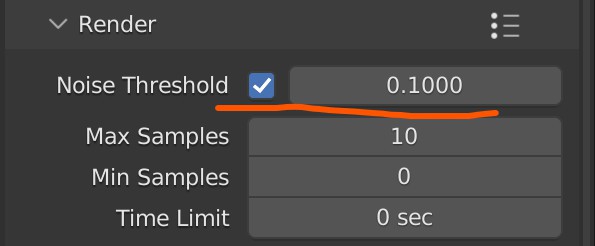
Manipulating this value is the reverse of manipulating the sample counts. Basically, the lower the noise threshold, the more time will be taken to clear up noisy pixels in your image, and the higher the value, the quicker the samples will move on to the next part.
Why Is Image Denoising So Powerful?
Image denoising has taken on several different forms in Blender 3D already. It started out as a node in the compositor.
Here you would render your image as usual, and if the results of the image had any amount of grain or noise in it, you would send it to the compositor and use the denoise node to clean up the image after it had been rendered, and then save your composited result.
Over time though, denoising has been introduced in other areas of Blender as well, including in the render properties tab. With denoising, Blender can clean up your images after calculating the samples.
The most significant advantage to using image denoising is that it can clean up images even when they use low sample counts. So if used correctly, image denoising can significantly reduce your render time while maintaining really clean results.
The Downside Of Image Denoising
There is a slight drawback to using the denoising tool, which makes it more apparent when using very low sample counts. The denoising tool will take the image it receives after the samples have been calculated, and then it will use whatever data is there to clean up the image.
This means that the less information the denoiser has, the lower the quality of the result. So if you were to use a deficient number of samples that would significantly limit the amount of detail visible in the image, then the denoiser, while able to create the general shapes, may not be able to read the finer details.
It is therefore recommended to still use a moderate sample count and a decent noise threshold level for the image denoiser to function correctly without losing detail.
Using The Denoiser
To activate the denoising tool for your renders, go to the properties panel and then go to the render tab. You will find the denoising tool located in the sample setting.
Note that this is only true for the Cycles X render engine and does not apply if you use Eevee. Nor is image denoising required because Eevee is a rasterized engine rather than a path tracer.
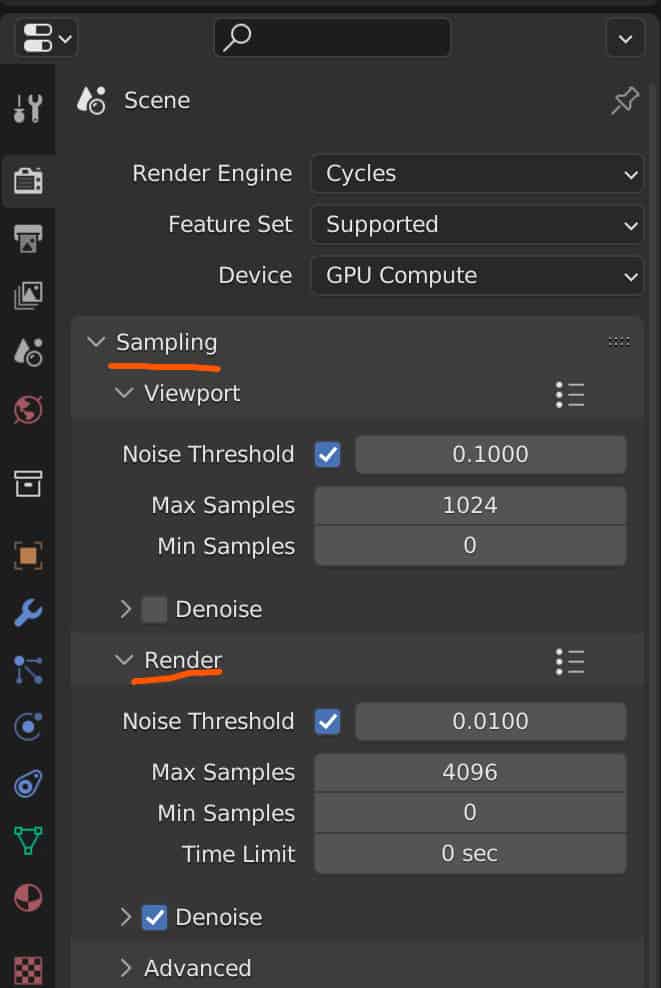
The sample section will be split up into two sub-sections. The first will be for the 3D viewport and the second for rendering.
Image denoising should be on by default with your 3D viewport. However, it’s going to be ticked off for your renders. Tick the box to enable image denoising, but we’re not finished.
Click on the arrow next to the tick box, and it will open up a small menu with a few settings for your denoiser.
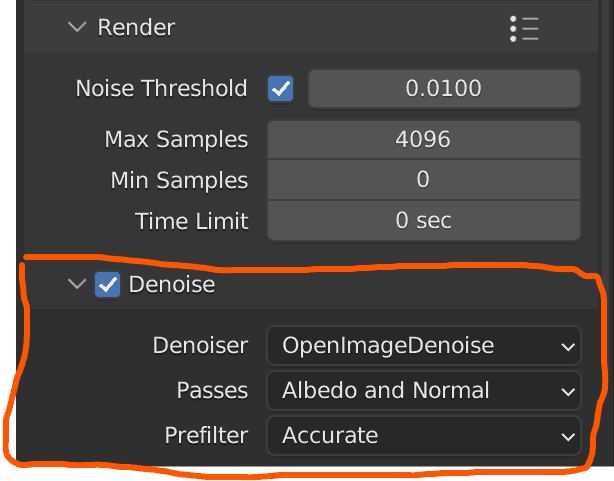
The noise option is the most important of these settings, which defines the denoising method based on your hardware.
The options here may change depending on the hardware that you are using. For example, my device has two options. Open image denoising is the Intel-based denoiser. Meanwhile, Optix is used with NVIDIA RTX graphics cards.
In many use cases, the differences between these different methods or negligible. However, sometimes one may yield a cleaner result than the other or maintain more of the fine details. Optix yields slightly better results than the open image denoise tool in our use case.
The passes option determines what type of information will be calculated by the denoiser. By default, this will be set to albedo and normal and, in most cases, should be kept on this option.
If you use the open image denoiser, you will also have access to the pre-filter option. If you have also set your passes value to calculate both the albedo map and the normal data of your image, then you can determine whether or not she wants your prefilter to denoise faster or more accurately.
While image denoising does take a small amount of time, it’s inconsequential compared to the total amount of time it couldn’t take an image to render, so it’s recommended here to keep this set for the correct setting.
Thanks For Reading
We appreciate you taking the time to read through this article, and we hope you found the information you were looking for. If you are interested in learning more about Blender and how we can use tools such as the image denoiser, then take a look at some of the other articles we have listed below.
- How To Maximize The Quality Of My Renders
- Why Does My Rendered Image Look Pixelated
- What Is A Render Farm And How Does It Work
- Why Is Blender Not Able To Complete My Renders
- How To Render An Animation In Blender 3D