Whenever we begin a 3D modeling project, we start off by gaining reference material that we can use to help with the design process. One way of importing your reference material is to bring it into your image editor, away from the 3D viewport.
To use the image at its heart for your reference material, create a new panel within your workspace and set it to the image editor. Then press the open button in the image editor header bar to bring up the file browser. Locate the image that you want to use as reference, select it and then load that image into your image editor.
Suppose the primary purpose of an image is simply to act as reference material. In that case, it may be a cleaner solution to use that reference material within your image editor instead of justice, having it as yet another object in your 3D scene.
Why Would We Want To Use Reference Material?
Regardless of whether or not you are a new 3D artist or if you have been using blender for many years and have a tonne of experience. There will always be a case for using reference material in your 3D modeling projects.
It’s very easy to fall into the trap of thinking you know exactly what an object looks like. But that’s not how our brains work. Our brains will remember basic shapes and forms.
We understand precisely what our objects are supposed to look like and why, but our brains don’t calculate the specific dimensions of these objects.
Take human characters, for example. We all know what a human looks like. Still, if we attempted to create a human model in Blender without any actual reference material, we would get plenty of things wrong, such as anatomy, stance, positioning, etc.
Reference material will always be important to you as an artist because it provides that visual stimulation of the design to your brain as you work out the various shapes and intricacies of your model.
In short, it doesn’t matter how long you’ve been using Blender, you always want to use some form of reference material for your modeling.
Why Add A Reference Material To The Image Editor?
There are a couple of ways in which we can bring in reference material to use with the blender software. The first method that you learn is likely to add an image object into the 3D viewport.
This image object type can be in the form of Eva, a reference image, or a background image. The difference between the two is just a matter of how the options are set. But the general idea is to add them to your viewports and position them in 3D space to use as a form of reference or as a guide to creating your model.
The alternative here is to add your reference material to another editor, specifically the image editor. You may want to do this if you try to keep your 3D viewports relatively clear of any clutter while creating your models.
How To Add A Reference Image To Your Image Editor?
The first step is going to be to change your layout workspace so that you can include the image editor for reference. You can even change one of the other editors to the image editor panel by going to the top corner all that panel and selecting the menu for editor types.
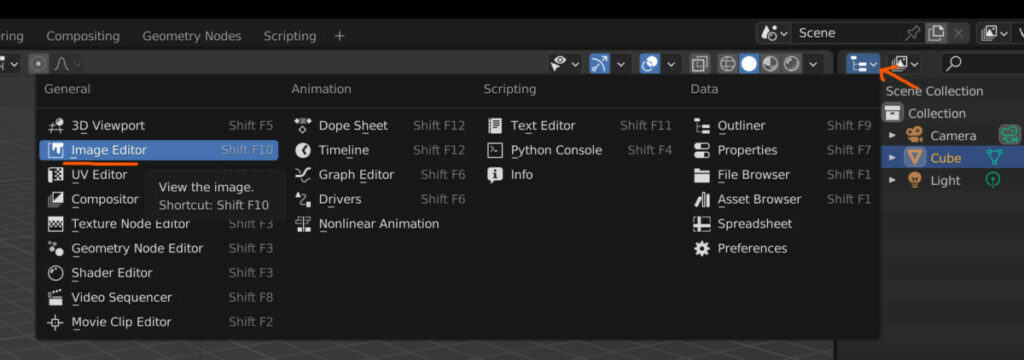
From this menu, you would locate the image editor and select it so that the panel changes to that image editor.
Alternatively, you could divide up one of your existing panels to create an additional one and then change this duplicated panel into an image editor using the same method of going to the editor type menu.
Another thing to note here regarding the image editor is that every instance of the image editor you create in your layout can open a separate image.
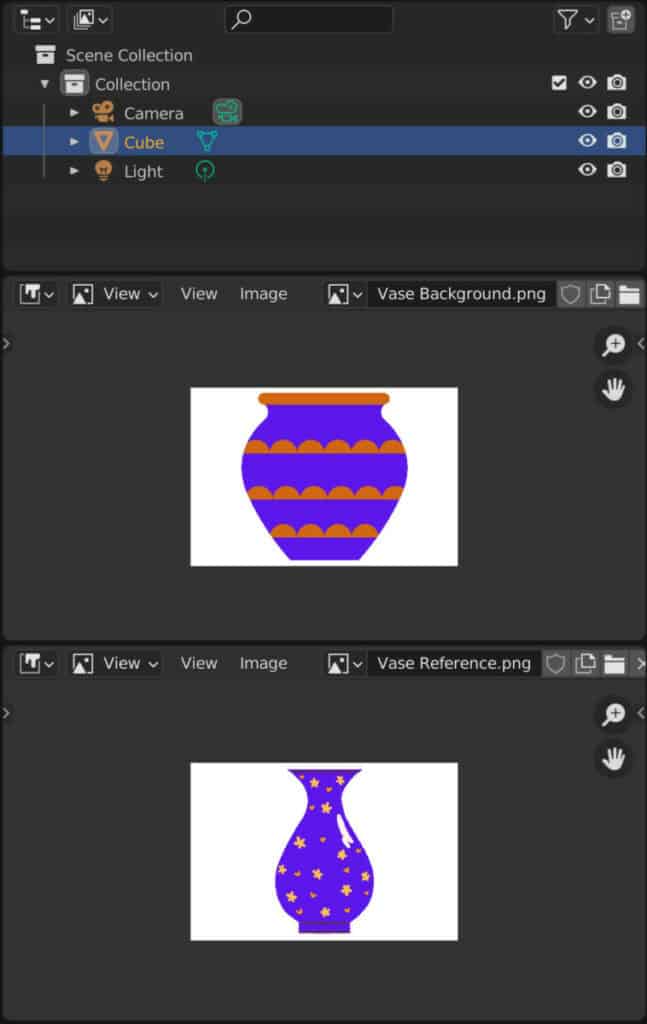
Therefore, if you have enough real estate on screen to add in free image editor panels, you can open and view three separate images.
To add your image to the image editor, find the open button in the panels’ header bar. Do not select a new button, as this will simply create a blank image based on your designed parameters.
To add in the reference material, we need to use the open button to open up the file browser.
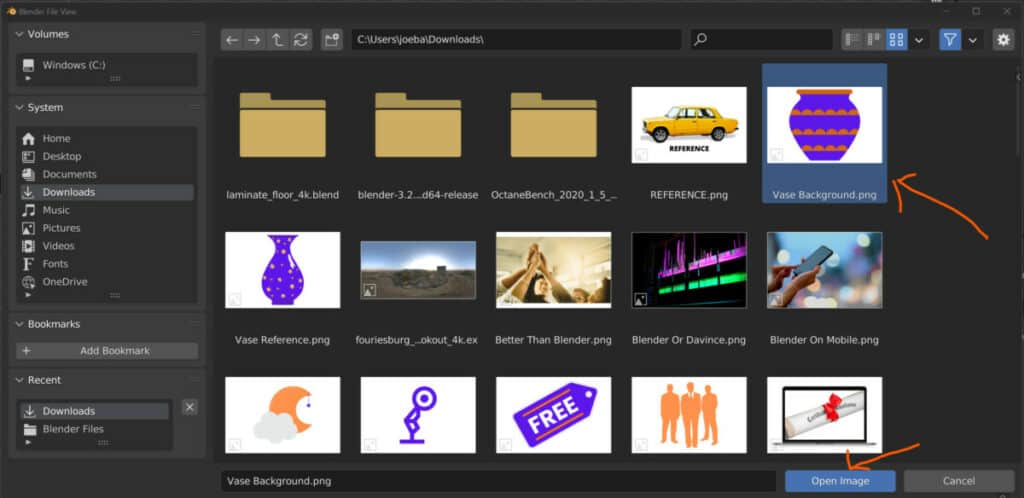
With the file browser open in a separate window, locates the image that we wish to load in as reference material. Select it and then click on the open image button, which should be highlighted blue in the bottom corner of the file browser.
Your reference material should now be visible within the image editor.
When Not To Use The Image Editor For Reference Material?
There will be some scenarios where you will still need to import your reference material directly into the viewport, for example, when you use it as a background image.
The standard way of using your reference material is to add it to the 3D viewport and use it to gain inspiration for your designs. However, you may want to take this a step further and use the image to create the basic shape.
This requires that you position the background image behind your model and then use either the wireframe or X-ray features to see through your model so that you can edit it while using the background image as the reference for where you position your geometry.
Of course, this is not possible if your reference material isn’t in the viewport, to begin with, which will be the case if you were to use the image editor. Therefore, we only use the image editor for the 3D modeling phase if we want to bring in our images as a reference and not as a direct guide.
Thanks For Reading
We appreciate you taking the time to read through this article, and we hope you found the information you were looking for. If you’re interested in learning more about using images as reference material in Blender, look at some of the related articles we have listed below.