Most tools, such as the object’s transforms, are often influenced by the object origin, which acts as the central coordinate of the object. But what if we wanted to manipulate multiple objects at the same time? Which origin point would be used to calculate the tool, and how can we change it?
The pivot point system is used to define how specific tools affect our models, particularly when the tool is affecting multiple objects simultaneously. For example, your choice of pivot point can change what your objects orbit around when using the rotate tool.
If you are manipulating a single 3D model, then the object origin will act as your pivot point, but when multiple objects are used, we need to change what we define as the pivot point for our selection.
Using The Object Origin As The Default Pivot Point
Many tools require us to use a point of reference so that they can be calculated, and this point of reference is typically known as the pivot point.
When manipulating a single object, for example the default pivot point will always be the object origin. The transforms are a vital example of the pivot point in effect.
When we attempt to rotate our model with the object origin at the center, the model rotates on all three axis without its location being significantly altered.
However, if we were to move the object origin outside of our 3D model, then rotating the model would see it orbit around the newly positioned object origin, as that counts as the default point of reference, or pivot point, for the rotate tool.
Displaying The Effect Of The Pivot Point To Rotation And Scale
To understand how the pivot point works, it is best to demonstrate the effect of the pivot point system on two axis rather than three.
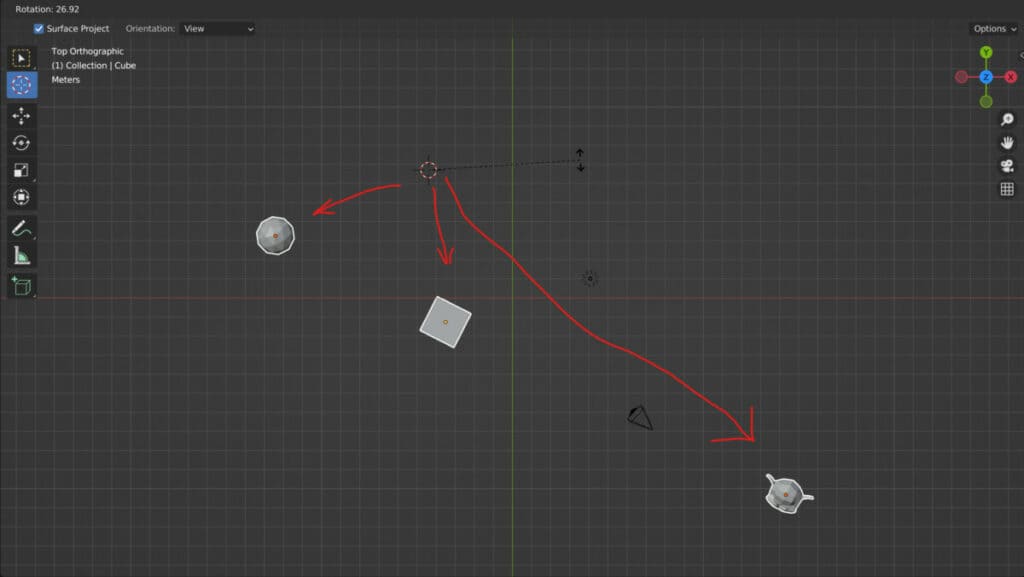
The example below shows three objects spaced equally apart on the X-axis. We are also viewing the objects from a top orthographic view so that the Z axis would not be accounted for when using tools like location, rotation, and scale.
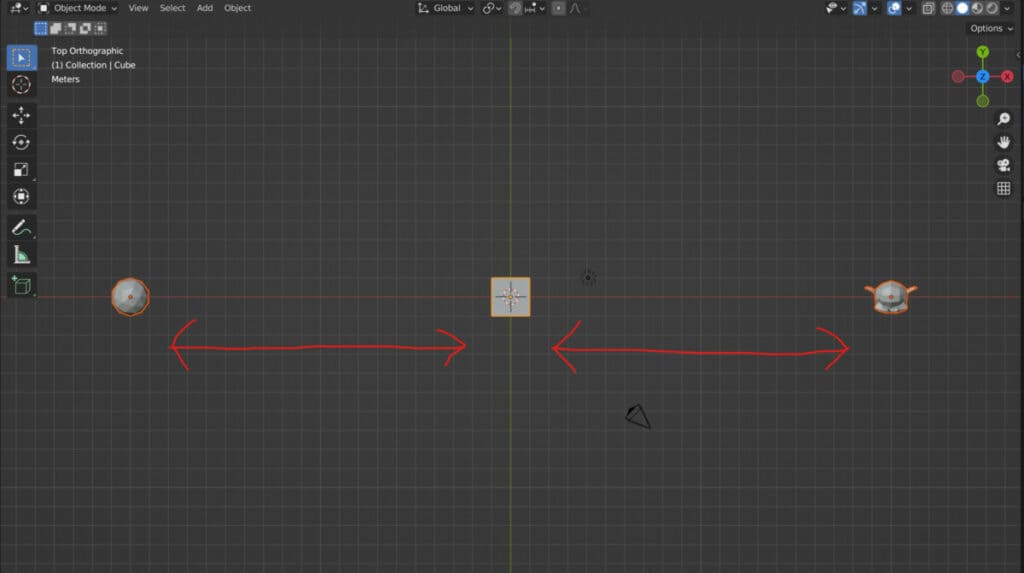
Selecting all three of our models we are able to grab, rotate and scale these objects at the same time. In the case of location, they are all manipulated in the same way based on their starting positioning.
However, when it comes to rotation, the objects behave slightly differently from each other. The model in the center rotates around its z-axis as usual, but the two side objects now orbit around the center.
The reason why is because we are manipulating multiple objects, we need to define the pivot point that they will rotate around since their own object origin is not the default.
The Median Point
If we take a look at the middle of the 3D viewport header bar, we will see a menu option with an icon that looks like two overlapping circles. Open this menu and you will see the different pivot points that we can access.
The fourth option on this list is the median point, and we will start with this one because it is the currently assigned pivot point in our scene.

The median point works by finding a middle value that acts as the average coordinate of all selected objects.
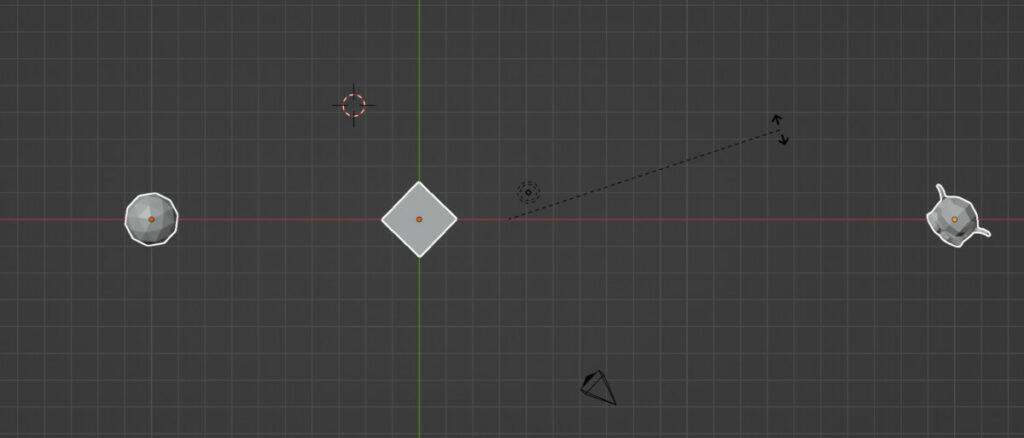
In our example, the three models are set to 0 on the Y axis and 0 on the Z axis, so the only axis to calculate here is the X.
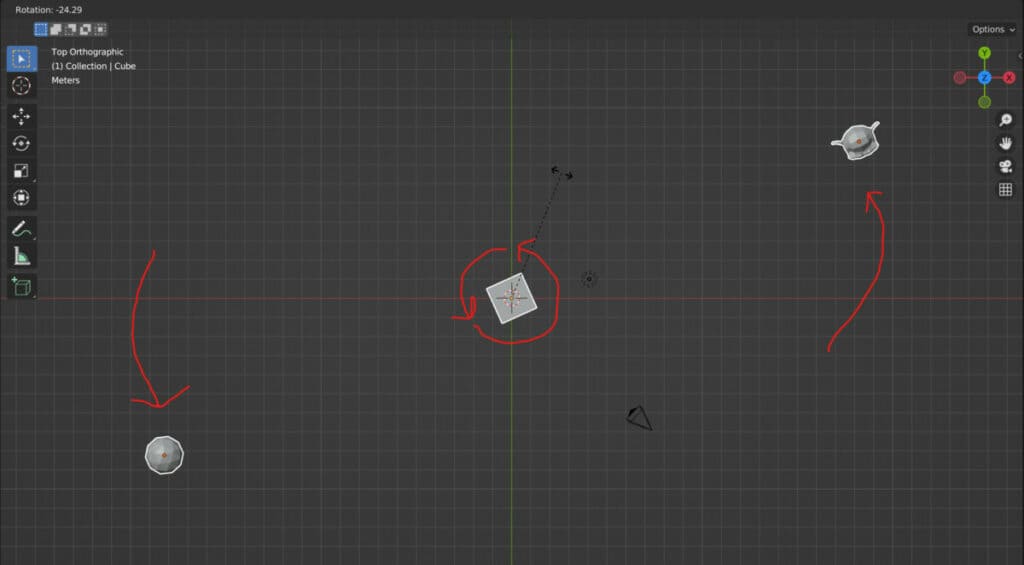
One object is set to -20, another is set to 0 and the third is set to 20. The median point is the average position of the three models, which is 0 on the X axis.
It, therefore, appears as though the two outside objects are rotating around the one in the center. However, this is not the case, if we move our first object from -20 to -10 on the X-axis, the objects rotate from a different point.
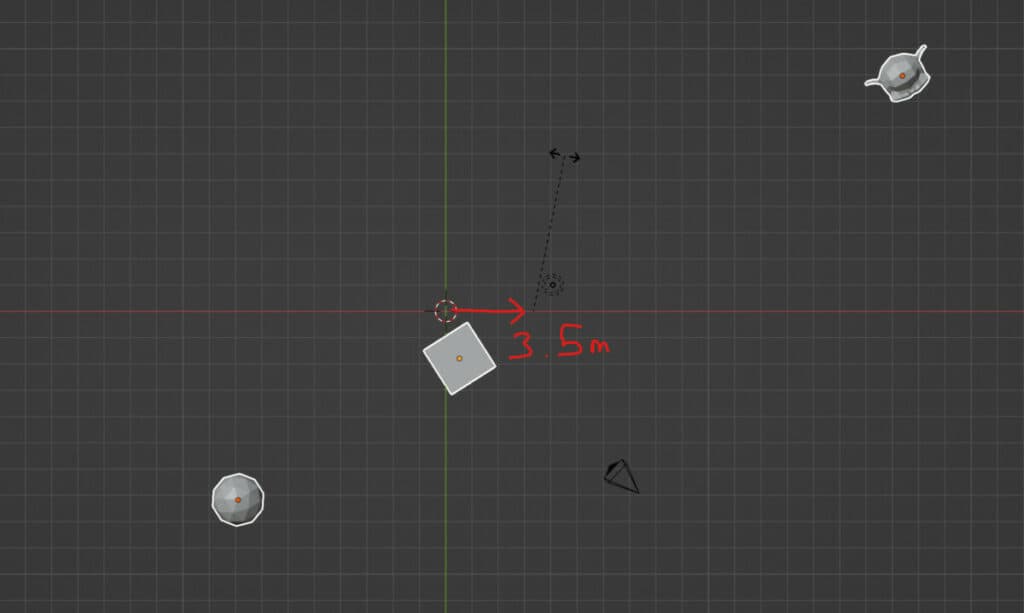
You may think that the average position here is going to be 5 on the X axis, as this is halfway between the two end objects.
However, if you use the Blender grid we can see that the actual location where the rotation occurs is set to 3.5 on the X axis.
This is because the average position of the three objects takes into account the individual values of each model and not just the two at the end.
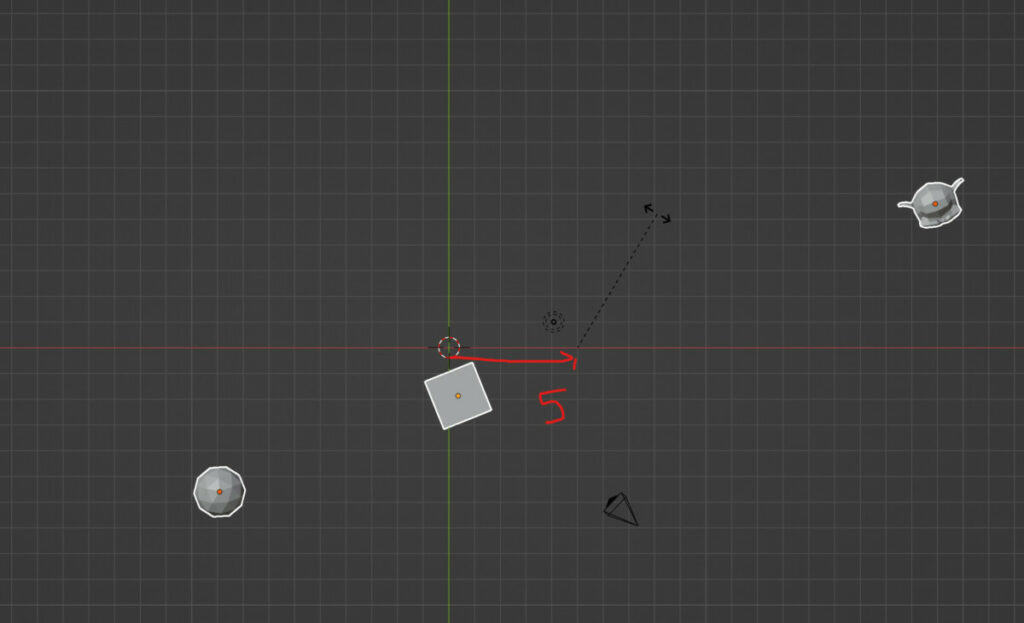
If you were to select only the two end objects then it would rotate at five and the X axis.
The Bounding Box Center
Let’s now take a look at some of the other options for how we can define the pivot point location. If we return to the pivot point menu, the first option on this list is for the bounding box center.
This works slightly differently from our original pivot point, which was the median. While the median point averages out the location of all the selected objects, the bounding box does not.
Instead, the bounding box while creates an invisible area, which is a box, using the values of the objects that have the most significant values on each axis.
With our three-object example, the bounding box is generated using the two end objects as they represent the end values of the X axis.
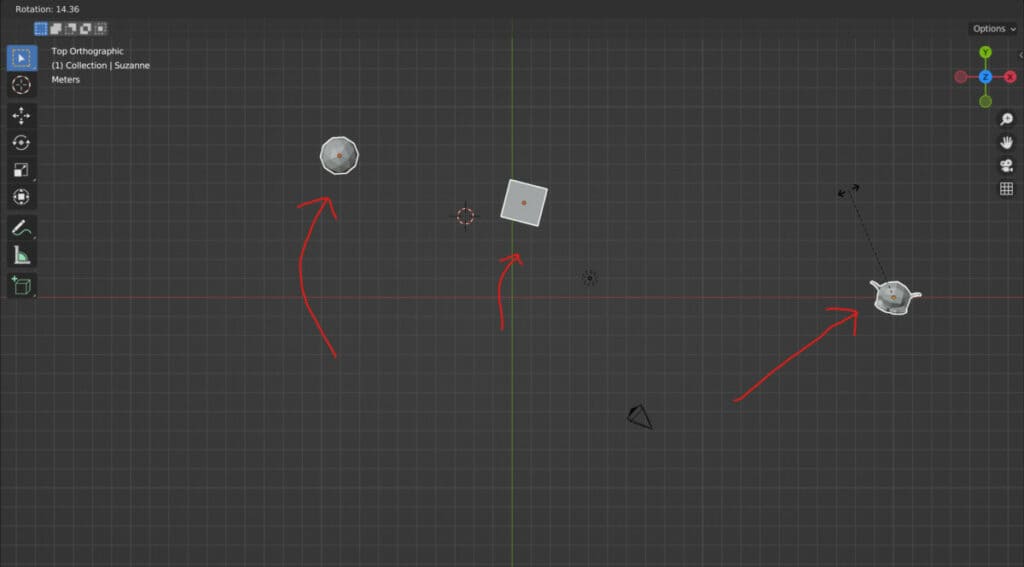
The center of the generated bounding box is then used as the pivot point of the whole selection. So this time, when we attempt to rotate with our objects at -10, 0, and 20, respectively, on the X-axis, the pivot point is set to 5.
This completely ignores the objects in the center, and moving the object in the middle to 7 on the X-axis, for example, does not change the pivot point because it does not affect the bounding box. However, if we set the middlebox to a value less than -10 or greater than 20, it becomes one of the models that affect the bounding box size.
The 3D Cursor
If you want to find your pivot point as something other than your 3D models, then you can set it to the 3D cursor.
The cursor is often used as the location for adding new objects in Blender, but it has many other use cases, including the ability to act as the pivot point.
Unlike the previous options, which involve using the median point order bounding box, the 3D cursor can also be used for manipulating the transforms of single objects, not just multiple ones.
In the case of the previous two options for our pivot points, having a single object selected would mean that the median point would always be that object’s origin, or the bounding box would simply be that one object. So the behavior wouldn’t change either way.
However, by setting the pivot point to the 3D cursor, we can manipulate the rotation and scale using the 3D cursor as the point of reference, regardless of how many or how few objects are selected.
Individual Origins
If you are new to Blender and you have tried to rotate multiple objects at the same time, you may initially believe that all objects will just rotate on their own origins.
This is not the case with the default median point. However, if you decide to change your pivot point to the individual origins option, it is the case.
With this option, all objects will rotate and scale around their own object origin points. This will be the case regardless of how many objects you have selected.
This can also be useful in edit mode when you are selecting multiple islands at the same time.
Active Element
The last option on the list of pivot points is to use the active element. When you select multiple objects in the 3D viewport, you will notice that one of them has a yellowish orange highlight, while the others have a much darker orange.
The reason why is because one of these is technically classed as the active objects, and this will usually be the object that you selected last.
When defining your pivot point to the active element, it uses the objects’ origin of your active selection to act as the point of reference for your transforms and any other tools that require that point of reference or pivot point.
In our three objects example, we can select each of our three objects, and then we can attempt to rotate our selection. The behavior of the rotation changes each time we alter which of our objects is the active object, which we can do by holding down the shift key and then left-clicking on an object to make it the active selection.
Thanks For Reading
We appreciate you taking the time to read through the article. We hope you found the information you were looking for. If you are interested in learning more about the Blender software, you can check out a few of the articles we have listed below.