When creating objects for video games, the traditional process involves creating high poly models for our designs first before creating a low poly version using a form of retopology and then using the baking tools to map those high poly details onto the low poly version of the model.
One of the fastest methods of retopology is to use the shrinkwrap modifier. This involves taking a basic shape and scaling it up to appear larger than the higher poly mesh. Then using the shrinkwrap modifier, the mesh will wrap itself around the object’s surface and is particularly effective if the high poly has poor topology.
If you can learn to use the shrinkwrap modifier effectively, you can significantly reduce the time spent on the retopology phase. This helps as it is one of the less enjoyable aspects of being a 3D artist.
The Process Of Retopology
If you are new to 3D modeling, then you may be unaware of the process of retopologizing your model.
The idea is to take a high poly version of an object and convert it into a lower poly version of the model, often without the reduction of detail on the model’s surface.
This is not required in every scenario. For example, if you are creating objects for simple image rendering, there may not be much point in retopologizing the model to a lower form.
While using a lower poly version may result in a reduction to render times, the process of retopology is slow and tedious, so its benefits of it are negated.
However, the art of retopology is important to models that may be used for more complex operations such as animations, which can be in form of a short film, advertisement, or video game.
The first stage of retopology is the initial high poly model, which can be constructed using traditional modeling tools. Still, if it requires retopology, then it is more likely that the model would have been sculpted in sculpt mode, allowing the artist to create all the detail that they require.
The second stage involves the creation of a second low poly model that uses the high poly version as the base for its shape. The idea is for the shape of these models to overlap effectively across the surface so that we can move on to stage three.
The third stage uses a process known as baking to map the details of the higher poly model onto the lower poly version in the form of a bump or normal map.
If it is used correctly, the low poly version can maintain 98% of the detail of its high poly counterpart while being much easier to use due to its clean topology.
Using The Shrinkwrap Modifier
To use the shrinkwrap modifier, add a second object to your scene that will act as the low poly version. It is to this object that we will apply the shrinkwrap modifier on to.
There are a few rules to keep in mind here. First, ensure that the low poly is either as large or larger than the high poly version. The modifier will scale down the model to fit the high poly target.
Second, your new model should be a similar shape to that of the high poly object. The closer they are to their appearance before the modifier is used, the more effective the modifier will be.
Adding a UV sphere and then wrapping it around a Suzanne head will not work, for example, because the shapes are so different.
The third is the geometry density of the low poly model. While a huge part of the idea is to reduce the amount of geometry on the final model, we still need enough geometry to work with, as going too low can create ugly stretching on the model.
Because of this requirement, the shrinkwrap modifier is best paired with sculpted meshes with poor topology, as improved vertex positioning is the biggest plus when using the shrinkwrap modifier. For models with good topology but too much geometry, simply reducing the geometric density may be the best solution, and a second model may not even be required in such a case.
A fourth rule that we should look to follow is to match the object origin location for both objects. It is easiest to perform retopology when both objects are at 0,0,0 in the 3D viewport.
So long as you follow these rules, the shrinkwrap modifier should function correctly. In the modifier, you will find an option for the target; click on the parameter to open up a menu that should have all mesh objects listed, including your high poly model.
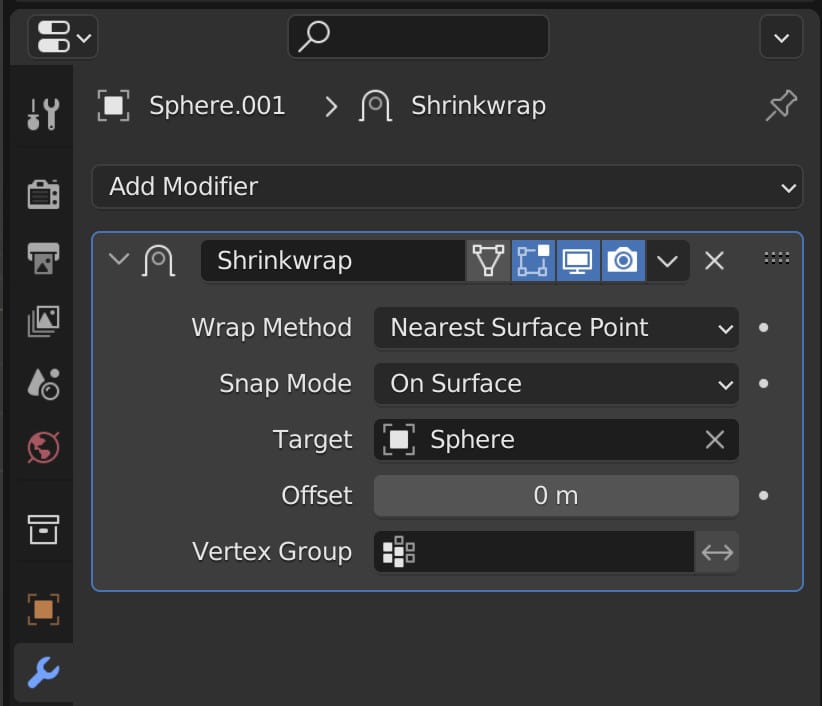
Select the high poly object as the target, and the shrinkwrap modifier will take effect.
Thanks For Reading The Article
We appreciate you taking the time to read through the article, and we hope that you have been able to locate the information you were looking for. Below we have compiled a list of additional topics available for you to view and learn more about Blender.