Not everyone can have the most potent PC at their disposal for creating renders and animations or even doing more standard tasks like playing the most up-to-date video games. Sometimes we need a little bit of help, especially when it comes to viewing path traced scenes in cycles in rendered view. Fortunately, there’s a tool that allows us to preview only a specific area of our scene.
The render regions hold allows you to create a box within your 3D viewport from which you can view your scene using the rendered viewport shading method. Use the hotkey Control + B to activate the render regions tool. Click and drag to create the box you wish to use as your render region. Then release and watch as the rendered section is isolated to that box, improving viewport performance.
If you are an artist with a mid to low-range computer using Blender, this will be an excellent option for previewing your scenes using the cycles render engine.
Article Key For Easy Navigation
Bold: Location Of A Specific Tool
Italic: Name Of The Tool
Bold And Green: Hotkey assigned to tool
How To Use The Render Region Tool?
The render region tool can be accessed via a menu or the associated hotkey. The view menu is where we can locate the render region option in the header bar of the 3D viewport while in object mode.
Locate the option labeled as View Regions to open up a secondary menu with three further options.
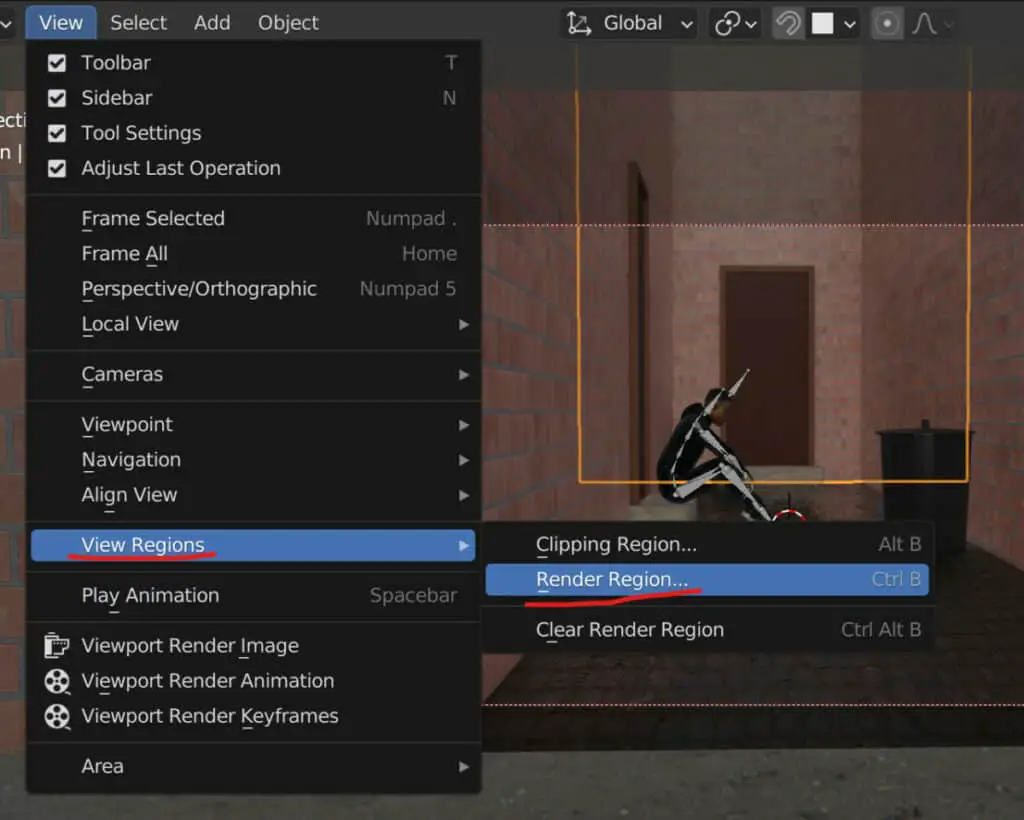
The first choice is the clipping region; this is used in solid view and is a fixed border that highlights an area of the scene for viewing and hides everything else. But is no good for what we want to do.
The second option of this list is for the render region tool. Activate this tool, and the viewport’s cursor changes to a horizontal and verticle line.
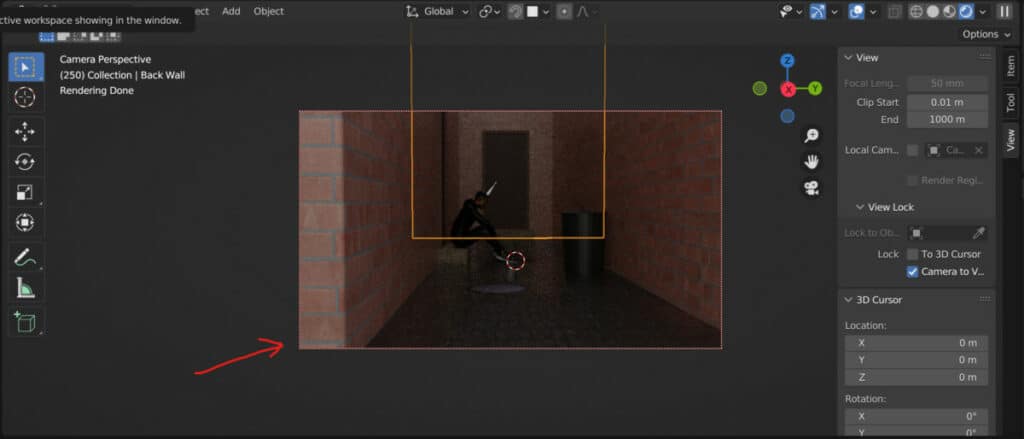
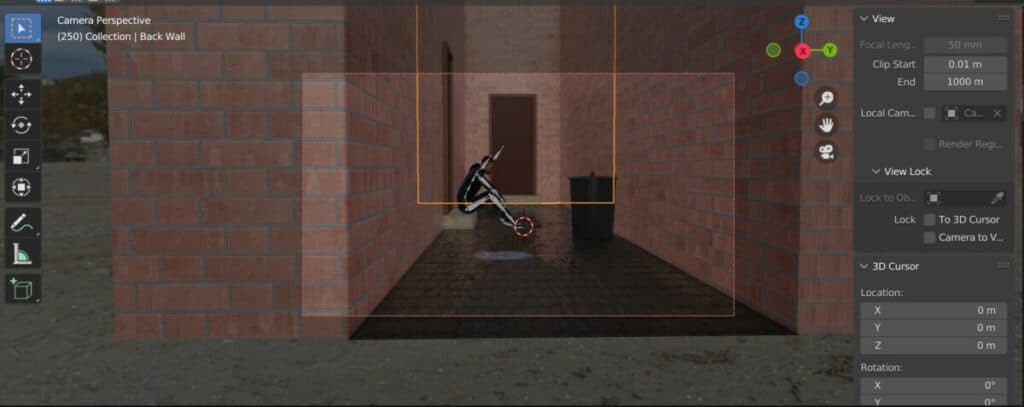
When you click and drag, you create a box, or border, similar to how you would create a box using the box select tool for selecting objects.
The difference here though, is when we release the left mouse button to confirm our border, as this will create an area on our screen that will display the scene in rendered view.
It may not work for you initially, though, as there are two prerequisites for the tool to take effect. The first requirement is that you need to be in rendered view, and the second requirement is to use Cycles X as your render engine.
If you want to clear your render region at any time, you can do so by returning to the view region menu and selecting the third option to clear the current render region.
We can also use hotkeys to either create or remove our render regions. To create a render region, we need to use the hotkey Control + B; to clear our render region, we use the hotkey Shift + Control + B.
Can Render Region Be Used In Eevee?
Even though the render region tool remains accessible when using the Eevee render engine, it will not work if Eevee is being used.
You still have the ability to select the option from the view menu in the 3D viewports header, and you can still create the box used for the render region tool.
However, when you create the box, even though the border will be visible, it does not have any impact on what you can see in the scene itself, even when using rendered viewport shading.
But the reason why this is the case is a clever one because sometimes we want to transition from how our scene looks in Eevee compared to cycles.
If you were to create a render region with the Eevee engine active and then transition over to cycles, the render region would still be in effect and would then begin to work with the cycles render engine.
Why Is Render Region Such A Useful Tool?
When you want to create a scene in cycles, you have to be prepared for the worst when it comes to your computer’s performance, depending on your device.
Cycles X is a path tracer, which means that our lighting and materials are constructed using near real-world physics and rules.
It requires high levels of computation concerning the direction of the various light sources within the scene and the services in which those lights bounce off. A lot is going on in almost any Cycles scene, which increases exponentially with more detail you add to that scene.
The ability to reduce what you can see to what you need to see is a valuable tool for when you want to focus on a specific area.
An excellent example of this in effect is when using the camera view. In this view, you can create the render region and have it line up with your camera lens so that the only area that is rendered in the viewport is the same area that will be rendered in the image.
Thanks For Reading
We appreciate you taking the time to read through the article. We hope you found the information you were looking for. If you are interested in learning more about the Blender software, you can check out a few of the articles we have listed below.