Learning to create materials is a daunting process, especially when you watch tutorials on complex materials for huge node trees that have very little organization. For a beginner, you need to know exactly what each node is responsible for, and one way to help with this is to use labels.
To add a label to a node, select the node and press the N key to open up the side panel in the shader editor. In the node tab, one of the options will be to add a label to the node. Fill in the blank space and the title of the node will be replaced by the new label.
There are several scenarios in which labels are useful especially if you are newer to node creation in Blender. It is just one of many different tools that can help material creation seem that much easier to learn.
Creating New Labels For Your Nodes
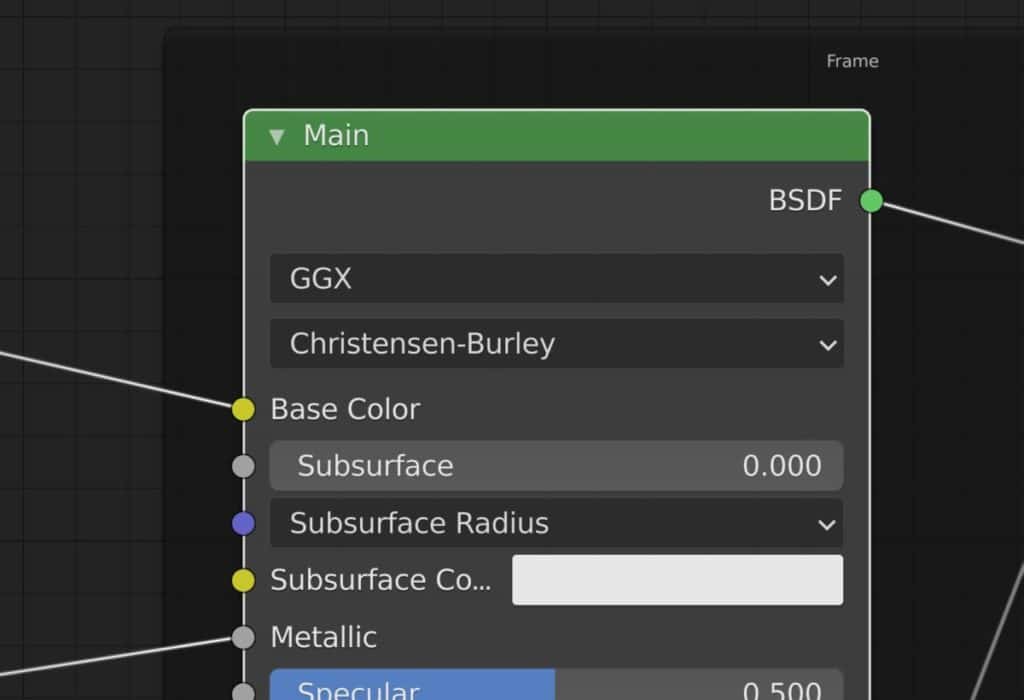
All nodes follow the same structure from top to bottom. You start with the title of the node, which is inside the top section of the node and has a different color depending on what category that node falls into.
Then you get to the output sockets, followed by the node parameters, finished off with the input sockets, as you move down the node.
Our focus in this article is purely on the top part of the node, its title. Labels are a great way of adding clarity to exactly what a node is being used for.
To add a label to your node you need to select that node, then press the N key on your keyboard which brings up your side panel.
The side panel will have a column of tabs down the side of it, the first one should be the node tab, which you should already be on. If you are not, click on the node tab to display the information in the side panel.
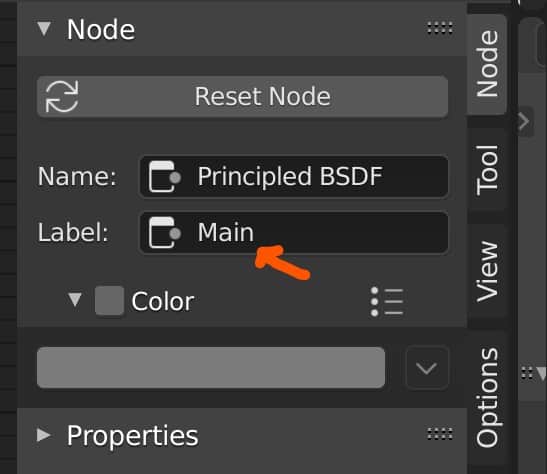
You have a few settings to change here, but the one you want is the label. The text box will appear blank, as all nodes use the ID Name as the default title until a label is created.
Type in a name that describes the purpose of the node as your label. For example, I use Main Shader as the label for my principled BSDF node. As soon as you add the label to the text box, it will become the title for the node in the editor as well.
The Difference Between A Label And An ID Name For A Node
All nodes will have a title at the top of the node, and it will be highlighted in a color depending on the category that the node falls in.
The title will be the ID Name of the node, which is the name given to it in the Blender code base that allows it to be identified as a certain node.
A label on the other hand is user-defined title that is normally used to describe what the node is required to do. In the side panel, you will be able to see the node label as well as the name.
The name here is not strictly the same as the ID name that you see in the title. For example, duplicate the color ramp node and you will have two nodes with the same name, but in the side panel, the second node will be ColorRamp.001. This is basically the same name, but where a number is added to the end.
The name here is the unique node identifier, which allows Blender to tell which node is what if they both have the same ID.
There are scenarios where the name value is used, but the node title is not one of them. That is where the label comes in and why nodes can have both a name and a label. One is for Blender to identify the node, and the other is for the user.
Creating A Label For A Frame
Not only are we able to add labels to our nodes, but we can also do the same with our frames too. A frame is a border that is used to store a section of your node tree. For example, if you have a set of nodes that allow you to create a procedural pattern or texture, then you can store these nodes in a single frame.
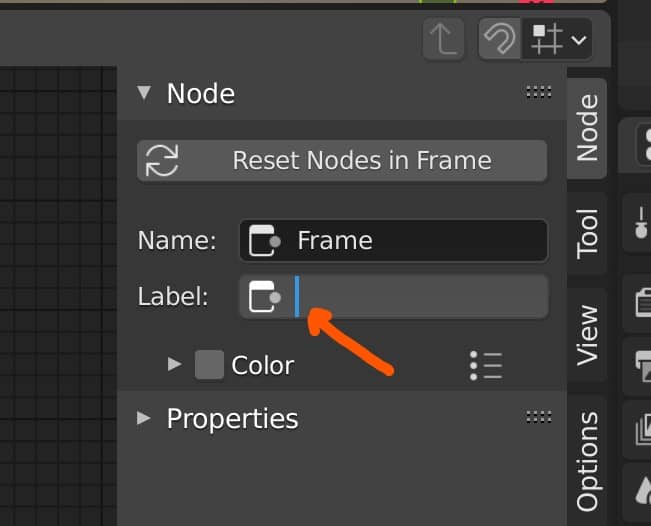
The problem when you create nodes is that they are not labeled by default. They have a name, but they don’t have an ID used as the initial title, so it just appears blank.
Fortunately adding a label to a frame is exactly the same as adding the label to the node.
Select the frame that you want to add the label too, and then press the N key to the side panel. Go to the nodes tab and you will be able to add a label to your frame, just as you are able to with nodes.
This is useful because it now allows the user to identify what the nodes inside the frame are used for without even having to look at the nodes themselves.
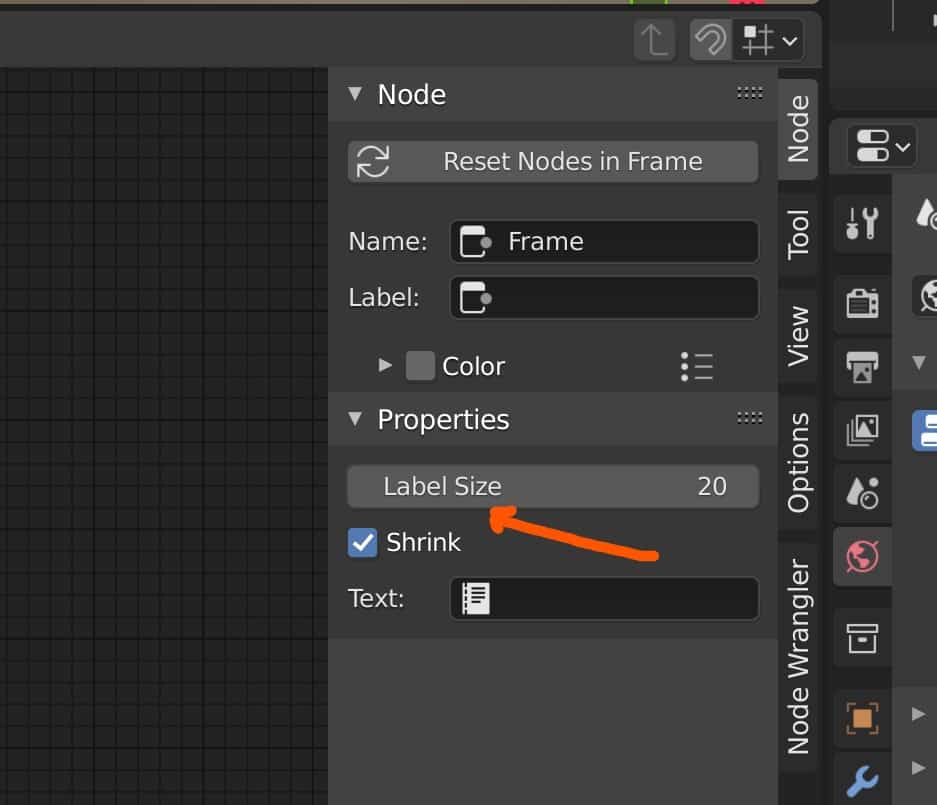
An additional function for frames that nodes do not have is the ability to increase or decrease the size of the label. This option can be found under properties in the nodes tab of the side panel.
What Are Some Other Organisational Tools For Node Trees?
Labels are a simple yet effective way of better organizing your node trees in Blender, but they are not the only means of doing so.
Frames are another tool used to help better structure our nodes into easily viewed categories. Combine frames and labels together and you can make even the most complex of node-setups seem relatively simple to understand, at least at the surface level.
But even riding up the nodes themselves hardly helps with the noodles, those thin lines that connect the nodes by their input and output sockets to send data from one node to the next.
A great tool here is the reroute socket, which is an independent node socket that can be used to take inputs and outputs, and redirect noodles in any direction to make your setup better to follow.
Then you have the node wrangler addon, which is a phenomenal tool for both working on and structuring your material node tree. It even has hotkey shortcuts that make the above tools even easier to use.
Thanks For Reading The Article
We hope that you found the tips in this article helpful for organizing your node trees with labels. We have put together a small list of topics that we think you may be interested in.
- Rendering An Image In Blender
- Using The Node Editor To Create Materials
- Painting Transparency Onto Your Textures
- Organizing Node Set Ups For Materials
- Should I Use Eevee Or Cycles For Rendering?
-
Stylized vs Realistic: Blender Techniques
Comparing stylized versus realistic sculpting techniques in Blender.
-
Detailing with Multires in Blender
Utilizing Blender’s Multiresolution for detailed sculpting and texturing.
-
Cloth & Drapery: Blender Modelling Tricks
Modeling realistic cloth and drapery with specialized techniques in Blender.