One of the core toolsets we need to learn early on in Blender is the ability to manipulate the transforms of our object. These are the location, rotation, and scale of our model.
However, it’s also going to be important to know how to prevent editing of these tools because there are just so many ways to manipulate them. Therefore we need to know how to lock our transforms to prevent editing when not required.
To lock your transforms, open up the side panel by pressing the N key. Each transform will have a lock icon next to each axis. By clicking on this icon, you can lock the transform on that specific axis, which prevents you from editing the transform anywhere but on the side panel.
Locking your transforms has the key benefit of ensuring that you don’t make any unnecessary changes to your model while editing or repositioning objects in your scene.
Locking Your Transforms In The Side Panel
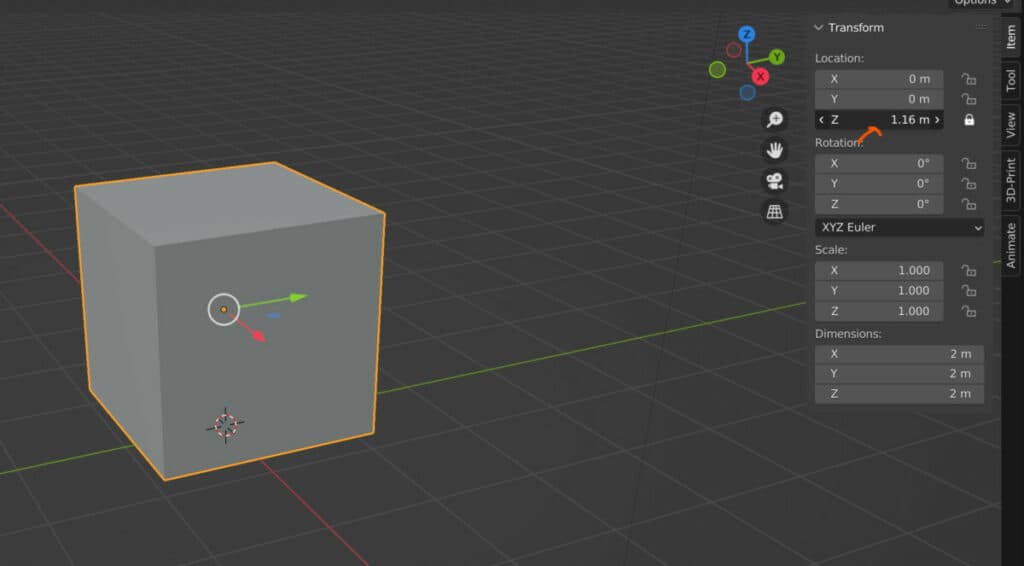
The fastest way to lock your transforms is in the side panel. So open up the side panel, and just press the N key on your keyboard.
The first set of parameters you will see in the side panel is the transform values of your selected object, I.E., the model’s location, rotation, and scale, as well as its dimensional values.
This is one of the many ways you can edit these transforms in Blender, alongside using the transform tools from the tool shelf and the blender hotkey system.
But while there are many ways in which we can manipulate our transforms in Blender, the side panel is one of just two locations where we can prevent editing specific transforms.
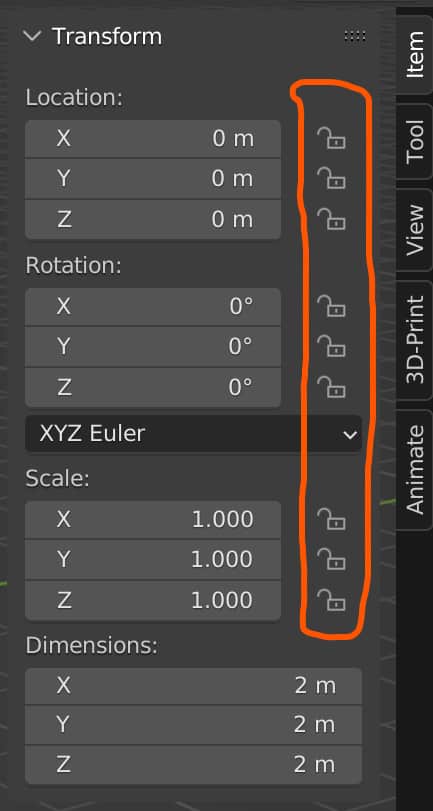
If you look at each of the values for each transform, you will notice that a lock icon is found next to that value.
By default, these will appear unlocked and greyed out to indicate that you can edit these specific transforms.
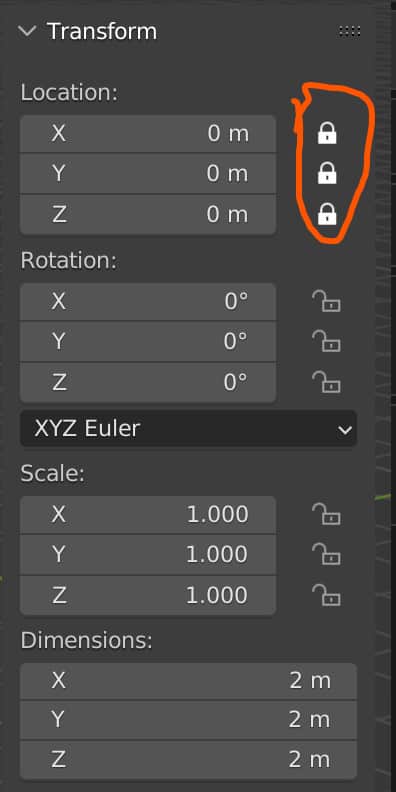
If you click on any of these icons, you would lock the transform on that specific axis.
How Does Locking Work?
Let’s say, for example, we wanted to lock the Z Location transform. So we want to prevent rotating our objects on the Z axis.
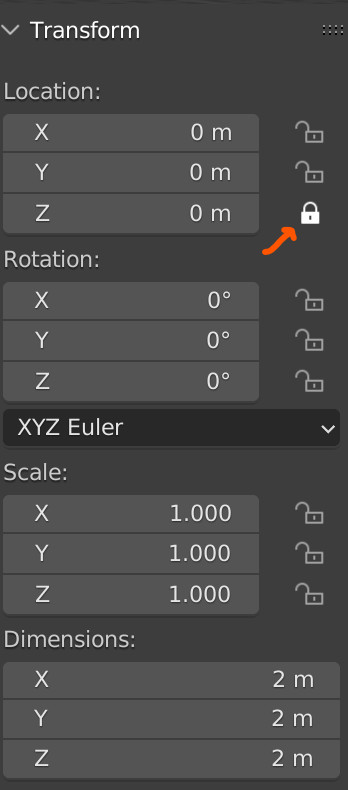
To do this, all we need to do is just tick on the lock icon next to the Z location in our side panel. This will prevent other methods of manipulating our transforms from being able to use the Z Location.
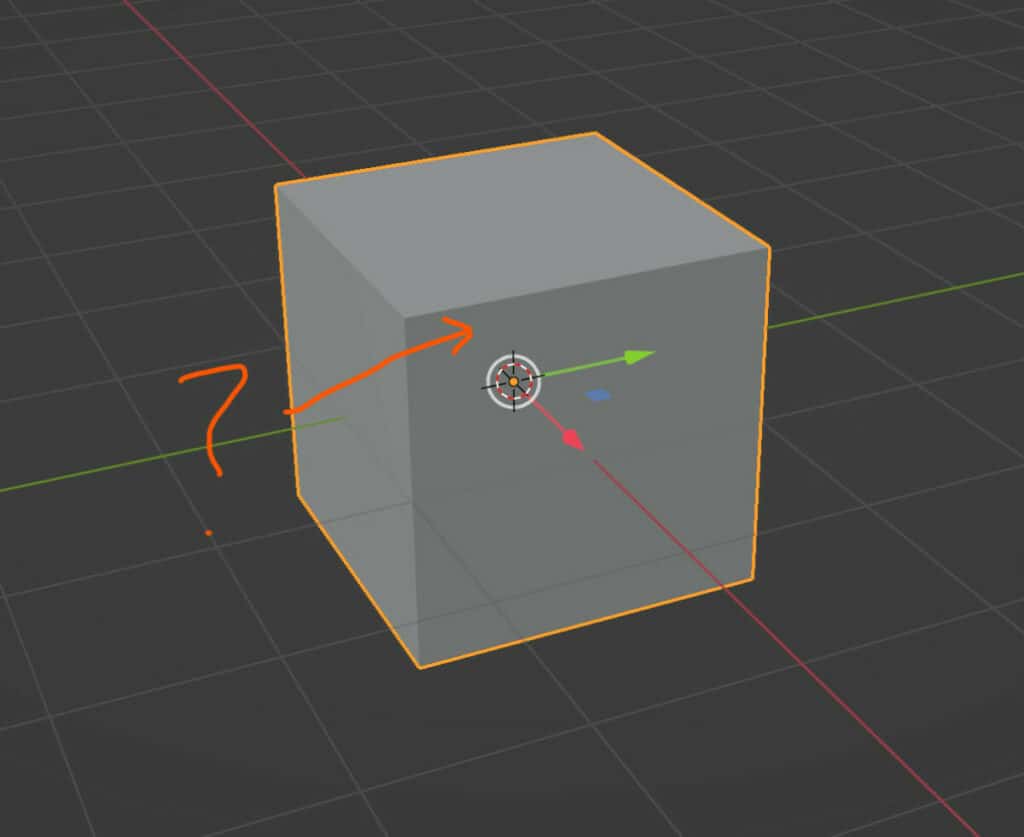
If we were to activate the Grab tool after locking the Location transform, we would notice that the blue line, which typically indicates the ability to Grab on the Z axis, is no longer visible.
If we were also to attempt to manipulate the Grab by using a hotkey such as G and then Z to lock to the Z axis, we would not be able to Move our model.
We can lock and unlock our transforms at our leisure, so here we could also lock the X location, allowing us only to move our model on the Y axis and preventing movement on the other two.
There is no limit to the number of combinations that you can make when it comes to locking and unlocking your various transforms, so you could, for example, lock the Z location, Z rotation, and Z scale if you wanted to.
What’s interesting, though, is that the locking feature does not affect manipulating your transforms in the very place that it is located, which is the side panel.
Going back to the Z location, if we were to lock this value, we know that we cannot manipulate it using any of the other tools, such as the location gizmo or the location hotkey.
However, if we were to click and drag on this value in the side panel, not only with the value change, but it would also affect the object as normal.
So in truth, the locking feature in the side panel is used to isolate the functionality of using that transform to the side panel and prevent it from being used anywhere else.
There is one exception to this rule, and that is the properties panel.
Locking In The Properties Panel
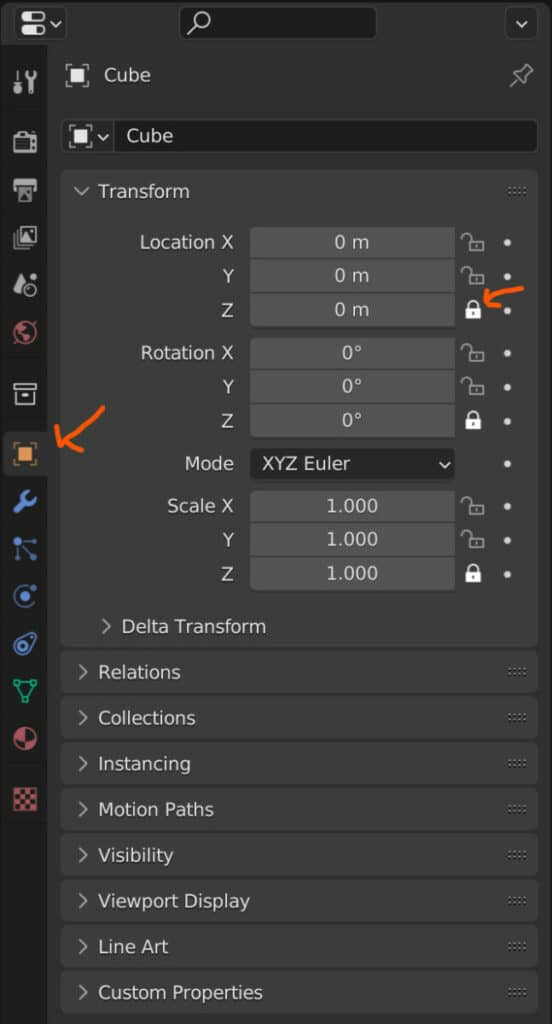
In addition to being able to manipulate the transforms in our side panel, we can manipulate these transforms in the exact same way within the properties panel.
All of these values and the lock icons associated with each value can be found in the object tab of the properties panel.
This all works in precisely the same way. We can manipulate the transforms at our leisure or lock the individual transforms with the lock icon.
You will also notice that if we were to lock one of our transforms in the properties panel, it would also lock in the side panel.
They also shared the ability to continue to manipulate the locked parameters as well, so you can just click and drag any value you want in the properties panel to continue editing it the same as you would in the side panel.
Thanks For Reading
We appreciate you taking the time to read through this article, and we hope you found the information you are looking for on locking your transforms.
If you are interested in learning more about how to manipulate transforms in Blender, you can try out some of the other articles we have listed below for your viewing.
- Applying The Transforms Of Your Objects
- Clearing The Transforms Of Your Objects
- Using The Transform Node In Geometry Nodes
- What Objects Should I Make In Blender As A Beginner
- Why Can’t I Move My Objects In Blender