One of the most useful tools for creating customized objects in 3D modeling is the Bullion modifier, which allows you to change the shape of your main model using a second model as the Boolean effect.
The following is a list of reasons why the Boolean modifier may not be working for you in your case.
- Artifacts Appear On The Shading Of The Main Model
- The Wrong Areas Of My Object Were Deleted
- I Cannot See The Effect That My Boolean Has
- The Boolean Object Looks Weird In The Viewport
- The Boolean Has Messed Up My Objects Topology
- I Cannot Seem To Cut Holes Through The Model
- The Geometry Is Self Intersecting
If you can learn to master the Boolean modifier, then you can create all sorts of incredible-looking objects very quickly. But we need to understand exactly how it works so that we can avoid making crucial mistakes when using the modifier in our projects.
How The Boolean Modifier Is Designed To Work?
The term boolean is used when there are two potential values to a query. For example, the typical Boolean is the True/False boolean in coding. Other examples of Booleans are 1 & 2, A & B, and Yes and No.
In Blender, the boolean modifier follows a similar concept, with at least two objects involved in the equation.
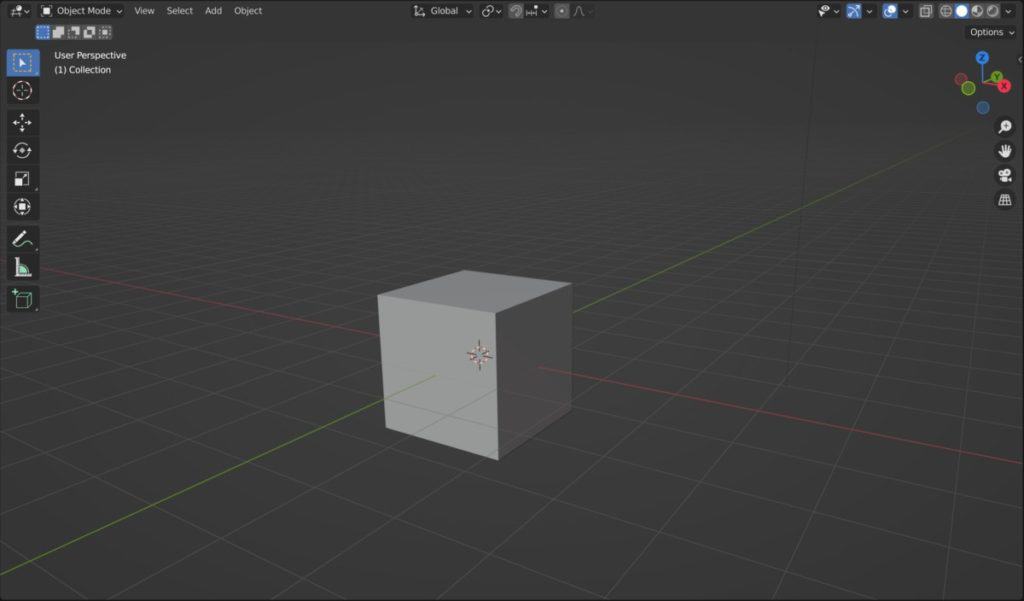
The first object is the main object that the boolean modifier that will be applied to, such as the cube model in the image below.
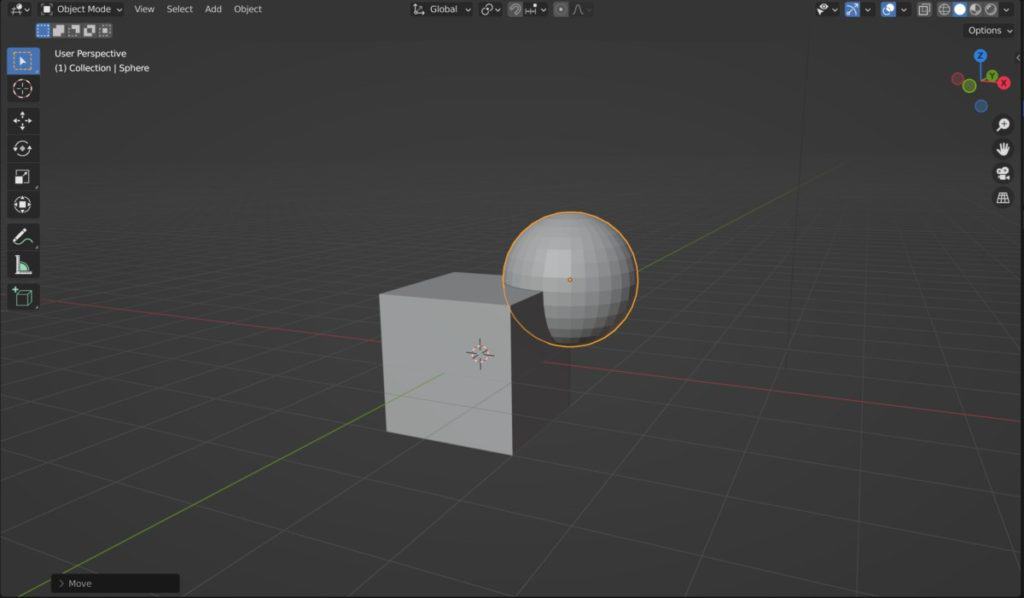
The second object is classed as the boolean model, and we need to tell Blender to use this model as the target boolean for the main object. For our example, we will use the UV sphere as the boolean.
Add the boolean modifier to the cube model in the example, which you can do by selecting the cube, going to the modifiers tab in the properties panel, and then adding the boolean modifier from the menu.
The icon that represents the boolean modifier here appears red because the modifier currently has no effect on the model.
Select the box for the object and a small list will pop up of objects that you can select as your boolean. Choose the object that you want from the list and the icon should appear white.
If the boolean is overlapping the main object then it is cutting into the object in real-time. Because it is a modifier, we can edit the positioning of the boolean object or the boolean settings in the modifiers tab.
When you are happy with the location you can apply the modifier to make the effect permanent and then move the boolean model out of the way to view the result.
Why Is My Boolean Union Failing?
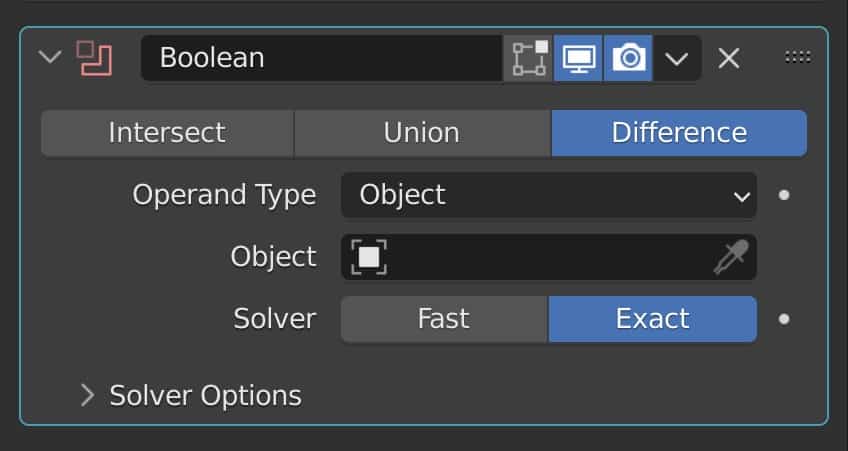
There are three types of boolean that you can use as your calculation method between the main model and the boolean object. These three types are Intersect, Union, and Difference.
The union method calculates your boolean to delete the space where the models are overlapping and then combine what remains of the two models, effectively merging them into the same object.
If you look inside your model you will see that there is no excess geometry inside as it was deleted with the boolean.
So What Would Cause A Union Boolean To Fail?
It is rare to see the Union method fail in blender because it’s actually relatively straightforward in what it tries to do. He effectively just merges the Boolean with the main object while deleting what would have been in between.
But what if the geometry in between is still there? Well, this can occur if the main object has a dramatically different level of geometry to the Boolean one. For example, if the boolean has a lot more geometry than the main object, then Blender might not know exactly how to connect it.
Alternatively, if your main object has any islands to it, which are areas of mesh that are disconnected from the rest of the object, then again Blender may struggle to calculate the boolean between the two objects.
Preventing The Boolean From Failing
There are two things that we can do here to help prevent our Union method from failing when using the booking modifier.
The first method is to avoid attaching your boolean to different islands of the main mesh at the same time.
The second method is to ensure that the amount of geometry, or geometry density, is fairly similar between both your bullion and your main model.
Why Is The Object Disappearing When I Use The Boolean Modifier?
A common teething problem for most Blender users when trying the boolean modifier is for the majority or even the entirety of the main model to disappear when using the boolean modifier.
One example where this may occur will be when you are trying to use a text object as your boolean for the main model. Sometimes when we are attempting to combine a text with our main objects, the main object itself can actually disappear from view.
The main reason why this is the case is that when we are using text objects that have been converted into meshes we are effectively working with a series of islands, an island is a part of the mesh that is disconnected from the rest of the object and in the case of a text object, every letter is an island.
Blender traditionally does not work well when combining islands with booleans and so we can sometimes get effects like our main model disappearing from view when using our boolean modifier with these kinds of objects.
A lot of the time this tends to be nothing more than just a glitch, and therefore the solution can be pretty straightforward. One thing that you can try is just moving the boolean model. Even if you move the Boolean model just a tiny bit, it can restore the main model into view.
Alternatively, you can change the boolean method temporarily for the Bullion modifier and then change back, like from difference to intersect and then back the difference. This I find does actually help to restore the main object.
To help minimize this, ensure that the geometry for your text mesh is as clean as possible. When you convert a text into a mesh, that object’s geometry is often messy, and this poor topology can impact the way the Boolean works on the main model. Clean up the topology on the mesh text before you use it as a boolean for the main object.
Being Able To View The Effect That Your Boolean Modifier Has?
One of the most common problems that Blender users have with the Boolean modifier is the inability to see exactly what is going on. The main reason why is because the Boolean itself gets in the way of viewing the effects that it has on the object.
Therefore, we need to find some way to hide or obscure the view of the Boolean object. One way that we can do this is to simply hide our boolean model. You can do this by selecting the boolean and then pressing the H key.
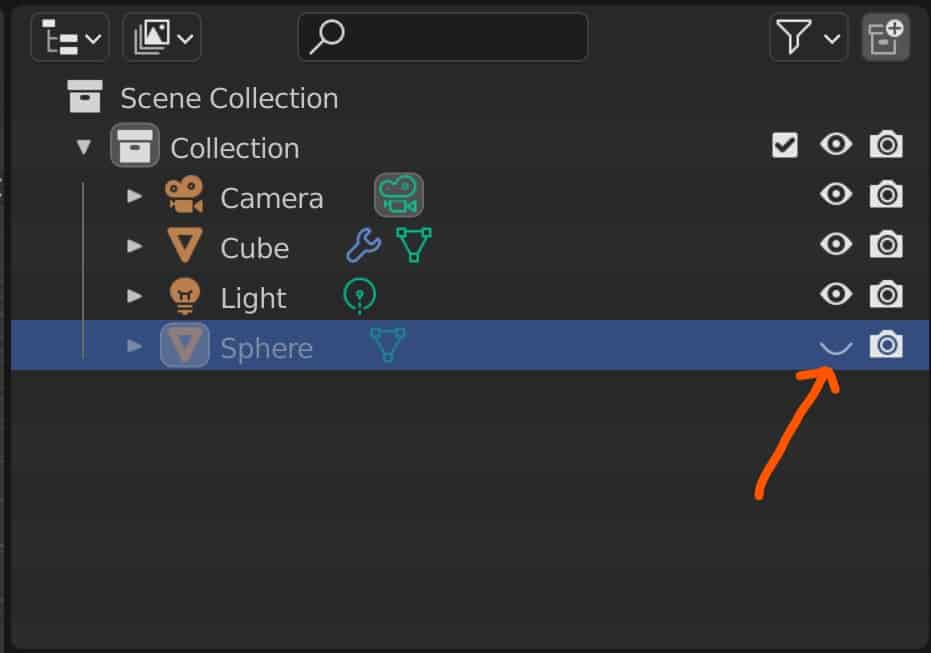
Or you can select the boolean model in the outliner panel and then click on the eye icon next to it. This would allow us to view the effect that the boolean has on the model, but if we want to adjust the boolean again, then we’re going to have to bring it back into view before we can move it.
A better solution is to actually change the viewport display of our boolean model. So select the Boolean and then go to the properties panel. Locate the objects Properties tab, which will have information relating to the object data itself.
Scroll down it where it says viewport display, and then find the option where it says Display as – textured. Click on this option to bring up a menu and you will want to select the wireframe option.
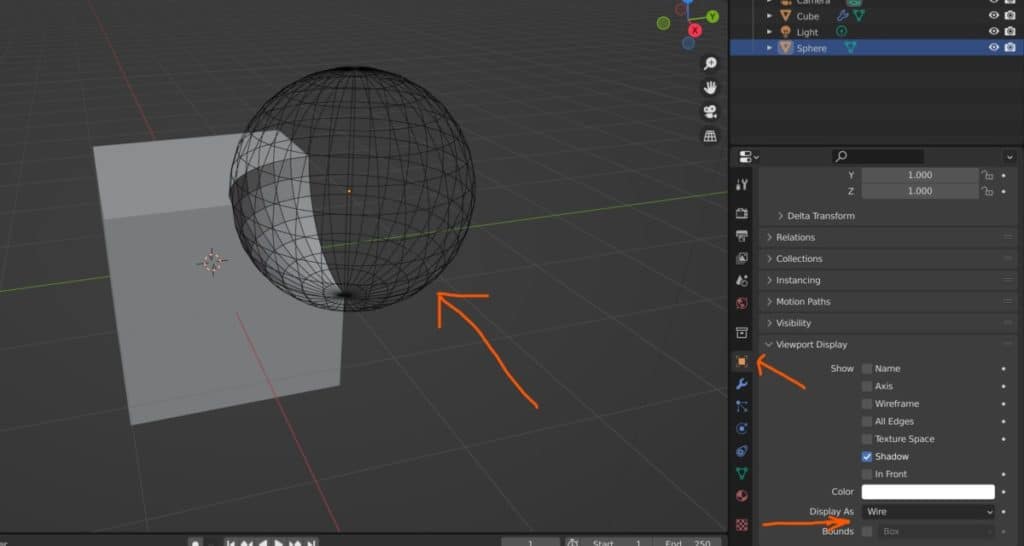
When you do this, the UV sphere or the Boolean that you are using will appear as a wireframe, but the rest of your scene will appear as normal. This way you are able to see the effect that the boolean is having on the model, while at the same time being able to adjust its positioning.
Problems With The Base Geometry That Can Affect The Boolean?
The Boolean modifier requires the calculation of both the main object’s geometry as well as the boolean geometry defining the location of each individual vertex, and deciding where and how these vertices should be connected.
It is always going to be an important step to ensure that the geometry or topology of your main object is in a clean, usable state. If, for example, you have overlapping geometry or if your main object is already self-intersecting on itself, then these factors can have an impact on how the Boolean modifier is going to be calculated and can cause many of the issues seen above.
As such, it is good practice to clean up your main objects before using the boolean as well as after. Before using your boolean modifier, select your entire model in edit mode, and then scan your model to ensure that there is no self-intersecting or overlapping geometry.
You also need to keep an eye out for zero faces. Zero faces are very, very tiny faces that are so small that they cannot be calculated by the boolean, and these types of faces can create shading artifacts when the Boolean is used.
With the entire model selected, or even just the areas that need fixing, use the ALT + M key to bring up your merge menu. From here, choose the merge by distance option and then increase your value to the point where you are able to clean up the poor geometry.
This should help improve the final result of the Boolean as well as improve the general topology of the main model. You may need to repeat this process after you have used the Boolean as this will also affect the topology of the main object.
The Boolean Is Not Cutting Through My Model When I Try To Create A Hole?
A common use case for using the Boolean modifier is to cut holes into our model. Of the three boolean methods that we have at our disposal, the difference option is normally the best choice for creating the holes, but there is a problem.
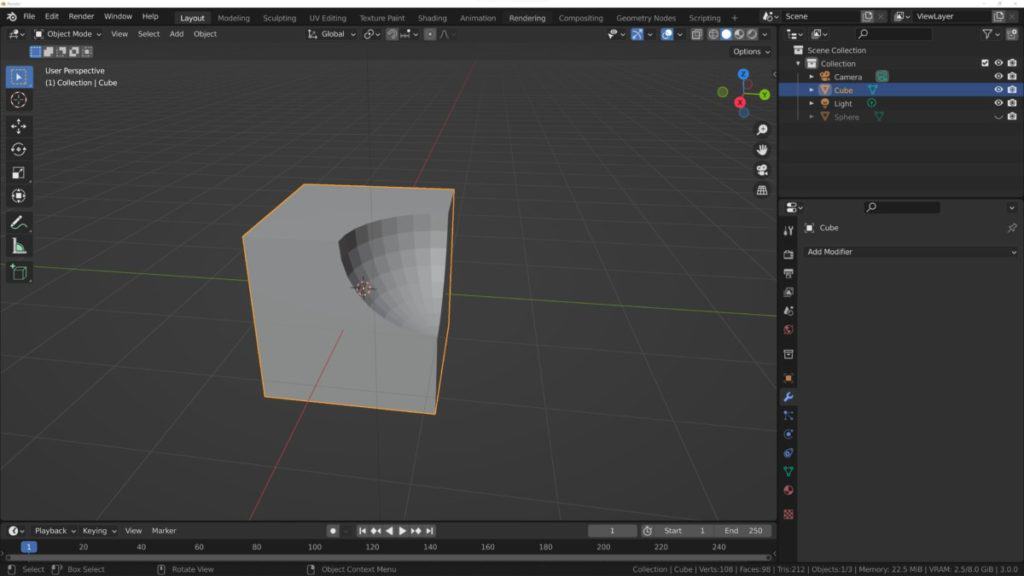
In the case of our cube/UV sphere combination, we are able to use the UV sphere to create our boolean. But we’re not actually creating a hole into our cube.
The reason why is because the boolean modifier wants to ensure that we are not able to view both sides of our object, both inside and outside.
The solution to this is to add another modifier to your main object. The modifier that we need to add is going to be the Solidify modifier.
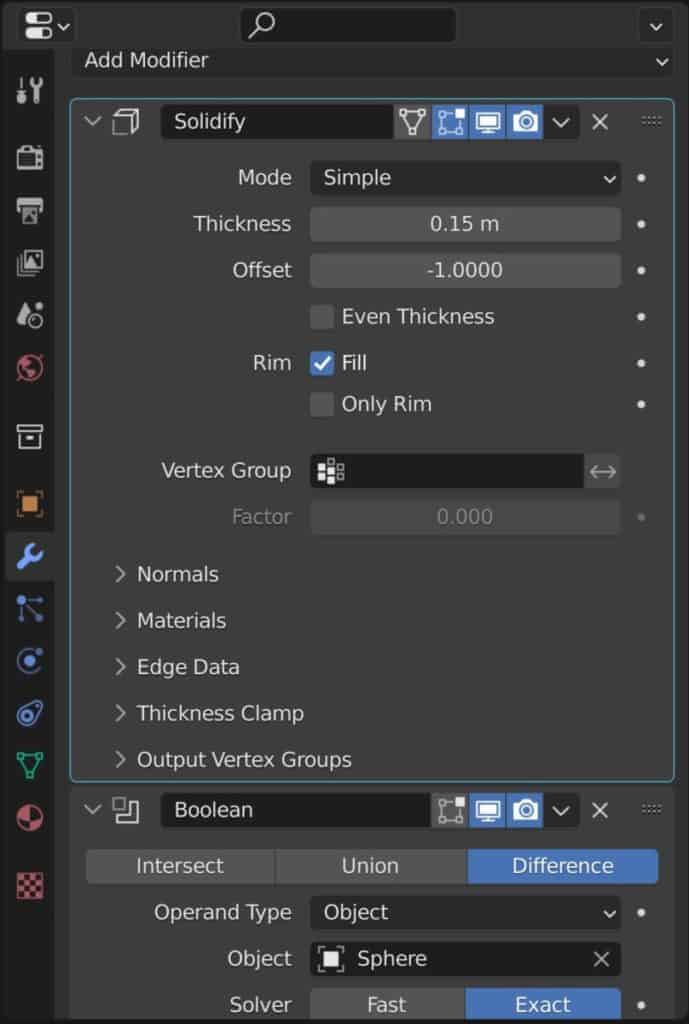
Go to the modifiers tab for the main object, go add modifier, and then select solidify. In order for this to work correctly, the solidify modifier needs to be positioned above the boolean because the Boolean modifier has to calculate the thickness of the model before it can apply the Boolean effects.
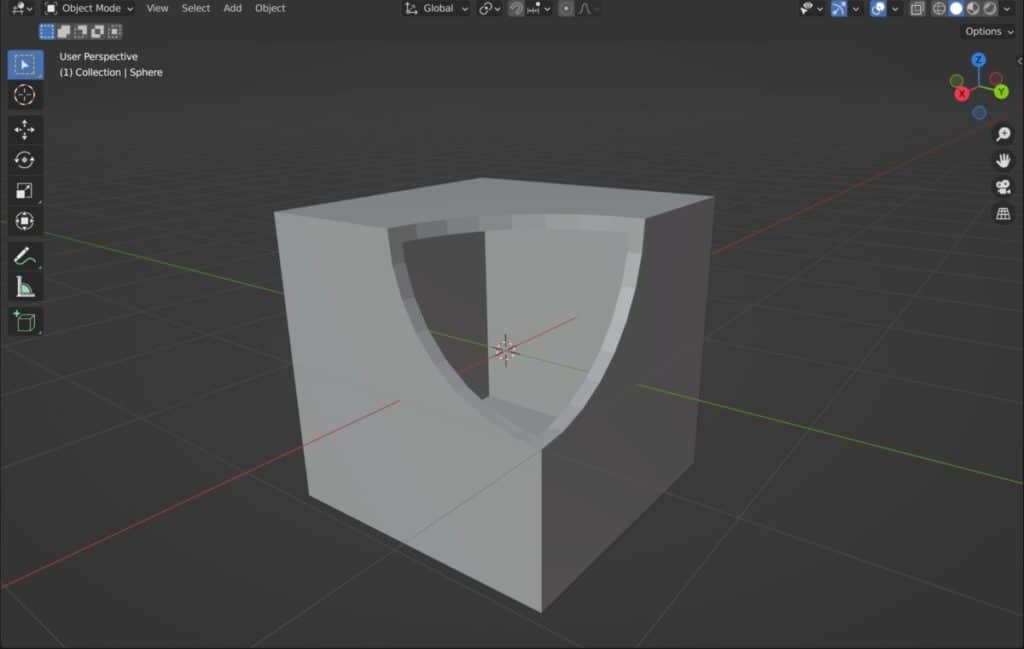
So grab your solidify modifier and bring it above your boolean. In our example, we can now see that while the shape of the UV sphere has been cut into our cube, we also have a hole that allows us to view the inside of the cube because the Solidify modifier has given the cube some additional thickness. This makes it easier for the boolean modifier to calculate the object itself.
How Object Normals Can Cause Issues When Using The Boolean Tool
One more factor that can affect the ability to use your boolean modifier is the use of incorrect normals. Normals represent the direction that the geometry is facing. All vertices, edges, and faces will have an inward direction as well as an outward direction.
Ideally, you should always be able to view the outward direction of your normals in the 3D viewport. Below we have an example of our UV sphere with the boolean targeting the cube. Yet the UV sphere does not seem to impact the cube at all.
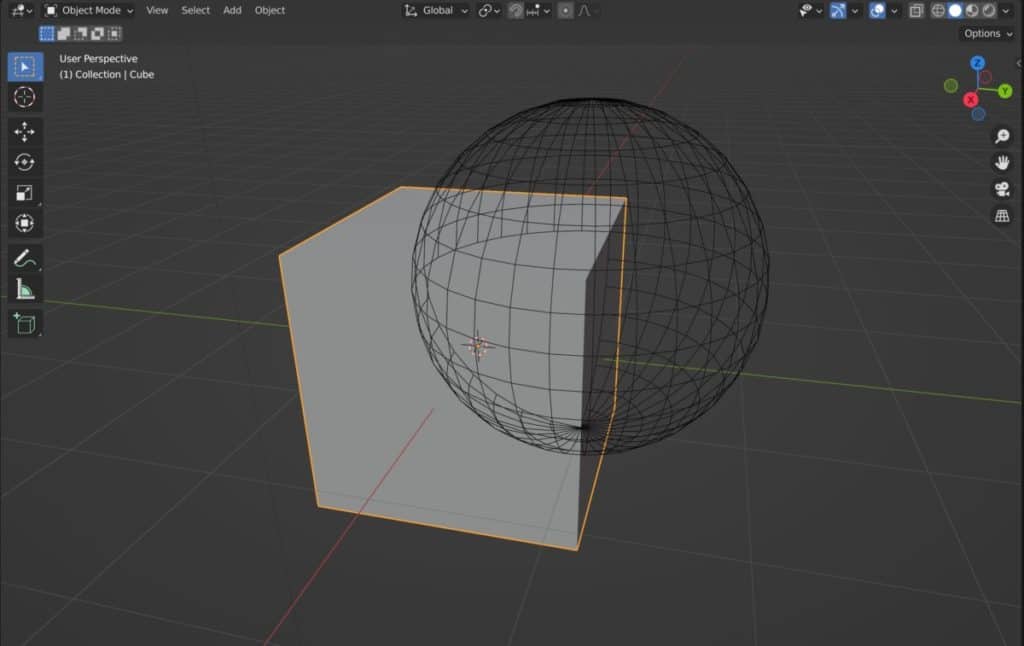
The reason why is because the UV sphere has had its normals flipped so that they are the wrong way round where the outward-facing normals are inside and vice versa. The boolean modifier uses the normal direction of the boolean models’ geometry to create the boolean.
So if the normals are facing the wrong way then they cannot be detected by the Boolean modifier and as a result, it doesn’t work on the main model. To fix this issue, select your boolean model, which in this case is our UV sphere, and hit the TAB key to enter edit mode.
With the entirety of the model selected, which you can do by pressing the A key, press Shift + N on your keyboard to use the recalculate normals tool. This should instantly flip your normals to the correct way.
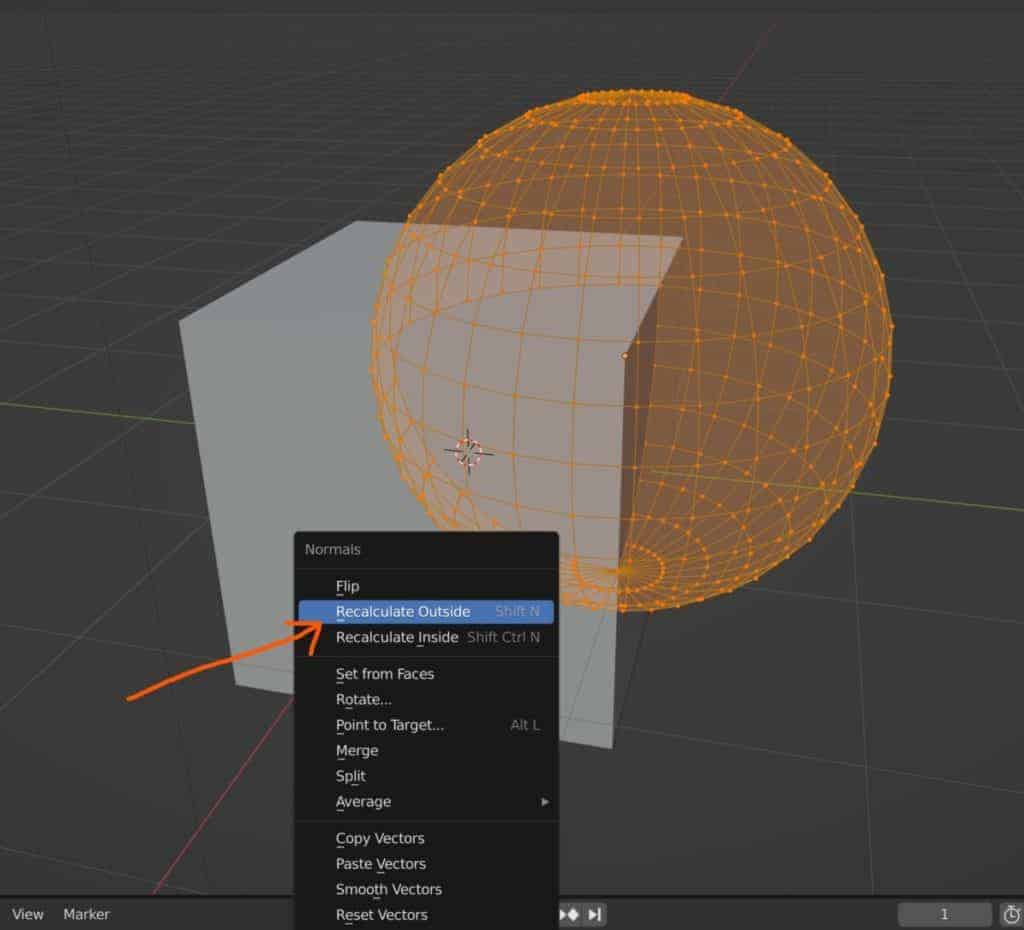
Alternatively, select all of your geometry for your boolean objects and use the hotkey Alt + N to open the normals menu. From here you can choose to recalculate outside, recalculate inside or flip the normals of your model.
Sometimes you may only have a few incorrect normals, so you will need to identify those normals and then select them independently before flipping them to the correct direction. Although using the recalculate outside option should be able to do this anyway.
How To Apply My Boolean To A Model?
When you are happy with your Boolean modifier and you are confident that there are going to be no negative effects to your main model. You would then need to apply your brilliant modifier.
To apply any modifier, go to that modifier in the properties panel and then click on the little down arrow. This will give you a variety of options and the first one should be to apply that modifier.
Note that this will not work if you are in edit mode for the selected object. Make sure you are in object mode first, then go to the properties panel and apply that modifier.
If you are using multiple modifiers, it is ideal to apply the ones that are on top first, working your way down. Otherwise, you can end up with changes in how the modifiers affect the model.
Thanks For Reading The Article
We appreciate you taking the time to read through the article and we hope that you have been able to locate the information that you were looking for. Below we have compiled a list of additional topics that are available for you to view and learn more about Blender.
- The Best Method For Improving Your Skills In Blender Is…
- Is Blender A Good Choice For Beginners?
- Best Shortcuts For 3D Modeling In Blender
- Boolean Tool Fast Vs Exact Solver
- Master Navigation In 3D Space
-
Blender Kitbashing: Complex Shapes Made Easy
Simplifying complex shape creation with Blender’s kitbashing approach.
-
Custom Normals: Blender Hard Surface Tip
Enhancing hard surface models with custom normals for realism.