There are many methods that you can choose for reducing the amount of geometry on your model, but one of the most popular methods is to use the decimate modifier to quickly reduce geometry across the entire object.
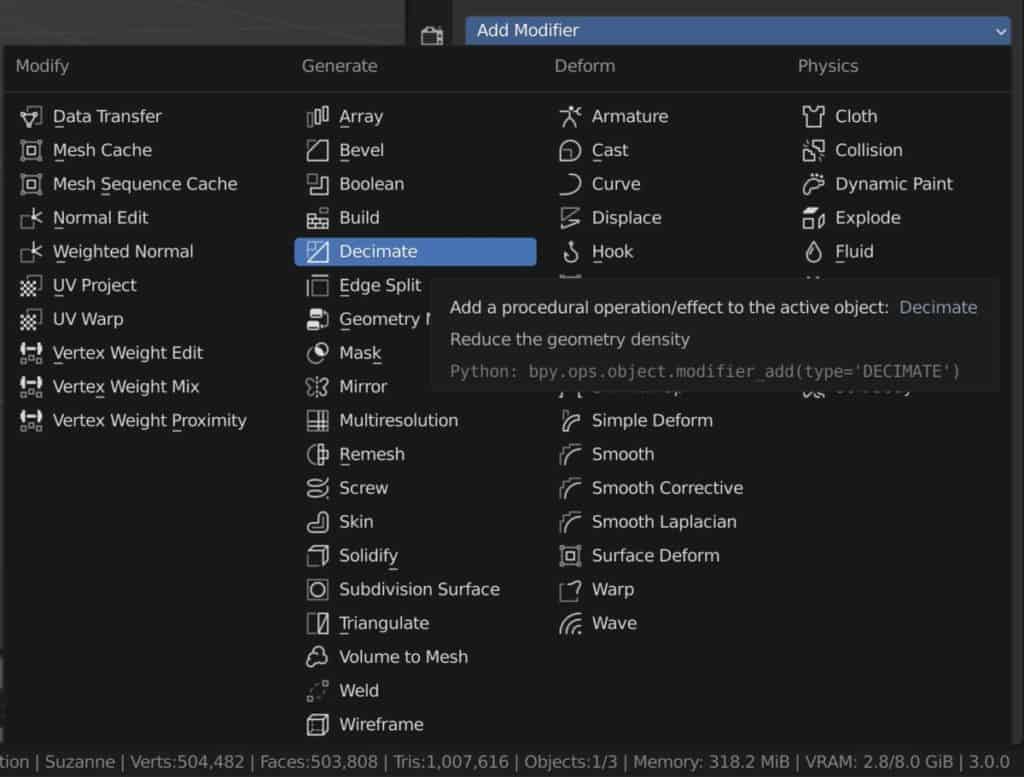
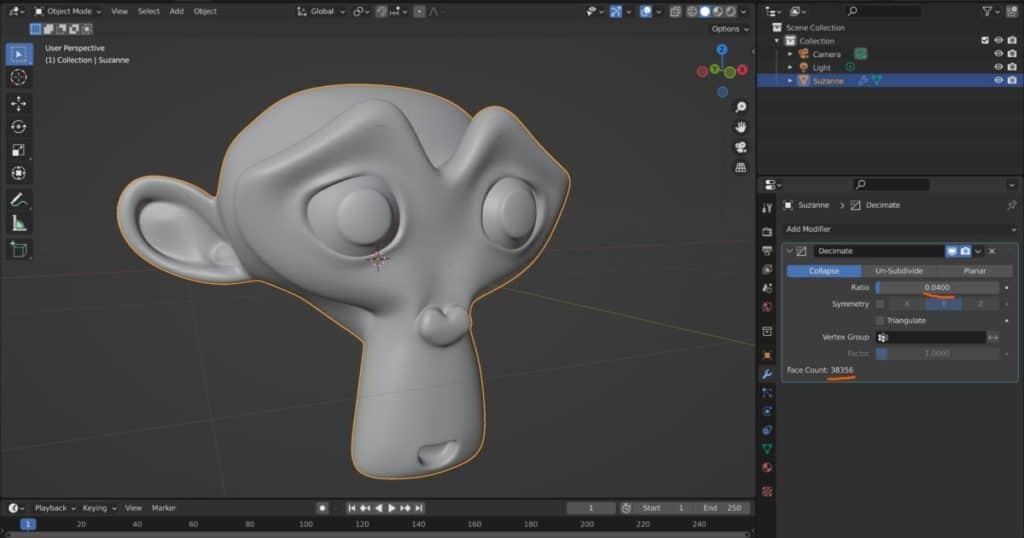
To use the decimate modifier in Blender, select your object and then go to the modifiers tab in the properties panel. Go to add modifier and select decimate. Then choose the decimate method that you wish to use on your model.
With the decimate modifier we are able to reduce the overall geometry of almost any 3D model that we create. But what are the different ways in which we can use this modifier to reduce our geometry?
How Do You Use The Decimate Modifier?
The Decimate modifier is a procedural way of reducing the total amount of geometry on your 3D model. That means that you can edit this tool while in use. To use the decimate modifier for any object, first select the objects in the 3D viewports, then go to the properties panel and locate the modifiers tab.
Click on the Add modifier button and from the generate list select decimate. The modifiers should be in alphabetical order so the decimates modifier should be close to the top.
When you add the decimate modifier, it will not have any immediate impact on your model. If you take a look at the modifiers icon, you will see that it is colored red. This indicates that the modifier currently has no effect on the 3D objects.
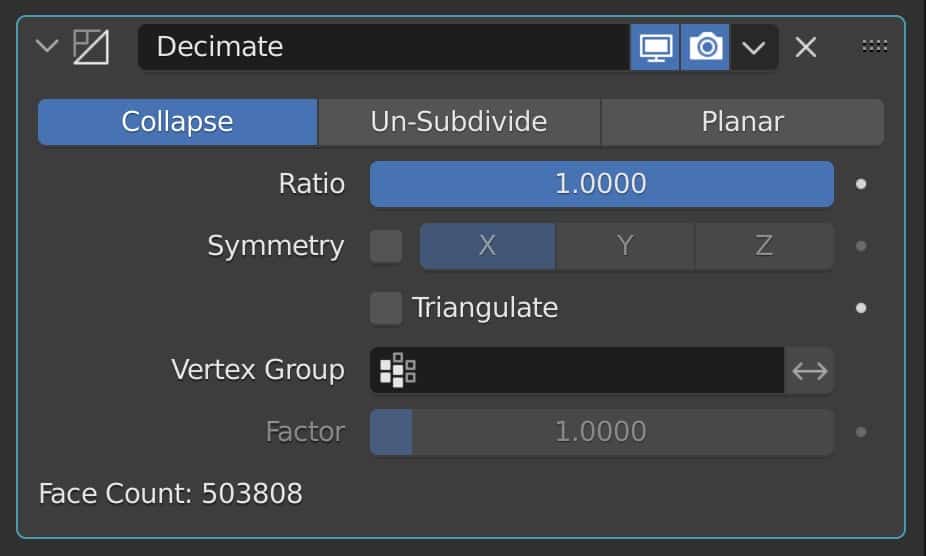
To begin using the decimate modifier to reduce your geometry, just click and drag on the slider within the modifies tab. The lower this value, the lower the amount of geometry will be on your model.
Which Method Should I Use With The Decimate Modifier?
The decimate modifier can be divided up into free methods. Each method will reduce your geometry in its own way. The first method is the collapse method of decimation. The second method is to UN subdivide and the third method is to decimate based on planar geometry.
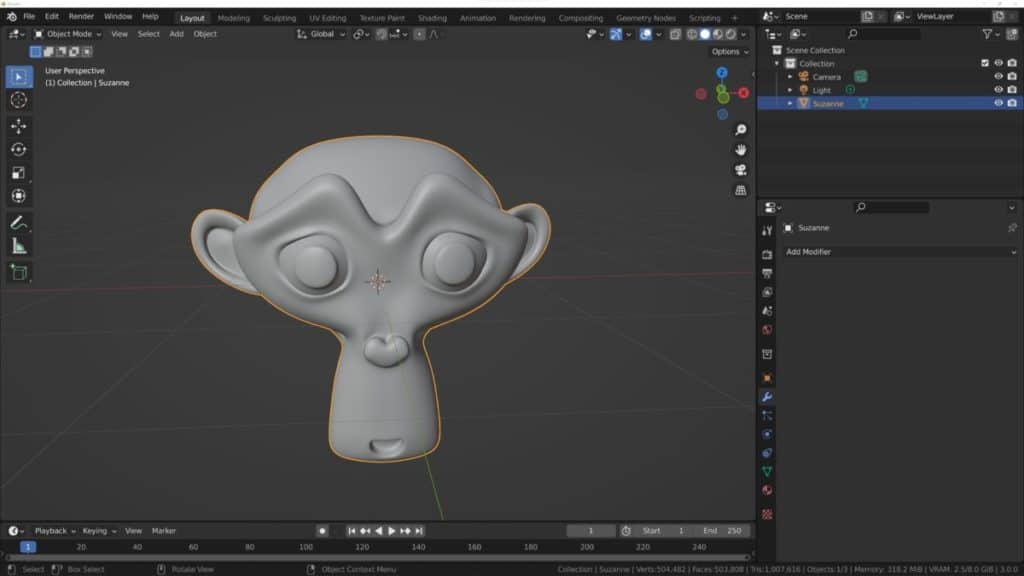
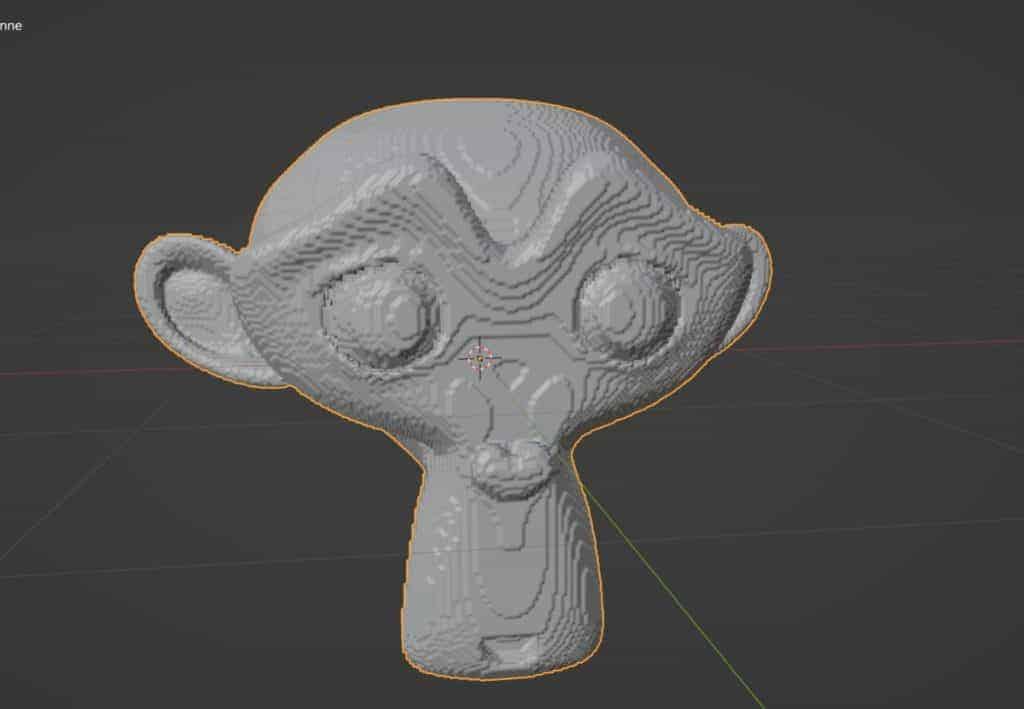
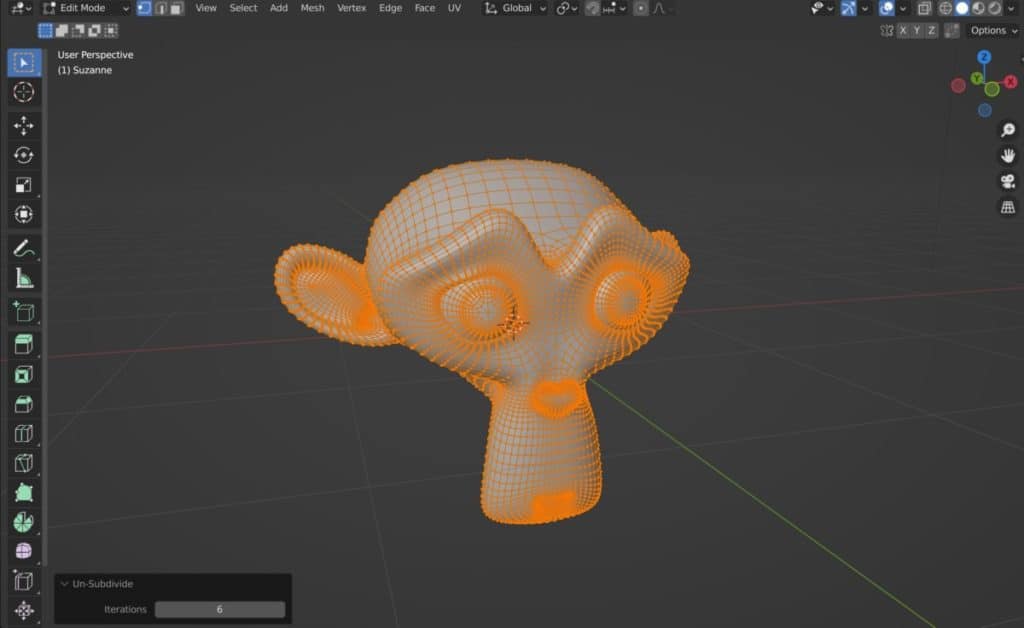
Below we have an example of Suzanne the monkey who has been subdivided a grand total of five times, giving it over 500,000 faces. We’re going to use this as our baseline for the decimate modifier and how each of the models work.
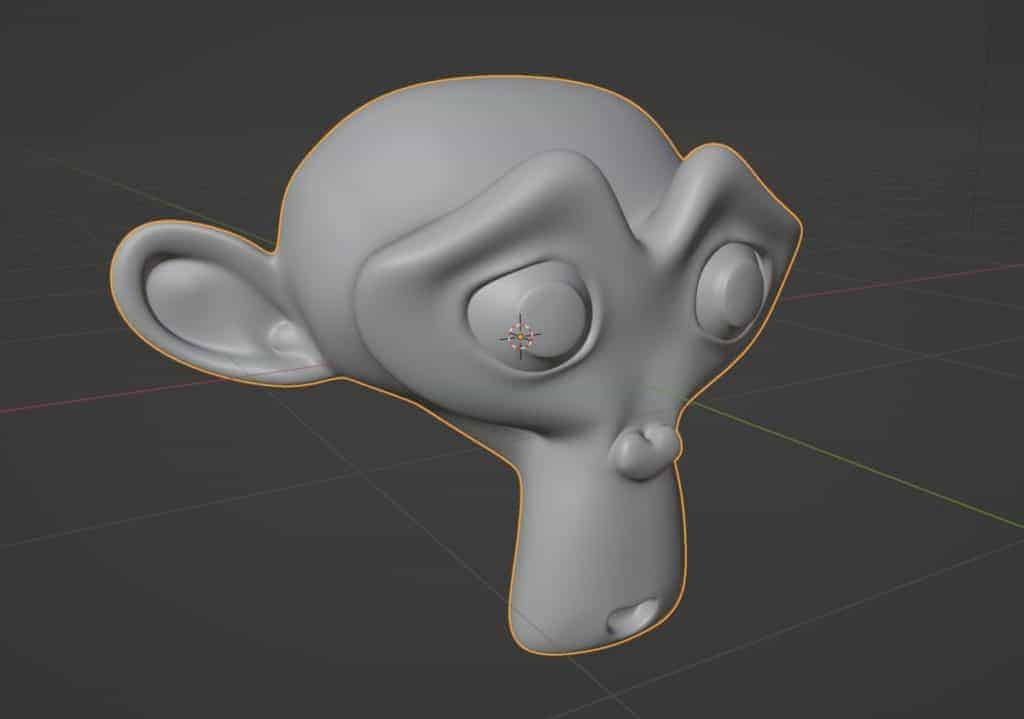
The Collapse Method
The collapse method will collapse the edges in together in a form of reducing geometry similar to that of merging.
This method does not focus too much on the topology of the model and prioritizes reducing the amount of geometry as quickly as possible.
Well, in many cases it does offer the best visual results. It is also the one method of the three that can cause the worst topology as a result. The topology, by the way, is the flow of the geometry on your model.
Also, when using the collapse method, you will be not only reducing the total amount of geometry, but if it is a quad-based structure then the collapse method will reduce it to a triangular structure because triangles have fewer edges than quads helping to reduce the total amount of geometry.
The Unsubdivide Method
The second form of decimation is to unsubdivide your model. With the unsubdivide option, you can increase the number of iterations in the modifiers tab in order to continuously reduce the total amount of geometry on your model. With the Unsubdivided tool, Blender will attempt to maintain the general topology of your model as best as possible.
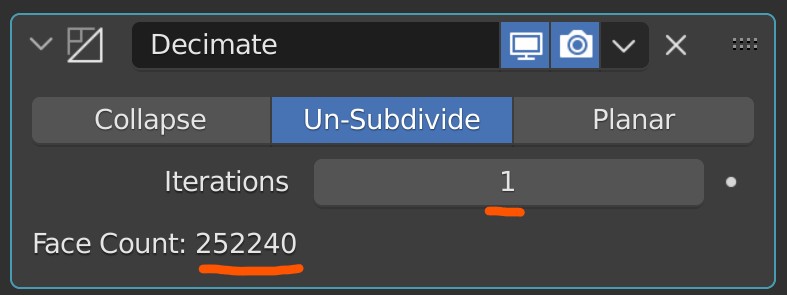
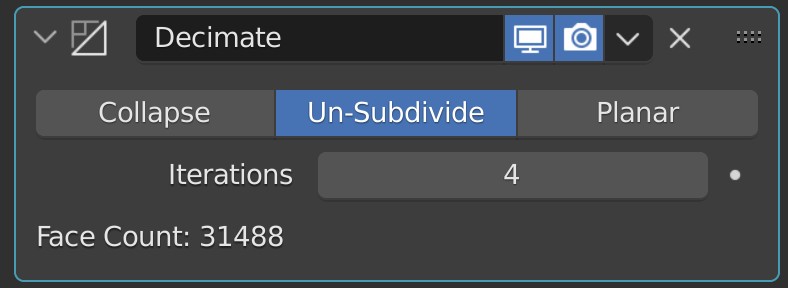
The iteration option is the only parameter that you can change with this method, and every time you increase that iteration value by one, you will in most cases half the amount of geometry on your model.
When working with an object that has a lot of smoother surfaces and curves, the unsubdivided option tends to be the best way to go in order to maintain the shape of the model.
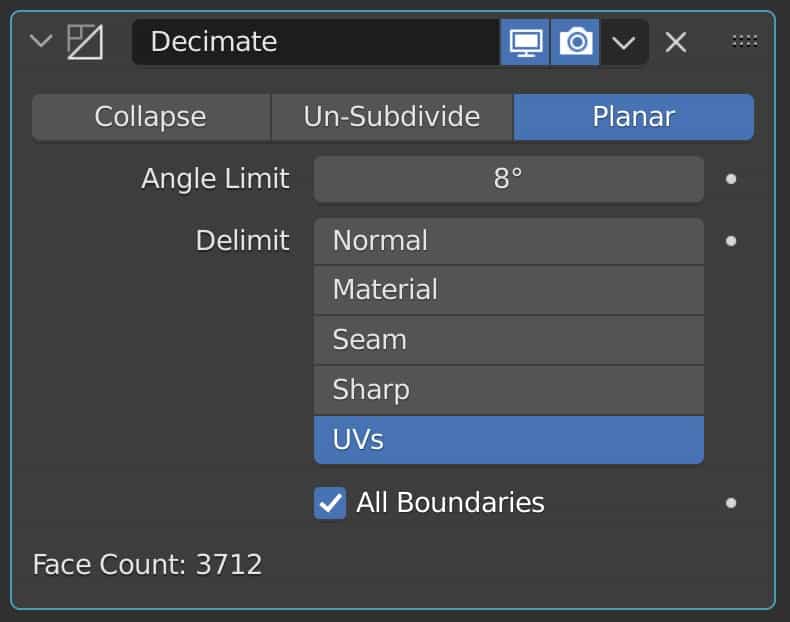
The Planar Method
The third choice of the free methods is the planer method. When using this method, you can reduce the total amount of geometry on your model based on the angle limit.
By default, this value is set to 5 degrees. The way the planar method works is Blender finds all of the edges that have an angular value below the set value of this modifier. And when it locates these edges, it will delete them.
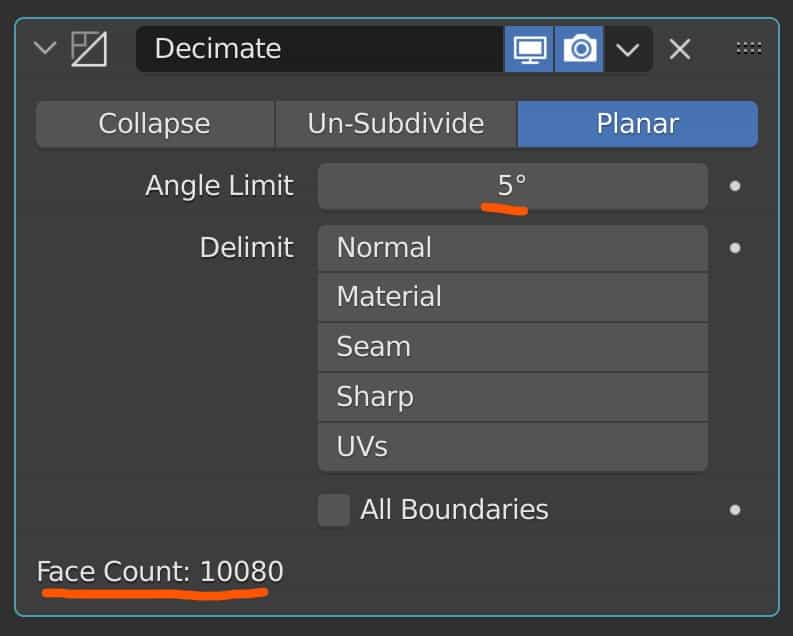
So when you increase the value here of your planer methods, you will decrease the total amount of geometry that you have because more edges will fall underneath that threshold and be deleted.
While the unsubdivide method issues for body smoother curved objects, The planer method is better suited in hard surface modeling where the angles of your shapes are generally much sharper and you will want to clean up the sides of your objects as much as possible.
When Should I Use The Decimate Modifier To Use In Blender?
There are going to be many situations where you are going to want to use the decimate modifier on your objects to reduce the total amount of geometry, but which situations are these?
The number one reason why you would want to use the decimate modifier is going to be when your viewport performance is impacted by the geometry density of your scene. This is fairly easy to do on mid to lower-end hardware, as well as mobile devices such as laptops.
It may also be useful to use the decimate modifier after you have created the sculpt of a model which has a lot of geometry density.
However, this is not the best option as the decimate modifier can quickly destroy finer details and there is a much better solution in the form of the Multiresolution modifier for reducing your geometry count in the viewport.
The Decimate modifier is best suited in situations where the topology of your model is not important to its purpose. For example, if you were to create a scene for the sake of rendering a still image. In this scenario, the topology of the model is not important, only its appearance, and so to help with your viewport performance, you may want to use the decimate modifier to lower its geometry.
Keep in mind that the more important the topology of the model is, the less likely you will be to use the decimate modifier as it affectively destroys the topology that you have. Examples of this can include models for video games as well as 3D printable models.
What Is The Difference Between The Decimate Modifier And The Remesh Modifier?
Another option for reducing the total amount of geometry on your model is to use the Remesh modifier. This is another modifier that loads the geometry of your model to make it easier to use for your 3D viewport. So what is the difference between the decimate modifier and the Remesh modifier?
The Decimate modifier uses a slider system in two of its three methods, so you can control exactly how much you want to decimate modifier to affect your model. This is true for both the collapse method as well as the planer method which uses an angular value to determine how to decimate the object’s geometry.
This means that when you are using the decimate modifier, you are using the original geometry as a base and then controlling how much you want to reduce the geometry by it from that baseline. But the Remesh modifier is a little bit different.
When using the various methods of the Remesh modifier, such as the voxel method, Blender will attempt to reconstruct your model from scratch based on the level that you define for the modifier. The higher the level in general, the more geometry that the model will have.
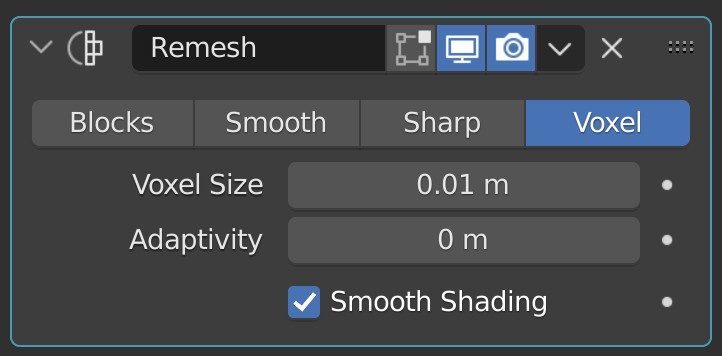
The way your model is constructed also changes with each method, and if you are working with a lower Poly model anyway, then the Remesh modifier is not going to be very useful as it will actually increase the total amount of topology on your model. If set up to a high enough level so that it can be comparable in terms of appearance.
The various remesh methods will also change the general look of your model depending on the method chosen. For example, if you choose the block method then you are literally changing the actual appearance of your model regardless of how high you increase your geometry.
Ultimately, there are better ways of remodeling your objects in Blender than the Remesh modifier, and so for now we recommend if your purpose is to reduce the geometry on your model and nothing more. The Decimate modifier is the better choice.
Is There A Normal Tool For Reducing Geometry Like The Decimate Modifier And Does It Have A Shortcut?
Modifiers allow us to control how much geometry our model has by controlling the attributes of the modifier. Regular tools allow us to reduce our geometry density as a permanent change and then continue the modeling process.
Many modifiers exist as a procedural variation to certain tools and that is also true for the decimate modifier, and actually, there is a tool comparison for each of the three methods used by the decimate modifier.
The collapse method of the decimate modifier does not have a direct comparison, but the closest comparison that we can make to it is a form of dissolving geometry. The tool in question is the collapsed edges and faces option.

With this tool, you are able to take a selection of edges and faces and then use this tool to collapse your selection to a single point. This is effectively a form of merging, as well as deleting, and is pretty much a straightforward tool that does not have a lot of room for control. So the decimate modifier and its collapse method offer a great deal more control to the user than this tool.
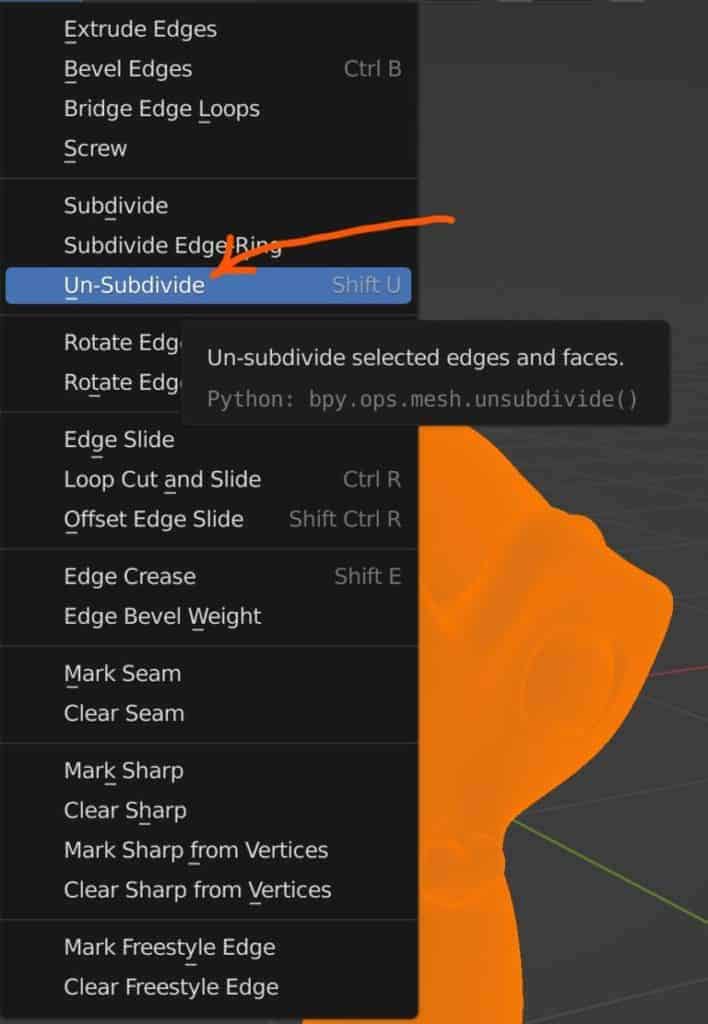
For the unsubdivide method of the decimate modifier, you could alternatively use the unsubdivide tool. To locate the unsubdivide tool, go to the edge menu while in edit mode for your object, and then locate the option for un-subdivide. Again, this will effectively do the reverse of the subdivide tool and reduce your geometry while maintaining the topology as best it can.
If you want to use a tool in place of the planar method for the decimate modifier, then you can use limited dissolve from the delete menu. Select the geometry that you want in edit mode and then press the X key to bring up your delete menu then select limited dissolve from the list.
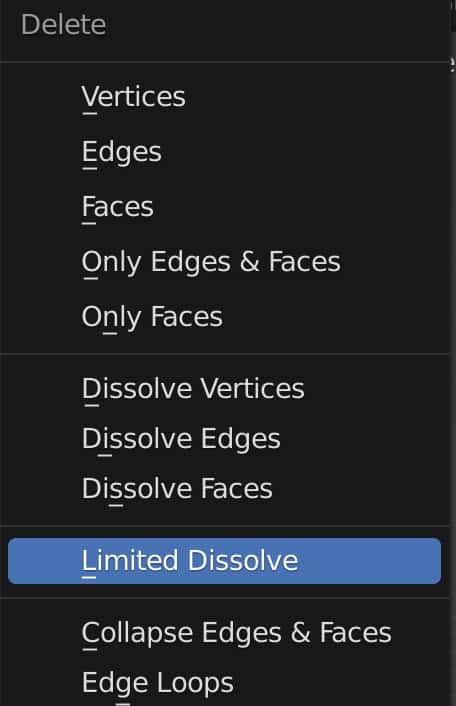
If you open up the operator panel you will see that you can control the angle at which the edges will be dissolved. This is similar to how the planer method works with the decimate modifier.
Other Ways To Lower The Poly Count Of Your Model With More Control
In addition to the two modifiers already mentioned, are there any other ways to reduce the amount of geometry on your model?
One way of controlling your geometry density is to use the multiresolution modifier, which allows you to control the level of subdivisions based on what you are doing to the model.
For example, you can set the sculpt value to a higher sub count and then work with a lower level in the viewport to improve performance.
The multiresolution modifier can also be used as a way of both subdividing and unsubdividing to control your geometry.
There are also some more basic methods of lowering the poly count of your mesh-based objects like the merge tools.
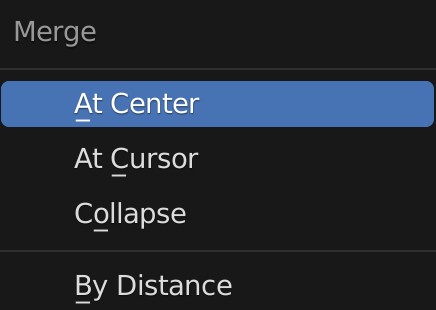
With merging you can make a selection and then merge all of the vertices in that selection to a certain point, such as the location of the first vertex, the last vertex, or even the 3D cursor.
A special type of merge tool known as merge by distance allows you to merge your geometry based on the distance between the vertices. If this distance falls below the defined threshold then any vertices found below this level will be merged.
To access the merge tools you can go to the mesh menu in the 3D viewport header and select menu from the list or you can use the hotkey M to open up the merge menu in the viewport.
A longer but more controlled approach is to retopologize the model. This means that we the high poly model as the base and then construct a low poly version of the same object over the top. Then if required we use a process known as baking to transfer the finer details to the low poly model.
This approach to modeling has long been used in the video game industry to create characters that look highly detailed but without the messy topology underneath that can affect the game’s performance.
Thanks For Reading The Article
We appreciate you taking the time to read through this article and we hope that you found the information that you were looking for. We have many articles on the various aspects of Blender and have compiled a few in the list below for your reading.
- Can You Make Art Using Blender 3D?
- Why Does The Modifier Icon Appear Red?
- How To Unsibdivide A Model To Reduce Geometry
- The Best Shortcuts For Navigation In The 3D Viewport
- Is Blender The Only Free Software Out There?
-
Detailing with Booleans: Blender Techniques
Incorporating Boolean operations for intricate detailing in Blender.
-
UV Layouts for Low-Poly: Blender Tips
Optimizing UV layouts for low-poly models in Blender.