The vast majority of projects we create in Blender will eventually be rendered or exported for use in different applications. These applications range from game engines like unity to MP4 files for videos and animations.
When it comes to our rendered animations, we need to define where that animation will be stored after the rendering stage has been completed so that it can be used outside of the Blender software.
To define the output location of your rendered animation, go to the output tab in the properties panel, and locate the output section. Change the output folder from the temp directory and create a folder unique to your animation. Alter the file format and container to the set up you want to store your video file as.
Once you have defined the location of your animation, you can then move on to other aspects of the animation like the frame rate, frame range, resolution, and the animated keyframes themselves.
Why Do We Need To Define An Output For Our Animation?
A critical step in the animation process is to define the output if your animation when it has been rendered.
This step can be done before we press the render button but should be done before the final render is attempted.
If the output is not defined, then the temporary folder is used instead, and the temporary folder is challenging to locate, and its files are only stored on your computer for a set amount of time.
Therefore we need to assign a location that is easy enough for us to reach from any location on our computer, whether that be the desktop or as a favorite in the file browser.
The location should be an empty folder with the same name as the animation. It is good practice to use folders unique to the animations we can create for easy organization.
How To Define The Output Location?
To define the output location, go to the properties panel, which houses all settings relating to our rendered images and animations.
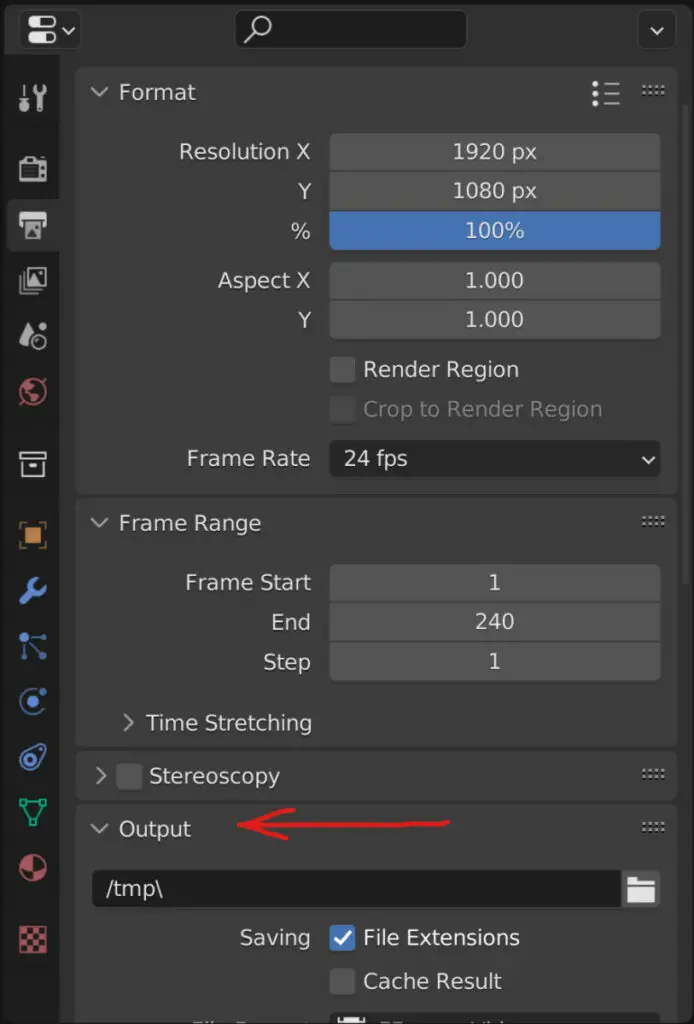
The output tab is where we will find the settings for our animations. The icon looks like a printer and a picture.
These tabs are split into their own sections, and the section that we are looking for is the output section, which should be below the frame range.
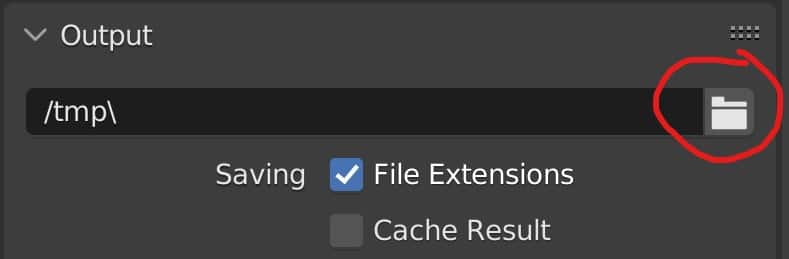
One of the options here is to change the target directory for our renders. On a windows device, the target directory will be /tmp\. The folder icon next to it will open up the file browser in a separate window.
Once this window opens, you must create a new folder to store your rendered animation.
It is recommended that the location for this folder is easy to reach. For example, you could save a new folder to your desktop.
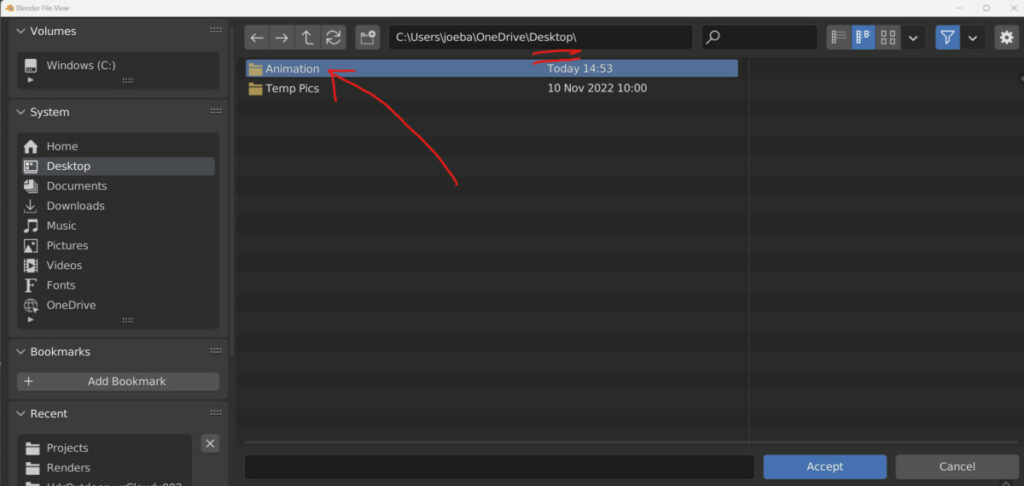
Alternatively, you could find an easy to access location within your documents. Make sure that it is named appropriately.
For better organization, create a primary folder and label it as Animation. Open up the animation folder and then create a secondary folder. This is where we will store our animation.
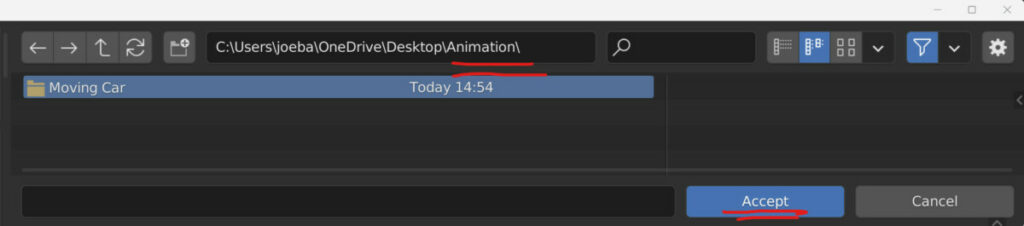
Make sure to name the animation so that it matches what the video actually is. For example, if your animation was of a moving car, you could label the folder as moving car.
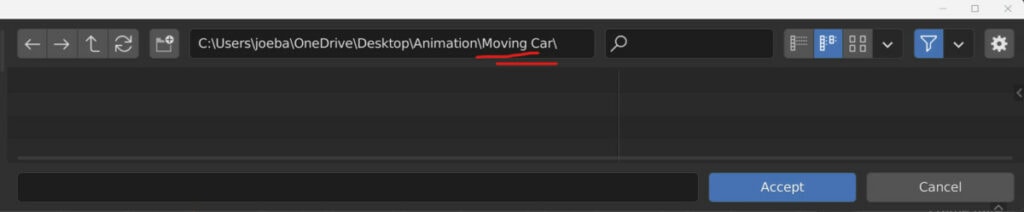
Once you have to find your location, click on the accept button in the bottom corner of the file browser, and you should see in the output tab that the new file output matches the folder that you created/selected.
Choosing The Correct File Format
Bloody option for defining the file outputs. We can change the file format. By default, this is set to PNG, which is an image format.
There is a use case for setting the movie file as an image format, but we will cover that briefly. To change your file format, select PNG to open a menu split between image file formats for rendering a single image and movie file formats for rendering animation.
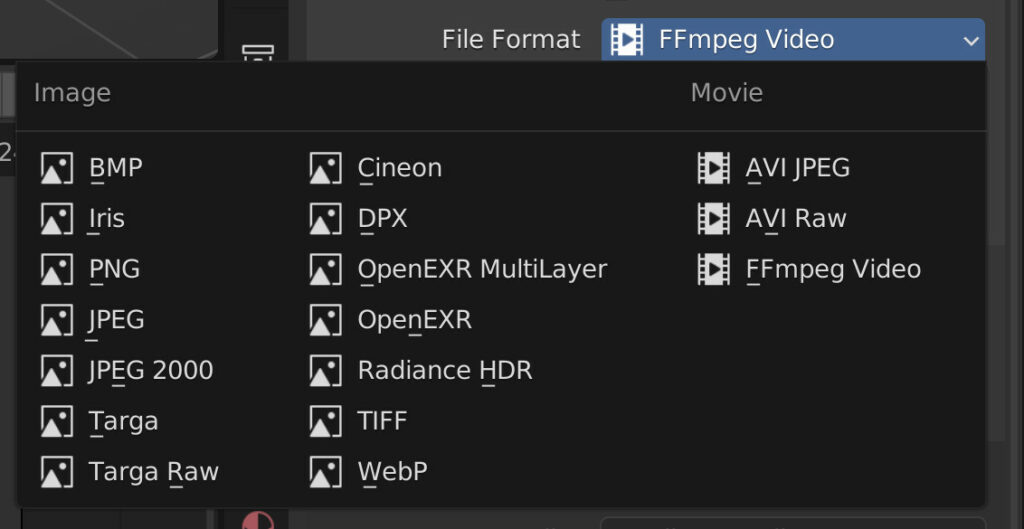
You will notice that the images section has more options than the movie section, but there is more to it than just choosing a movie format. You will also need to define the encoding container and the video codec used to make the animation accessible to certain video players using the FFmpeg file format.
Which File Format Is Best?
Of the three options available, the FFmpeg format is the most flexible. Select this file format, and an additional subsection labeled encoding will be available.
It is essential to define how your videos will be encoded for several reasons…
- Your settings will dictate the overall quality of your final renders, as specific setups can render more information than others.
- How a video is encoded will influence what video players can use it. Not all video players can use all file formats.
- The size of the final output video changes significantly depending on the video codec that is used.
In short, the encode settings determine the quality, accessibility, and size of your renders.
So, what settings do we use? No perfect setup offers the best solution to all three criteria, so you have to decide what is best for you.
For the container, the following settings will be available to you:
- MPEG-1
- MPEG-2
- MPEG-4
- AVI
- Quicktime
- DV
- OGG
- Matroska
- Flash
- WebM
The container is what the video is stored in and is key to the accessibility of the animation for the video player that you want to use.
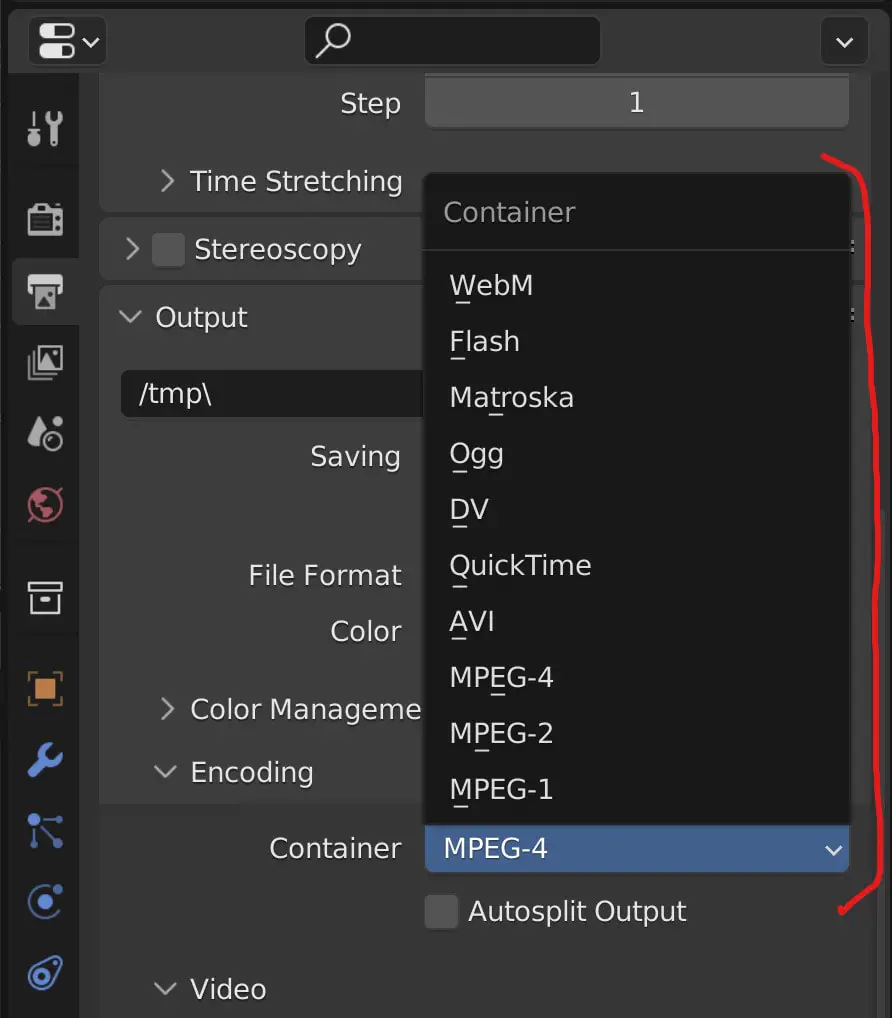
Depending on your situation, the best choices here are MPEG-4, AVI, Quicktime, and Matroska.
You then have to define the video codec settings, which will be used to determine the size and quality of your animation files.
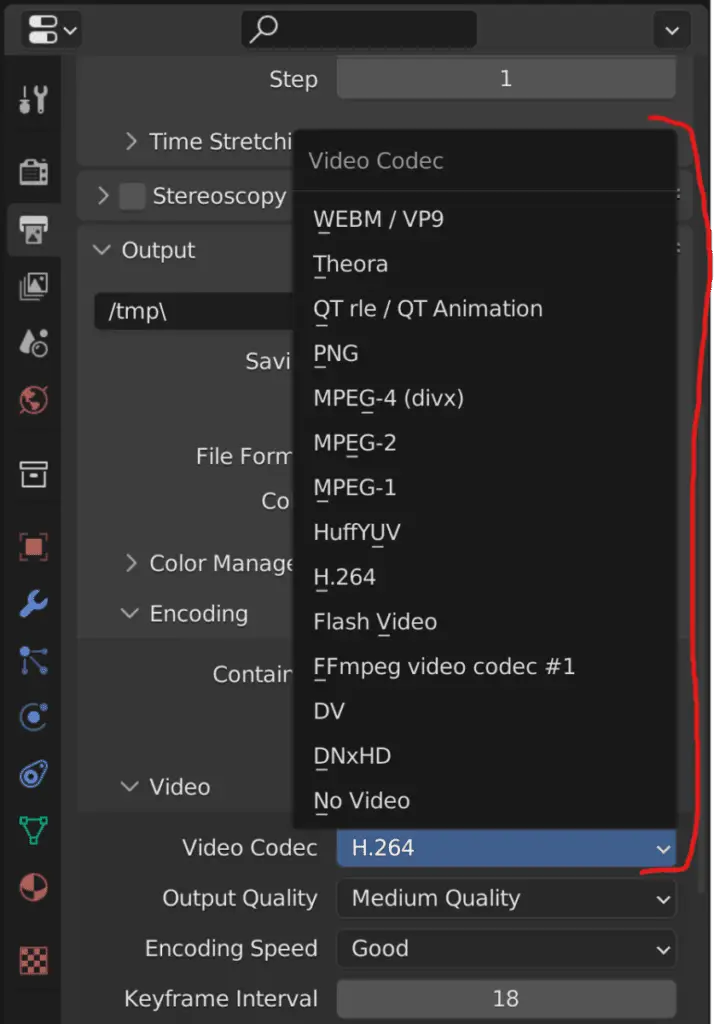
Note that some video codec files are not compatible with certain containers and vice versa. However, the codecs do have similar names so you will largely be able to guess which codecs can be used with which containers.
We use the H.264 codec with the MP4 container, as this setup is highly accessible across most mediums. Its main expense is in file size as this setup can require much more storage than a Quicktime format.
In addition to the video codec, we also can change our output quality and encoding speed.
The output quality allows us to control the trade-off between quantity and file size. The greater the output quality, regardless of the video codec, the more file size is required to store that video.
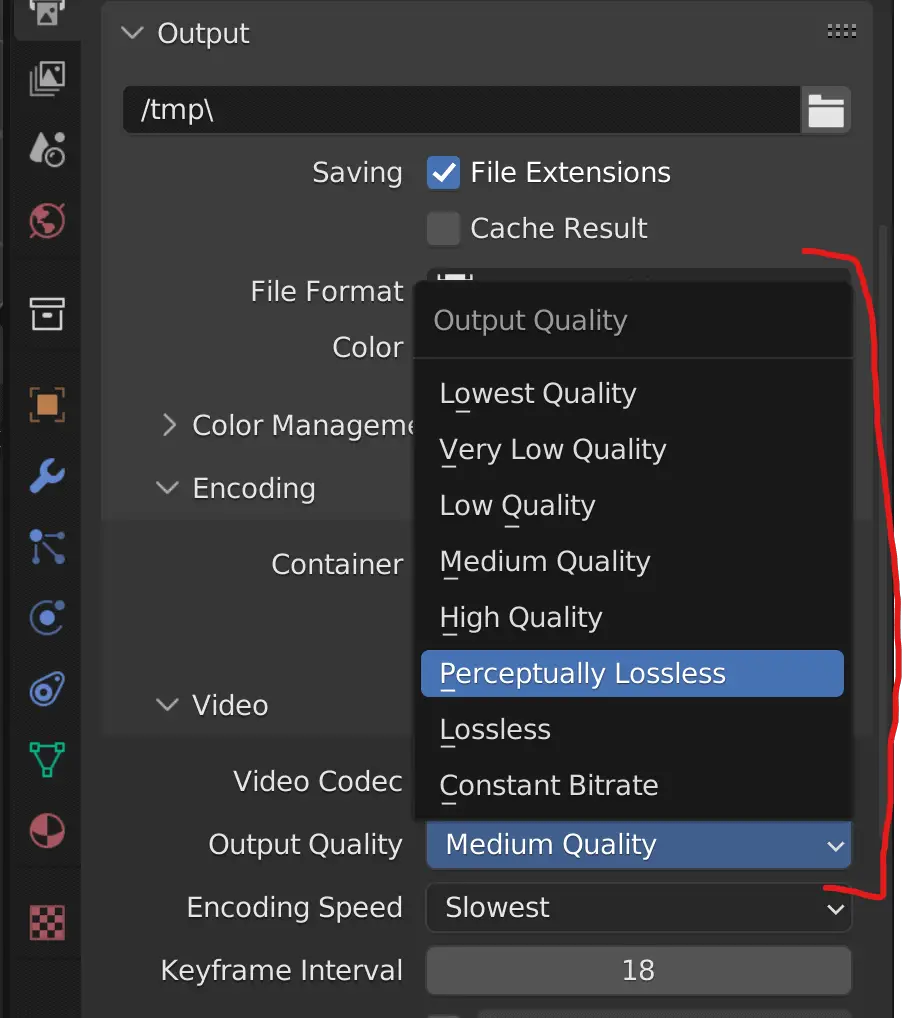
On the other hand, by reducing your output quality, you will reduce the required file size. If you’re unsure of the best option, stick with medium quality for the output. However, if you are required to produce animation at maximum quality, you may want to sacrifice file size, especially if it’s part of a larger project.
However, we don’t recommend going beyond the perceptually lossless setting, as the quality between this setting and those beyond it is tough to discern.
From here, going with a lower-quality setting can create artifacts in your rendered videos, such as color banding.
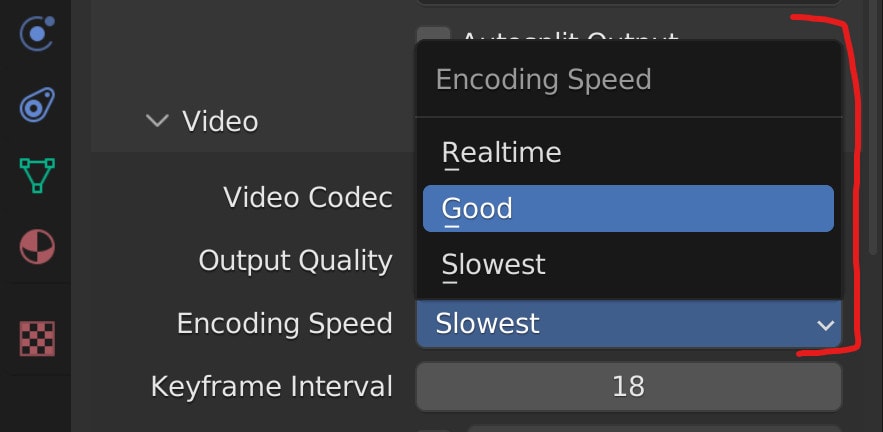
The option directly below that is to define the encoding speed. This is a trade-off between compression effectiveness and the time taken to encode your animation.
Once again, if you are looking for the best result, you will want to change this to the slowest encode setting, especially if you already have a decent setup for rendering your animations.
In most cases, however, the standard setting will suffice here.
Creating And Converting An Image Sequence For Movie Files
If you’ve rendered a longer animation, then you may have experienced that which all animators dread when your software decides to crash halfway through rendering and animation, and all the time spent beforehand is wasted.
If the amount of time it takes to render an animation is approximately 2 hours, and then 90 minutes into that process, your software crashes, it doesn’t pick up where it left off. Everything that was rendered in those first 90 minutes is no longer usable.
This is not the various thing in the world either. It’s happened to us numerous times, especially with older hardware.
While a slightly longer approach, a good solution would be to render your animation as an image sequence first.
When defining the file format, we switched from a PNG file to a movie file like an FFMPEG. However, there is a use case for keeping it as a PNG.
If you choose an image file format instead of a video file format, then when you render the animation, each frame will be rendered as before, but then they will be saved as separate images rather than as a single movie file.
Each of these images will be named based on the corresponding frame. Frame one will be 001; frame two will be 002, et cetera.
This is a powerful workflow because if your software crashes at any point during your rendering. All images rendered beforehand will have been finalized and accessible in your designated output.
For example, if Blender crashes on frame 45, the first 44 frames will already have been completed. To continue the process, reopen your blender project and position your active frame range so that this start frame is 45. Then resume the rendering process of your animation, and it will restart from that frame.
It is essential to select the frame you want to restart from, as failing to do so will see Blender start from the beginning of your animation again.
When it is all complete, you can view your list of frames in the file directory where you stored it. This may not seem helpful, but we can import this image sequence into the Video Sequence Editor In Blender, change our render settings to video output, and rerender the image sequence.
This conversion is far quicker than the render itself, and the result will be a high-quality animation file without the worry of our software crashing during the rendering process.
To learn more about the whole process of converting image sequences into movie files, take a look at the full article listed here.
Thanks For Reading
We appreciate you taking the time to read through the article. We hope you found the information you were looking for. If you are interested in learning more about the Blender software, you can check out a few of the articles we have listed below.
- Choosing The Target Resolution For Your Renders
- What Is The Frame Range And How Does It Affect your Animation
- How To Change Your Animations Frame Rate
- Rendering As An Image Sequence And Converting To A Movie File
- Can You Use Blender For Animation