There are a wide variety of tools and functions that you can use in blender 3D, and not all of them are associated with 3D modeling. However, many of them are, and one of the most important toolsets to learn is the ability to select objects in your free D viewports and outline a panel.
To select an object in the 3D viewport, hover your mouse cursor over it and left-click. You can use the shift key to select multiple objects in your viewports. You can also use additional tools like Box and Circle select to select more objects faster.
Because the ability to select objects and geometry is so important, Blender offers a wide variety of different ways in which you can select your models. If you are able to select the correct model at the correct time, then it just makes the whole process a lot simpler.
How To Select Objects In The 3D Viewport?
Of all the skills that you could possibly learn in 3D modeling, the most basic of all is probably going to be the navigation of the 3D viewports, and being able to move around in 3D space.
The second tool you’re going to want to learn is the ability to select objects in your 3D viewports. If you can’t select your objects, you can’t do anything with them.
To select an object in the 3D viewport, just hover your mouse cursor over that object and then hit the left mouse button. A selected object will appear with yellowish-orange highlights.
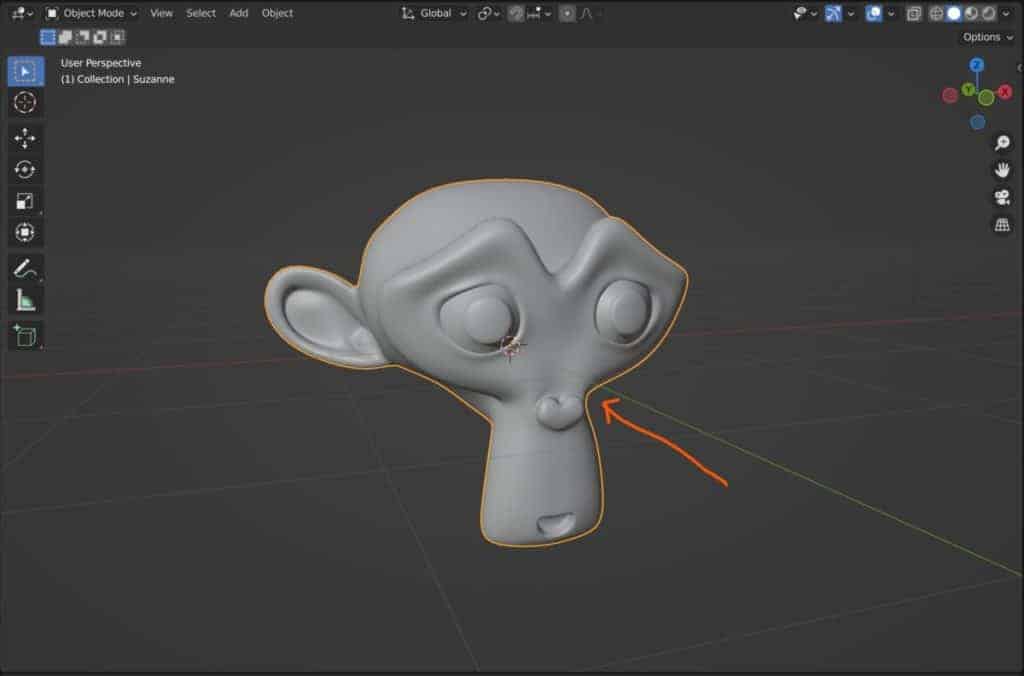
This highlights the outline of that model to indicate that it is a part of your selection. You can then manipulate that object however you like. For example, you can use the G, R, & S keys on your keyboard to grab, rotate and scale your model. You can’t do this if you don’t have the model selected.
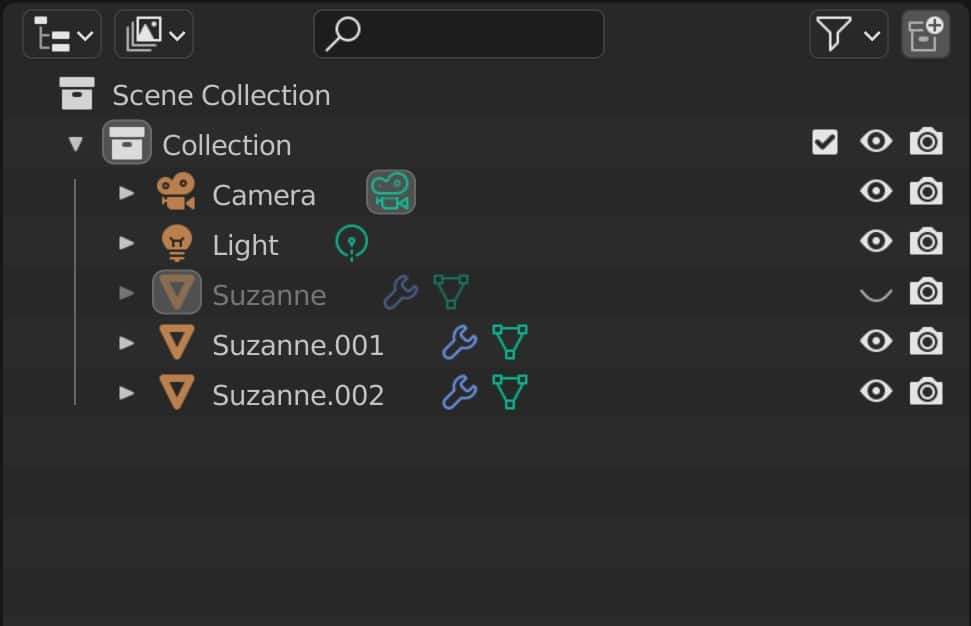
Selecting Your Models Using The Outliner Panel
Another way of being able to select your models is to actually use the outliner panel instead of the 3D viewports. This becomes very useful when you are working with a scene that has a lot of objects and you need to locate a specific object.
It can be difficult to select specific objects when you have hundreds of them in your scene. The outliner panel is structured as a list, so you can locate the exact object that you want and then left-click to select that object from the outliner panel.
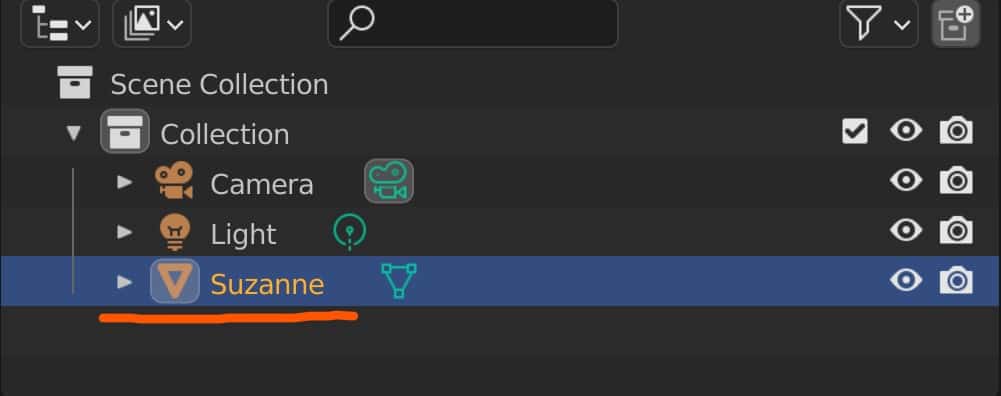
Once again, the object would appear with a yellow highlight to indicate that it is active, both in the outliner panel for its icon as well as the 3D viewports.
Selecting The Mesh Instead Of Selecting The Object
Each object in Blender has what is known as data blocks. For example, our cube object, which is the default model, has three data blocks associated with it. These are the object data block, the mesh data block, and the material data block.
One thing that we can do in the 3D viewport is select our geometry in edit mode so we can change the mode of our mesh object. If you take a look at the top corner of the 3D viewports you will see a menu labeled object mode.
By default, we are in object mode for any object that we select, and through object mode we are able to grab, rotate and scale that object. If we want to change this so that we can manipulate the actual structure of that model, we can left-click where it says object mode and then select edit mode from the list that appears.
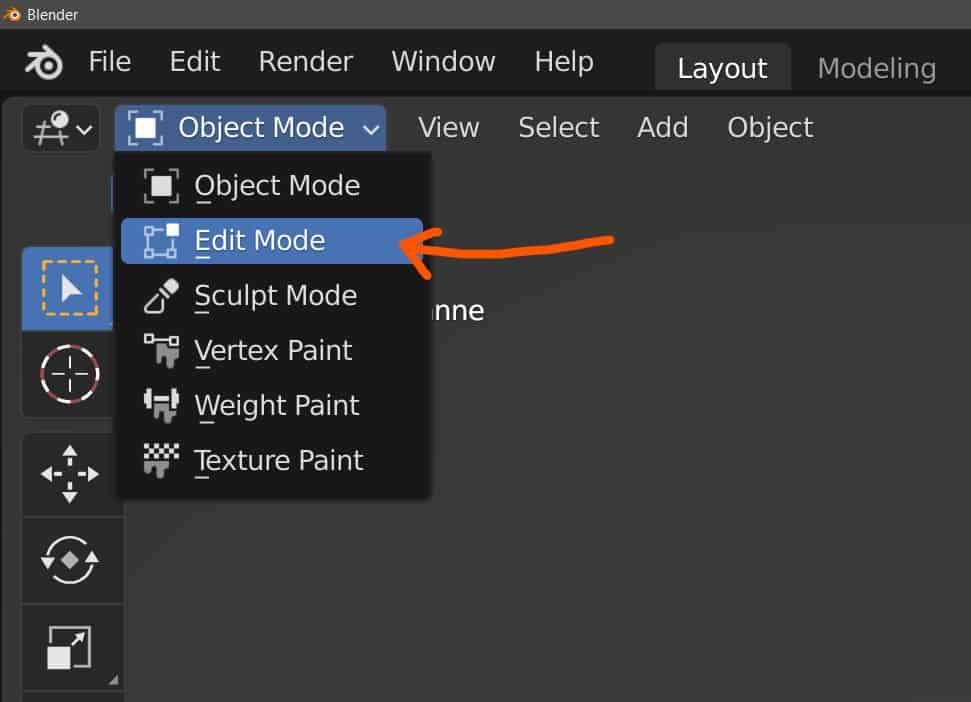
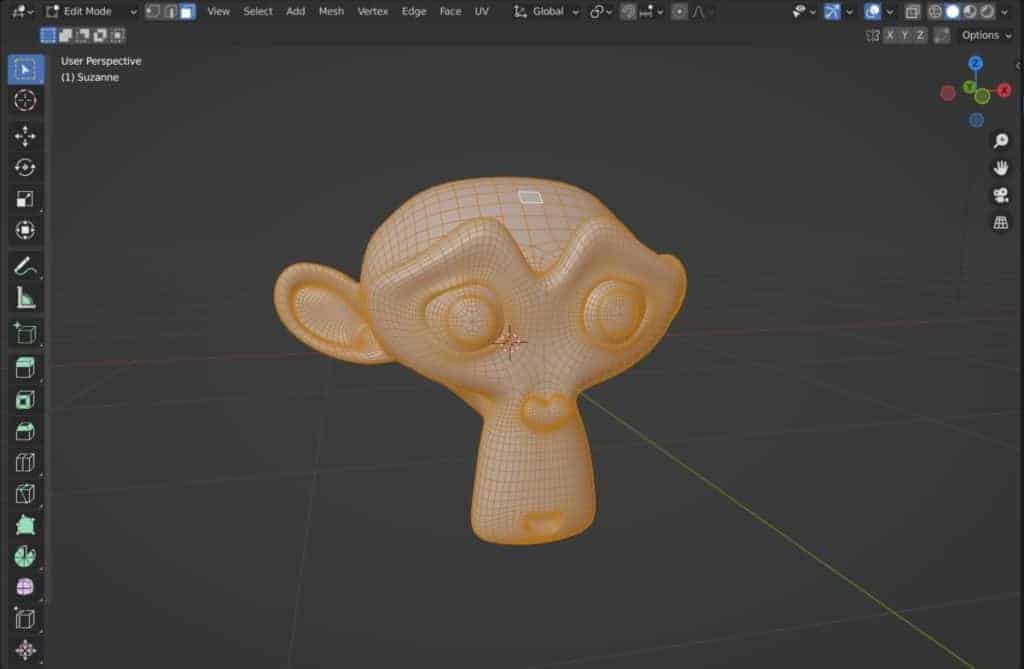
Now you will be able to edit the vertices, edges, and faces which make up the geometry of your model. You can also press the TAB key to switch between object mode and edit mode if you want to select either your main objects or the geometry that creates those objects.
Another way of selecting your object’s geometry is to select the mesh data in our outliner panel. Go to the outliner panel and click on the little arrow next to one of your objects. This will open up a hierarchy and underneath it, you will have the mesh data that is associated with that object.
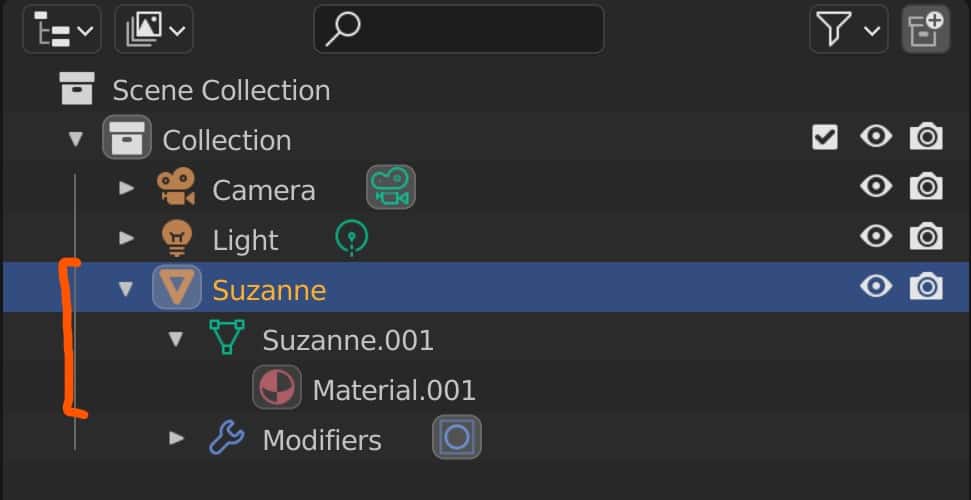
If you left-click on the mesh data instead of the main object, then not only will you select the object, but it will also transition to edit mode straight away without having to go to the menu button or pressing the tab key in the viewport.
Isolating A Single Object In Local View For Editing To Avoid Selecting Others
When working in a scene or environmental creation, you’re going to be working with a lot of objects potentially at the same time to structure out your environments.
One of the challenges to 3D modeling is being able to edit one model and having the other models effectively get in the way of your editing.
When editing an object, you will need to orbit around that object to view it from various angles and to manipulate its geometry, and sometimes the geometry of other objects can obscure this view.
To combat this, Blender has what is known as local view, which will hide all of the objects in your scene apart from your selection.
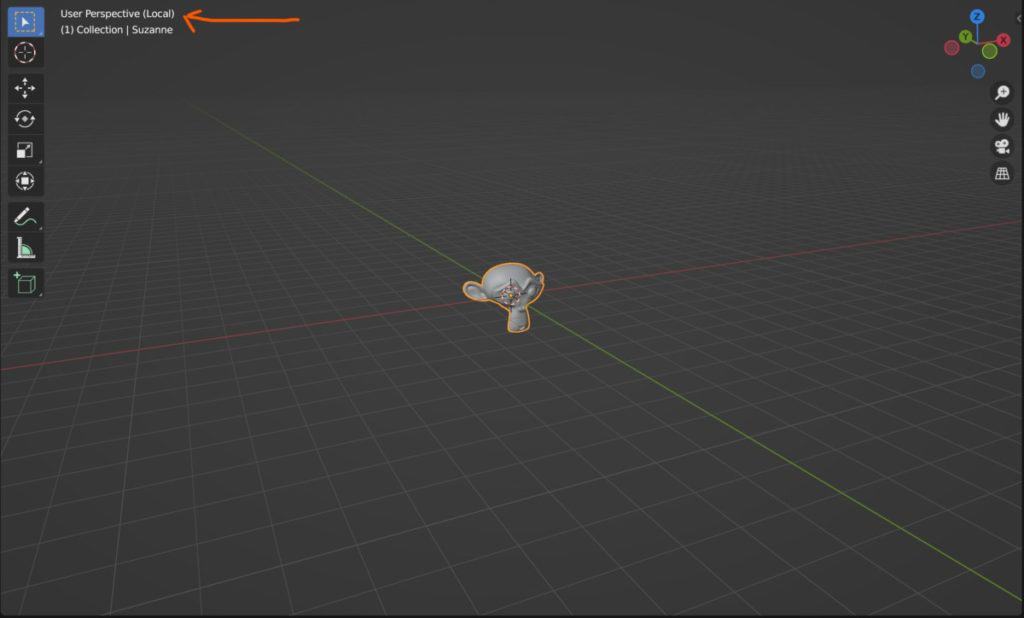
Select the object that you wish to isolate and then use the hotkey, which is the / button on the number pad, to enter the local view for that object.
You can also go to the view menu to access the same tool. Go to where it says local view, open up the menu here, and then select toggle local view.
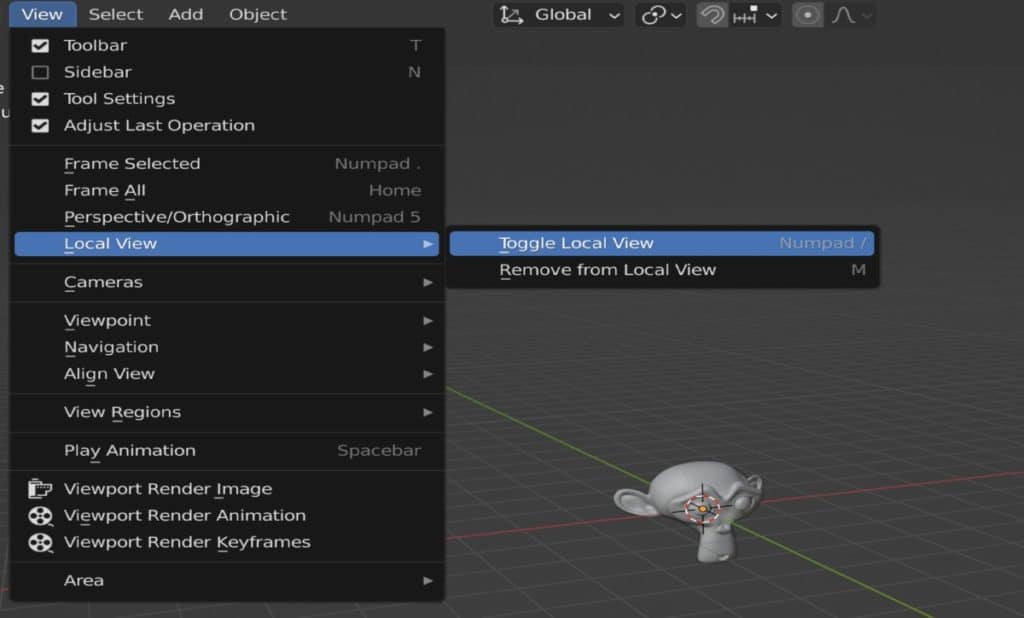
The same option from the view menu, as well as the same hotkey on the number pad, will take you out of the local view for that object. You can have multiple objects in the local view at the same time by holding down the shift key and selecting.
Why Can I Not Select Objects In The Viewport?
Sometimes you may notice that you are unable to select any objects in the 3D viewport, or it may just be specific objects that you are not able to select.
The number one reason as to why this may be the case is that you have disabled selection for that object. You may also have locked your transforms in the side panel. So let’s take a look at how we can correct each of these issues.
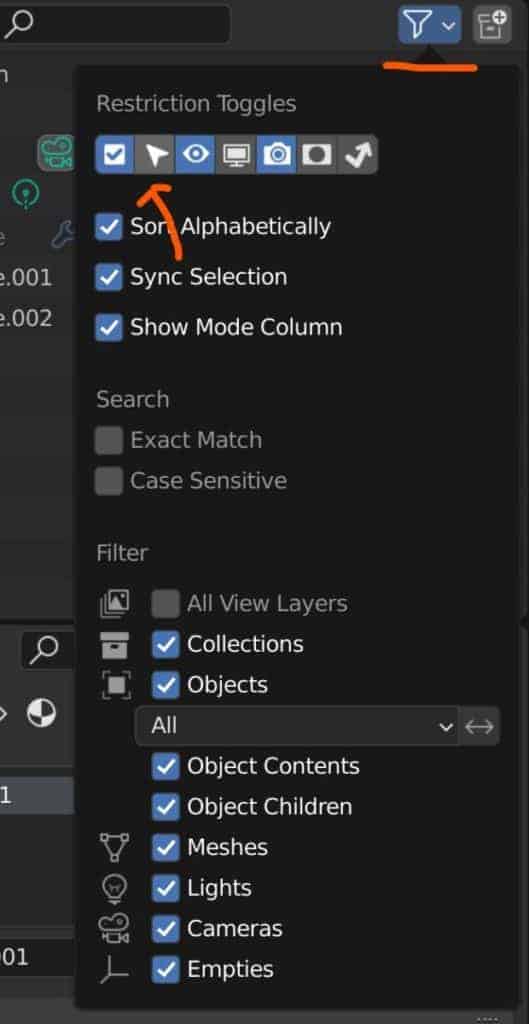
If you have disabled the selection for the objects themselves, then go to the outliner panel. If you cannot select the object because it has become invisible, then this is likely because it has been hidden from view. Locate the object’s name in the outliner panel and you should see an eye icon that will probably be closed next to it.
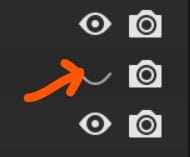
Left-click on this icon and it should bring your object back into view. However, if you have a visual of your object and you still cannot select it, then go to the icon in the outliner panel that looks like a funnel.
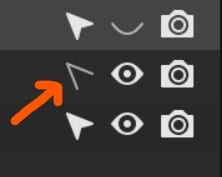
Under the restriction toggles, select the Second tab, which looks like a mouse cursor. This will indicate whether or not an object is selectable. It may be that you already have this option visible in the outliner panel and that you have already tipped the option to make your object unselectable. Locate the object in the outliner and tick this option in order to make it selectable.
The other issue is when the actual transforms are locked for your location, rotation, and scale. To troubleshoot this, press the N key in your 3D viewport and open up your side panel.
With the main object selected you will see the transforms for location, rotation, and scale, and on each axis you will see a lock icon.
If the lock icon is locked, then that means that you cannot manipulate the transform on that specific axis. Make sure they all appear unlocked so that you are able to move, grab, rotate, and scale your models.
The Different Methods For Selecting Multiple Objects In Blender
In addition to being able to select single objects, we can also select multiple objects at the same time in Blender. The easiest way to do this is to press the a key on your keyboard. This will select all of the objects in your scene.
If you want to deselect all of the objects in your scene, then you can use the hotkey Alt + A or just left-click anywhere where the objects are not located.
You can select objects one by one by using the shift key. Select one object first and then hold down the shift key and left-click on a second object.
Two objects will now be selected at the same time. This allows you to grab, rotate and scale both objects based on what is known as a pivot point.
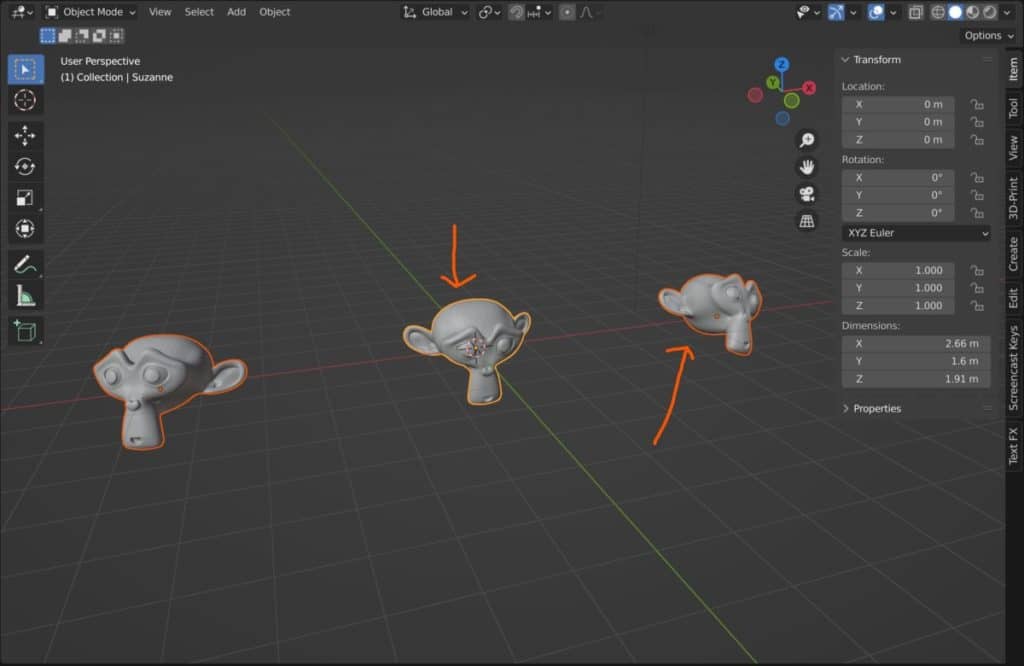
You will notice that one object has a yellow highlight while the other object has an orange highlight. The yellow highlight indicates which object is the active selection, which plays a part in other tools that may be used when selecting multiple objects, such as the pivot point.
If an object has an orange highlight, then it is considered a part of the selection, but it is not the active object. Again, this affects the way that certain tools will interact with the selection. Let’s use the pivot point system as an example of how selection works.
By default, if we rotate our objects or our selection, then we will rotate the objects around the pivot point, which is the median position between the two models. In this case, it does not matter which one of them is the active object.
Go to the icon in the top center of the 3D viewport that looks like two circles overlapping each other. This is the pivot point menu. Select it to open up the menu.
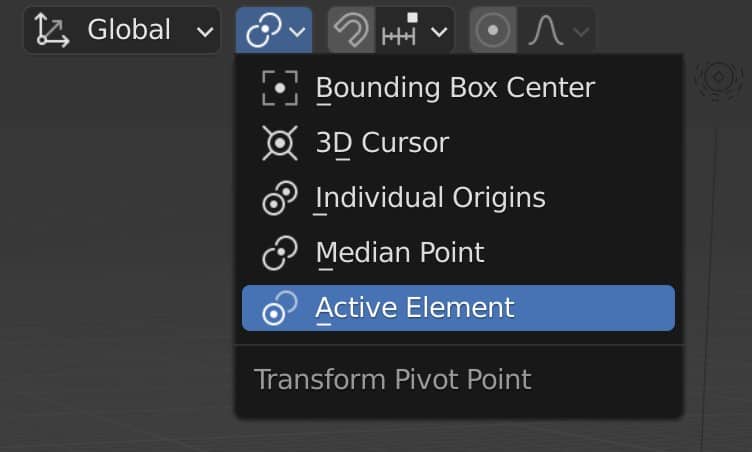
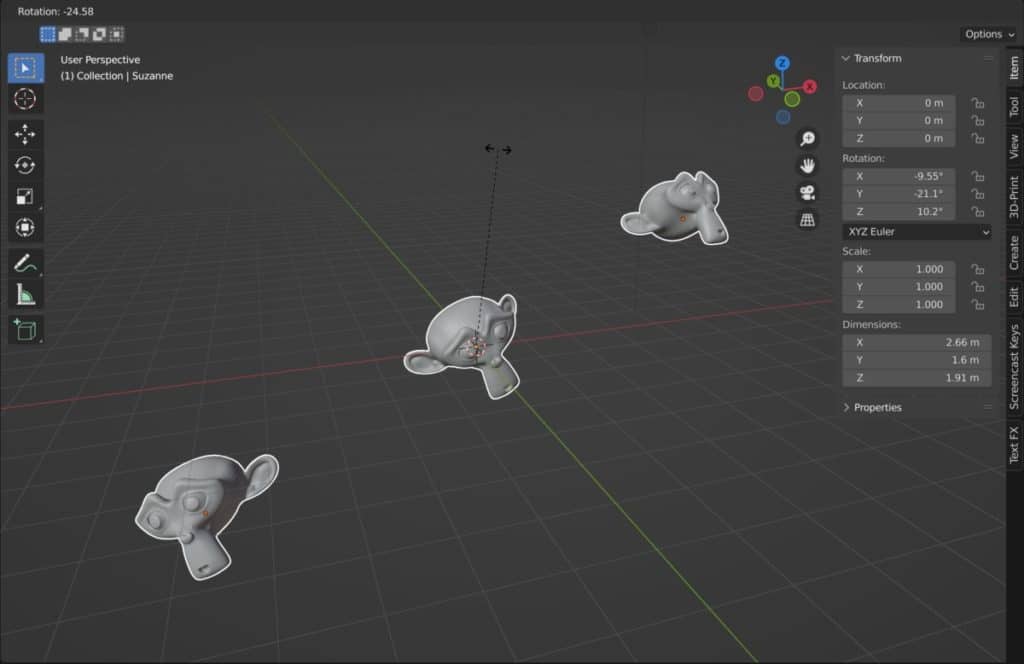
The median point is the pivot point that is used in our example, but we can change this to another option such as the active elements. If we change it to the active element and then we attempt to rotate our two objects again, you will notice that we rotate based on the object origin of the active selection.
So the rotation of the active object looks normal, and then the second object which is not active rotates or orbits around the active selection. This is just one example of understanding how selection works when using specific tools.
Another method of selecting multiple options in the 3D viewport is to use the box and circle selectors. To the side of our viewport is the tool shelf and in this tool shelf, the first option that we have is our method of selection.
By default, we are set to box select. What we can do with box select is left-click and drag in our viewport to create a white box. When we release the left mouse button, the box will disappear, but any objects whose object origins fall within that box will be added to our selection.
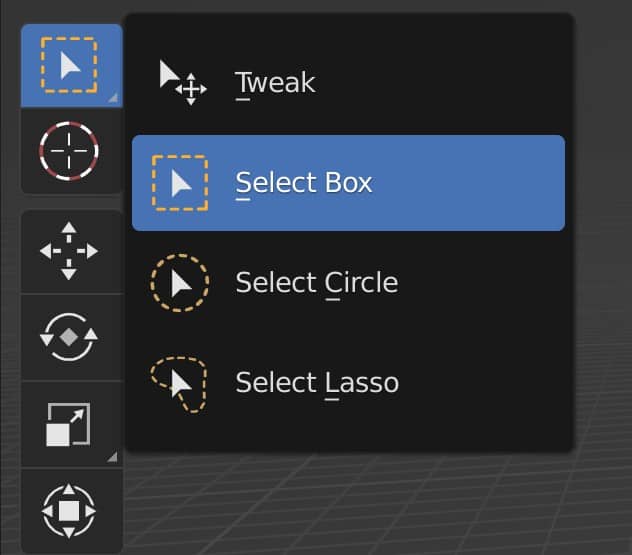
Alternatively, we can go to the tool shelf, and we can left-click and hold on this selection icon to bring up the menu which displays all of our selection methods.
We can choose circle select from this menu and then we can use our circle to click and drag and then begin selecting multiple objects in our scene. Without the need of using the shift key.
Thanks For Reading The Article
We appreciate you taking the time to read through this article and we hope that you found the information that you were looking for. We have many articles on the various aspects of Blender and have compiled a few in the list below for your reading.
- Downloading An Older Version Of The Blender Software
- Joining Vertices And Edges To Create New Geometry
- What Are The Shortcuts For Edit Mode In Blender?
- Enabling The GPU For Rendering In Cycles
- Navigating 3D Space In The 3D Viewport
-
Hair & Fur in Blender: Particle Systems
Creating realistic hair and fur with Blender’s particle systems.
-
Skin Texturing: Subsurface Scattering Techniques
Mastering skin texturing with Subsurface Scattering techniques in Blender.
-
Anatomy Modelling: Blender Muscle Guide
Sculpting anatomically accurate muscles with Blender’s powerful tools.