While it may seem like a mundane skill to learn, the ability to cut holes into your objects is important for the creation of 100’s of different objects from bowls to cars. There are different ways of cutting these holes into your geometry and each method affects your topology in a different way.
These are some of the methods that you can use to create holes in your mesh objects:
- Inset And Extrude Combination
- Deleting Geometry And Then Solidify
- The Boolean Modifier
- The Knife Tool
- Knife Projection Method
- Geometry Nodes Boolean
The best method for you will depend entirely on the shape of the model. For example, a simple object may only need to use the inset and extrude combination to create the hole, while a more complex object may need to use another object’s geometry as the boolean.
Using The Delete Tool To Create Holes For Your Model
One of the easiest methods of creating holes is to delete existing faces on our 3D model. In object mode, the delete tool is used to remove entire objects from our scene, but in edit mode, the delete tool is more powerful and allows us to delete specific areas of our 3D model.
Let’s start with the simplest of examples, the default cube. By deleting the top of the cube we can transform the object into a box that we can use to perhaps store other objects into.
To delete geometry, first, select the object, and then hot the TAB key to enter edit mode, or go to the top corner of the viewport where it says object mode, click to open the menu, and then select edit mode from the list.
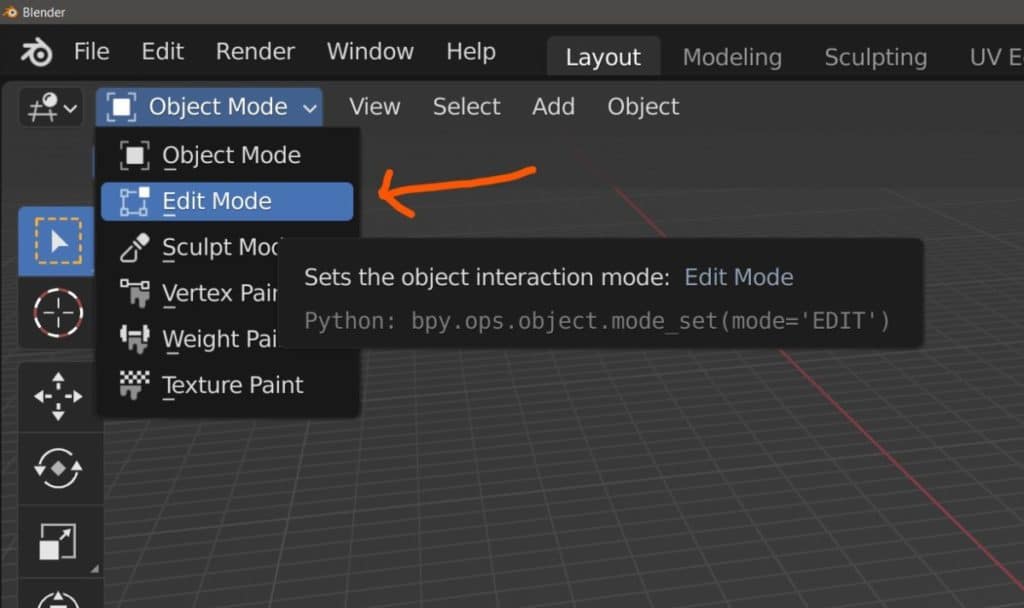
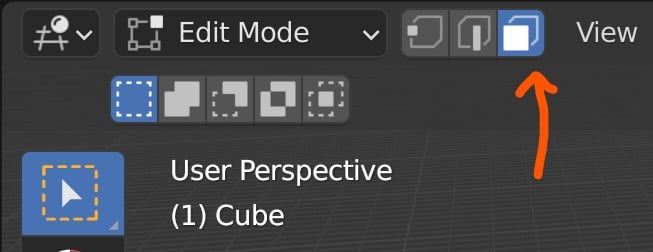
When you enter edit mode the menus in the viewport header will change and you will find three buttons next to the edit mode menu, the first of which will likely be highlighted blue.
These are the selection modes for the three types of geometry, vertices, edges, and faces. The third option is for faces, so select that as you will want to delete faces directly.
You can also use 1, 2, and 3 on your keyboard to switch between these methods of selection.
Then all we need to do is select the geometry that we want to delete. If we wanted to we could select multiple faces using the shift key and then delete the selection, but the top face will do for creating a box.
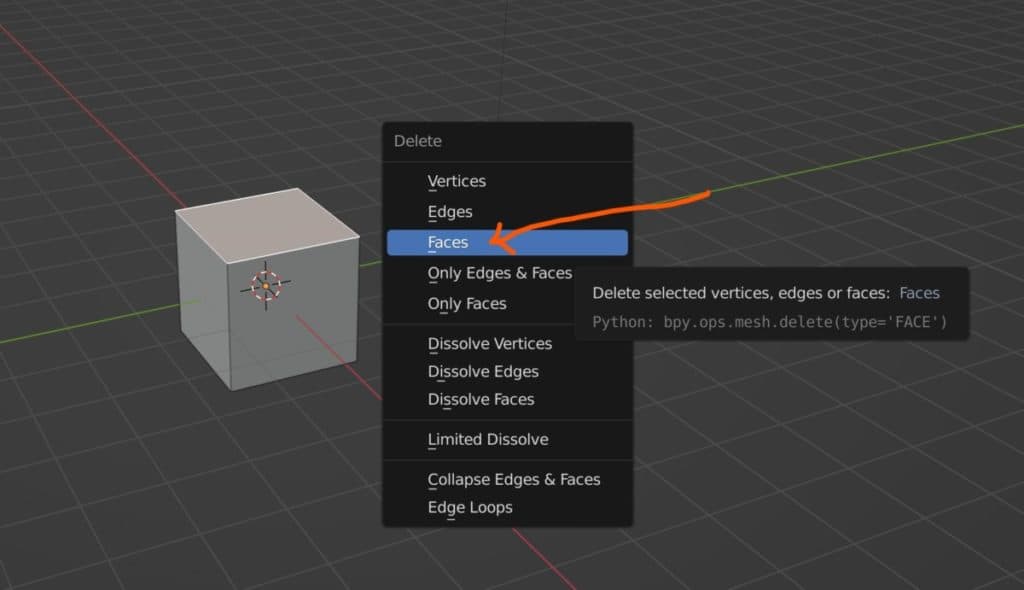
With the top face selected, press either the X key or the DEL key on your keyboard. Both of these hotkeys will bring up the delete menu, which is an actual menu this time instead of a simple command prompt.
You can choose to select different kinds of geometry, or even dissolve them. Dissolving will merge the surrounding geometry together so it won’t create the hole that we need, and deleting vertices will not only delete the top face but also the side faces as well, so we don’t want that. Select the delete faces option to delete the top face of the cube.
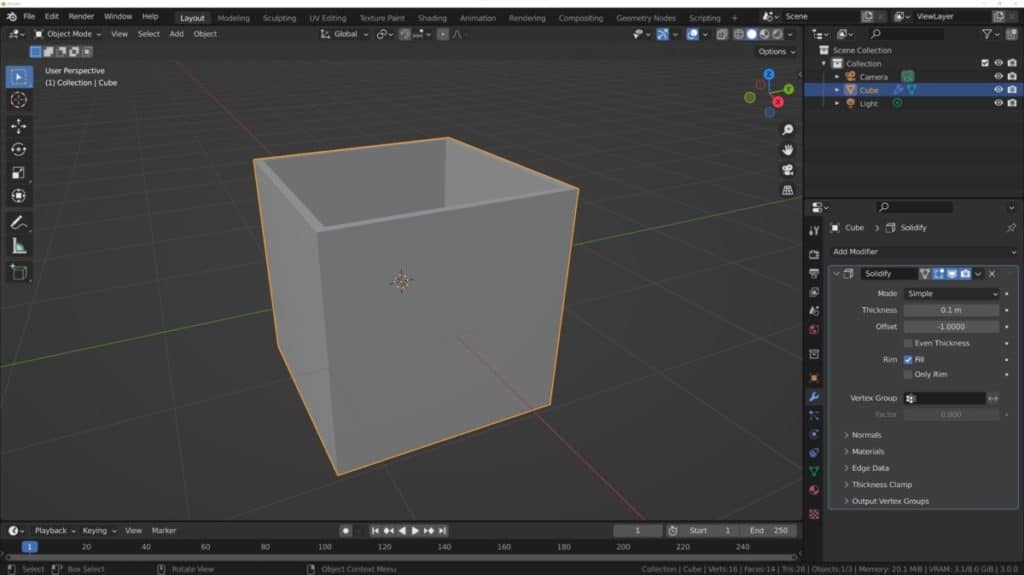
Your cube will now appear as an open-top box with the top face deleted. This does create a new problem with the object being hollow which we cover in more detail towards the end of the article.
When you can see both the inside and the outside of the object you will need to give it some thickness. This is where the solidify modifier comes into play, adding thickness between the inside and outside, allowing for a more true-to-life model that does not look infinitely thin.
To add the solidify modifier to your object, press the TAB key to go back into object mode. With the model still selected, go to the modifiers tab in the properties panel. Open the add modifier menu and then select solidify from the generate list.
Increase the thickness of the modifier to whatever you want it to be, and now you have a box that has an actual thickness to it.
This is just one method to cutting holes in your objects, but it works best with the most basic of models. Other methods will be required for the more complex objects out there.

Custom Shapes And Holes Using The Boolean Tool
Perhaps the most effective method for cutting holes of various shapes and sizes is to use the boolean modifier.
This is a powerful tool that allows you to deform your main object using a second object (the boolean) to create a new shape.
The boolean modifier has three methods that you can choose, and each method calculates the booleans effect in a different way.
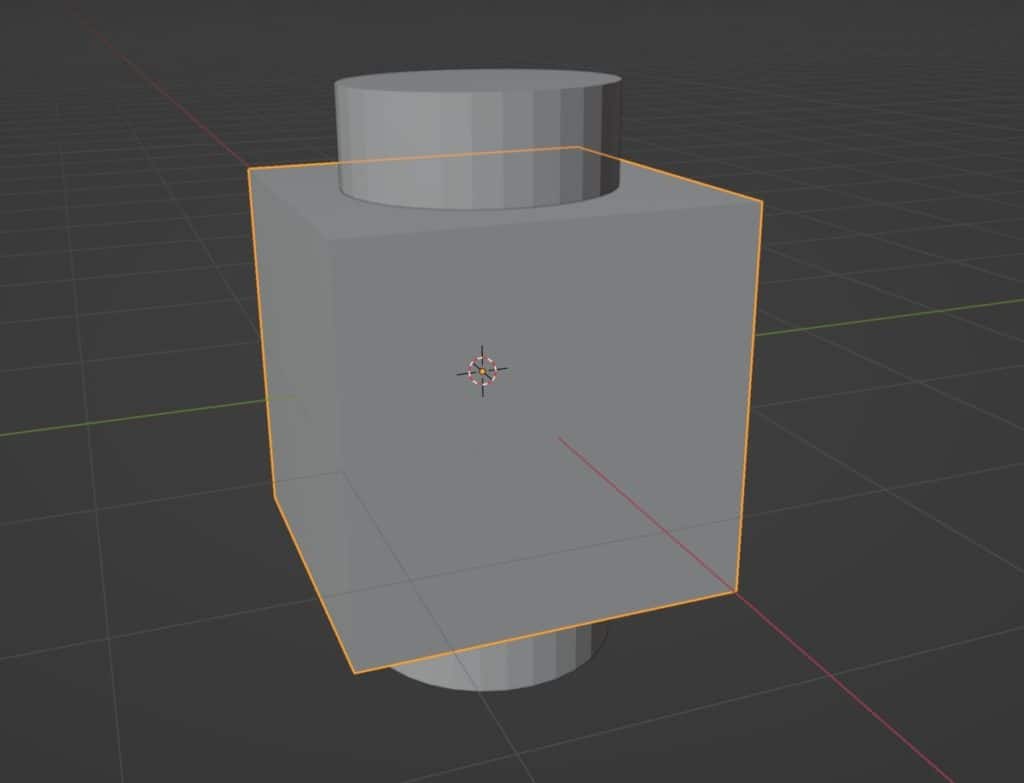
To use the boolean modifier, you will require a boolean object. For our first example here we will use a cylinder as our boolean to cut through our cube.
For the boolean to work both objects need to overlap each other at the point where we want to create the boolean.
Selec the main object, not the boolean object, and go to the modifiers tab. Then open the add modifier menu and select boolean from the generate list.
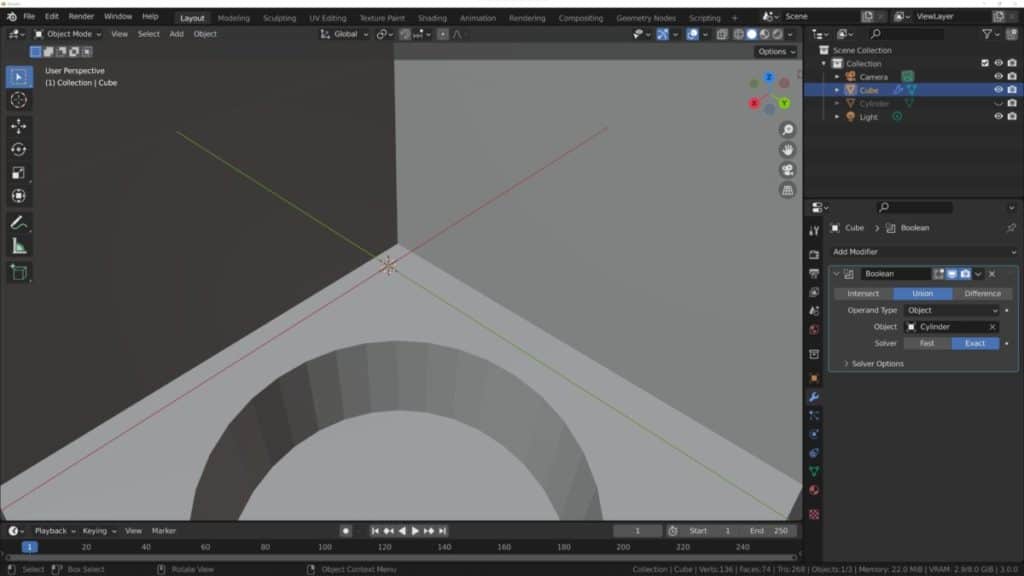
To better see the effect that your modifier has, go to the outliner panel in your UI and press the eye icon next to the cylinder to hide the boolean object. This does not change how the boolean affects the model.
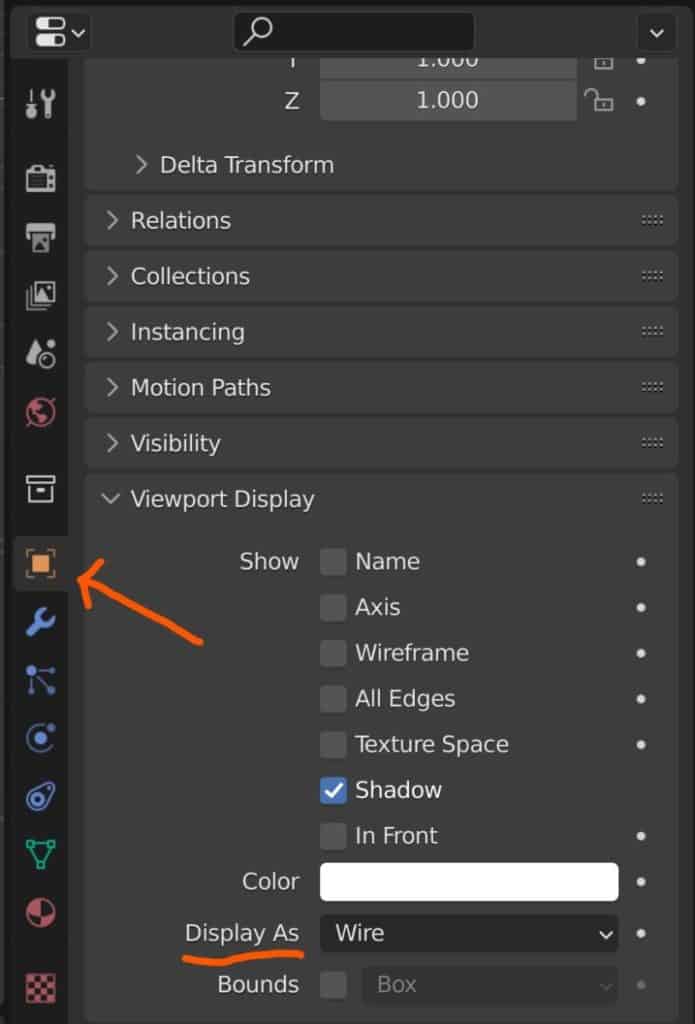
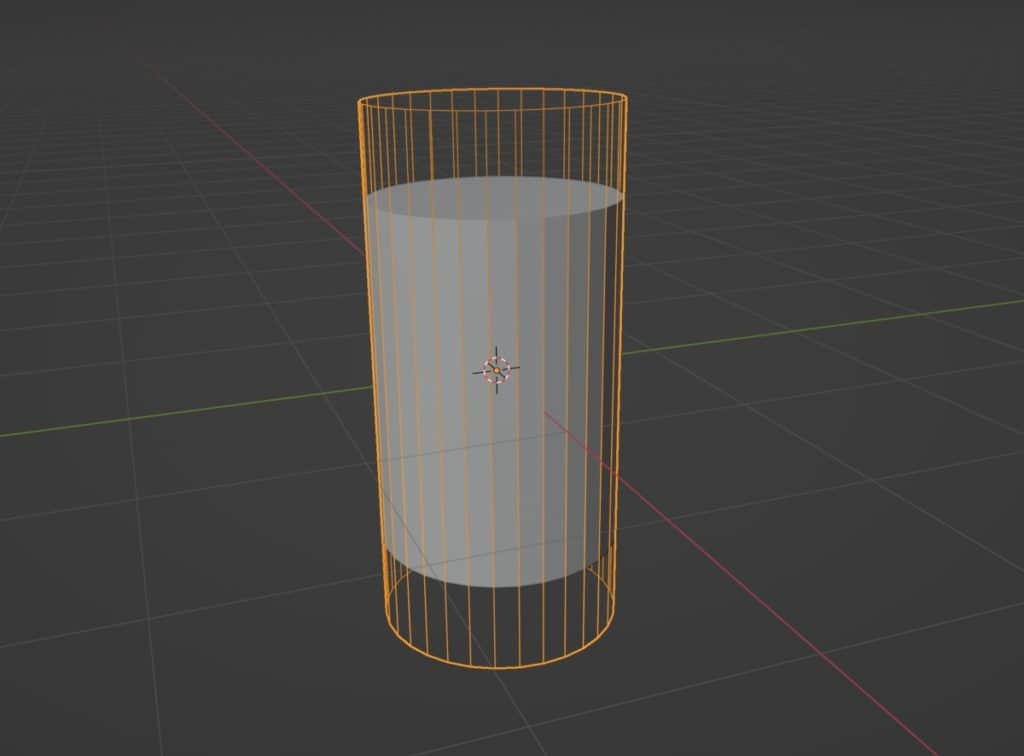
You can also go to the object tab in the properties panel with the boolean object selected, go down to where it says viewport display, and then change where it says Display as to wire so that the boolean appears only as a wireframe. This also makes viewing easier while also being able to select the boolean object to change its positioning.
Then go back to the boolean modifier and click on the empty space next to where it says object, then select the object that you want to use as the boolean.
Once you have selected an object the modifier will then begin to take effect on the model so long as the two objects are overlapping.

You can see the three boolean types here listed above, and each of these changes the way that the boolean modifier affects the main objects. The question is, which type is best suited to creating holes in our model?
Intersecting Boolean
The first option of the three is to intersect the two objects. Rather, the Intersect option is used to calculate what geometry is leftover based on where the two are intersecting.
This means that the geometry that is overlapped by the boolean is maintained, while the rest of the geometry is removed.
But judging by the effect that this has on our model, it is not the right method for creating holes.
Union Boolean
You will find that all three boolean types are adequately named for their purpose. With the union type, Blender will add the structure of the boolean model to the outside of existing geometry.
In the case of our cube and cylinder combination, The parts of the cylinder visible outside of the cube are added to the main object.
However, if you zoom inside the object you will see that shape has changed but you don’t have geometry inside the main mesh.
This is a powerful tool for creating custom shapes, but it adds to our model as a whole, whereas we are looking to subtract from it.
Next one.
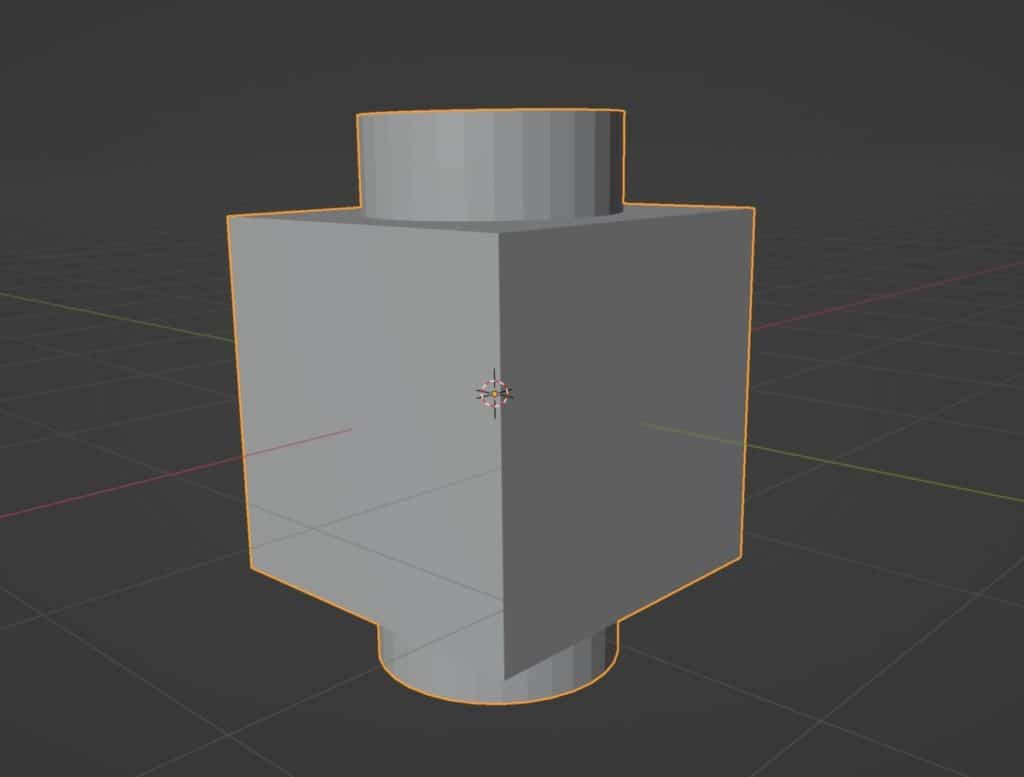
Difference Boolean
With the difference method, the geometry that is not overlapping is what gets kept and the overlapping geometry is removed instead, giving us the two circular holes that we are looking for.
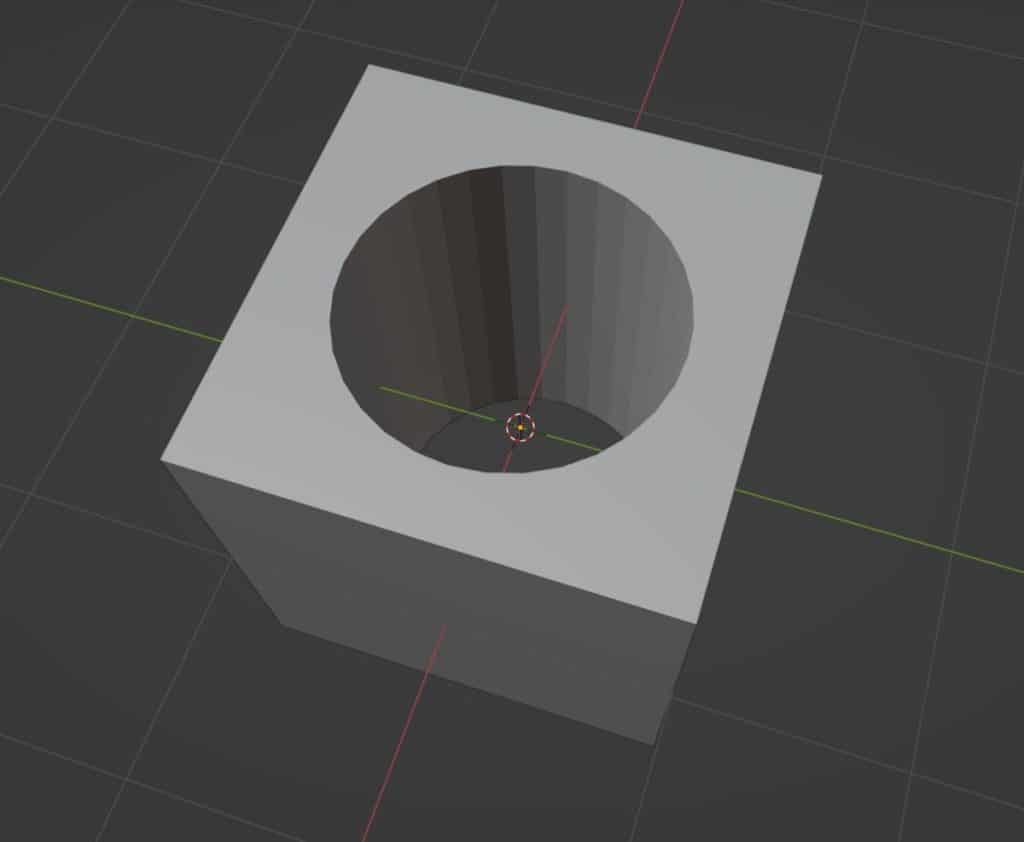
So this looks like the correct boolean method for cutting custom shapes into our objects, but there is a hidden issue with this method that we cannot quite see here.
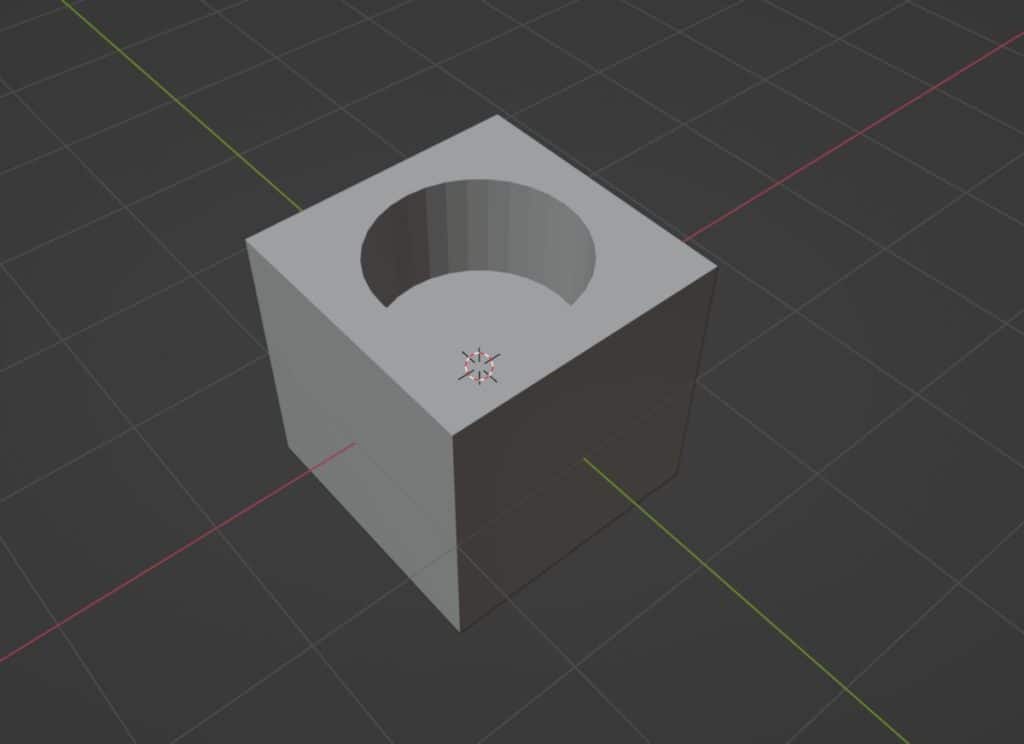
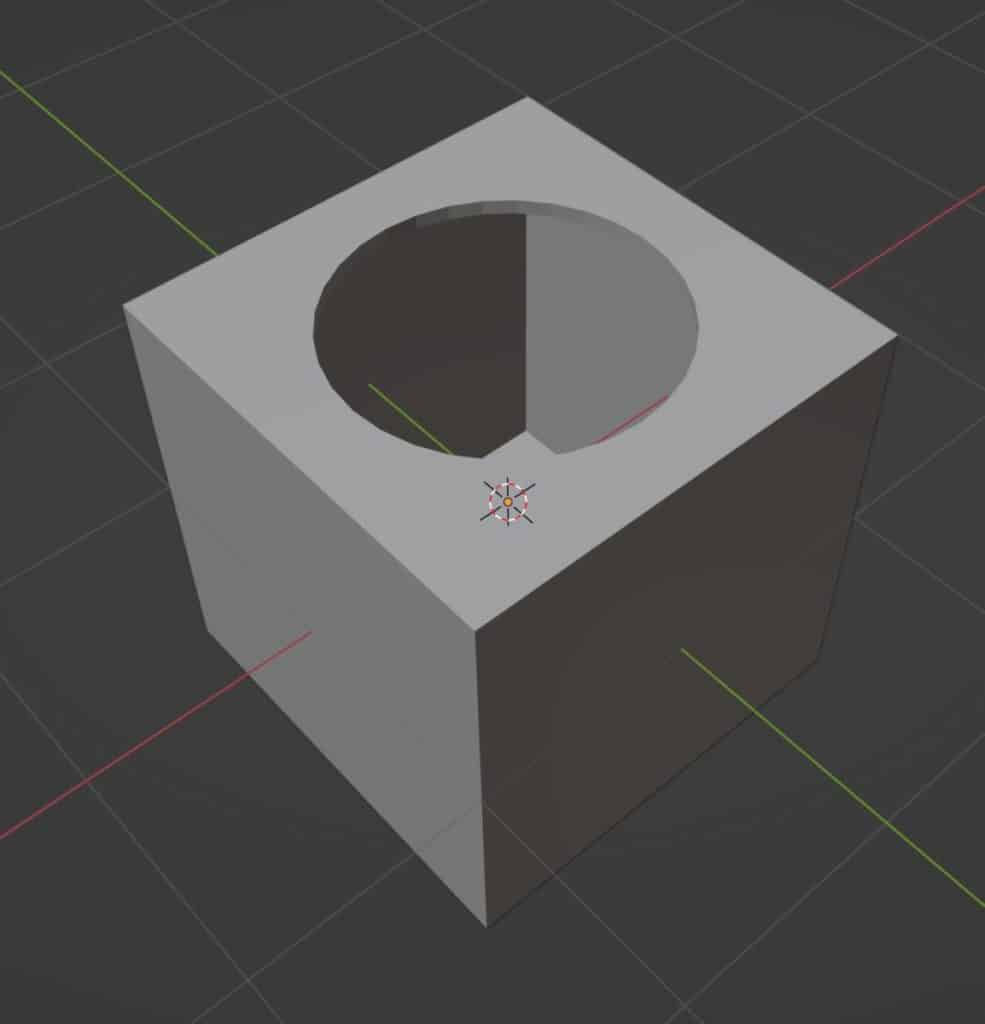
Let’s say we move the cylinder up a bit so that it only overlaps the top face of the cube and not the bottom. As soon as we move the cylinder the effect changes, and we create a hole similar to the box object that we saw earlier, only this time the space in the box is circular.
This might be what you are going for, but what about if you only wanted to create the circle hole on the top face and still retain the shape of the inside. It does not seem to work here.
The solution here is to tell Blender that we want to maintain the cube shape on the inside, by giving it thickness for the boolean to work with, as the boolean is looking to create a complete shape where possible to avoid a hollow object.
The answer of course is to use the trusty solidify modifier to add thickness to our object. So go to the modifiers ta again and add a solidify modifier, only it does not seem to work here.
The object’s shape is already complete, and so while the modifier is working, we just can’t see it. Remember though that we are trying to get Blender to use the thickness of the object to change the behaviors of the boolean, so we need to create the thickness first.
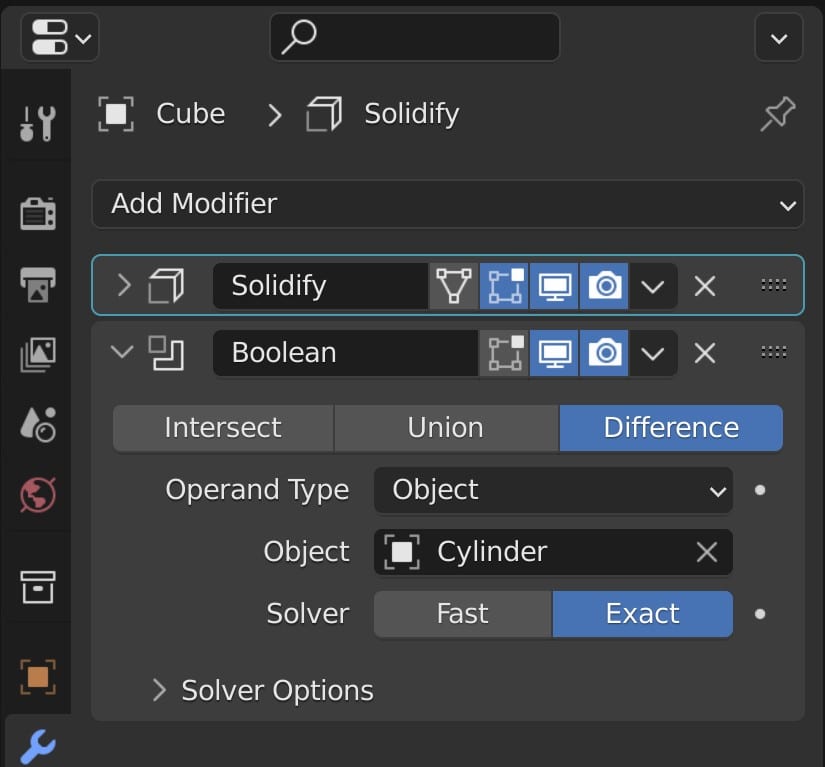
Grab the solidify modifier in your modifier stack and position it above your boolean modifier, then release. The effect on the object changes completely.
Now the boolean has created the circular hole at the top of our mesh but the rest of the cube has maintained its shape both inside and out.
Plus we are able to again use the thickness slider to add to our object.
Using A Collection As A Boolean
Alternatively, you are also able to use an entire collection rather than a single object for your boolean. A collection is a user-defined set of objects in the 3D viewport and is a tool primarily used for organization of objects in our scene.
Collections can also be useful when we want to influence a group of objects at the same time, for example in a forest scene we can hide all the trees at the same time if they are stored into a tree collection.
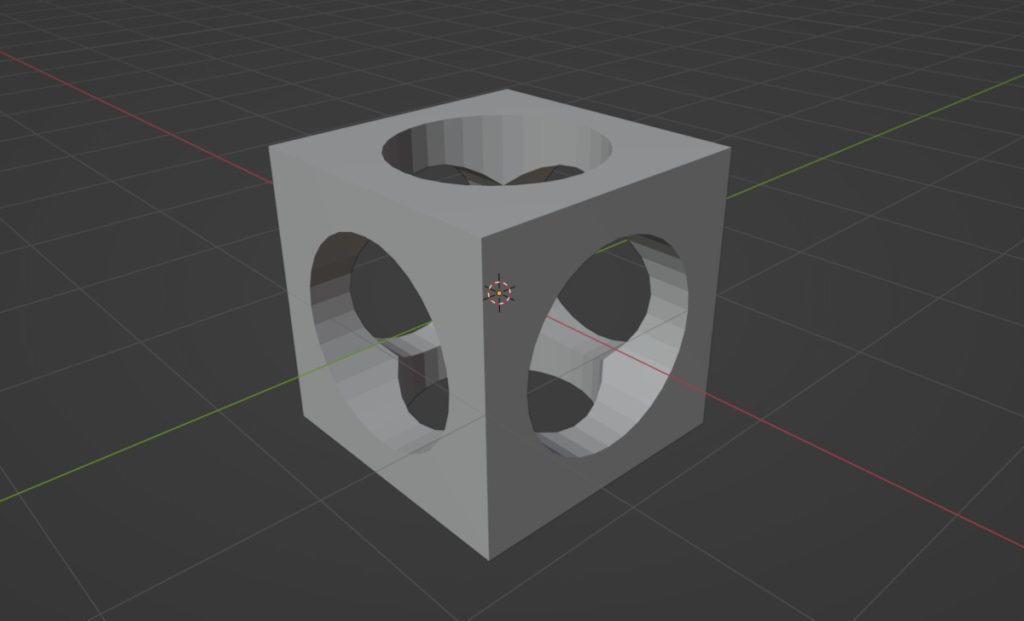
With our example, let’s say we wanted to cut circular holes into all the various sides of the cube and not just to the top and bottom.
Modeling a single object to use as the boolean would take just as long as just modeling the holes themselves without the boolean, so the quick method will be to use several cylinders.
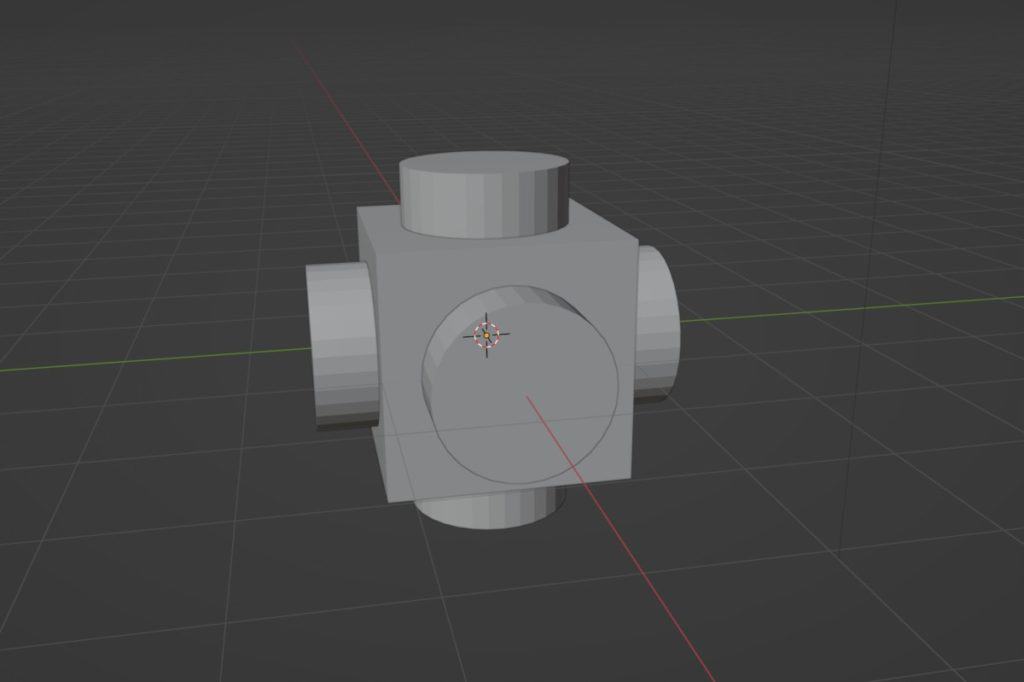
We will add two more cylinders to our scene and lay them flat on the X and Y axis in the viewport so that we have three cylinders sticking out of the six sides of the cube.
If we take a look in the outliner panel we will see that all of our objects are currently in a default collection, but we need to keep the cylinders in a separate collection for the boolean to work.
Select the three cylinders and then press the M key in the viewport to open the collection menu and select New Collection, then name the new collection Boolean and press the return key.
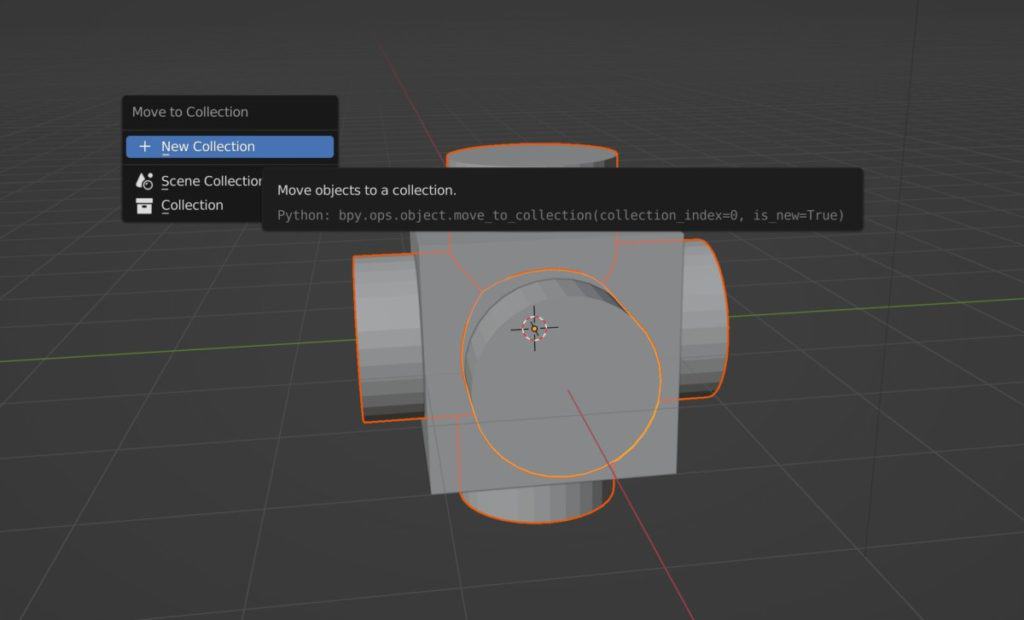
Our three cylinders will now be stored in their own collection which you will be able to see in the outliner panel.
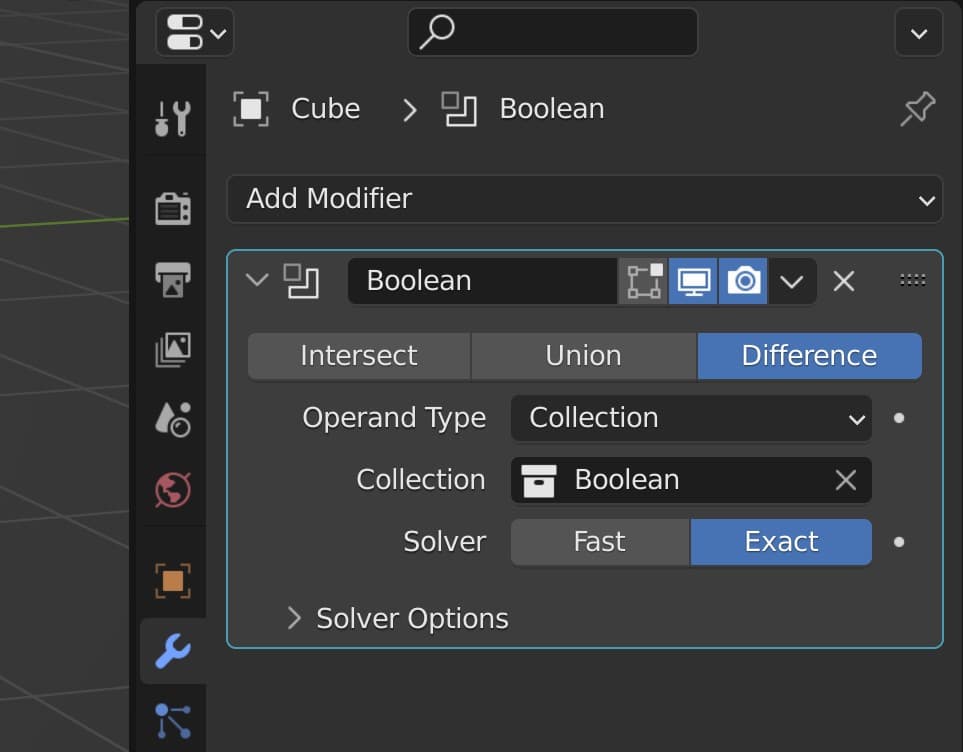
Now go to the modifiers tab for the cube object and you will see the option for operand type, which will be set to Object by default. Open up this menu and change it to Collection, then select the Boolean collection underneath.
If we then hide the collection from view, which we can do by clicking on the eye icon next to the collection name in the outliner panel, then we can see that we have cut our circular holes through each side of the cube.
Cutting Out Custom Shapes With The Knife Tool In Blender
A more advanced method of creating custom shapes is to use the knife tool in combination with the delete and solidify tools.
It is an additional tool added to the delete method that we talked about earlier and allows you to create far more complex holes for your model.
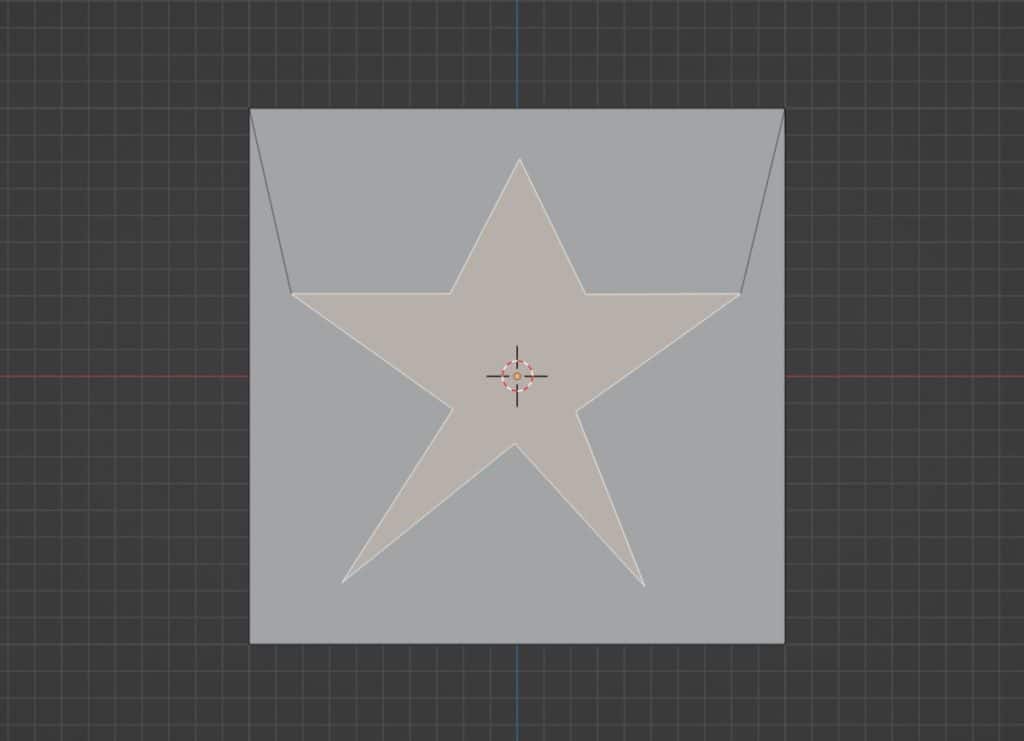
For example, let’s say we wanted to create a hole shaped like a 5 point star into the side of a cube object. Modeling a star and then using it as a boolean would be more accurate, but a quick solution would be to add geometry with the knife tool, then delete the star shape.
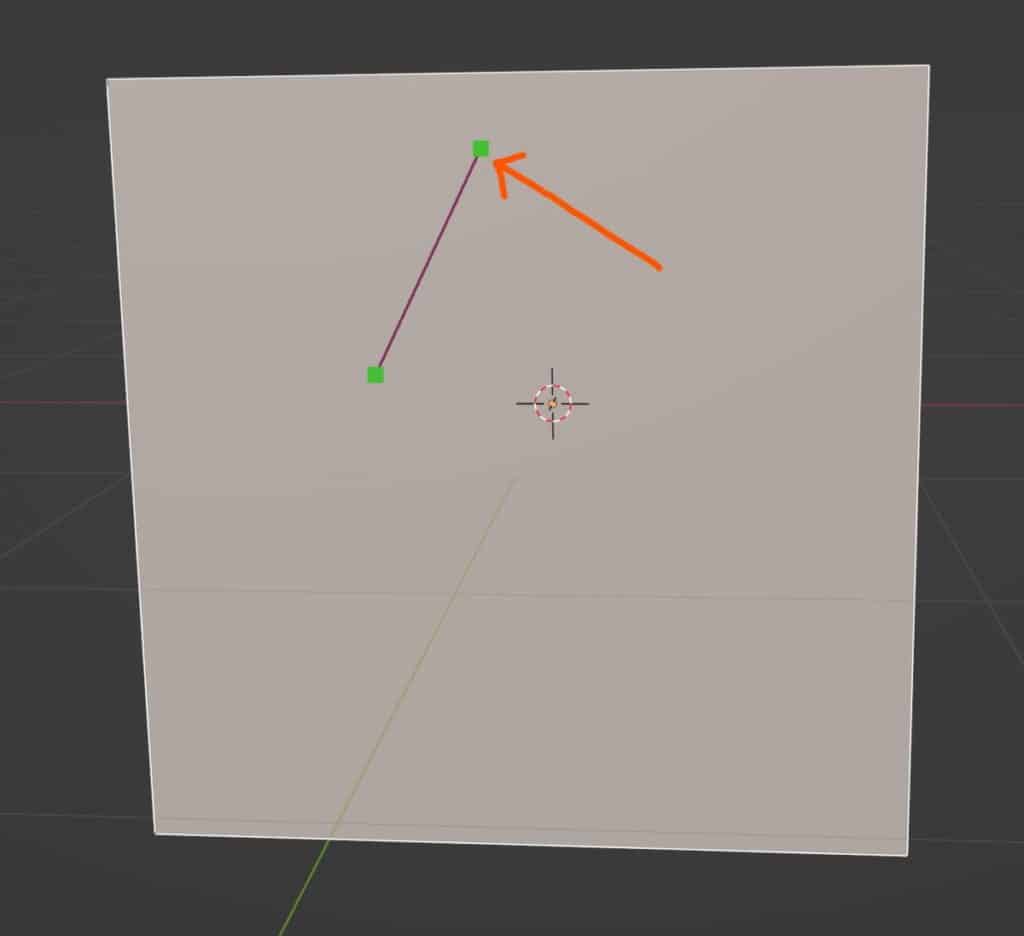
To use the knife tool, go into edit mode for your selected object, then press the K key on your keyboard to enter knife mode.
The cursor will change and you should see a green square, so hover over to where you want to start drawing and left-click.
As you move your cursor across the face of the object, an edge forms from the starting point to the location of the cursor.
If you left-click again the new edge is not confirmed, but instead, the tool resets to allow you to create the next edge from the new location.
You can do this continuously, creating new edges until you come back to the start of the shape, where you will be able to close the loop.
The tool will still be active, however, meaning that you need to press enter to confirm the geometry that you have created, and should now have the custom shape on your model’s geometry.
The Inset And Extrude Combination
Another method is to use the inset/extrude combination where you inset a face to create the rim and then extrude into the center of the object to create your hole, while also ensuring that the object still has thickness.
This means that when using the inset/extrude combination we do not need to use the solidify modifier after the fact.
Using this technique offers a bit more flexibility than just deleting our geometry as we are able to control how deep the extrusion goes and even the shape of the extrusion after it has been made.
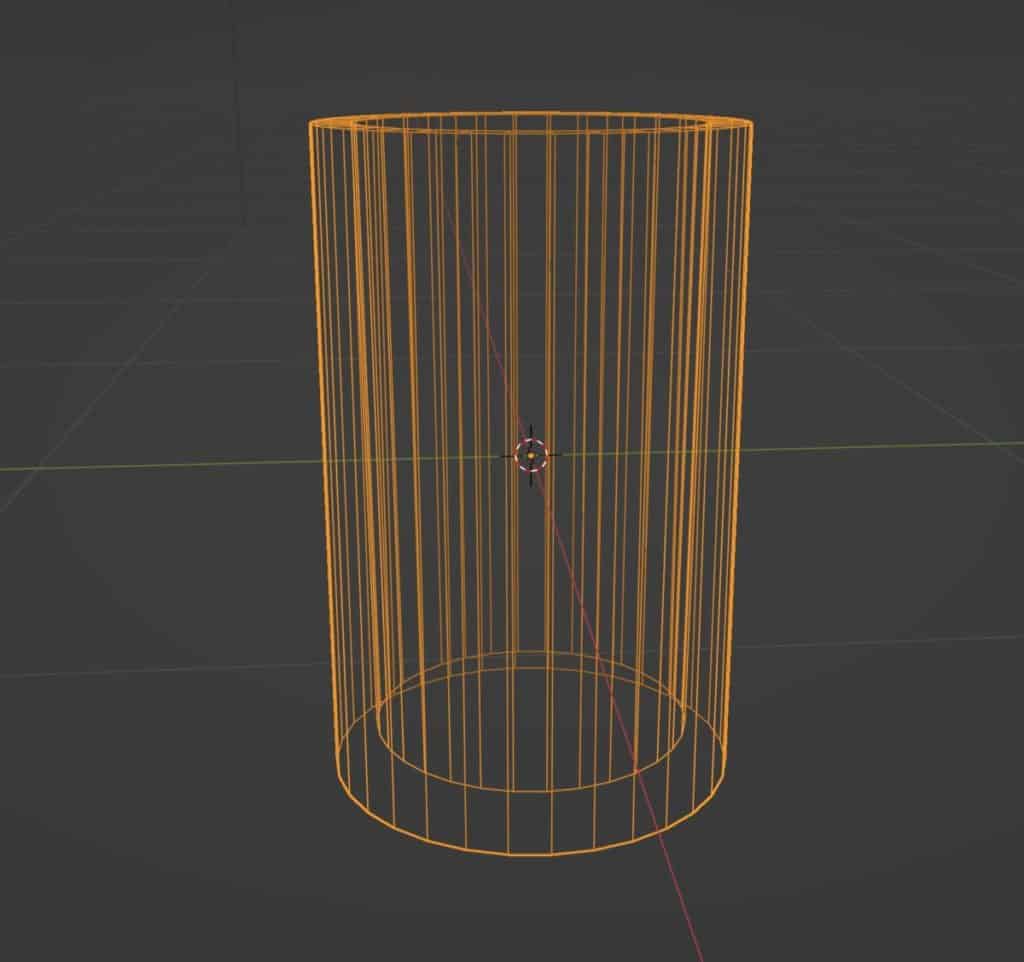
An example where you may want to use this technique is when creating a simple drinking glass. You can start by using a cylinder, which already has the base shape.
Select the top face, but instead of deleting it, press the I key to enable the inset tool and bring the inset in a bit.
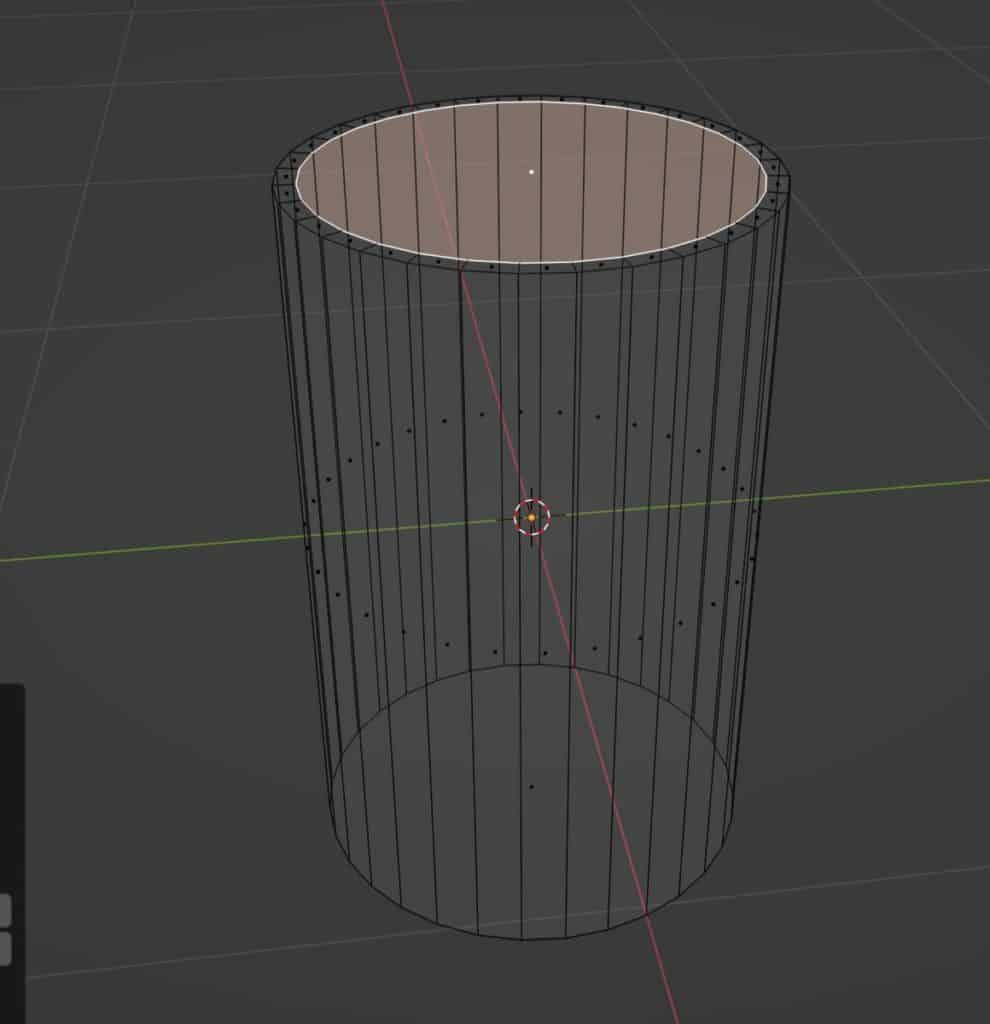
With the middle face selected, press the E key to activate the extrude tool and then push the geometry into the model rather than outwards.
Go as far as you feel you need to and then left-click to confirm the extrusion. Just like that, you have the model of a basic drinking glass.
Like the delete method, this combination is more effective with simple shapes, while the boolean and knife methods are better suited for the more complex ones.
Making Sure That Your Objects Are Not Actually Hollow
With all of the methods used to create either holes or indentations into our models, we always need to ensure that our model has a degree of thickness to it, which in most cases can be solved using the solidify modifier.
It is important to have a thickness to any model based on what it needs to be used for. For example in video games normal direction is important to the rendering of the objects. Each face has an inward direction and an outward direction, and in gaming, the outward direction is rendered while the inward direction is not.
This is a process known as backface culling and is used to save on memory when rendering 3D objects. If our object is hollow with no thickness, then we will be able to see both sides of our faces in Blender, but this will not be the case in the game engine.
So we need to ensure that we are always looking at the outward side of our face, or the normal, which the solidify modifier allows us to do.
A very different use case that also requires thickness is 3D printing. If your model is hollow then the edges and faces are infinitely thin, making them impossible to print out. All models need to have a minimum thickness of at least 1mm, normally 2mm so that they can be printed.
Adding thickness to your model after creating your holes is an important step that should not be disregarded.
Thanks For Reading The Article
We appreciate you taking the time to read the article. We hope that you were able to find the information that you were searching for. Below we have compiled a list of additional topics that you may be interested in reading.
- Assigning A Shortcut To A Tool In Blender
- Zero Faces In Blender
- Improve Your Material Workflow With Node Groups
- Identifying Normals In Blender 3D
- Creating A Wireframe Object Our Of Any 3D Object
-
Custom Normals: Blender Hard Surface Tip
Enhancing hard surface models with custom normals for realism.
-
Align Perfectly with Blender’s Snap Tools
Aligning objects perfectly with Blender’s advanced Snap tools.
-
Mechanical Parts: Blender Modelling Guide
Detailed guide to modeling mechanical parts with precision in Blender.