There are a variety of ways in which we can manipulate the geometry used to construct our mesh objects. There are also several tools that can be used to manipulate the objects themselves. One tool that falls into both of these categories is the Separate tool.
To use the separate tool, go to edit mode and open the mesh menu in the viewport header. Highlight the option for Separate, and a second menu will appear. Each option in this menu will use a different parameter for how we separate that object into multiple, smaller objects. Another way to access the same menu is to use the P key in edit mode.
The primary function of the separate tool is to create more objects from your existing geometry. There are many use cases for such a tool, like independently editing the various parts of your models.
How To Access The Separate Tool?
The separate tool acts as the mirror opposite to the join tool, which can be found in object mode and involves taking two or more objects and combining them into a single object.
By contrast, the separate tool takes one object and splits it into two or more models. We can access these separate menus in a couple of ways.
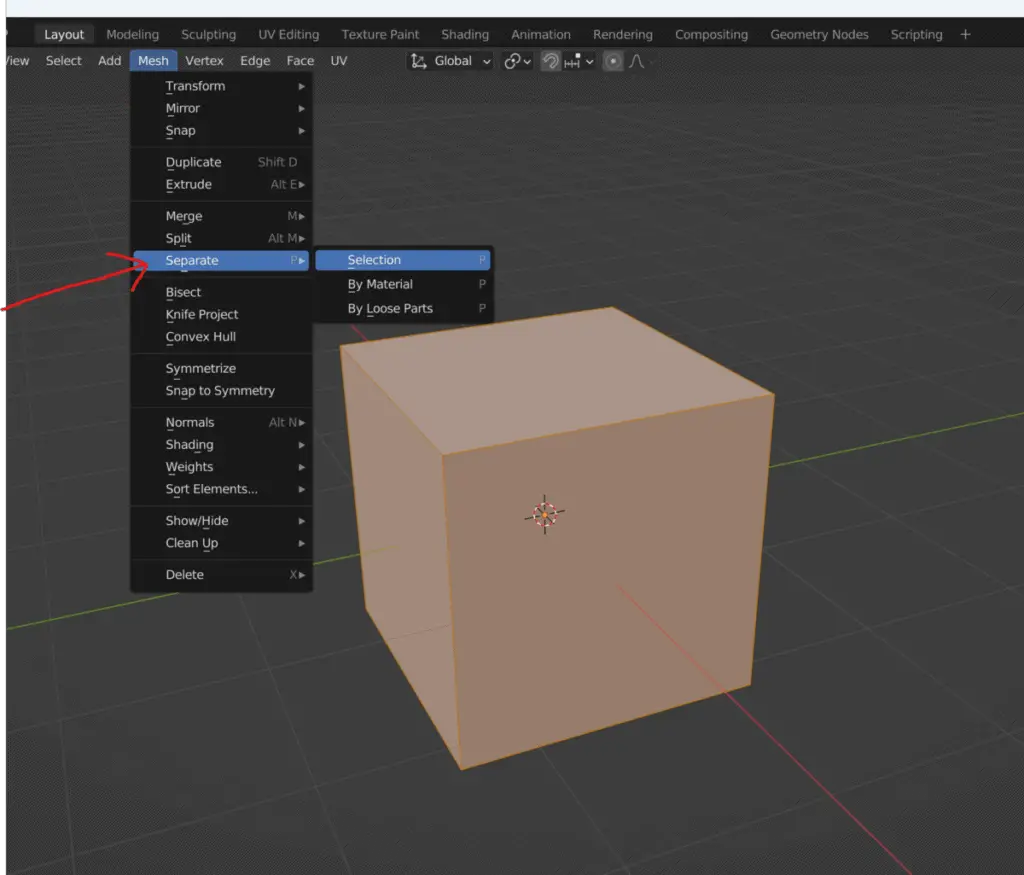
The first method requires us to locate the mesh menu in the header of our viewport. From here, go halfway down the list until you find the separate option. Hover your mouse over separate, and then a secondary menu will appear.
The options that are available to you should be as follows…
- Selection
- By Material
- By Loose Parts
An alternative method to access the same menu is to go into edit mode and press the P key on your keyboard. You would then have access to the same options that you can use to separate your geometry into multiple objects.
How Do The Various Options Of The Separate Tool Work?
For the separate tool to work, we must define the property used to split our objects. Our object will be divided into smaller models depending on the property we select.
The first option on the list is to separate via the selection, which takes the geometry you currently have selected and divides the object into two, depending on your selection.
Let’s take the default cube as an example. Select the top face and press the P key to open the separate menu.
From here, choose the option labeled Selection, and the top face will be removed from the cube object.
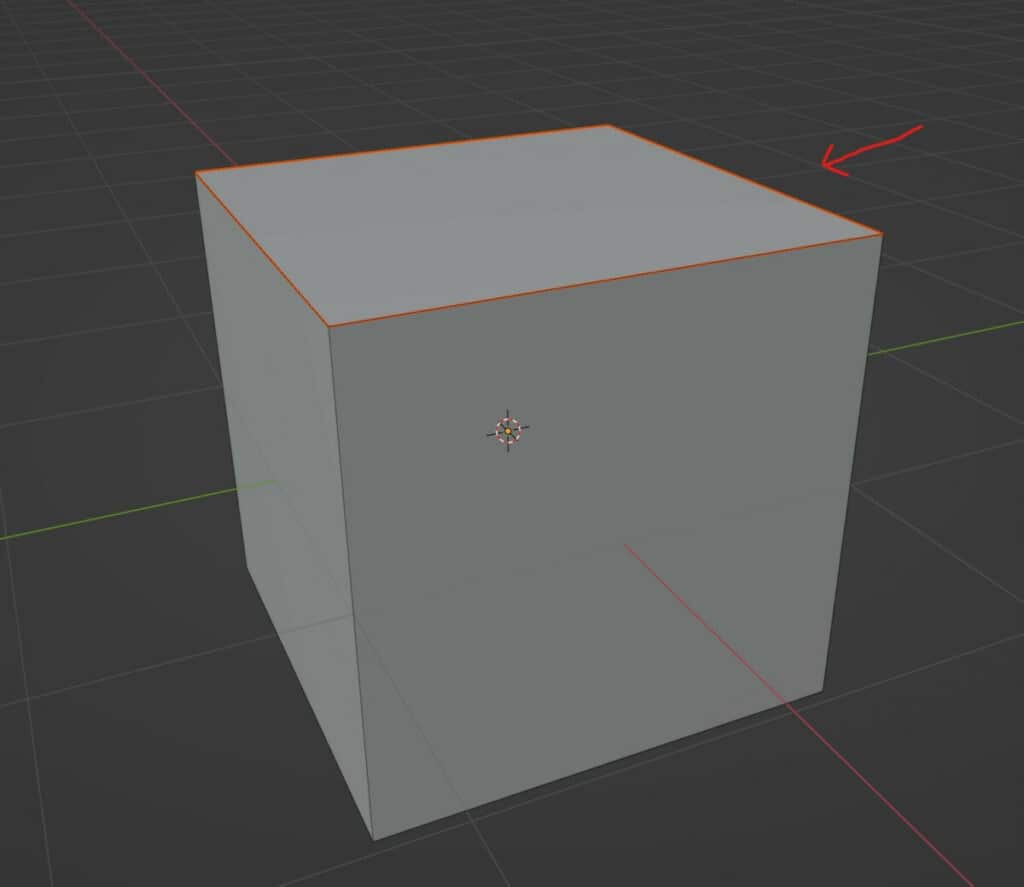
A red outline will be visible around the top face, indicating that the top face is still a part of our selection, only this time, that selection is mainly in object mode.
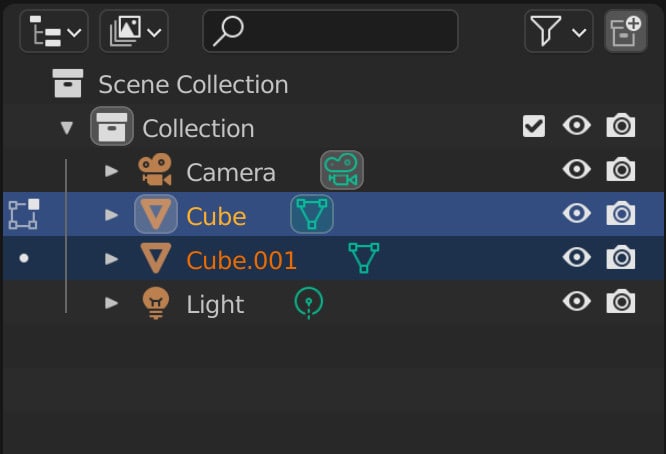
Looking at the outliner panel, we will notice that a new object has been created in cube.001. This is the top face of its object.
How Many Objects Can We Create Using Selection?
When separating your objects via selection, the selection you make and how you make it is irrelevant. We even can select faces that are not directly connected and separate them.
For example, we can select the top and bottom faces of a cube and then separate them from the main object same as before. But how many new objects does this create?

Regardless of your selection, and if the selection is all directly connected, only one object will be created from the original.
To create multiple objects using the separate tool, we would need to select and separate each face or selection of faces and then separate them one at a time.
Separating Our Geometry Using Loose Parts
The next option we will cover is the ability to separate your geometry via its loose parts. Some objects have multiple meshes that are not directly connected, called loose parts by the separate tool or islands in general.
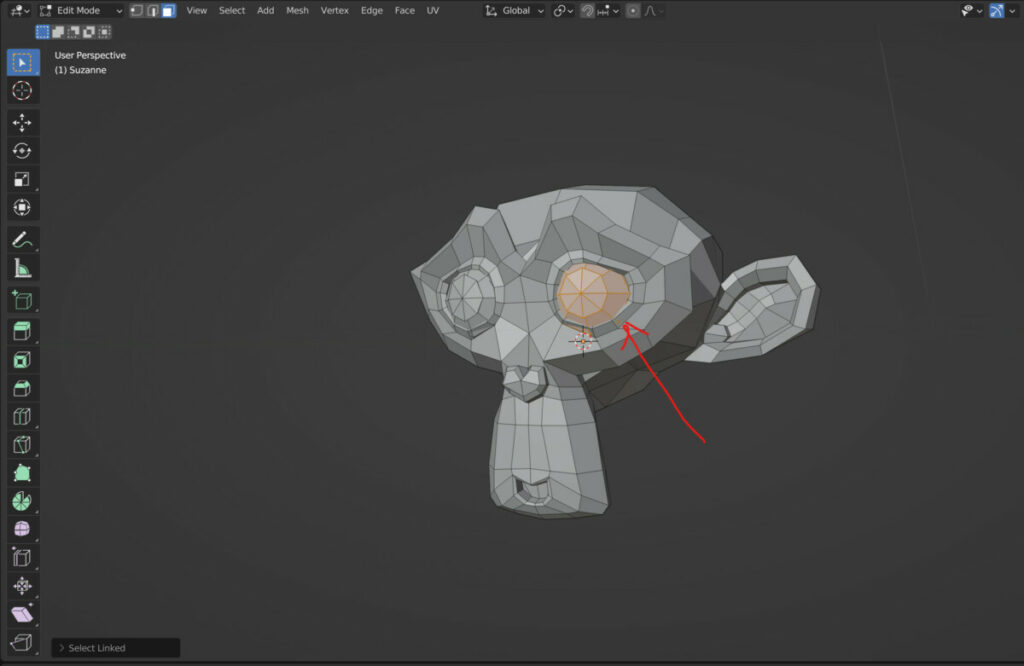
For example, the Suzanne primitive object is a model that has three islands. The main monkey head counts as one island, and each of the two eyes is its island. If you deselect everything with Alt + A and then press the L key over an eye, only the geometry from that eye will be selected, as the L key allows us to select individual islands.
Geometry does not need to be selected for this to work; go into edit mode for your object, open the separate menu and then choose the loose parts options.
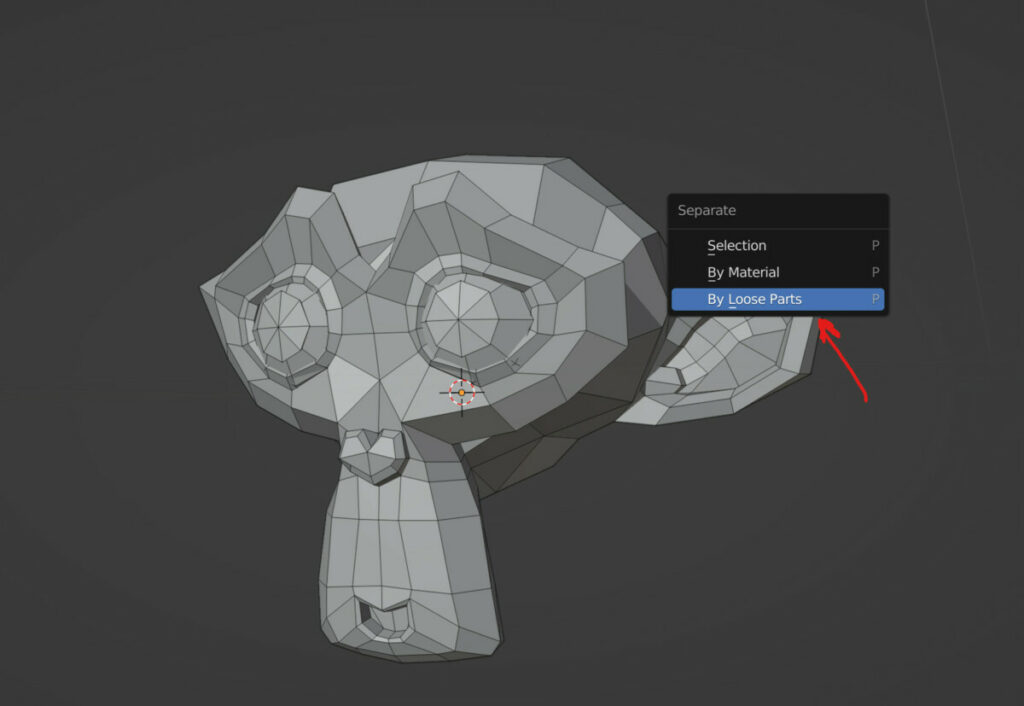
What if you only want to remove a single island from your selection? the loose parts option locates all the islands and transfers them to their own object.
The solution here is to select the island you want to isolate using the L key and then use the separate by selection option to remove the island from your object.
Separating Our Object Using Materials?
Creating a 3D model will, at some stage, require you to assign materials to the model, which at a minimum, result in the application of base colors and potentially the inclusion of textures.
The final option for separating our geometry is to use the assigned materials as the main parameter for how our geometry is divided.
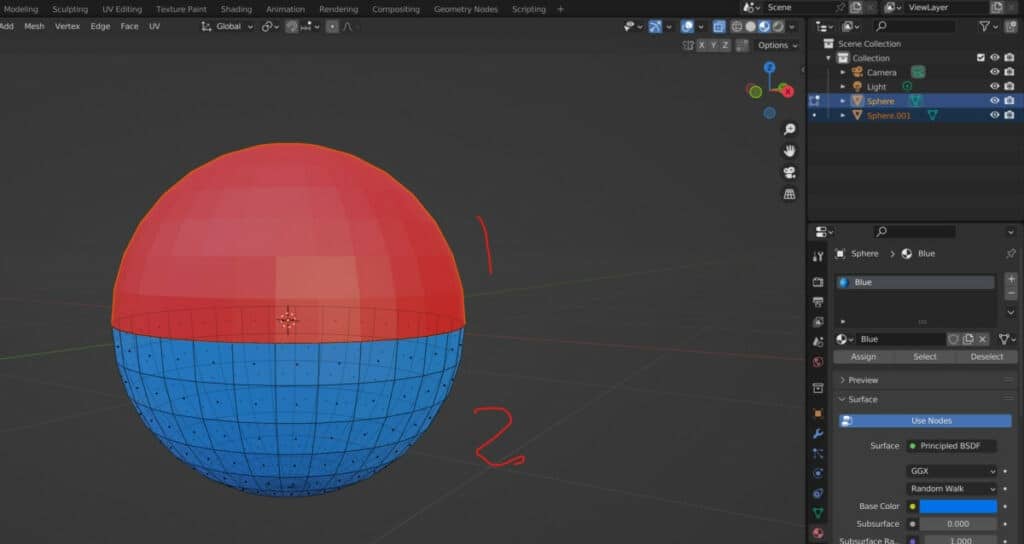
This is a clever way of using the separate tool, as any object in the real is typical of a single material, and objects with multiple materials are constructed from multiple parts.
Why Should We Use The Separate Tool In Blender?
Every tool in Blender has a purpose and can be used in different workflows depending on the tool’s design.
The separate tool is best suited in scenes where objects must be divided into multiple parts depending on the selection, islands, or materials.
For example, any object made of multiple materials could be separated based on those materials. An object constructed of multiple parts in the real world, like a vehicle, may need to be divided up using each of these parts that are not directly connected through their geometry.
Editing a single object is much easier than editing a part when it is positioned with the other parts of the object or scene.
We can use the separate tool to divide our object, select the part we want to edit, and toggle the local view option with the / key to isolate that model for editing in the viewport.
How Can We Join Our Pieces Back Together?
If your reason for using the separate tool is to focus on editing a part of your primary model, then you may need to rejoin that part to the original object, which is the opposite of the separate tool.
Fortunately, this is a more straightforward process than separating and requires us to use the join tool, which has no parameters, properties, or options associated with it other than the primary function of the tool.
To use the join tool currently, select the part that you have edited first and then the object you want to connect it to second.
To learn more about how we can use the join tool, try the article here.
The last object we select in the viewport is the active object, and when we use the join tool, we connect all other selected objects to the active model.
To activate the join tool, go to the object menu in object mode and locate the join tool. Alternatively, use the hotkey Control + J to join your objects together.
What If I Want To Keep My Pieces As Separate Objects But Still Want To Control Them All?
You may not want the parts of a model to be classed as a single object, and may instead be looking to use the separate pieces as their own models, so that you can move and replace those parts more easily.
This does create the issue of moving all of your objects in one go around a single origin. The best way to fix this is to assign all your mesh objects that create the primary model to a parent empty.
Empty objects are a particular form of object that holds little data beyond the required transforms and info related to the object origin.
There are many use cases for an empty, but one more common is using it as a control object. To parent your objects, select each of them and then select the object to act as the parent, similar to how we have the last selected object as the primary model for the join tool.
Use the Control + P hotkey in object mode to open the parent menu and then select how you want to parent your objects.
To learn more about the process of parenting, click here.
If the tool is successful, you will see numerous dotted lines known as the relationship lines connecting the parent object with its children.
Manipulating the children’s transforms only affects the selected individual object, but manipulating the transforms of the parent object will affect all objects connected to the parent and the parent itself.
Thanks For Reading
We appreciate you taking the time to read through the article. We hope you found the information you were looking for. If you are interested in learning more about the Blender software, you can check out a few of the articles we have listed below.
- How To Join Objects Together Into A Single Model
- How To Lock Your Transforms From Editing
- The Process Of Parenting Objects To Each Other
- The Different Ways To Delete And Dissolve Geometry
- What Is An Empty Object And How Can It Be Used