The traditional way of adding primitive objects to our scenes in Blender is to go to the add menu, select the mesh option and then choose a primitive mesh to add in at the location of the 3D cursor. But did you know that there is a tool that can allow you to add primitive objects to any shape, any size, anywhere?
You can add primitive objects to your scene by using the add tool, which is located in the toolbar of the 3D viewport. Hold down the tool button to open a menu to choose the primitive shape, then click and drag in your viewport to begin adding multiple objects quickly and not have to reactivate the tool for each new model, and move each new model after the fact.
If you want to build up a basic representation of your scene, then the add tool is the perfect way to add in your objects quickly, making it ideal for constructing low poly scenes in Blender.
How To Use The Add Tool?
The add tool is located exclusively in the tool shelf of the 3D viewport, and by default, cannot be found in any other menu. It does have a hotkey associated with it, but this hotkey is Shift + Spacebar and brings up a menu that has the same tools as the tool shelf.
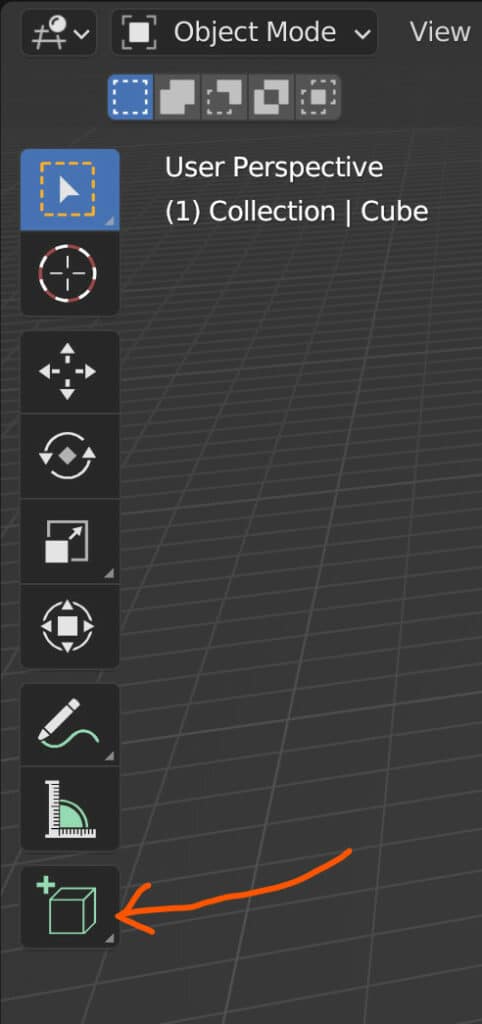
If you cannot see your tool shelf, press the T key to open it in the 3D viewport. The add tool will be the final option on the tool shelf and will have an icon that looks like a cube.
If you hold down the left mouse button when selecting the add tool, you can open up a menu that allows you to choose the primitive object that you wish to create.
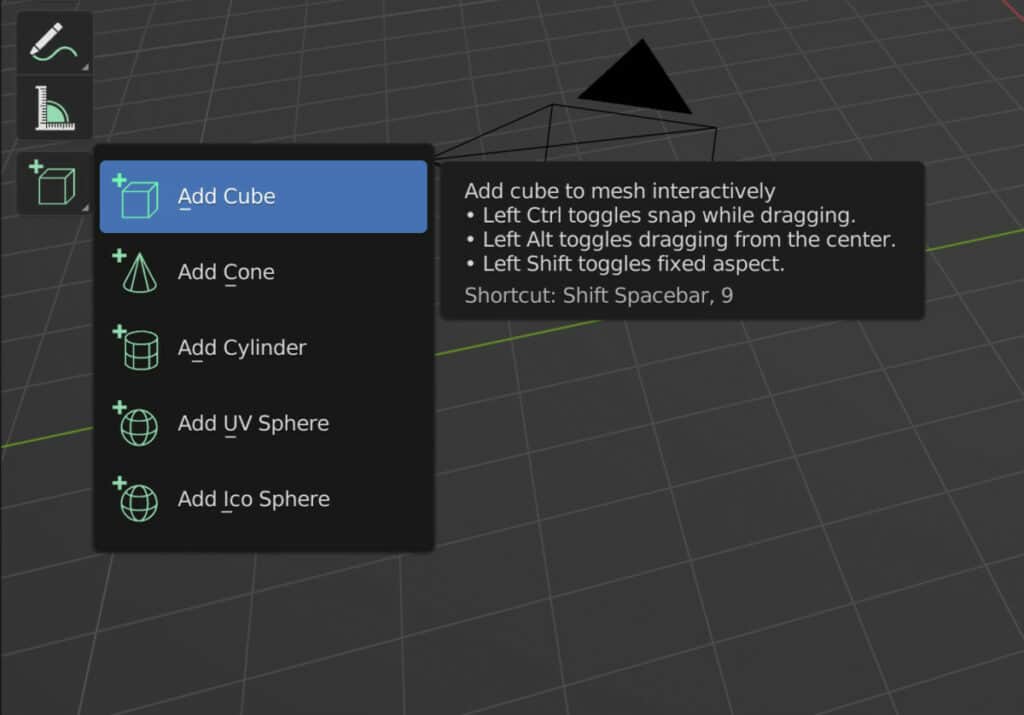
Compared to the options in the add menu, your choices are more limited here, but we can choose from the following mesh primitives…
- Cube
- Cylinder
- Cone
- UV Sphere
- Ico Sphere
Sticking with the cube, for now, make sure the tool is activated (The button will be highlighted blue) and move your cursor over the viewport.
You will notice that the add tool highlights the Blender grid, allowing you to use it as the base of your object.
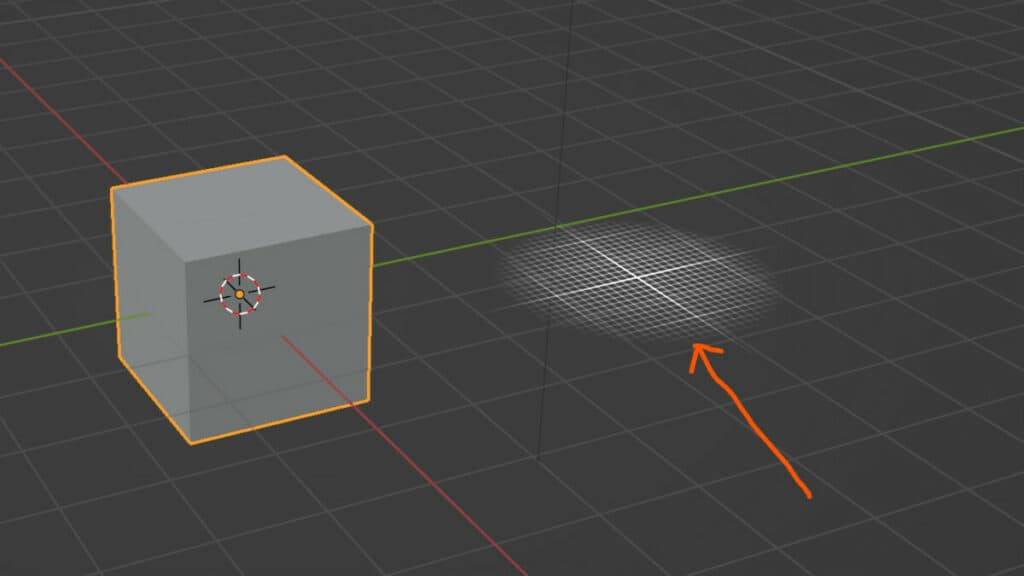
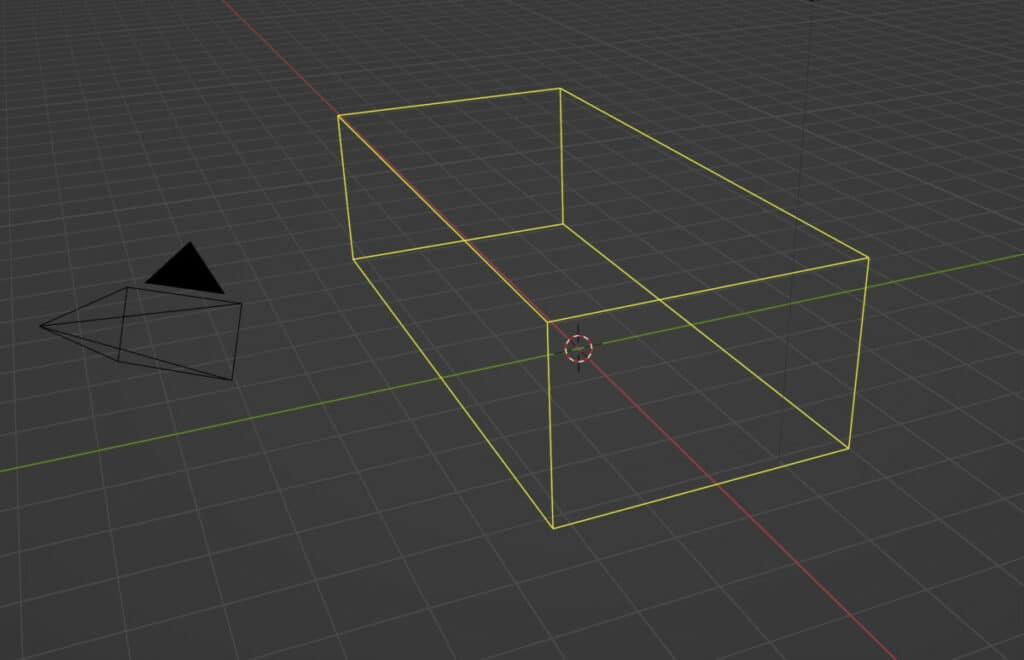
Left click and drag your cursor to create a square on the Blender grid, do not release the left mouse button until you have the base shape you want.
The add tool works in two stages. The first stage creates the base on a single plane, which is usually the Z plane. The second stage occurs when you release the left mouse button, allowing you to determine the third axis of the model.
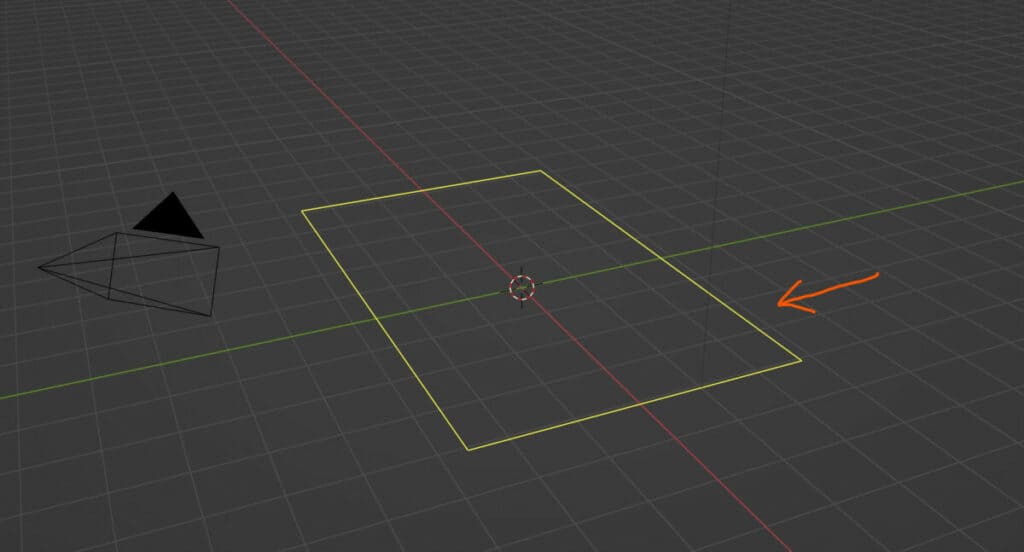
At this stage, your design will have a 3D shape, and to confirm the shape, you need to click on the left mouse button to complete the process.
So to summarise, the process of using the add tool is to click and drag to create the base for the first stage, then release the left mouse button to initiate the second stage, which allows you to make the 3D model. Left Click to finish the second phase and the process as a whole. This leaves you with your object.
The essential advantage of this tool is that you are able to control the dimensions of your primitive objects on all three axis.
The exact process applies to all of the other primitive mesh options. Click and drag to create the 2D base and then release your left mouse button to define the shape on the third axis.
Using The Surface Of Other Objects
There are several settings that we can change regarding the add tool, and these can be found in the header bar of the 3D viewport when the add tool is activated.
Many of these options remain the same for the different primitive meshes, such as the orientation and depth options.

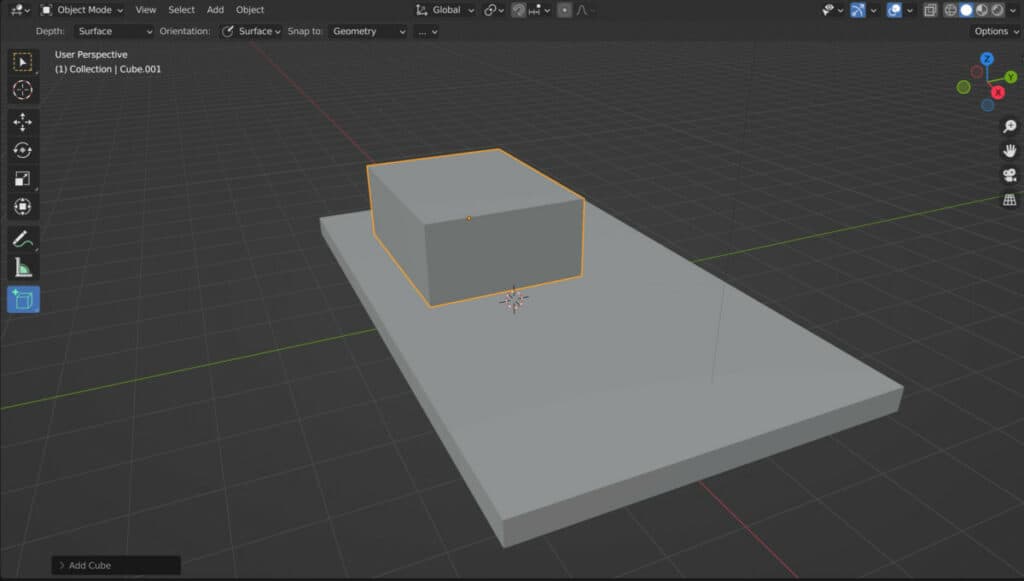
The default orientation is to lock to the surface of either existing objects or the blender grid. This means that we can add our objects on top of each other.
For example, we can generate a larger cube, and then we can generate a smaller cube by clicking and dragging on one of the faces of the larger model. This would also allow us to create the depth of the cube on a different axis.
Combine The Add Tool With Snapping
If we want to use our existing geometry more accurately to position new objects, we can combine the adds hall with snapping.
Enable the snapping tool, open up the menu, and choose one of the various options. For example, you can select the vertex option.
Now when you add additional objects, you can snap to the vertices of existing models to use as your base. This can be useful if you want to generate objects on the corners of your cubes.
The Depth Of The Add Tool
Regardless of the primitive mesh you are creating, the first option that you will have that you can change is the depth option.
Surface
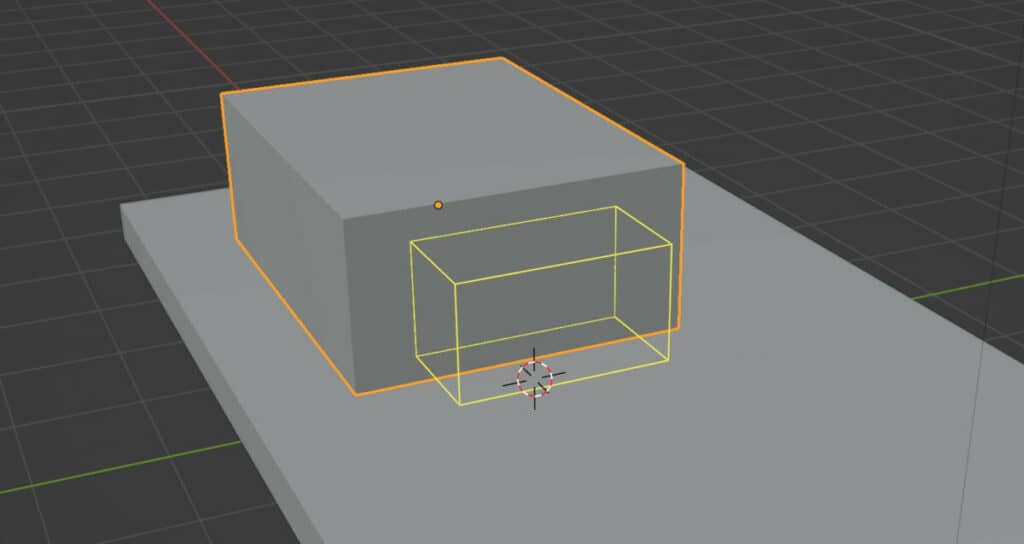
By default, this is going to be set to the surface. This means that the ad tool will attempt to place new objects on top of existing ones.
If you are not hovering your cursor over an object, it will use the Z depth of the 3D cursor as a backup.
If you were to move your 3D cursor up on the Z axis and then re-attempt to use the add tool, you would notice that the objects would be added where the height of the 3D cursor was positioned.
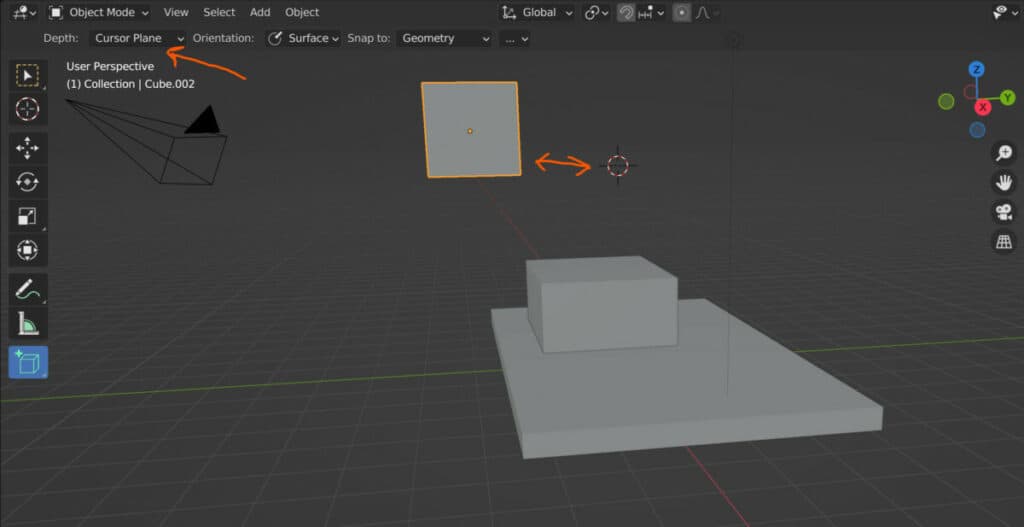
Cursor Plane
The Cursor Plane Options is the second of our three settings and uses the 3D cursor as the point where the shape will be generated.
The key difference here is that this setting ignores your geometry entirely, so even hovering over an existing object will not change the position of the new object from the selected axis of the 3D cursor.
Cursor View
The third setting uses the cursor view to dictate the positioning. This means that the view of your viewport in relation to the cursor position is used to determine the location of the new object.
So if you create one model from one viewpoint, and then create another from a second viewport after orbiting, the two objects would be at different heights.
Orientation Of The Add Tool
The second set of options that we have with the add tool is used to define the orientation. By default, this is set to surface.
With this setting, the add tool will change its orientation based on the direction of the face normal. This allows us to add objects on the side of our existing models.
The second option is to use the default orientation, which is the currently selected orientation from the orientation menu.
When you set it to this option, you will notice when you go to add your objects that the orientation does not switch based on the face normal.
Instead, if you are using the global axis orientation, it will use the Z direction of the viewport. You can also use a custom orientation here if you want to change the direction of all generated models manually.
Snap To Option For The Add Tool
The next option that we have in the header bar is for the snap to setting. This is set to Geometry, which means that the cursor will snap onto other objects allowing you to build on top of them. The next setting is for the default snapping option.
As we noted earlier, you have the ability to combine the add tool with snapping to position your models more accurately.
If you use increments for snapping, and set the snap to option to default, then Blender will restrict your add tool so that you can only increase the size of your object by the assigned incremental values, such as whole meters.
For increments, we don’t need to turn on the snapping tool at all for this to work and only need to change the snap to setting to default.
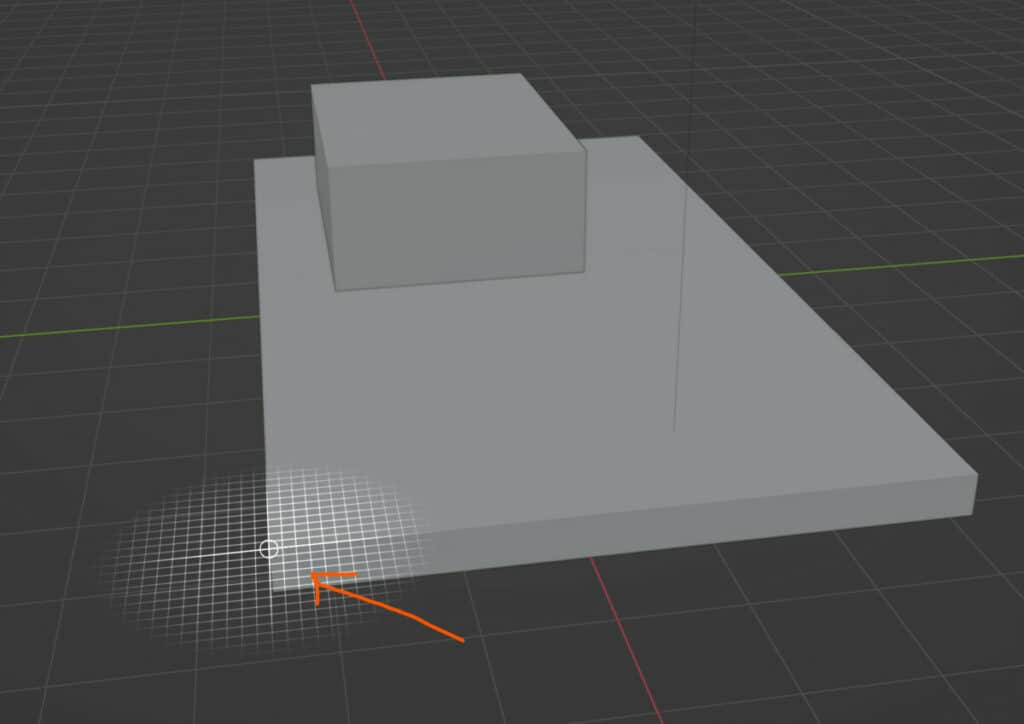
Other options from the snapping menu require the control key to use. For example, we can set the snapping option here to vertex, and then if we hold down control and hover our cursor over a vertex, we can snap to that vertex and use it as the starting point of our shape.
By comparison, if we use the geometry setting and then use the control key, we will also snap to our vertex, but also other areas of the mesh as well such as the edge and edge center.
Additional Settings
The add tool also uses another menu that has an … appearance at the end of the header bar options. open up this menu to find the following options.
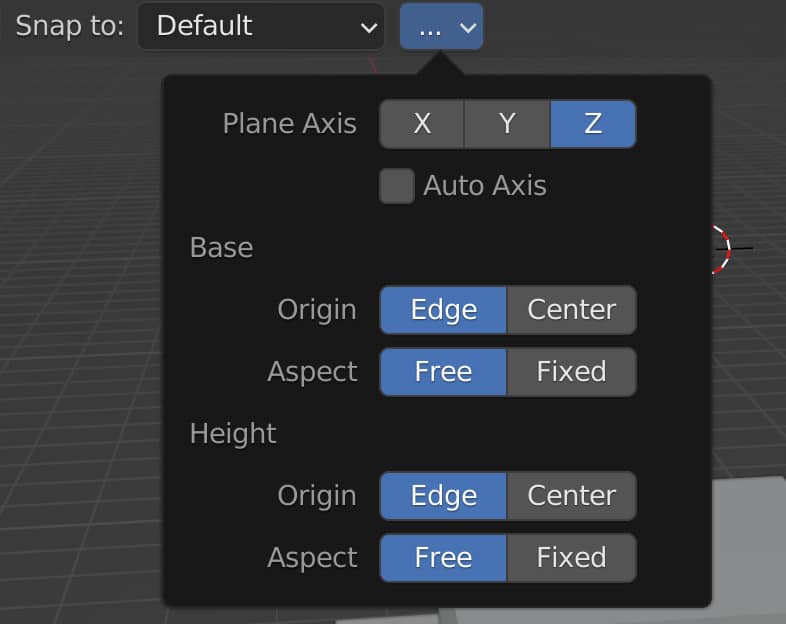
Plane Axis
This option defines the plane on which the 1st phase of object building will take place. By default, this is set to the Z plane, which allows you to scale up on the Z axis for the second phase.
We can change this setting to build up the 2D base on either the X or Y planes. This works even when snapping the object to existing geometry.
Base
This is split into two options. The origin allows you to begin constructing your model either from the edge or your model, which is in fact the corner, or center of the model, so when you click and drag the original position of the cursor becomes the center of that plane.
The second base option is for the aspect ratio of the shape. The free setting allows you to have different values for the X and Y axis of your plane (If using the Z axis as the plane axis). The fixed setting ensures that your two axis keep the same value as each other, so the base shape is always a square.
Height
The base options are for the first stage of the add tool, while the height settings are for the second stage. The options for the height are the same as they are for the base, but are adjusted accordingly, so when using the center origin for example, the chape will scale in both directions with the original plane located at the center instead of the top or bottom.
When To Use The Add Tool For Your Projects?
In most cases, you will still end up using the traditional method for adding new objects into your scene, especially in projects where you are working with a smaller number of models or even a single mesh object.
There are a few scenarios, though, where using the add tool becomes invaluable. The first example is when you are designing the environments and want to quickly generate and position new models so that you can create a mock-up of your scene.
With the add tool, new models can be introduced at several times the speed of the traditional methods for adding 3D objects.
Another example where the add tool is useful is for quickly constructing the general shape and size of an object.
For example, if you want to design a model of a TV, you can create a cube that more accurately resembles that shape straight away.
Thanks For Reading
We appreciate you taking the time to read through the article, and we hope that you found the information that you were looking for, and if you are interested in learning more about the different tools available in Blender, you can try out some of the other blog posts listed underneath.