One of the first things we need to learn when creating any animation in Blender is how to use the timeline, which is ground zero for where we can find and preview our created animations from the 3D viewport.
The timeline allows us to view and position any keyframes we create for our 2D and 3D animations. We will also find the playback controls for playing, fast forward, and rewinding our content. The frame range can also be defined here in the timeline, as well as the ability to perform essential functions like selecting, duplicating, and deleting our keyframes.
You will struggle to create any animations in Blender without at least using the timeline editor to preview your content and position your keyframes, so learning how it works is an absolute must.
What Is The Purpose Of The Timeline?
Blender can be used for many different projects, but the two main reasons you would use Blender would be to create 3D models for use in external situations or create your 3D animations.
If you are using Blender for the latter purpose, you will need a suite of tools geared toward creating these animations.
The most fundamental of these tools can be found in the timeline, an editor built to preview your animations in the 3D viewport.
Unlike many other toolsets in Blender, you don’t have to go far to find a timeline, as it is a part of your default layout whenever you open any basic project in Blender.
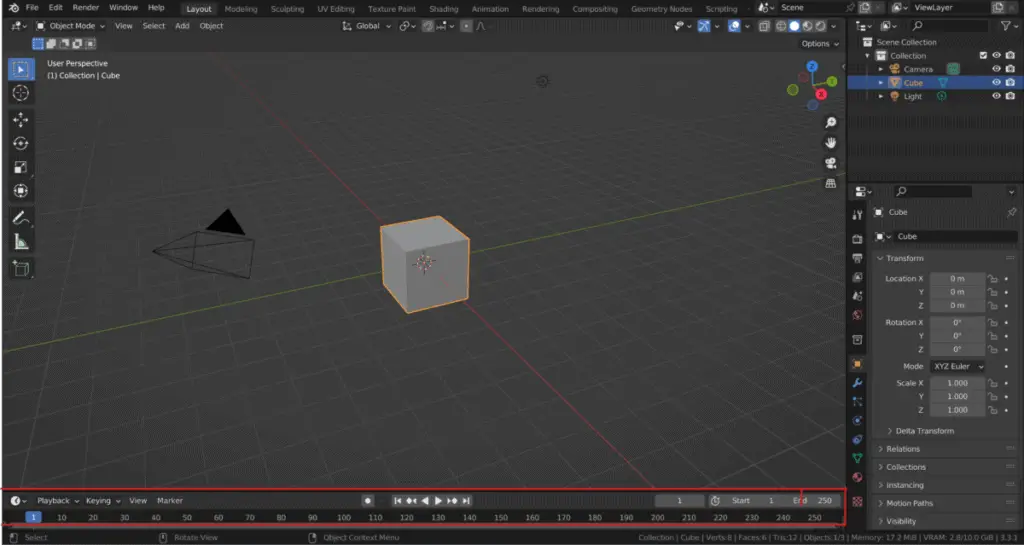
The timeline will be located at the bottom of the blender UI in the layout workspace. It can be found directly underneath the 3D viewport.

It can also be found in a similar location in the animation workspace, which is more geared towards creating your animations, and it’s recommended to use this workspace once you have created the models in your scene.
In the timeline, we can perform many core animation tools in Blender. This includes the ability to playback our timeline in the viewport using the playback controls. We can also define the length of our animation using the frame range feature.

In addition, we can perform basic tasks relating to adding keyframes, which are central to any animation we try to create in Blender. Using the timeline, we can select, move, delete and duplicate these keyframes to perform basic editing of our animations.
How To Add And View Keyframes To Your Timeline?
Before using any of the other tools in the timeline, your first step is going to be to add some keyframes. Any single animation requires a start keyframe and an end keyframe. The goal is for the end frame to have a different value than the start frame.
This change in value is then projected in your 3D viewports in the form of an animation. An example would be rotating a mesh object 360 degrees on the X-axis.
By adding a keyframe for the original rotation and then rotating by 360 degrees on a second keyframe, we can create a rotation animation.
This can be done by simply locating where we can create keyframes for that specific property. In the case of our rotation value, we can open the side panel in the viewport. Then we can press I as we hover over the rotation values of our selected object to add a keyframe.
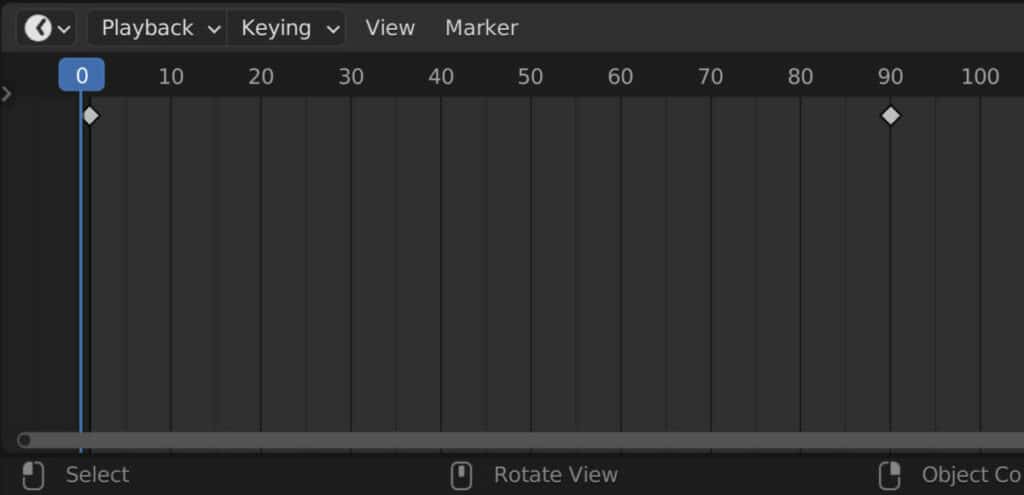
If we were to go back to our timeline, we would see at frame one that a yellow diamond has appeared. This diamond indicates that a keyframe has been added for this object on this frame.
The second keyframe, which is required to calculate the difference for the animated value, must be on a different frame. We can click and drag on the blue slider in the timeline to change which frame is currently active.
Then when the frame has been changed, we can rotate our object on the axis. This rotation changes the color that we see on the side panel. We can press the I key again to insert a new keyframe for that changed value.
Go back to the timeline again, and a second keyframe will appear. You now have a start keyframe and an end keyframe. The gap between these two keyframes is the period of your animation in which this value will take effect. This is the general rule when creating our keyframes in Blender and viewing them in our timeline.
But to see this in motion, we need to use another part of the timeline: the playback controls in the header.
Using The Timelines Playback Controls
There are many things we can do in the timeline that we can also do in other editors, such as the dope sheet. But there is one thing that is unique to our timeline and is why it must always be made available during your animation workflow: access to the playback controls.
These controls are found in the center of the timelines header bar. You don’t see the timeline editor when you open up a new project in Blender.
The only part of the timeline that is made visible is in its header. And this is because the most critical aspect of the timeline is its playback controls, which are visible within the header.
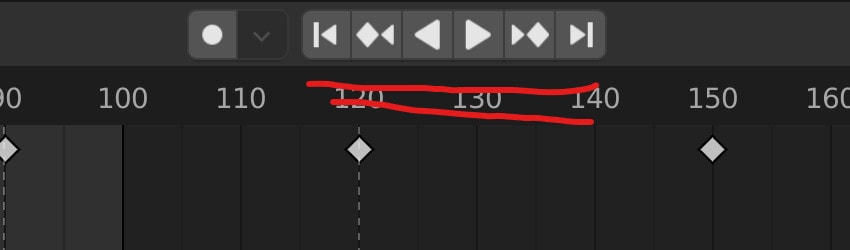
These controls allow you to perform essential functions in previewing your animations. We have to play button that allows us to play our animation within the viewport.
We can also jump to and from the various keyframes we create within our timeline. On top of that, we can also Fast forward and rewind our animation using the playback controls.
Defining The Frame Range For Your Animation
Another key aspect of the timeline is access to the frame range. This is the selection of frames that will be rendered for your animation. The number of actual frames we can access in the timeline is almost limitless, so we always need to define a selection.
By default, we have a start frame and an end fine. The start frame will be frame one, and the end frame will be 250.
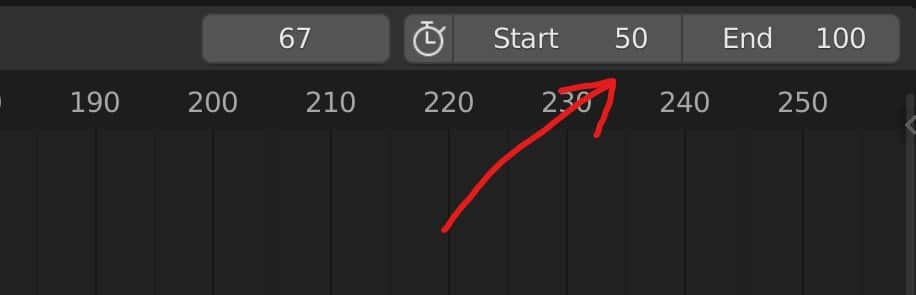
You can locate the start and end frames at the end of the timelines header. These are editable values so that you can left-click on the start frame, for example, and then you can type in what you want to be the new start point.
If we were to set our start frame to 50 and the end frame to 100, we would only render the frames from 50 through to 100 within our timeline. Anything before 50 frames 1 to 49 would be ignored, as would any frames after 100.
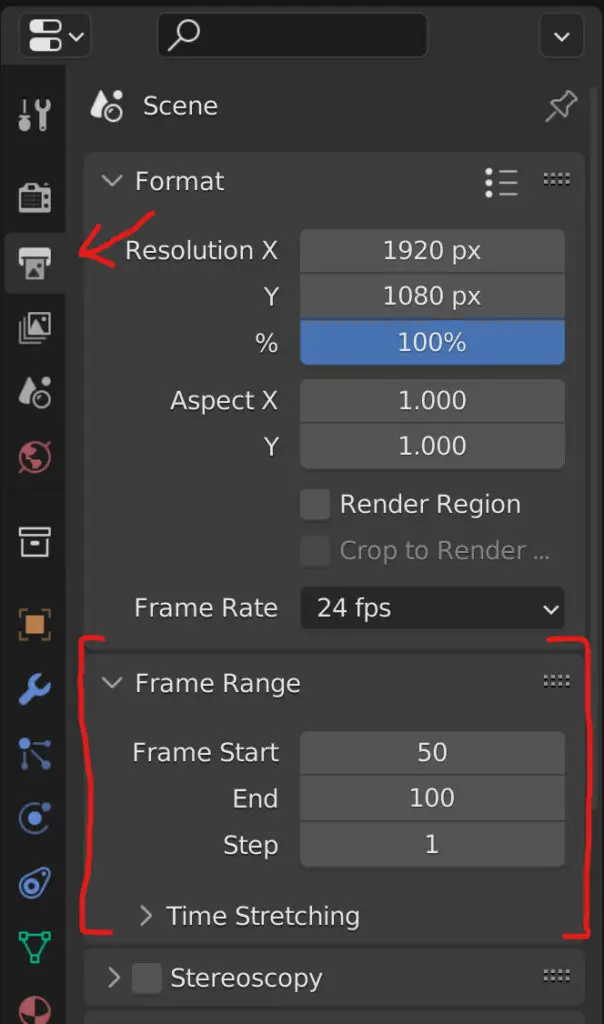
However, this tool is not unique to the timeline, as we can also manipulate the frame range in the output tab of the properties panel. It is helpful to have the frame range in the timeline, as it means we won’t have to jump across from one panel to another to use specific tools.
Creating Markers To Organize Your Animation
If we were to go slightly more advanced, we could add markers to our timeline. A marker is a helpful way of organizing your timeline so that you know what is animated at what point.
This becomes more useful as you animate more values in your scene. For example, we have a scene where our monkey objects rotate on different axes in different directions.
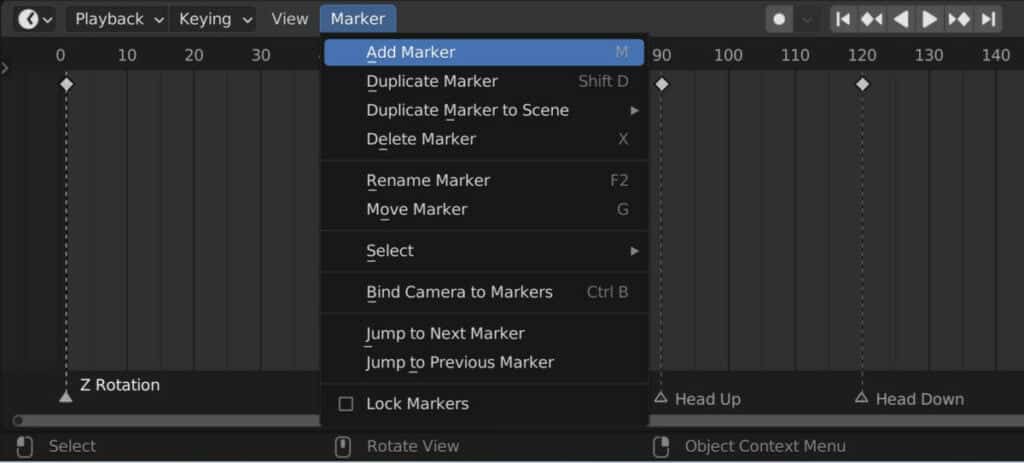
We can add a market to the first frame by making it the active frame in our timeline, then going to the markers menu in the header of the timeline and selecting add marker.
A quicker way of doing this is to select the active frame and press the M key to add a new marker. The name of the marker will typically be something like F_01.
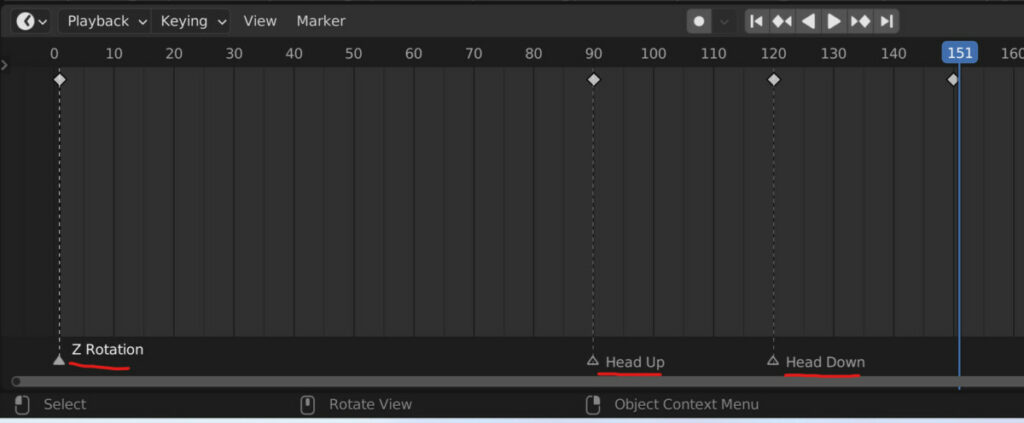
If we want the market to be more descriptive, which nine times out of ten, we will, then we can rename it by hovering over the marker’s name and pressing the F2 key to bring up the name tool. For the example, I could use the name Rotate Z, to indicate that this is the animation that begins on this frame.
Then we can go to the next keyframe and create a marker for the following animation to rotate the head up, so we name it head up.
Thanks For Reading
We appreciate you taking the time to read through the article. We hope you found the information you were looking for. If you are interested in learning more about the Blender software, you can check out a few of the articles we have listed below.
- Beginners Guide To Using The Dope Sheet
- Setting The Output For Your Rendered Animations
- How To Define The Frame Range Of Your Animation
- Why Is My Animation Playback Lagging
- What Are The Shortcuts For 3D Animation In Blender