When creating our 3D objects, we often want to display our creations to the world, and a really good way to do this is to publish a carousel animation of your model where we rotate the camera around the object so that we can view it from all sides. There are several methods for creating this style of animation in Blender, but perhaps the easiest involves using an add-on.
To introduce the turnaround camera add-on, go to the edit menu and then go to preferences, in the add-on section, type Turnaround into the search bar to display the turnaround camera add-on and enable it. Select all objects in the 3D viewports and then go to the animate tab in the side panel. Click on the turn around button to create an animation of the camera circling the main object.
This automates many steps that we would typically take to animate our camera around a specific object, such as parenting and rotation. Therefore, this becomes one of the easiest ways to create the carousel effect in Blender.
Enabling The Turnaround Camera Add On
As of Blender version 3.3, the turnaround camera add-on is supplied with the vanilla version of Blender; however, it is not currently enabled.
This add-on will allow us to automate many of the steps we traditionally need to take to create a carousel effect for our animation.
The idea of a carousel animation is to rotate around an object or have the object itself rotate so that we can see all sides of the model.
This can either involve rotating the object itself 360 degrees and then keeping the camera in place. Alternatively, it can also involve moving the camera around the object, so the object is stationary while the camera orbits around it.
The turnaround camera add-on will be using the second of these methods, selecting the camera and then orbiting the camera around the selected object.
To enable the turnaround camera add-on, go to the edit menu, and select preferences to bring up the preferences panel in a separate window.
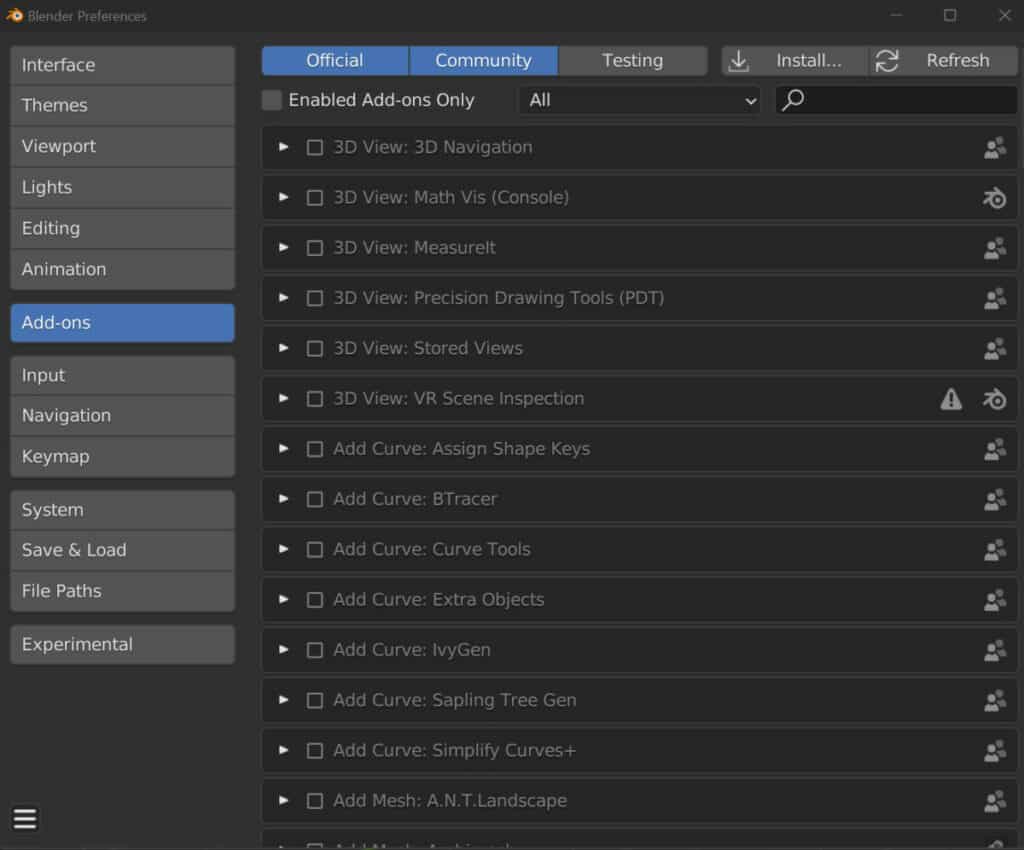
In the list of tabs to the side of the preferences panel, select add-ons, which will display the entire add-on library.
Rather than trying to locate the turnaround add-on. In such a long list, we will use the search bar in the top corner.
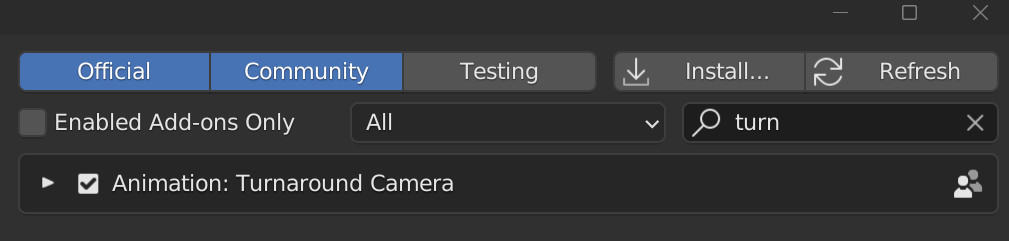
Left click on the search bar and type in at turn around. The list will be reduced to a single option which is the turnaround camera add-on. Make sure to tick the tick box, so the add-on is enabled, and then close the preferences panel.
Accessing The Add On
To access the turnaround camera add-on, press the N key on your keyboard to open the side panel.
To the side of this panel, we have access to various tabs. The bottom of these will be the animation tab, which will have been added when we enabled the add-on.

Select the tab with a single closed menu for the Turnaround Camera. Click on the little down arrow to the side to open up the menu.
How To Create To Carousel Effect
Now that we have access to the turnaround add-on controls, we can begin to create our animation. With the default settings, we should be able to orbit our camera at 360 degrees on the Z axis.
The Turnaround Button
All we need to do to achieve this is to just click on the turnaround button at the top of this panel. However, for this to work, it needs to have a selected object which you can view to the side of the button.
Make sure that the object has been selected before you press the turnaround button, and then the animation should be applied to that model. Test the animation by going to your timeline and pressing the play button. You should see your camera orbiting around the selected object.
Select Your Camera
If you have multiple cameras in your scene, then you can use the option directly below the main button to change which camera you want to apply the Council effect to.
Animation Length
To change the animation’s carousel effects length, you can determine the start and end frames. For example, you can start your animation on frame 30 and finish it on frame 120. Note that the smaller the frame range, the faster the animation will appear.
Changing The Direction
If you want to change the axis you will be orbiting your model, you can do so with the values below on the X, Y, and Z axis. By default, this is set to a value of 0,0,1, with the orbit focusing on the Z axis.
To orbit on the X axis, you would reduce the value to zero and increase the X value to 1. These values resemble the number of rotations around the model.
So a value of 1 means that your camera will orbit 360 degrees around your model on that axis. Change this value to 2, and then it will rotate twice around the object, so 720 degrees.
You can even reverse the direction of your camera by using the minus axes, which are buttons next to the X, Y, and Z values.
Back And Forward
Below the initial settings, we have additional options that allow us to perform slightly more advanced effects. The first option here is the back and forward option.
When enabled, your camera will orbit in the initial direction that you assign it, which is usually the positive axis. However, it will orbit at double the initial speed you set in the options above. Once it completes that iteration, it will reverse its direction and orbit in the opposite direction.
Clear Camera
The clear camera option located directly next to it is beneficial because it will cancel out any changes you make. Every time you press the turnaround button, you create a new rotation target, which you can view in the outliner panel.
Overwrite Previous
If you want to overwrite previous rotation targets, you can enable this option before clicking the turnaround button.
Create Track Constraint On Camera
The create track constraints option will add a track two constraint to the camera, allowing you further to edit the properties on the camera object itself.
You can view the track constraint controls by selecting your camera object after initializing the rotation target. Then go to the Constraints tab in the properties panel to view the track to constraint.
Focus On 3D Cursor
The next option on the list allows us to focus the animation on positioning the 3D cursor instead of the object origin. To display how this works, position your 3D cursor to the corner of the scene where your camera can view it.
The turnaround effects create a new rotation target and play the animation when enabled. You will notice that the orbits behave differently. It is now attempting to orbit around the location of the 3D cursor, and if you view your animation through the camera lens, you will see that the cursor does not move from its position within the camera’s border.
The Lens Effect
The final set of options available to us on the lens effects. This is set to none by default, but we can use this option to enable Dolly Zoom. By setting start and end values, we can zoom in or out of our object using this effect.
Thanks For Reading
We appreciate you taking the time to read through this article, and we hope you found the information you were looking for. If you are interested in learning more about how to create different animations, effects, and renders in Blender, look at some of the articles we have listed below.
- How To Create A Carousel Effect Easy Method
- How To Animate With Blender
- How To Animate Text With Blender
- Which 3D Software Is Best Suited To 3D Animation
- What Is Blender Used For By 3D Artists