When working with materials in Blender for the first time, we may initially come across unfamiliar terms, especially if we have not created materials for 3D objects before. One of the first terms you may come across when adding a simple material are specular and specular tint.
Specular or specularity is a term used to describe the strength of the reflection in a material. The higher the specular value is, the more visible the surrounding area will be in the reflection. This is not to be confused with roughness which affects how light is redistributed when it hits the object’s surface.
We use specular shaders to create brighter highlights in our reflections based on the viewpoint, where the light hits the object’s surface and reflects towards the scene camera, making the angle at which we view the object important when it comes to what we can see in the reflection.
What Does The Specular Tint Option Do In Blender?
When using the specular tint value in the principled shader, we change the reflection’s color that bounces off the object’s surface.
For this to be most effective, we need first to lower the roughness value in the principled shader and increase the specular value to 1.
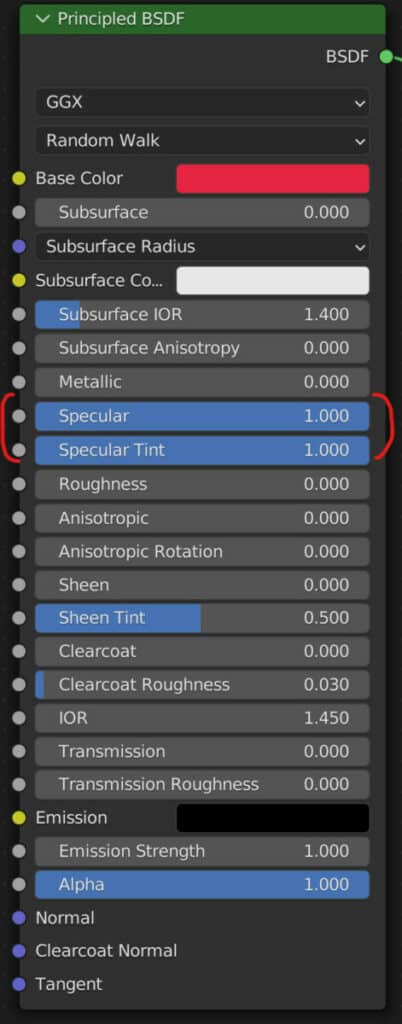
Even though the specular value is a 0 to 1 slider, real-world materials will either have specularity or won’t, so we tend to use values of either 0 or 1.
Below is an example of a UV sphere with a basic red material applied with high specular and low roughness.
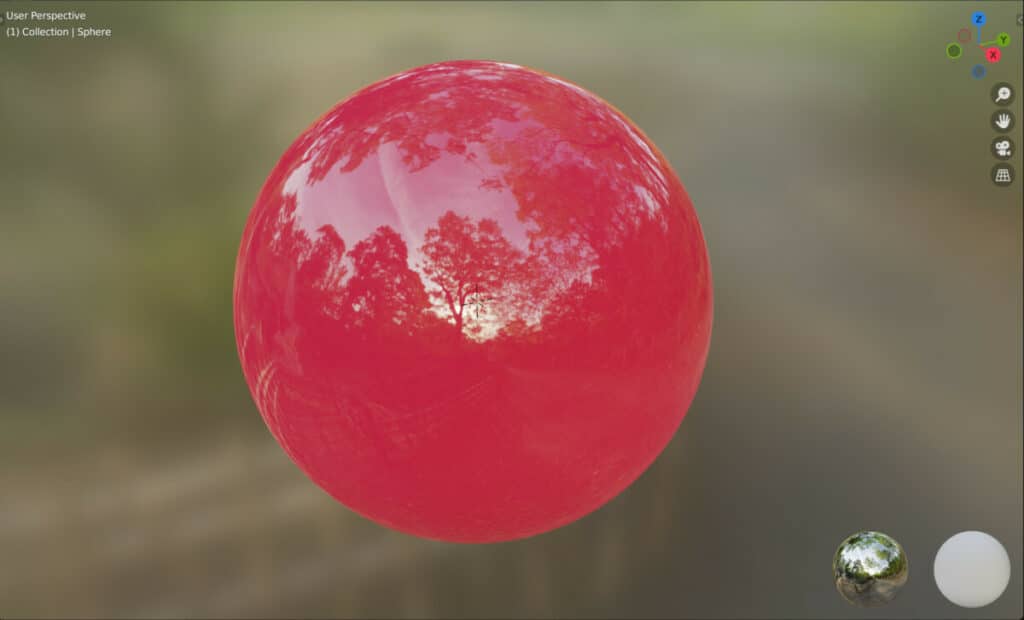
The reflection of the surrounding area on the model uses a light temperature similar to that of the lighting.
The specular tint value is set to 0 in this initial image, but increasing the tint value to 1 changes the color of the reflection.
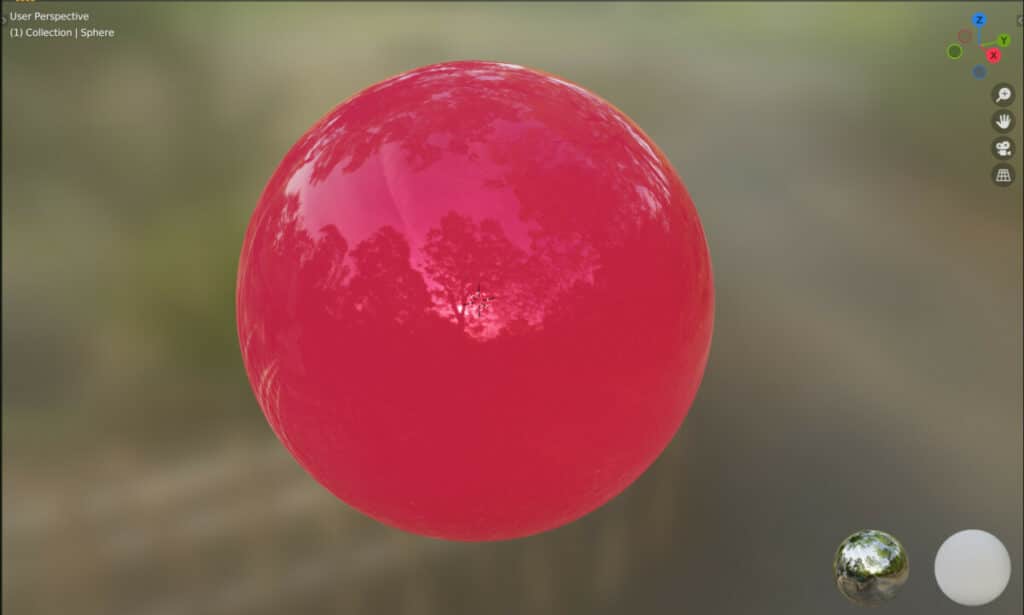
When the specular tint is increased, the reflection adopts the base color of the material of the object. In the case of the red sphere, the reflection adopts a redder view as a result of the specular tint.
How Do Specular Reflections Work?
Specular shading in Blender attempts to mimic the rules set by snells law, where when light strikes the surface of an object, whether that object is flat or curved, the light will then reflect at an angle that mirrors the incident light angle and is adjusted based on the surface normal where the light makes contact.
To clarify, the incident light angle is the angle at which the light travels towards the model’s surface before it hits. The reflective light angle is the angle at which the light travels away from the object after contact.
This is important because our camera will only pick up the specular light angled towards the camera lens when viewing the scene.
If you look at our example of the shiny red ball, you will notice that the reflection on the ball seems to display objects in the environment (Or HDRi in this case) that appear almost above the sphere.
Orbit around your sphere in the viewport, and you will see that the reflection warps as you change the angle of incidence between the light, the object, and the camera.
Switching from a spherical surface to a flat surface will have a similar end result; however, the lack of curvature on the surface means that the reflective angle will fully mirror the incident angle of light and will not be influenced by the surface normal.

In this example, we swap out the sphere for a flat cube, and in the image above, we view the surface from a relatively straight angle.
Since the cube’s surface is flat, we can see the environment (HDRi) from directly behind the camera, as the lower the angle of incidence is, the lower the angle of reflection will be.
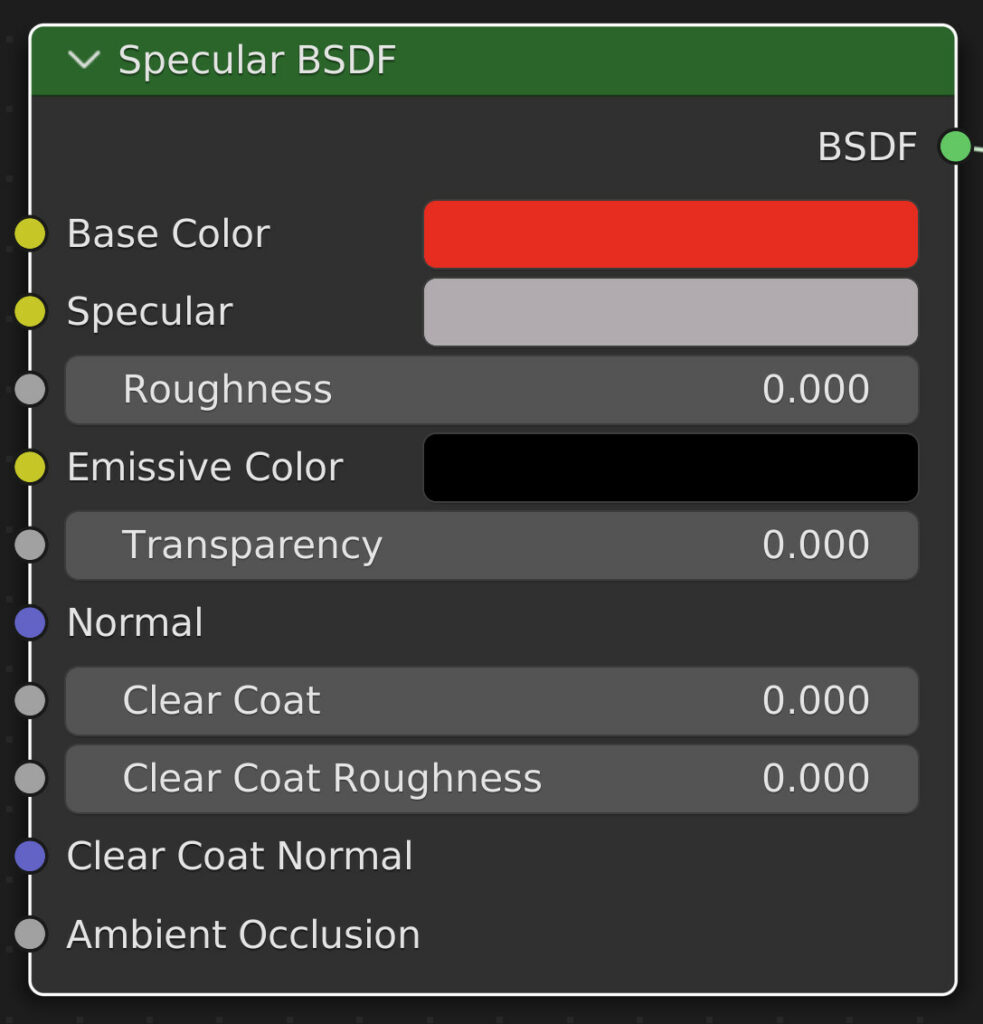
The Specular Shader
Exclusive to Eevee, we have the specular shader, a shader node that follows the specular workflow for material rendering. By contrast, the principled shader from which we have generated our examples uses a metalness workflow, considered more PBR accurate.
This shader is exclusive to the Eevee render engine because it does not follow the real-world application of properties that the cycles engine is built upon.
Mostly, it operates similarly to the principled node but with fewer parameters to control.
A key difference here is the specular option that with this node doubles up as both the specular intensity and the color.
Opening the color wheel for this option allows you to adjust the color tint using the color wheel while controlling the brightness of the color to control the specular strength.
As per the Blender manual, it should be noted that this node may not be permanent. Because it shares so many parameters with the principled node, there is a possibility that the node may be integrated into the principled node in the future, with a potential option to switch between specular and metalness workflows.
The Difference Between Metalness Workflow And Specular
When creating materials, the application that you are using may allow you to choose one of two workflows. All 3D renderers will allow you to use a specular workflow for materials creation, which is considered an industry standard.
Some 3D modeling applications like Blender also offer the option to run a metalness workflow for your materials. So what are the key differences between these two workflows?
Perhaps the most important difference is the maps that are used. PBR textures and materials require image maps to display where certain properties are influenced.
The most common map is the albedo texture map, which displays the base color and pattern of the texture onto the model.
A metalness map uses black and white colors to determine which parts of the map will be metal (White) and which parts will not be metal (Black).
This map type is limited to these two colors and is based on this color data because a real-world material is either a metal or a dielectric (nonmetal) with no in-between. By contrast, the specular workflow uses specular maps.
Both workflows use color and microsurface displacements (roughness) data to control the material’s reflective properties. Still, they differ with the workflow’s third component, either metalness or specular.
With specular maps, the saturation of the colors plays an important role, as black or grey areas are classed as nonmetal, while areas of the map with color are classed as metal.
In addition to the color influence, the brightness of the map also helps control the level of reflectivity in certain areas. This is something that does not apply to the metalness workflow.
The specular workflow offers a little more control overall, allowing you more artistic freedom with your materials. In contrast, the metalness workflow is a more clear-cut approach often used in game engines such as Unity and Unreal Engine.
Thanks For Reading The Article
We appreciate you taking the time to read through the article, and we hope you found the information you were looking for. Below we have compiled a list of additional topics that we think you may be interested in reading.