One of the most popular tools in 3D modeling, the subdivide tool has become the go-to tool for adding geometry across a model without disrupting its topology or its basic shape. It can be used in almost any workflow, even for low poly models.
There is no blender shortcut assigned to the subdivide tool, nor is there a shortcut for the unsubdivide tool, which is used to perform the function in reverse. However, you can use the hotkey of Control + 1,2,3,4,5,6 to activate the subdivision surface modifier to the object instead.
Surprisingly this is a rare case of the modifier having a shortcut assigned to it, rather than the base tool, but why is this the case and how can we assign a hotkey to the subdivide tool itself?
Why Does The Subdivide Tool Not Have An Assigned Hotkey?
The majority of tools in Blender will have a hotkey, or keyboard shortcut, assigned to them. However, this is not the case with the subdivide tool despite the fact that it is one of the most popular tools used in editing 3D objects. There are two reasons why no hotkey is assigned to the tool.
The first reason is that it can already be accessed from two different menus that both have their own shortcuts. The subdivide tool can be located in the edge menu, which can also be accessed using the hotkey of Control + E. It can also be located in the object context menu, which is accessed by using the right mouse button.
In the edge menu, it is the fifth option from the top, and for the context menu, it is the very first option. So the subdivide tool is already very easy to reach without its win hotkey.
The second reason is that you have the existence of the subdivision surface modifier, which can wolf in the same manner as the subdivide tool but offer a non-destructive workflow. In fact, there is an entire process of modeling that revolves around the subsurf modifier.
Assigning The Subdivide Tool To Your Key Favorites?
If you are looking for an alternative method of accessing the subdivide tool, then you can try adding it to your quick favorites menu. This is a custom-made menu where the artist assigns their favorite tools so that they can access them all with a single button. The hotkey for the quick favorites menu is the Q key.
But why bother adding the subdivide tool to another menu when it won’t make accessing the tool any faster? Well, the main reason why you would want to do this is that the exiting menus are much longer and it can take a second or two to locate your tool.
With the quick favorites menu, you would look to add your favorite five or six tools so that you can access the tool fast and easily, without needing to go look for it.
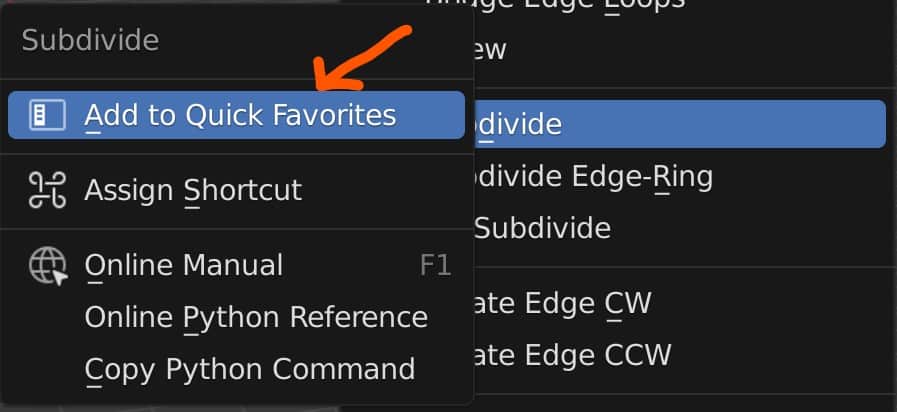
To add a tool to your quick favorites menu, locate the tool in one of the existing menus. Instead of left-clicking to activate the tool, press the right mouse button to open up the tool context menu.
This menu will look pretty much the same for any tool, and the first option will be to add the tool to your quick favorites menu.
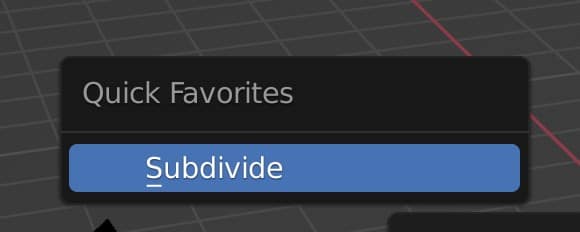
Now when you go to the quick favorites menu you will find the subdivide tool in that menu.
Creating A Hotkey For The Subdivide Tool?
If you want the most direct route for accessing the subdivide tool, then you can always add the blender shortcut yourself.
There are two ways that you can add your own hotkey to a tool. The first method is via the context menu, where we added the tool to our quick favorites. The second method is to add the hotkey in the keymap library, where all of our hotkeys are stored.
There are pros and cons to each method. Adding the hotkey via the context menu is both quick and easy, but only allows for access to the base tool, which is normally all that you need.
The second method of adding the hotkey directly in the keymap library is slower and requires a little bit of technical knowledge n how Blender works using Python script. However, it is a more flexible approach and can allow you to use multiple hotkeys for the same tool.
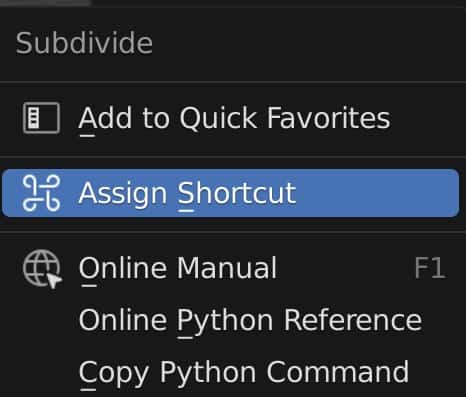
Going back to the first method, to add your hotkey straight to the tool first locate the tool in the appropriate menu, then right click on the tool name to open up the context menu.
The second option will allow you to add a shortcut to your tool, so select it and you will get a prompt to type in your hotkey. This is very sensitive to any button that you press, so make sure to only touch the hotkey at this point.
Even using the mouse buttons or the scroll wheel will result in those actions being recorded as the new shortcut, be careful as it is very easy to inadvertently press the wrong button here.
When you have added the hotkey it should be visible in the original menu next to the tool. You should also test the hotkey to see if it works.
Using Multiple Shortcuts For Different Levels Of Subdivision
The second method of adding a hotkey will allow us to add multiple hotkeys to the same tool. The subdivision surface modifier is already an example of this. By holding down control and then pressing any of the numbers from 1 to 6, you can add the modifier to your object in object mode.
Each number here represents the subdivision level that you want to use on the model, so control + 1 will create less geometry than Control + 3, even though the same tool is being used.
We can do this with any tool that has editable parameters, which just happens to be nearly all of them. First, we need to go to the edit menu at the top of the UI, then select preferences to open up our preferences panel in a new window.
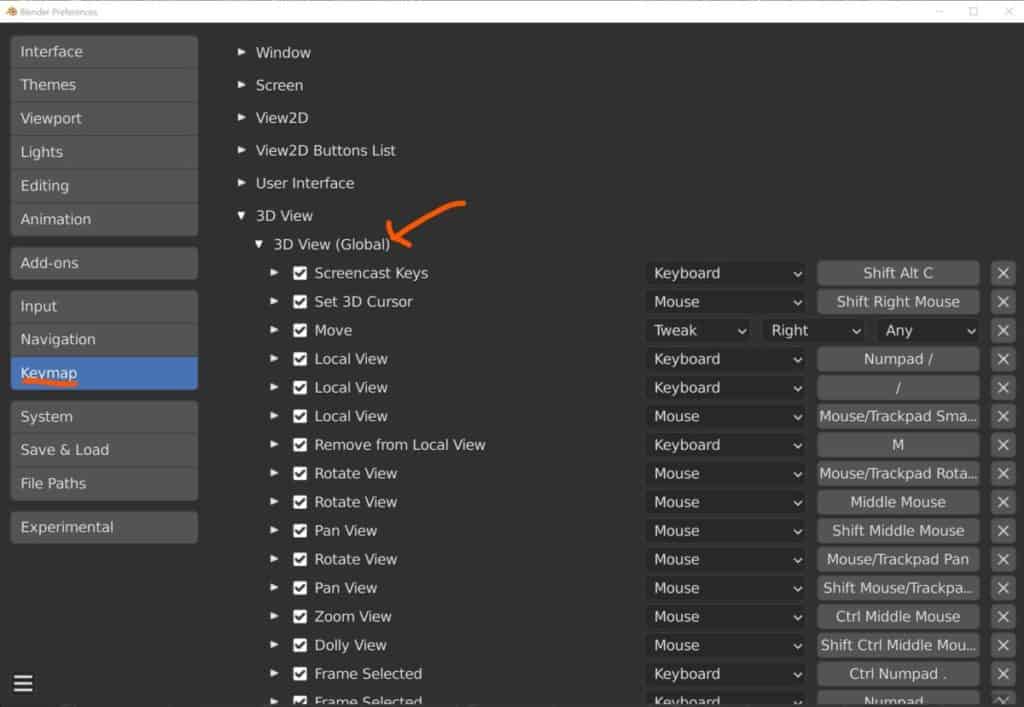
From here we need to go to the keymap subsection. Here you will find the library of shortcuts for all the tools used in Blender that have keymaps assigned to them.
This is a branch system, which means we need to locate the branch that represents the area for editing 3D objects in the viewport. Open up the branch for 3D view, and then open up the branch for Mesh. Then we will select Mesh (Global) and view all of the hotkeys that are used in this area of Blender.
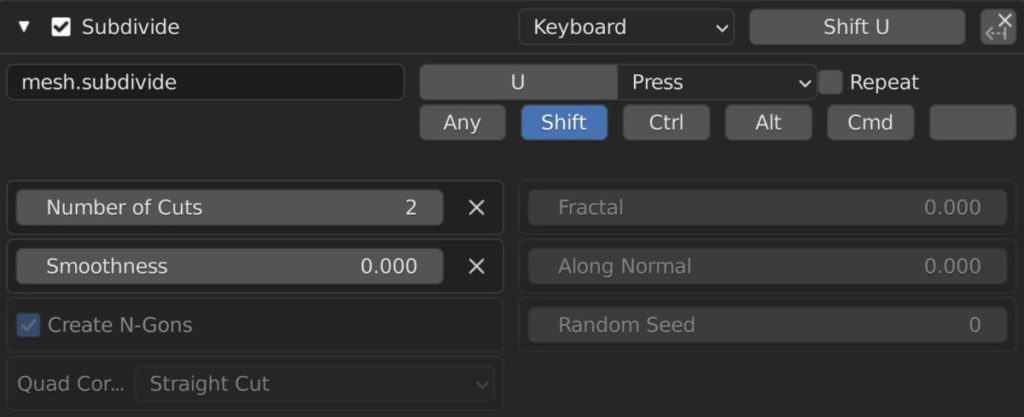
Scroll down to the bottom of the list to find the add new button and press it. You get a template for adding data to the new hotkey. First, add the hotkey that you want to use for the subdivide tool, such as Shift + U. Then we need to connect the key to the tool. Typing subdivide into the text box won’t work here, as we need the specific Python script to call the function when the hotkey is pressed.
Go back to the subdivide tool in the edge menu and hover your cursor over the tool name for a couple of seconds. A tooltip should then pop up and in grey text, you will see the python script used to call the function.
We will only need a part of this script, so back in the textbox of the preferences panel type in mesh.subdivide and the hotkey will auto-assign to the function.
The parameters of the function will appear underneath. You can edit these to change the behavior of the tool when that hotkey is used. This is where you can create multiple hotkeys for the same tool but change how the tool acts with each one.
Thanks For Reading The Article
We thank you for taking to time to read through our article. We have gathered a list of additional topics that we think you may be interested in reading.
- The Hotkey To Add A New Mesh
- The Shortcuts To Modeling In Edit Mode
- Assigning A Hotkey To A New Tool Full Guide
- Shortcuts For Navigating The 3D Viewport
- Learn Faster With Blender Shortcuts
-
Blender Kitbashing: Complex Shapes Made Easy
Simplifying complex shape creation with Blender’s kitbashing approach.
-
Custom Normals: Blender Hard Surface Tip
Enhancing hard surface models with custom normals for realism.