With Blender we are able to import our images for various purposes, ranging from referencing new designs to acting as image textures. When it comes to the 3D viewport, there are two ways in which we can import our images, either as a reference image or as a background image. So what is the difference between the two types?
The key difference between a reference image and a background image is the settings that you find in the properties panel. When you add one of these images, go to the object data properties tab in the properties panel. Some of the settings here differ depending on whether or not you use a reference or background image.
It’s understandable that you may be confused as to what the differences are between the reference and background images and when to use each because they are basically the same thing.
Are Reference Images And Background Images The Same Thing?
When you go to add an image to your 3D viewport, you have the option of choosing between a reference image and a background image. Because these appear as two different options, and unless you enable an add on will be the only two options for adding images into the viewport, you will immediately inquire as to whether or not they are different. And we usually assume that they are.
But the most part, however, these two types of images are very, very similar. They have all of the same settings available to them. And both followed the exact same process for adding to the 3D viewport.
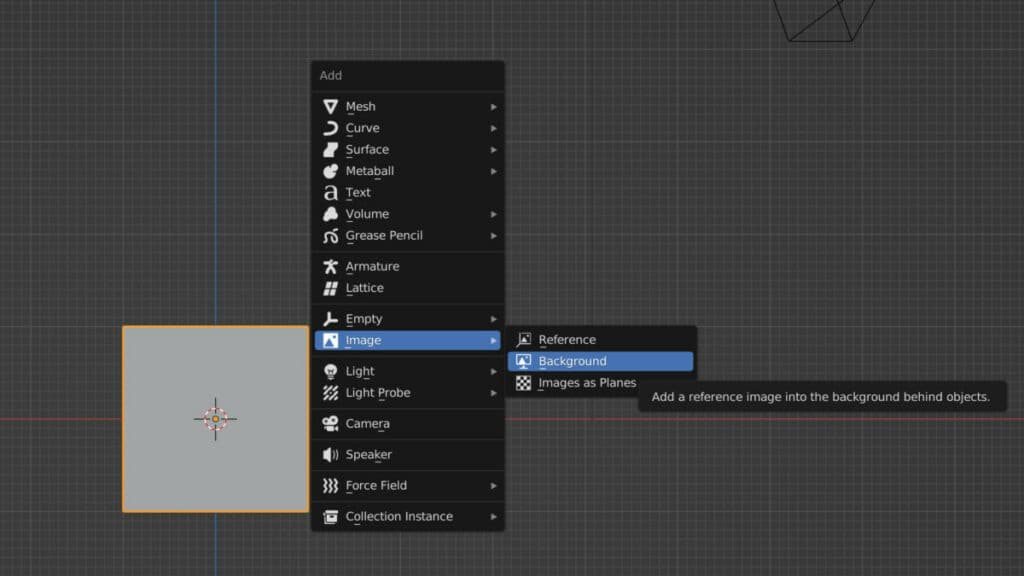
We open the add menu by going to the viewport header or the hotkey Shift + A. From there, we go to the images object type. Hover over this option, and you will see two options appear in the following menu. These are for reference and background images.
Regardless of which one you choose, you will be taken to the file browser in a new window allowing you to locate and select the file you wish to open.
Then you press the Big Blue button in the bottom corner of the file browser to import the image into your scene.
The Same Object Type With The Same Viewport Controls
Both the reference and background images Fall under the same type of object, which is an image object. This means that the controls associated with each object type are exactly the same within the 3D viewport, and this doesn’t change regardless of which object type you use.
With both the reference and background image objects, we can grab, rotate, and scale to help position them where we need them around our viewport. Both also allow us to click and drag from the corners of the image, which is another way that we are able to scale and is unique to our image-type objects.
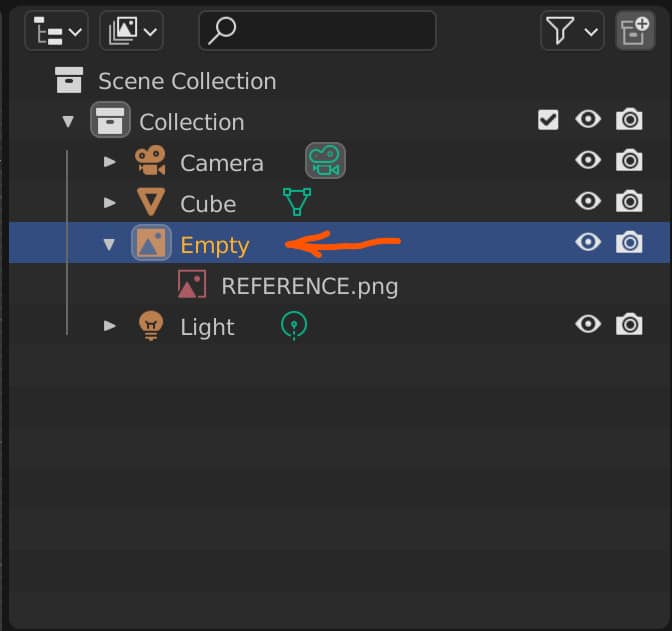
An interesting side note here is that the image object type is in fact a form of empty. If we take a look at the outline of the panel, regardless of which image type we have added, we will see that it falls under the category of an empty object because it is given the empty name.
A key difference here between an image empty and the other forms of empty objects is the Icon in the outliner, which represents an image in the case at the image type.
The Different Settings
The key differences then will lie in the settings you can find in the properties panel. As soon as you add your image, you can go to the object data properties tab in the properties panel, and this will display all of the different tools and parameters you can change, which are unique to the image object type.
If you were to add both a reference image and a background image and then make your way to this tab in the properties panel, you would notice that all of the options available to you are the same.
But while the available options remained the same between the two, the settings of these parameters are different.
So which parameters are different that can make a reference image a background image and vice versa?
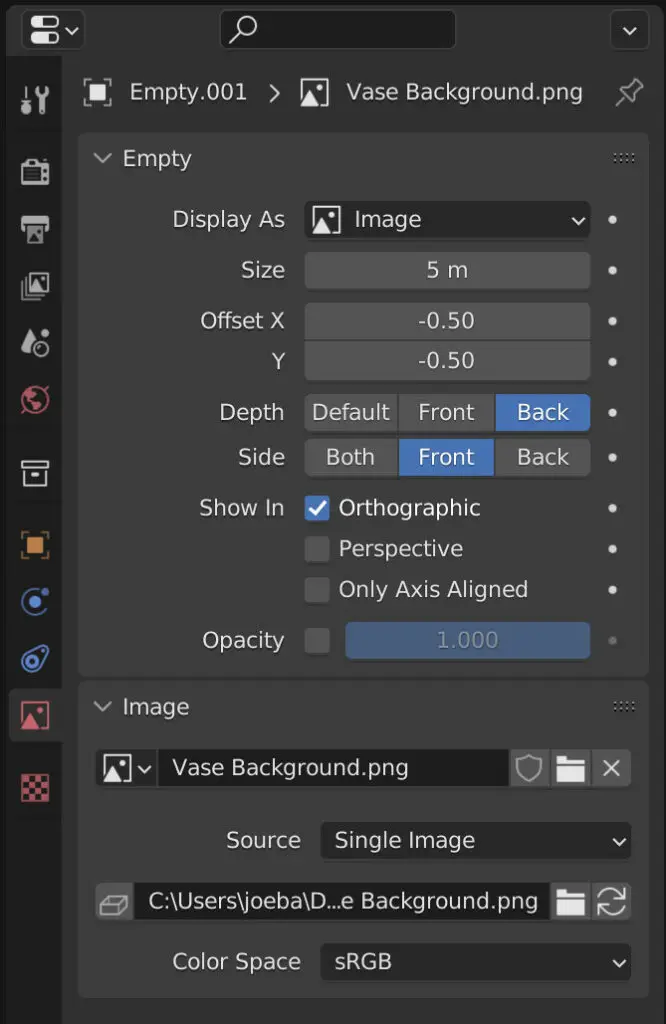
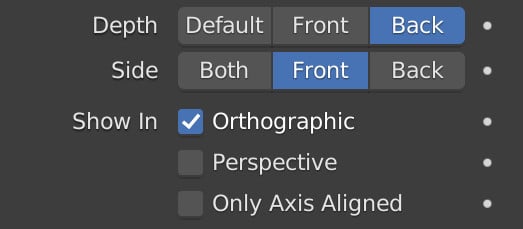
The first key difference is the checkbox for the perspective view. When adding in a background image, this box is automatically unticked if you add a background image in a 2D view, such as the front view.
When you orbit around your scene, the image will disappear because you won’t be able to view it from a perspective viewpoint.
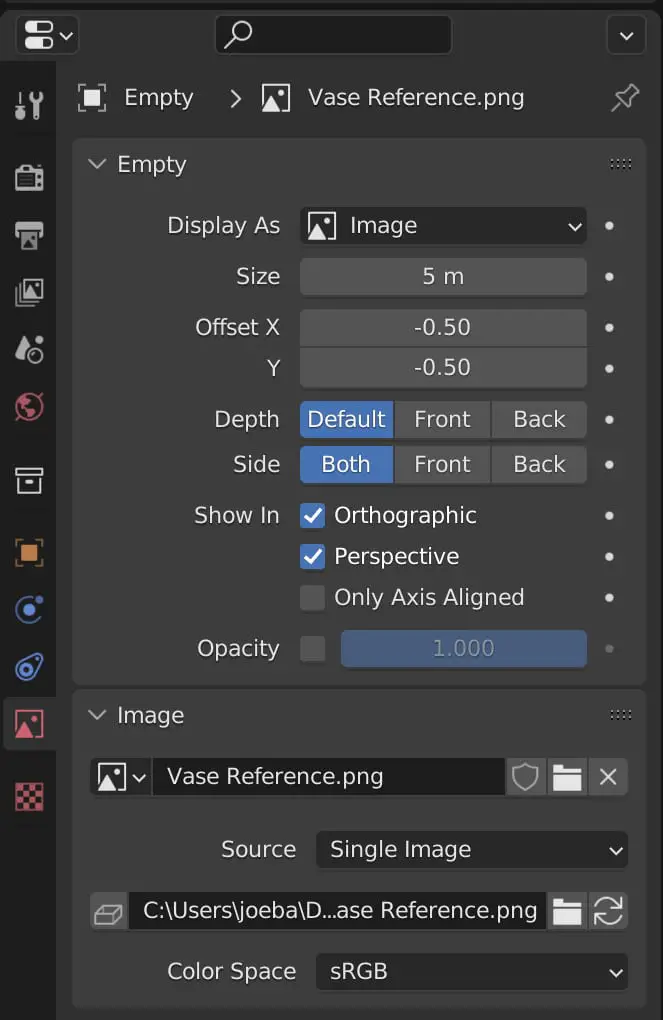
On the other hand, when adding in a reference image, this box will be ticked regardless of whether you are viewing it from a 2D or 3D perspective.
Another setting that differs between the two image types is the depth option. This is used to indicate whether or not your image is going to appear in front of your model, behind your model, or if it’s allowed to just cut through your model, depending on where it is positioned.
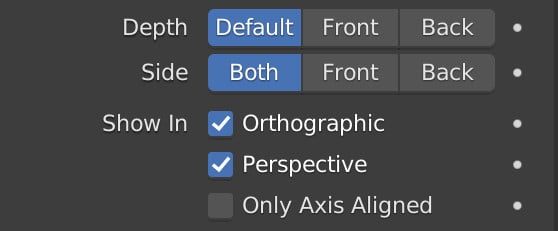
The reference object is going to have the depth setting at default. This means that to view the image before a model, it needs to be positioned in front. And if it needs to be behind the model, then it needs to be placed behind the object in the viewport.
The background image type is set to back. That means that no matter where it is positioned in the viewport, any mesh objects are going to be visible as if the background image was behind them, even if it is directly in between the object and the viewport camera.
The third and final deferred setting here is the side setting. This is an option that determines whether or not you can view an image from its own front, back, or on both sides.
The reference image object has this setting at both, which means you’ll be able to see the image from the front side and the backside as well, so you can orbit around your view port and still see the image.
The background image type, however has this set to the front option, which means you can only view the background image from its front-facing side. If you go behind a background image, it will appear invisible.
Thanks For Reading The Article
We appreciate you taking the time to read through the article, and we hope you found the information you were looking for. If you’re interested in learning more about using images in Blender, then you can take a look at some of the articles that we have listed below.