Blender shortcuts are the fast methods of activating many of the tools that you can use in Blender 3D. they offer a quicker solution compared to locating a tool in one of the many menus littered around the user interface. But not all tools in Blender have an assigned keyboard shortcut. So how do we go about adding shortcuts to the tools that have none?
To add a Blender shortcut to a tool, first, go to Edit > Preferences > Keymap. Go to the area in the hierarchy where you want to add the new shortcut and scroll to the bottom of that branch. Click on the Add New button and then fill in the necessary data, including the hotkey to be assigned and the tool that it is to be assigned to. Then close the preferences panel and test the new hotkey.
Adding a new hotkey to a tool that does not have one assigned to begin with is particularly challenging, as there are a couple of areas of Blender to visit in order to get the information that you need to correctly assign the hotkey.
The Simple Way Of Adding A Shortcut To A Tool
Almost everything in Blender can be done more than one way. The same is true for even assigning shortcuts to a tool. Let’s say for example you wanted to add a shortcut to the subdivide tool, as currently, it does not have a hotkey assigned to it.
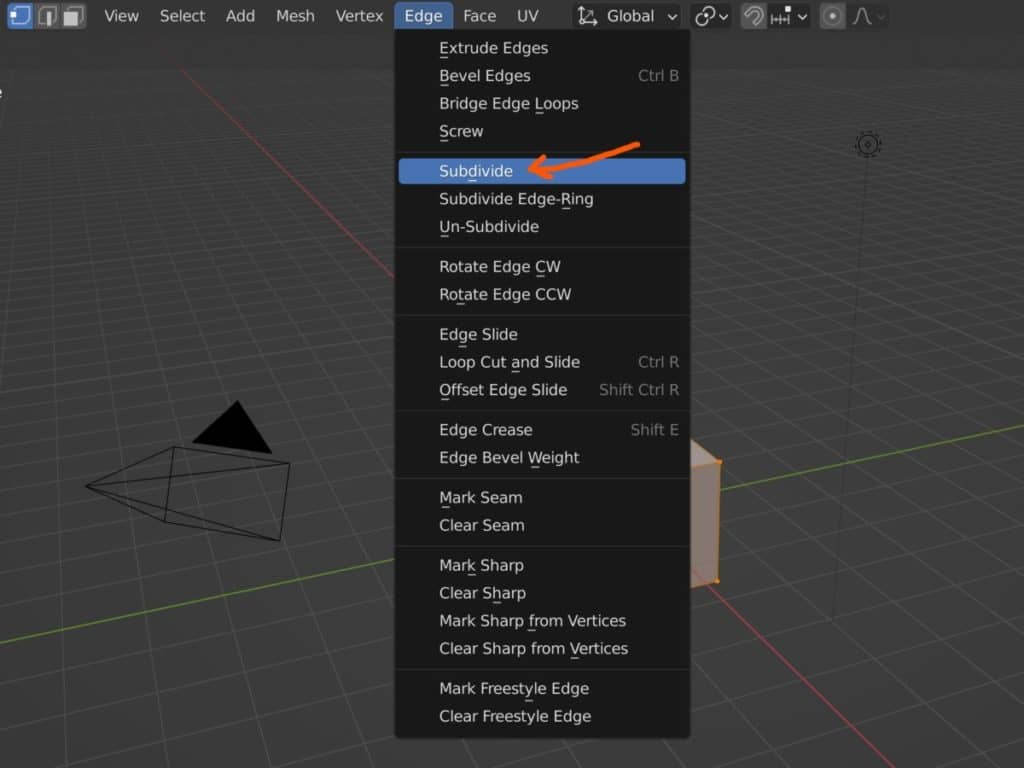
First, locate the tool in the appropriate menu, which in the case of the subdivide tool will be the edge menu. Highlight the tool but instead of using the left mouse button, use the right mouse button instead to open the tool context menu.
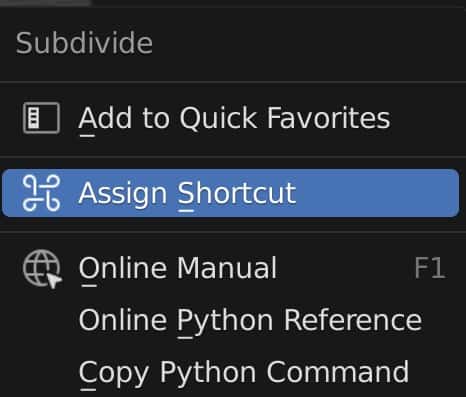
The second option on this list allows you to assign a shortcut to the selected tool, so click on this option and it will then tell you to press any key or keyboard combination to assign. Be careful as performing almost any action with either your keyboard or mouse will assign that action as the new hotkey, so it’s very sensitive.
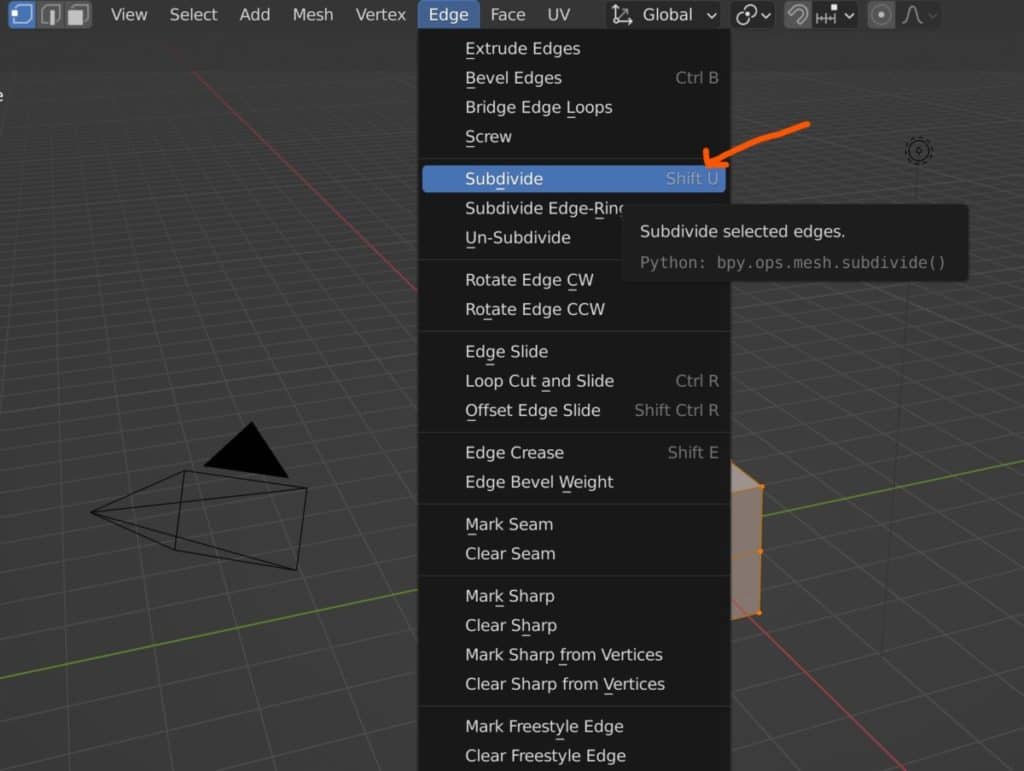
For the subdivide tool we use the shortcut of Shift + U as it is not assigned to anything important. Then we need to test the new shortcut on the model to make sure that it works. The assigned hotkey will now also appear in the menu next to the tool.
Where To Find The Script That Points To The Right Tool?
If you decide to take the more difficult route and create your shortcuts through the keymap library, then there are a few things that you need to do to set things up correctly.
First, you need to locate where you are going to add the keymap, for example, if you are going to assign a shortcut to the subdivide tool then you need to find the section of the library that stores the shortcuts for mesh objects in edit mode.
Go to the edit menu at the top of the Blender UI, and then select preferences from the options below, which will open up the preferences panel in a separate window.
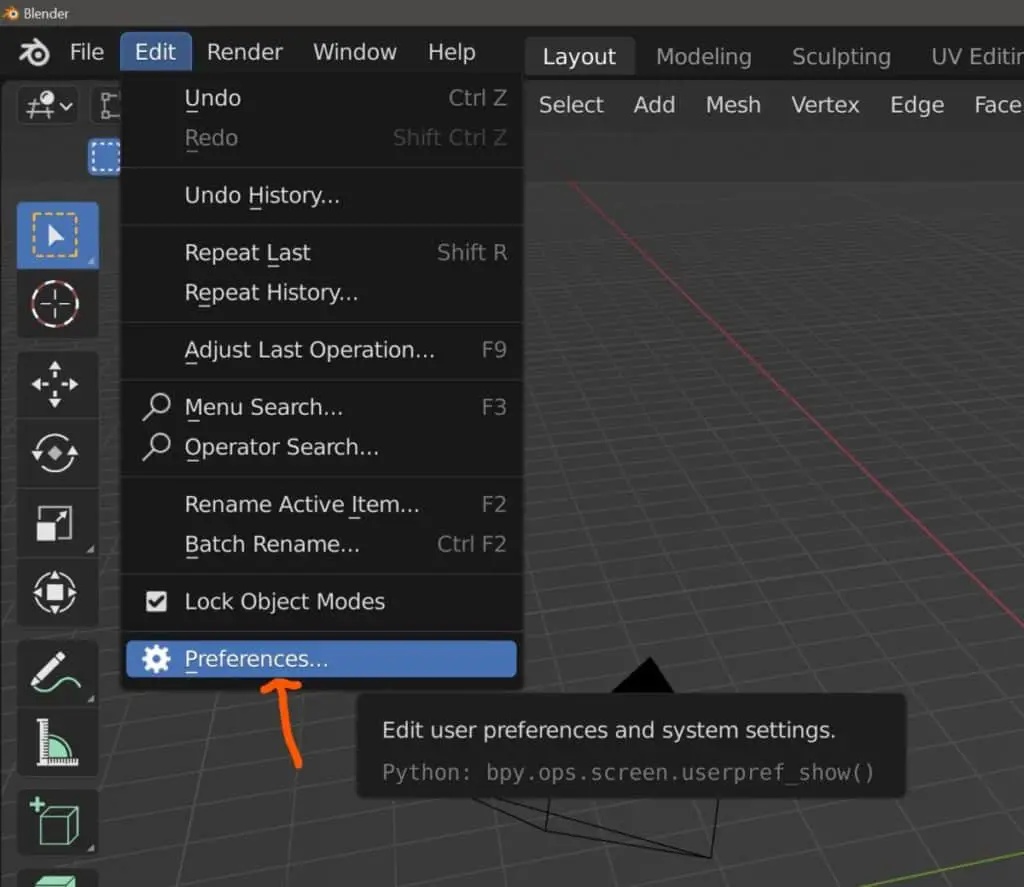
Along the side, you have the different sub-sections of the preferences window. We want to select the Keymap section to open up the hotkey library.
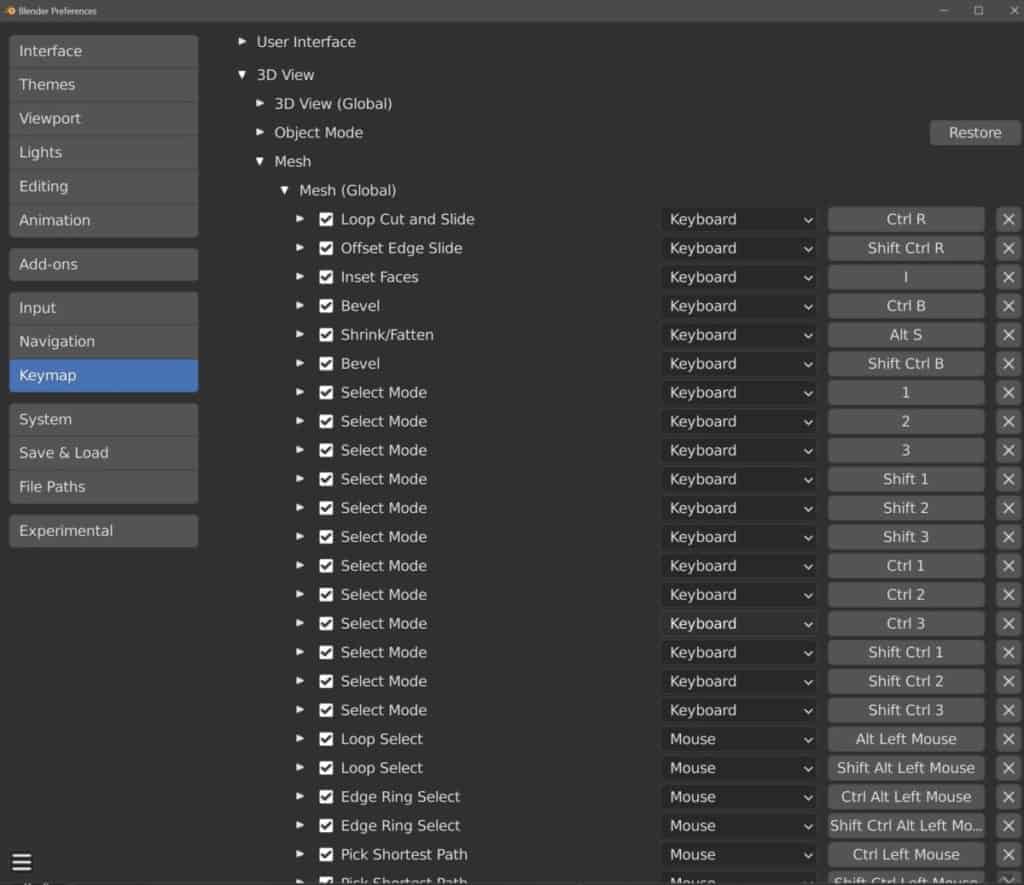
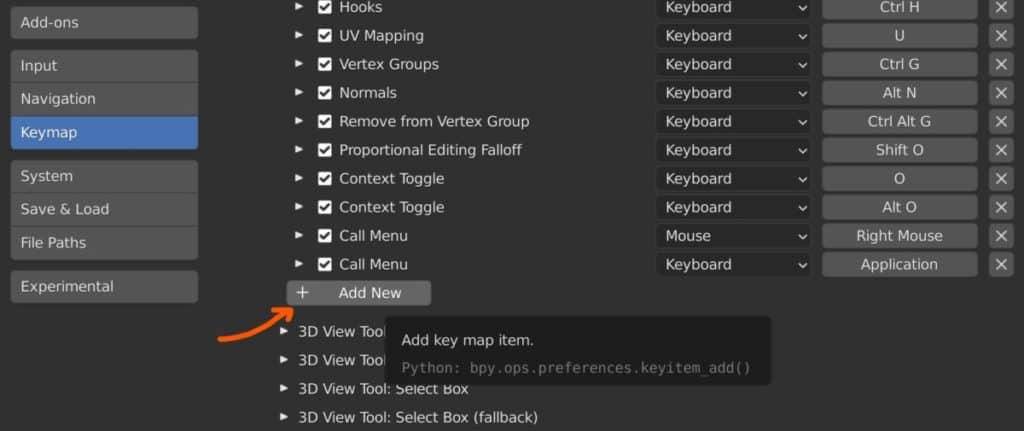
From here we need to find the area of Blender where the shortcut needs to be stored in. Using the subdivide tool as our example, go to 3D View > Mesh > Global. and scroll down to the bottom of this list. You should see an Add New button at the bottom of this section.
Click the Add New button and you will get a blank panel that can be used to create your hotkey. There are two tasks here that need to be completed. The second of which is easy, as you simply need to use the options available to program which shortcut you want to assign to the tool.
The first is a bit tricky, as you need to type in the specific python script related to that tool. So how is this done?
Well, you need to find the python script that is used to activate the tool, fortunately, this is easier than you think. Locate the tool in the appropriate menu, say the subdivide tool in the Edge menu, and hover your mouse cursor over the option.
After a couple of seconds, a tooltip will pop up explaining what the tool is and what it is meant to do. You will also see the Python script for that tool. In the case of the subdivide tool, you should see the below…
bpy.ops.mesh.subdivide()
We don’t need all of this, just the second have, so go back to your preferences panel and where it asks for the identifier just type in mesh.subdivide. You don’t need the parenthesis at the end either. If it is done correctly you should see the parameters for the tool appear underneath. While these are greyed out initially you can alter them to change how the tool behaves when you first use the hotkey.
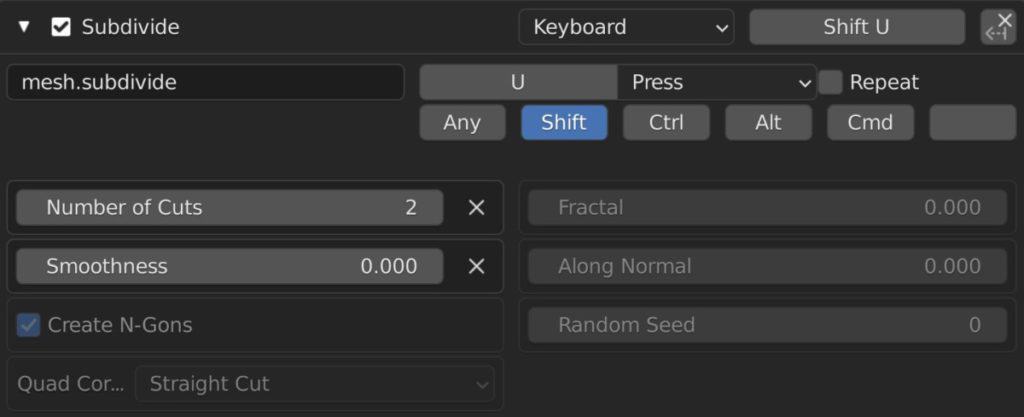
When you have set up your parameters and the assigned shortcut close the preferences panel and test the shortcut in your project.
Making Sure That The Hotkey Is Not Already In Use
Before you assign a hotkey to a tool, you need to make sure that the hotkey is not already in use for something else. For example, we do not want to assign the E key to the subdivide tool as it is already assigned to the extrude tool, which we use on a regular basis.
Nor do we want to assign Shift + A as this is used to open up the add menu in the viewport. There are two scenarios however where we may choose to use a hotkey that has already been assigned to something else.
Scenario 1, There may be a few tools that we simply do not use, and when we do use them, it is so infrequent that we are unlikely to have memorized the hotkey anyway, and simply decide to locate the tool in the menu. For example, I rarely use the connect vertex path tool which has the assigned shortcut of J, so the letter J is an option for me, although that may not be the case for you if you use the tool frequently.
Scenario 2, all the hotkeys in Blender are sensitive to the panel in which the mouse cursor is currently in. If you have the cursor in the 3D viewport and press the M key, then you will open up the collection menu, but if the cursor is in the timeline, pressing M will add a marker to the active frame instead.
So if the hotkey is in use in a different panel, then assigning it to a new tool does not matter, as a single shortcut can have a different function for each editor.
Adding A Tool To The Quick Favorites Menu As An Alternative
If you don’t want to add a specific hotkey to a specific tool, but instead decide to store all of your favorite tools into a single menu, then you can do exactly that using the quick favorites menu.
Most menus can actually be accessed already using their own assigned hotkeys, such as the Edge menu which can be accessed using Control + E. But these menus are large and many of the tools get rarely used. A smaller menu that houses all your favorites is more productive and can be accessed using the Q key.
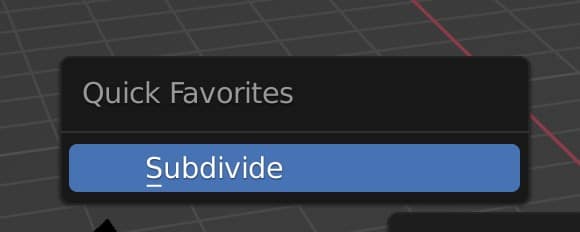
If you open up the quick menu, it will be empty apart from a prompt encouraging you to add tools to the menu. Adding a tool to your quick favorites is similar to adding a shortcut.
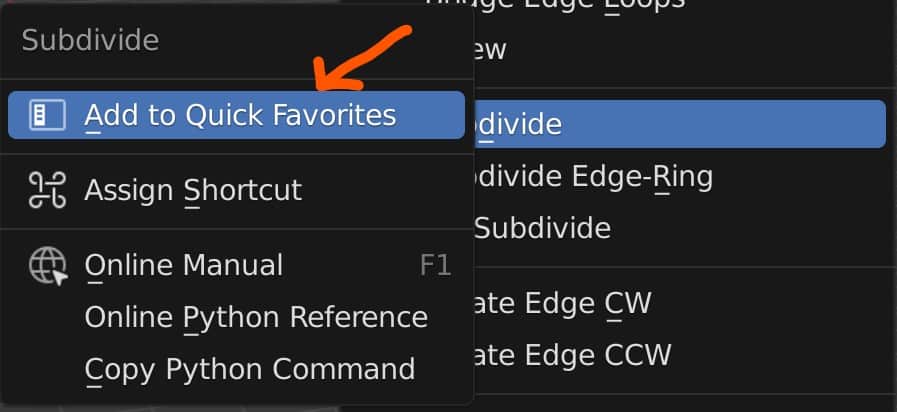
First locate the tool that you want to add, say the subdivide tool in the Edge menu, and then press the RMB to open up the context menu. The first option here allows you to add the tool to your quick favorites, so select this option and then open the quick menu again. You should now see the subdivide tool in the quick menu.
Now you can add other tools as well, for example, I use unsubdivide and bridge edge loops a lot. So I locate these tools and add them to my quick favorites as well.
Watch Out For Those Add Ons – They Steal Hotkeys!
A word of warning if you plan to assign shortcuts to all of the tools that do not have shortcuts assigned to them. If you enable an addon, then depending on the functionality the add-on may assign its own hotkeys to specific tools in Blender.
The add-ons are often designed to exploit gaps in the keymap library and in some cases even overwrite hotkeys assigned to lesser-used tools.
If you find yourself in a situation where your hotkeys are no longer working, especially hotkeys that you assigned yourself, consider if you have enabled any add-ons recently. You can check in the add-ons section which keymaps an add-on has assigned in some cases.
Thanks For Reading
We appreciate you taking the time to read through this article. Below we have compiled a small list of additional topics that we believe you may be interested in.
- What Are The Main Features Of The Blender Software?
- Why Materials Get Deleted When You Leave Your Blender Project?
- How To Identify Normals In Blender 3D?
- Using The Node Editor To Create Materials
- Navigating 3D Space In Blender
-
Sculpting Organic Shapes in Blender
Sculpting lifelike organic shapes with advanced techniques in Blender.
-
Animation Ready Hard Surfaces in Blender
Preparing hard surfaces for animation with optimized topology in Blender.
-
Symmetry for Hard Surfaces in Blender
Ensuring symmetrical perfection in hard surface models with Blender.