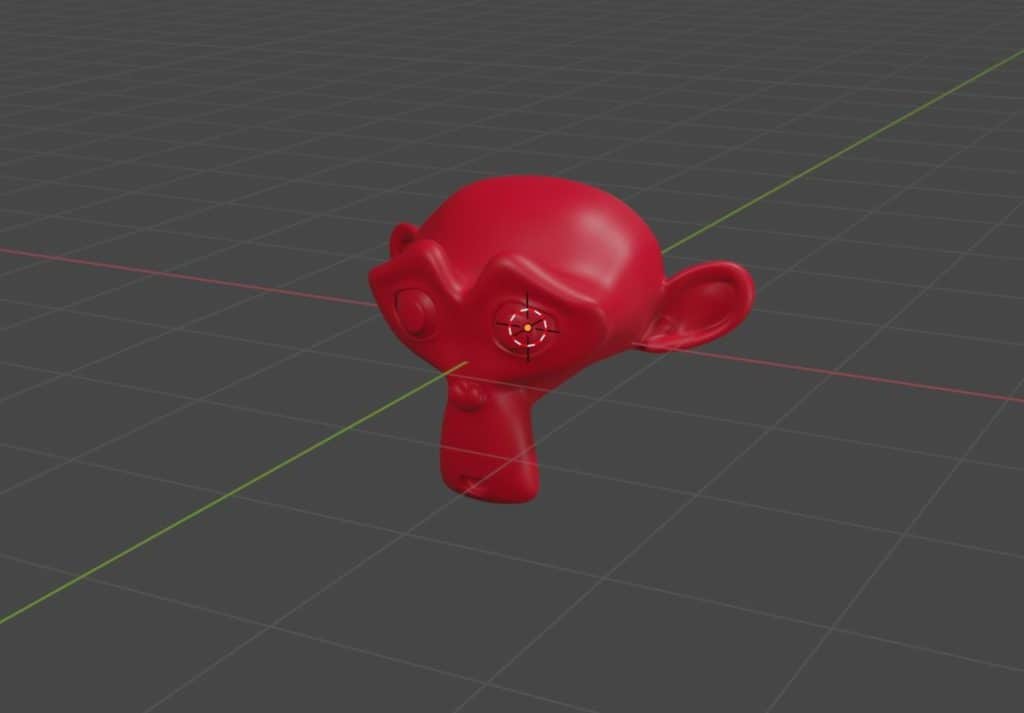
One of the main reasons why someone would begin learning about 3D modeling with Blender in the first place is to create 3D assets for use in video game engines. Once the asset has been created in Blender the artist will need to test the asset in the game engine of your choice.
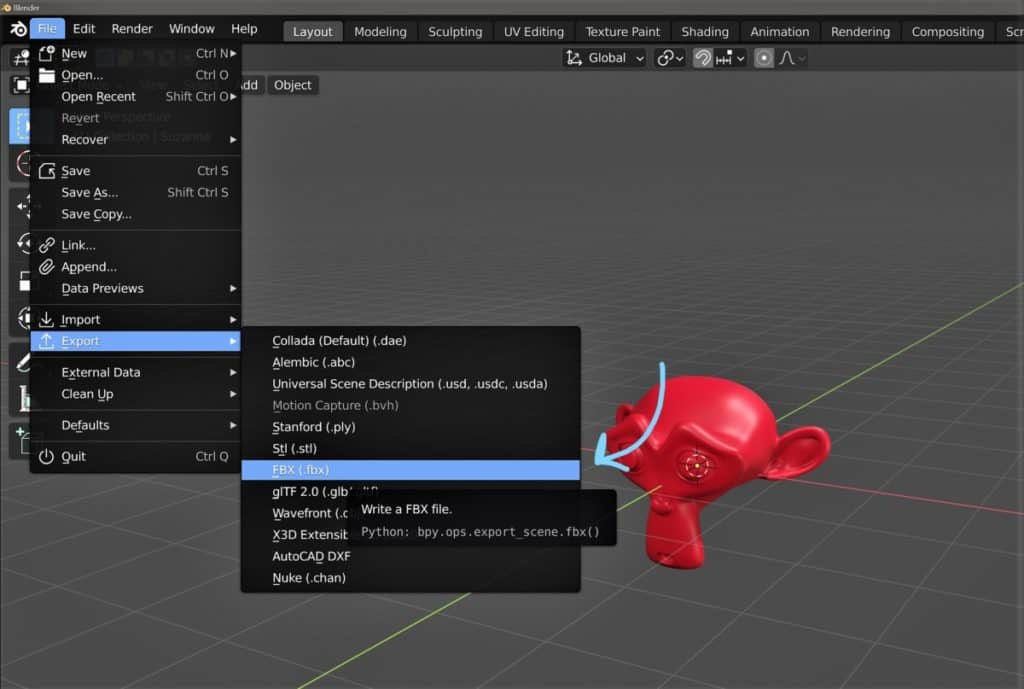
To export an object from Blender and import it into Unity, Go to File>Export>FBX and make sure you set the correct parameters. Select the mesh and armature object types, forward direction of -Z, up direction of Y, and click the apply transform button, then click export. Then go into Unity and bring your file into the asset folder to use in your project.
For game engines, the FBX file format is the primary choice for bringing in game assets of all kinds, but there are alternatives. What are these alternatives and what data do the different file formats allow you to transfer.
Making Your Object Export Ready
Before exporting your game asset from Blender, it’s crucial to ensure that it is properly prepared. Follow these steps to optimize your asset for a smooth transition into Unity:
1.1 Modeling and Texturing
Start by creating or importing your 3D model into Blender. Ensure that your model is correctly scaled and has a suitable level of detail. Apply UV mapping and textures to enhance the visual appeal of your asset. Take time to optimize the topology and remove any unnecessary geometry that might affect performance.
1.2 Rigging and Animation
If your asset requires rigging and animation, set up armatures and bones to enable smooth and realistic movements. Animate your asset using Blender’s powerful animation tools, keeping in mind the requirements of your game.
1.3 Materials and Shaders
Assign appropriate materials and shaders to your asset to achieve the desired visual effects. Experiment with different material properties, such as glossiness, transparency, and reflectivity, to enhance the realism of your asset.
1.4 Lights and Cameras
Configure the lighting and camera setup in Blender to capture your asset from the desired angles and showcase its features effectively. Take advantage of Blender’s lighting options to create dynamic and atmospheric scenes.
Depending on the purpose of the model, only the 1st part, modeling, and texturing, may be required as game engines will have their own shader systems, lighting, and camera anyway.
Choosing The Correct File Format For The Export?
Game engines will require you to use certain file formats for your 3D objects when importing them into your scene. The most common ones are universal formats that are not attributed to any single application but are designed specifically to move files from one application to another.
The process of transferring data in three stages and not two. Each stage is split between the import and export options. Stage one is creating the object in Blender, and at this point, the object is still a .blend file used specifically for editing in the 3D platform.
Then you export as your chosen file format, making sure that you also select the correct parameters for your export. This moves things into stage 2 where you now have the object still in your original blend file, but also as an independent file on your computer that can now be sent to a wide variety of 3D applications from game engines, to texture applications, to even other modeling programs.
Examples of universal file formats include the FBX and OBJ file formats. These are the most likely options for when you are looking to import a model into Unity from Blender.
By the way, we have an article covering all of the different file formats that Blender can use here.
Exporting As An FBX?
The FBX file format is actually licensed by Autodesk, the owners of Maya and 3DS Max, which is curious when you consider that they are in a sense rivals to Blender in the 3D space. It was originally created by a Canadian company called Kadara. But the purpose of the file format is to create a fully connected ecosystem between different applications and make production pipelines far more efficient.
This file format allows you to export the following data from a 3D scene…
- Geometry
- Vertex Data
- Normals
- UV Data
- Transform (Scale, Orientation, Location)
- Materials
- Textures
- Animations
With this file format, you can transfer everything that you could possibly need in a game engine, although it is not as widely used by VFX artists.
Step 1
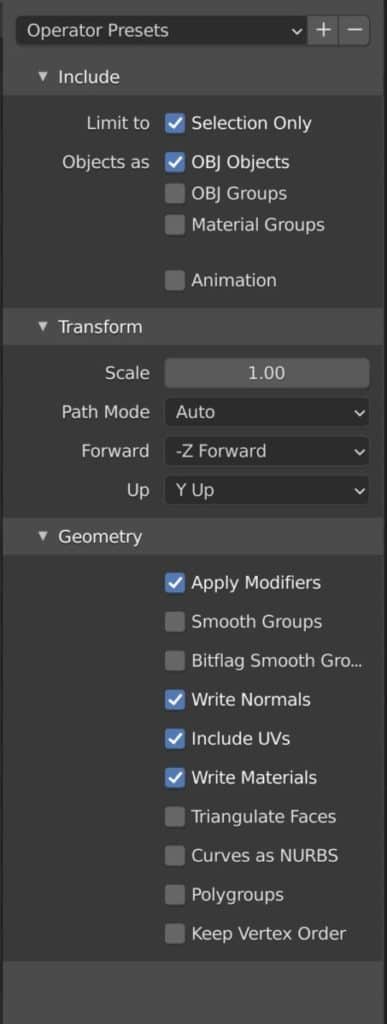
To export a game asset from Blender as an FBX file, and then reimport that file into Unity, first go to File>Export>FBX. This brings up the file browser with a series of parameters at the side. If you don’t see these parameters, then press the N key.
Step 2
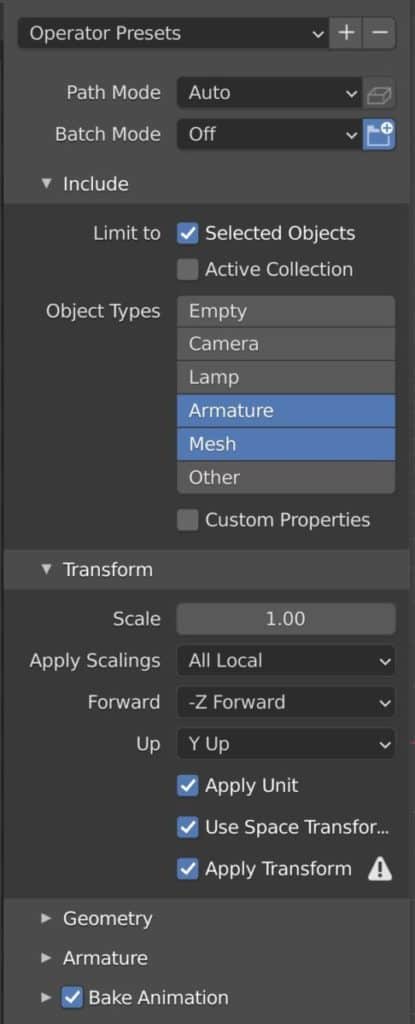
Select the Mesh object type from the list of options, also select armature if you have rigged your model. You can also choose the selected only option to avoid exporting other objects. the forward direction should be -Z, while the up direction should be Y. Also make sure to check the apply transforms button as well, and under armature settings untick the add leaf bones option as this is not needed.
Step 3
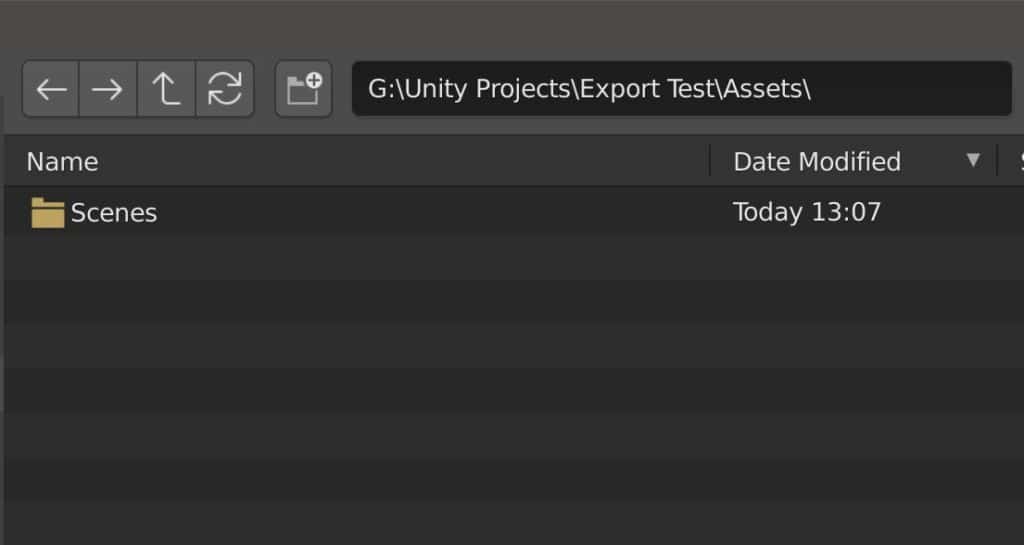
Choose the asset folder of your Unity project as the location for your export, this will make step four easier. Then click the export button to complete the process.

Step 4
Go into Unity and open your asset folder in the project, and you should find your model in the folder ready to be dragged and dropped into your scene.
Exporting As An OBJ?
The second option available to artists for exporting their 3D models is the OBJ format developed by wavefront. This is an older format that is notable for its reliability and incredibly wide range of compatible software, making it a truly universal option. The key difference between the OBJ and the FBX formats is that the OBJ does not store animation data.
This format allows you to export the following data from a 3D scene…
- Geometry
- Vertex Data
- Normals
- UV Data
As you can see this file format does not allow for the transfer of many different forms of data and focuses mainly on the object itself rather than adding things like texture and animation data. This can be both an advantage and a disadvantage, as it does not transfer as much data but at the same time is considered slightly easier to work with.
Step 1
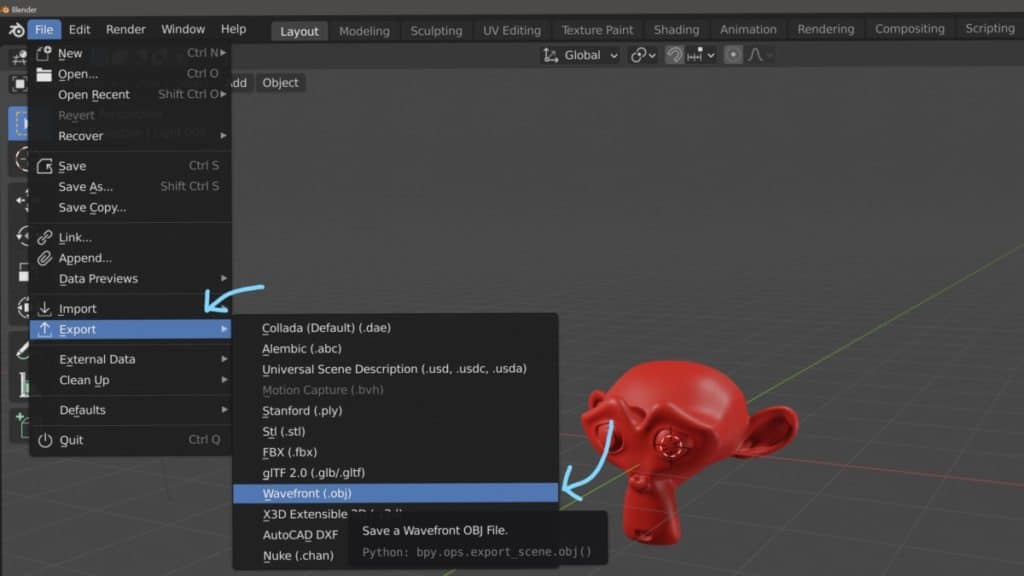
To export your object as an OBJ file, first go to File>Export>Wavefront (.obj). This brings up the file browser with a series of parameters at the side. If you don’t see these parameters, then press the N key.
Step 2
Set the -Z axis as the forward axis and the Y for forwards. Also, tick the selection only box if you want to expect a specific model in a scene. Under the geometry tab make sure to tick the apply modifiers option to confirm any modifiers that are active in Blender, as well as the write material option to create a second file for your materials, which will be an mtl file.
Note that there is an animation option here, but this will create an obj for each active frame in the timeline. It has its use cases, but FBX is a far better option for an animation export.
Step 3
Choose the asset folder of your Unity project as the location for your export, this will make step four easier. Then click the export button to complete the process.
Step 4
Go into Unity and open your asset folder in the project, and you should find your model in the folder ready to be dragged and dropped into your scene.
Saving As A Blend File
We don’t always export our models when they are finished, in fact, a 3D model will normally pass between the 3D modeler and the game engine multiple times in a typical game production pipeline. Each time a 3D model is sent from Blender to Unity, it is tested for its appearance, materials, animations, etc.
The model is then likely sent back for the artist to make changes to any of these properties, for example, if the level of detail needs to be increased/decreased or if the character design needs to change.
These are known as revisions and are an important part of the modeling process. Each revision is an assessment of the model with the game developer providing feedback of changes that need to be made each time until the final result is deemed fit for purpose.
Rather than the conventional method of exporting and importing a 3D model back and forth between software, another method is to actually save the blend file in the asset folder for your game project.
By doing this, you can immediately drag and drop from your asset folder into your scene for testing, but that’s not the main advantage to this. The main advantage to using a blend file is live updating.
When using your asset in Unity, you can open your blend file and perform any action like a simple extrusion, then come back to your still open unity project, wait a couple of seconds and watch as the model updates without you having to do anything.
This approach is perfect if you are performing both roles yourself as the modeler and the game developer and is also a great way of testing your models on the platform before sending the model off to someone else to use.
In order for this approach to work in real time between two different users, both applications would need to be operating on a shared network that multiple computers can access.
A disadvantage of this method in practical terms is that when you drag and drop a blend file you will import the entire scene into your unity project, which means import objects that you don’t want or don’t need.
Potential Errors And How To Fix Them
It can be very easy to go through the entire process of exporting a 3D model from Blender, and then importing that model into Unity only to encounter an undesirable issue with the model as it is brought into your scene. Let’s cover some of the primary issues that you may face when importing a model into unity.
Incorrect Orientation Of The Object
The first and easiest error to make is the incorrect orientation. This occurs primarily because Blender and Unity use different coordinate systems to determine the direction of the X, Y, and Z-axis. In Blender, the Z-axis is considered the up axis, while the Y-axis is considered forward, and the X-axis is side to side.
In Unity, the X-axis is the same, but the roles of the Z and Y are reversed. This means that Y is the up axis and Z is the forward axis, which makes more sense given that Z traditionally represents depth in mathematics.
What makes this even more confusing, is that setting the forward axis to Z can give an incorrect Y value of 180 degrees in Unity. Therefore we need to set the forward axis to -Z in the export settings.
Incorrect Scaling Of The Object
The second issue that you are likely to encounter is incorrect scaling, which can mean either importing the model into Unity with a value other than one or the actual size of the object is incorrect. Either way, the importing object is not to scale.
The most likely reason for this is that the scale values were not applied to the object in Blender, which leaves Unity confused as to what the default size should actually be. the solution to this is to go back into Blender, select your model and everything connected, then press the hotkey ‘Control + A’ and select apply the scale.
Then repeat the process of exporting your asset back into Unity and test.
Animation Data Does Not Transfer Correctly On Export
For the FBX format, we are able to export our animation data as well as our geometry data. However, you may find that when you import your model into Unity that the animation does not fully complete. This issue is caused by having an incorrect end frame value.
For example, if you have an animation that lasts for 120 frames and the end frame is set for 60, then you are only going to export the first half of the animation, much as you would only render the first half of the animation because of the end frames positioning.
The solution is very simple, before exporting set your end frame a couple of frames after the animation finishes (122 – 125 for a 120 frame animation) to ensure that all the animation data is exported.
Other Issues With Animation Data
If you are still having issues with your animation data in Unity, it may be a result of having some unwanted options ticked on the export. So in the file browser when you are exporting the model from Blender, go to the bake animation section in the export parameters and untick the following boxes:
- NLA strips
- Forced start/end keying
This will reduce the data transferred to what is necessary and help to prevent any issues on import.
Not Bringing In Material Data From Blender
If you have good through the process of creating a full 3D model with rigs, animations, and textures, you may find on export that your textures don’t import. The solution to these changes depends on the file format, whether that be FBX or OBJ, or anything else.
It should be noted that Unity has its own shader editor and materials system. While we recommend creating a UV map for any 3D model that you plan to create materials for, we also recommend not creating the materials in Blender itself as it is far easier to build materials in Unity when those material parameters are based on the Unity Engine and not on Blender.
If you are looking to bring in material data from Blender, the FBX file format will do this but with a few caveats. First, the data will not be complete, as only the data for the base color will come through on a standard import. Second, you will not be able to edit this material.
With the OBJ format, you have to create a separate file for the materials, which you can do by ticking the write material option to create the MTL file. Again you will not be able to edit these materials in Unity on import.
-
Anatomy Modelling: Blender Muscle Guide
Sculpting anatomically accurate muscles with Blender’s powerful tools.
-
Sculpting Organic Shapes in Blender
Sculpting lifelike organic shapes with advanced techniques in Blender.