Most video games these days will require the use of 3D assets to fill the environments and create the detail and character of the game. However, game engines themselves are not used to create these objects, as that responsibility is laid to 3D modeling suites like Blender. OBJ is a common file format used in-game engines for static meshes, so how can we get an object from Blender into unity as an OBJ?
To export an object as an OBJ format, select the object or objects that you want to export, then go to File > Export > Wavefront (obj) to bring up the export settings. set to selected objects only and have the forward direction set to -Z with the up direction set to +Y. Make sure the write material checkbox is ticked and then export directly to the asset folder of your Unity project.
There are also things to consider such as animation data, PBR materials, and textures when exporting your models. But is the OBJ format the right choice when you want to use these types of data, or are there better alternatives.
Why Use An OBJ File To Export 3D Models?
There are many options for exporting 3D objects such as OBJ files. But why is OBJ so popular anyway? An OBJ file format is a good format for exporting 3D models from Blender because:
- It is a widely used and compatible format that can be imported by many other 3D applications and programs.
- It is a simple and lightweight format that only contains basic geometry and material information, which makes it easy to transfer and load.
- OBJ is a flexible and customizable format that allows you to adjust the unit system, scale, rotation, and other options when importing or exporting.
- It is a universal and standardized format that does not depend on any specific software or platform, which makes it more reliable and consistent.
- The format is a text-based and human-readable style that can be easily edited or modified with any text editor, which gives you more control and freedom over your 3D models.
What Can My OBJ File Actually Hold?
The Obj file format is a basic, universal file type that allows for the easy transfer of 3D data from one application to another. Your objects in Blender are not obj files while in Blender, as they are still a part of the main project, which uses the proprietary blend file format.
OBJ is specifically designed to transfer 3D mesh data such as geometry, UV mapping, and vertex data. In other words, anything to do with the object’s shape and structure. The format is not intentionally designed to export materials, textures, and animation data, although there are workarounds to this.
It is not recommended to use an OBJ format on any object that will be rigged or animated. The ideal use case is for static meshes with basic materials that will be edited in Unity.
The material data is not held by the OBJ file itself and is instead stored in a separate MTL file that is exported to your Unity project at the same time.
Below is a list of all the things that can be imported with the obj file itself:
- Position Of Each Vertex
- UV Map Of The Vertices
- Vertex Normals
- Geometry Created By The Vertices
There are of course other options for file formats that you can use to transfer content. Learn more about the different articles that Blender can use from our article here.
The Full Process Of Exporting Via OBJ To Unity
There are a lot of things that can easily go wrong when you are exporting data from one application to another, so we have broken down the details of what you need to do before the export process, during the process, and importing into Unity below. Being a simple format makes OBJ one of the most reliable so long as you use it for what it is built for, the transfer of 3D data from one application to another.
What To Do Before You Export Your Model?
As we mentioned there are several things that can go wrong when transferring your data from Blender to Unity. Many of these issues occur because of something incorrect in the blender file itself, other times the wrong parameter can be set in the export. Let’s take a look first of all at getting the model right in Blender.
Is The Objects Transforms Correctly Applied?
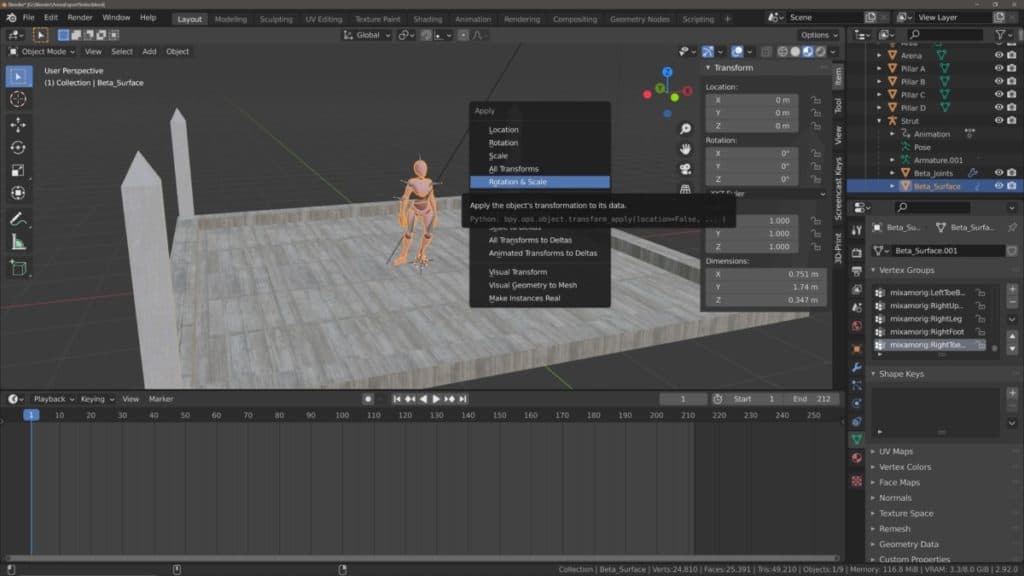
The most common issue that you are likely to have is with the transforms, ie the location, rotation, and scale of the object. Now the location does not matter too much because that value is based purely on the application the model is in and where you decide to drag and drop it into your scene, plus you can export multiple objects in the same file if you want.
The rotation and the scale values are more important here and incorrect scaling, in particular, can cause issues down the line. Ideally, you want the rotation values to be set to 0,0,0 and the scale values set for 1,1,1 in both Blender and Unity, so you want to apply the transforms first.
Note that applying is not the same as resetting your transforms, which reset the object’s rotation and scale make to their default values, changing its appearance in the viewport. Applying assigns the current values as the new defaults, keeping the appearance the same and just reassigning the values.
To apply your scale and rotation values, first, select the object, then use the hotkey ‘Control + A’ to bring up the apply menu. From the list of options you will want to select ‘Rotation and Scale’, and this will then apply those transforms.
Is The Object Facing The Correct Way?
Some objects may have a front side, for example, a house or a car, and others may look the same when viewed from any side, like a table or a ball.
You will ideally want the front of your object to face forward in Blender before you begin exporting it. Forward in Blender by the way is the positive Y-axis, while positive Z is the up axis. this can make things a tad confusing as game engines like Unity use a different coordinate system where you have to invert the Y and Z axis but we can deal with that in the export settings.
For now, rotate your object in the Blender viewport so that the front side of the model is indeed facing forward in the Blender viewport and then apply the rotation and scale again just to keep those values at their defaults.
The exception to this rule is for when you want to export a scene of objects where they are all rotated in different directions. Here forward does not really matter so you can skip this step.
Do You Have A UV Map For Your 3D Model?
While the obj format does not allow for direct exporting of textures, it does allow for UV data to be transferred.
A UV map is a 3D object that is cut apart and mapped out onto a 2D image editor, as a means of being able to more easily map a texture from a png or jpg onto the 3D model.
The UV map needs to be well structured to prevent artifacts on the textures when imported to the game engine. If you are assigning the texture in Blender, you should be able to preview the result before you export and make changes to your UV map where needed.
You will then be able to import your texture into Unity later and reapply it to your object’s material.
Keep Your Normals Facing Outward
If you are new to 3D modeling then you may not be aware of what normals are, but they are very important to assets used in game engines.
Alongside incorrect transforms this is one of the more common issues that artists and game developers will face when exporting a model from Blender to a game engine like Unity because of the very visible issues that it can cause immediately on import. A normal is a line that is perpendicular to a vertex or a set of vertices looped together (face).
The normal defines which side of the vertex, or face, is considered the front side. For objects used in games, normals are very important as the game engine will only render the front side of the geometry, in a process referred to as backface culling.
If the normals of your geometry are facing the wrong way, then you will find parts of your model become invisible when you export it to Unity.
There are multiple ways in which we are able to both identify and deal with incorrect normals in Blender, and you can learn more about it in our article on normals here.
For now, let’s cover the short and sweet method of correcting your normals, and if this does not work then check out the article link above for other ways to correct normals.
Select the model and hit the TAB key to go into edit mode, making sure to select all the geometry of your model. Then use the hotkey combo of ‘ALT + N’ to bring up the normals menu. The quick and dirty fix here is to select the ‘recalculate outside’ option to have all normals facing an outwards direction, which is considered the correct behavior and should allow you to see your entire model in Unity.
A Summary Checklist
- Orientate single objects to face forwards
- Apply the rotation and scale transforms of the object
- Create a UV map so that textures can be applied in Unity
- Make sure all of your normalsare facing outwards so that all the faces are visible
I Can’t Find The Option For The OBJ export
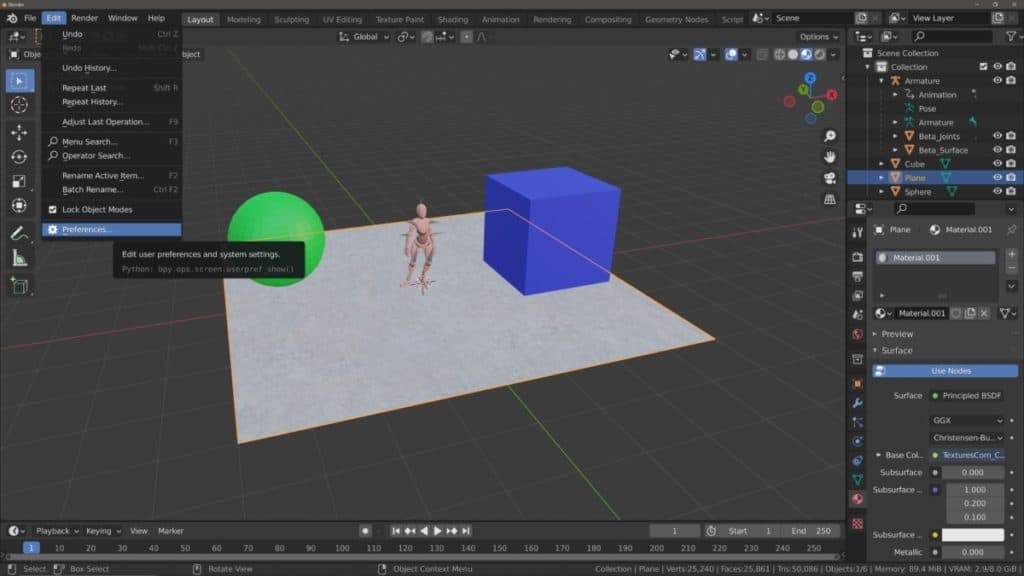
If you follow the steps at the top of the page but cannot find the OBJ option from the export list, then that means the add-on for the export has not been enabled.
Most export and import file formats with Blender are not a part of the base functionality and are instead included in what are known as addons which improve Blender in various ways.
By default the OBJ addon should already be enabled with any build of Blender that you may have so this should not be a problem that you come across too often.
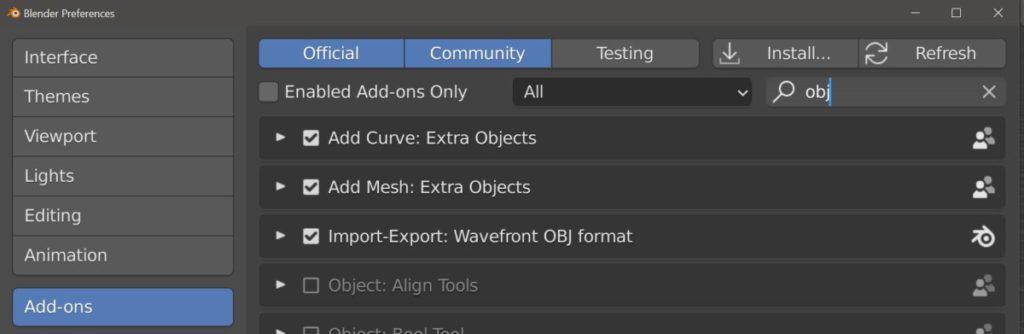
To enable the add-on for the OBJ file format go to Edit > Preferences > Add Ons and type ‘obj’ in the search bar. This will show the correct addon.
If the checkbox is empty, tick the box to enable the addon and then close the preferences window.
If you go back to the export options, the OBJ file format should now be available.
Setting Up The Parameters For The Export
Now that everything is in place in your scene, and you have clicked on the OBJ file export from the file menu, you will see a file browser appear which will allow you to define the location of the export and also the parameters.
If you do not see the parameters to the side, press the ‘N’ key with your cursor in the file browser to open up the side panel.
The Operator Presets
The first option you will see is not a parameter, but a list of user-defined presets that allow you to quickly select the group of settings that you want to use for your export. The emphasis here is on user-defined, as you will not be able to see any options in this list until you have created them.
The way it works is that you select the parameters that you want for your export below and then below you click on that export button, you go to the plus button next to where it says operator presets and name your new preset whatever you want.
We will come back to this tool after we have defined the parameters that we want to use.
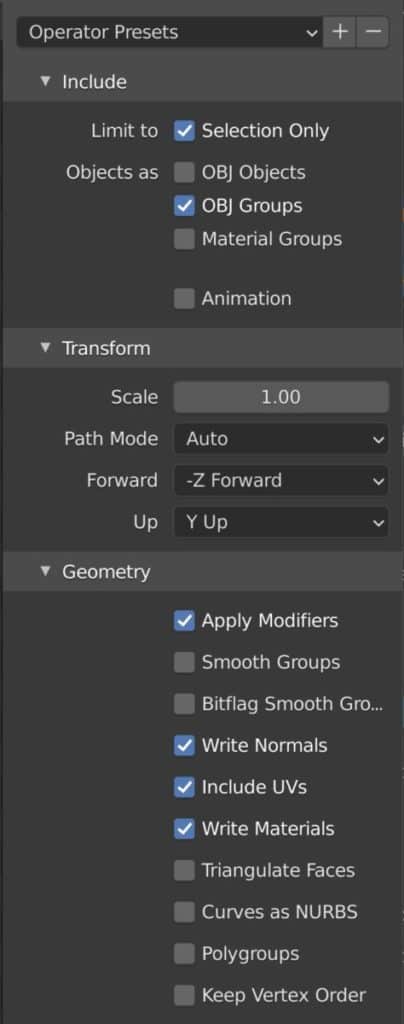
The Include Tab
Below the presets you will see three tabs that are likely closed. Clicking on the arrow for each tab will open up the parameters within that tab. The labels of each are listed below:
- Include
- Transform
- Geometry
Starting off with the ‘include’ tab, this is where you as the user defines what objects are going to be exported, as the OBJ format is capable of exporting multiple objects at the same time.
The first check box allows you to only export the objects that are a part of your selection in the viewport, which we recommend having turned on so you have better control over what gets exported.
Then we can define how our objects are grouped together on the export with the object as options. When you choose to export as the first option, OBJ objects, Blender will export all the models as a single object. This means when we use these objects in Unity they will come as a fixed set where the individual objects of the set cannot be moved, rotated, or scaled on their own.
This may sound like a disadvantage but has the benefit of saving data on a scene where every object will already have its place as a static mesh and not need to be manipulated in Unity.
The OBJ groups option allows you to export your entire scene but edit the individual transforms of the 3D objects, basically acting in the opposite manner to the first option.
OPINION: Personally I think the naming convention is opposite to what it should be as OBJ groups sound like you are manipulating a whole group of objects and vice versa for OBJ objects.
The material groups’ option allows you to split up your objects based on the materials that are being used. This is best suited for exporting a single object that has multiple parts, such as a car or an electronic device.
Then you have the animation data option underneath, but this does not export your animation! Instead, it exports an OBJ for each frame of the animation, meaning if you have a 60 frame animation in Blender, it will export 60 OBJ files, one for each frame.
For animations, the FBX file is the far better alternative, if you want to learn how to export your models in the FBX format, check out our article here.
The Transform Tab
This tab hosts the options that allow you to control the orientation of your mesh objects. The scale value should normally be kept to one and the path mode set to auto.
In Unity, the +Y direction is considered up, and the +Z direction is considered forward. However, converting to this can be a little bit funny as Blender and Unity use two different coordinate systems. When exporting with a forward direction of +Z, we find that the object’s Y rotation gets flipped in Unity, resulting in a Y value of 180 degrees.
Therefore we recommend having the forward direction set to -Z and the up direction set to +Y as default in the export parameters. If you have any issues with rotation values then switch to positive Z or reorientate your model.
The Geometry Tab
In this tab, you have a wider range of checkboxes that allow you to make some last-minute changes to how the models themselves will be exported. Since we are only learning about the basic process we don’t need to go through what every single one of these options is meant to do.
In fact, the setup that you should see is the setup that you want for a basic export. Every tick box that should be ticked is, and vice versa.
The four options that should be applied are listed below:
- Apply Modifiers
- Write Normals
- Include UV’s
- Write Materials
The bottom three, in particular, should always be ticked for any export, the apply modifiers option is useful when you want to export a model as it is but don’t want to apply the modifiers in Blender itself.
As stated above, normals are important for being able to view the geometry of the model in a game engine such as Unity.
The UV data will be required for when you want to add a texture to the material over in the Unity game engine. Not having one will confuse Unity in how you want the texture to apply.
The OBJ format, as we have already stated, will not hold material data by itself, and so by ticking this option we create an additional file with the MTL extension.
Defining The Location Of Your Export
This is an important step as you always need to know where you’re going to send your file. You also need to consider if the file is going to be used in a single project, in multiple projects, or even in multiple applications. Below we advise on the ideal export location for each of these scenarios.
Using Your OBJ For A Single Project
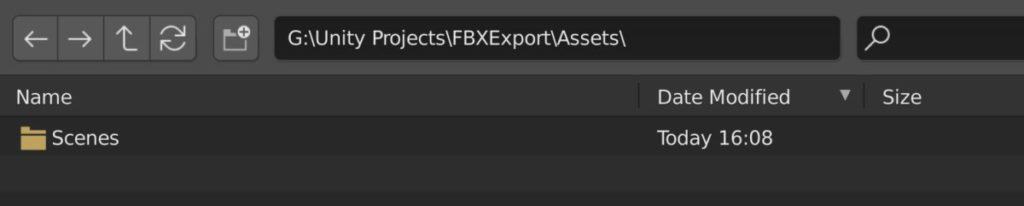
If the purpose of the model is to be used in a single project, then why not export it directly to the project itself. We can export to a project by navigating to the file directory in the browser and then selecting the asset folder. You may also see a folder labeled as ‘library’ but the one we want is the asset folder.
Just select the folder and then click on the export button. The process should only take a couple of seconds and if you switch over to your Unity project then you will see the asset loaf into your asset folder, ready to be used in your project.
Note that in order to use this method the Unity project must already exist and be reachable in your system.
Using The OBJ For Multiple Unity Projects
If you have multiple Unity projects that your asset could be used for in some capacity, then we recommend a location that is easy to reach and easy to remember. You should create a folder where all of your individual projects are saved, and label it as Unity projects or something similar.
If you open up this folder and already have saved projects, you will see those projects as folders. This is a great place to store assets that you want to use across all your projects, so create a new folder and label it assets or ‘universal asset’ so that it is clear what the folder contains.
Then you can export your OBJ to this new asset folder. Keep in mind that not exporting directly to a project means we add the additional step of importing.
Using The OBJ In Multiple Applications
If you plan on using the file in multiple applications, such as substance painter or Unreal Engine, then you will want a destination that is easy for any application to access.
The best place is the desktop, which is easy to reach in any file system. For organization, create a folder on your desktop and label it as 3D assets so that you know exactly what it is. Then you can export your OBJ to that new folder.
Regardless of the location, make sure to click that blue export button when you’re done.
Importing Your Model Into Unity
If you have done everything right up to this point then importing and using your objects should be easy. If you exported your file directly to the asset folder of your project then it will already be there waiting for you when you open the project in Unity.
You can then drag and drop your model or scene directly into the viewport and begin positioning it, it’s as simple as that.
If however, you saved your file in a more neutral location, then the additional step of importing your model is required.
In your asset folder, right-click to bring up your options menu and select the option labeled as ‘Import New Asset’, then locate the OBJ file and import it into your project.
If everything has been done correctly, you should see the object appear in your asset folder available for use. If you have any issues, refer to the checklist above and double-check that everything has been done correctly.
For example, if you import the OBJ but don’t see the model, then you may not have selected it for the export.
Remember that the object as options change how you can adjust the transforms of the individual objects, and so we recommend exporting as object groups for full control.
Check To Make Sure Everything Has Been Imported Correctly
When you have imported your asset, drag and drop it into your scene and the first check to see if the geometry is 100% visible. Don’t worry if the textures don’t show at this point we will deal with them last. The orientation of the object should be correct with the model facing Z forward.
The rotation values should all read as 0,0,0 across the three-axis and the scale should be set to 1,1,1. If you have rigged and animated your model you will need to check these as well.
Applying Materials And Textures To Your Models
Since these objects won’t be used for animation, the last thing we need to check is the materials and textures of the model.
Now we can’t send over our texture data but we should have our basic materials applied to our objects, the problem is that we can’t edit these materials in Unity until we extract them.
To extract your materials, select the obj in the asset folder, not of the material itself, but the overall file. You will see in the inspector panel that there are four tabs at the top with the following labels…
- Model
- Rig
- Animation
- Materials
Click on the Materials tab and you will see two buttons, the first labeled ‘extract textures’ and the second one labeled ‘extract materials’.
The textures button will likely be greyed out because no textures would have been imported with the file, so click on the materials button to extract the materials from the file.
Make sure to set up a subfolder labeled ‘materials’ in your asset folder and send any materials to that folder. Create a texture folder as well to store your textures.
You will now be able to edit these materials in Unity and apply them to any objects in your scene.
For textures, you can import texture maps as assets the same way you can bring in OBJ files from outside the project. Save these to your texture folder and then drag and drop them onto the albedo channel of your material.
And that’s it, you now have an object made by Blender, used by Unity.
Why Use OBJ Instead Of Something Like FBX?
In the realm of 3D modeling, the choice of file format is critical. While FBX is known for its versatility and complex data handling, OBJ (Object File) has its unique strengths that make it an attractive choice for certain tasks.
OBJ format’s enduring popularity stems from its simplicity and broad software compatibility. Being an open standard and older format, OBJ has robust support across nearly all 3D software. Whether you’re using Blender, Maya, 3Ds Max, or even lesser-known software, you can count on OBJ compatibility.
OBJ files focus on the model’s geometry – vertices, texture coordinates, normals, and faces. This simplicity makes them easy to parse, which is particularly valuable for developers creating their own 3D software or plugins. With regard to game engines, many will prefer FBX, but issues are less likely to occur when using the simpler OBJ format.
The OBJ’s approach to materials and textures is straightforward, which can be beneficial in certain workflows. When exporting an OBJ, a separate .MTL file is created to store material definitions. This can make it easier to manage and edit materials independently from the 3D model itself.
And for static models without rigging or animation, OBJ often provides a more straightforward choice with viewer unwanted settings for an object that is simply going to set there.
If your model doesn’t involve animations, bones, or complex deformers, then OBJ is a lightweight, effective solution. It keeps the focus purely on the model’s geometry and associated textures.

-
Efficient UV Packing: Blender Techniques
Strategies for packing UVs efficiently to maximize texture space in Blender.
-
Seams & Islands: Blender UV Mapping
Efficiently managing seams and islands for optimal UV mapping in Blender.
-
Master UV Unwrapping in Blender
Mastering UV unwrapping for detailed texturing in Blender.