You ever heard of the term normals in the 3D modeling space? It’s a term used to describe the direction your geometry is facing. If it’s facing the right way then you have nothing to worry about. But what if it was facing the wrong way? And how would you even be able to tell what direction your geometry is facing?
To identify the direction of normals in Blender, go to edit mode for a specific object and then go to your viewport overlays menu in the top corner of the viewport. Scroll down until you find the normals subsection and then click on one of the three box icons to view the normals for vertices, edges, or faces.
Normals can cause a host of issues further down the modeling pipeline if they are not correct, so you need to be able to stay on top of things and keep your geometry facing the right way. But why do we really need to worry about this?
Why Do We Need To Check Our Normals?
To make it possible to calculate the coordinates of geometry in 3D space, that geometry must follow a set of rules to exist. One of those rules is to have two sides, an outward-facing side that acts as the front, and the inward-facing side which acts as the back.
This rule applies not only to faces but to vertices as well. Every individual piece of geometry will have a front side and a backside, and it’s important to know which side is which.
A normal is a line that extrudes outwards perpendicular to the geometry itself. For a single face imagine a hair that is just sticking out by itself in the center of the surface.
For vertices, the normals will extrude out from the vertex. For faces, the normal is positioned based on the average positioning of the vertices that were used to create it, and may not always be right in the perceptual center.
So what effect do normals actually have? Well for one they can affect how light interacts with the surface of the geometry. Normals can play a key role in the behavior of any materials that are created.
Then you have the more profound effect of backface culling, an effect where the normals are used to show which side of the geometry to render, and which side should not.
On top of that, normals can affect modeling tools like the extrude tool, or the mirror modifier, and can cause issues like artifacts when these tools are used. Even if the tool is used correctly, having normals facing the wrong way creates a snowball effect that can get worse the longer it’s left unchecked.
How To View Our Normals As Visual Lines?
There are effectively three different ways in which you are able to view your normals or the effect that your normals are having on your geometry.
The first method is to view your normals visually in the 3D viewport. In other words, we need to actually see the lines that represent the normals extruding out from our geometry.
In the top corner of your 3D viewport, you will find plenty of buttons and menus that can change the way your viewport looks and even navigate around your viewport.
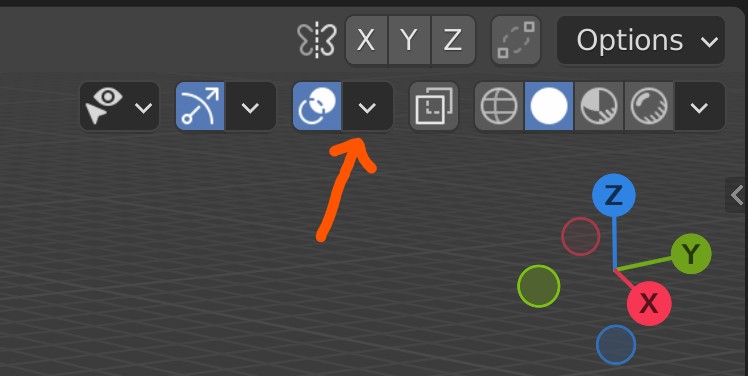
One of these menus is for controlling the viewport overlays, which are a series of elements used to help guide the user. For example, the Blender grid is an overlay that is active by default in the viewport. You will find a button that looks like two circles, one hollow and one full. This turns your overlays on and off, but we will want to keep it on for now.
Next to it is a drop-down menu that houses all of our overlay options individually. But the one that we want will not be visible just yet. This is because many of our overlay options are tied to the geometry of selected objects, like our normals.
So we need to select the object whose normals we want to check, and then press the TAB key to enter edit mode for that object.
Now if we go back to our drop-down menu we will see more options. In fact, there are so many that you may need to scroll down the menu depending on the font size of the interface.
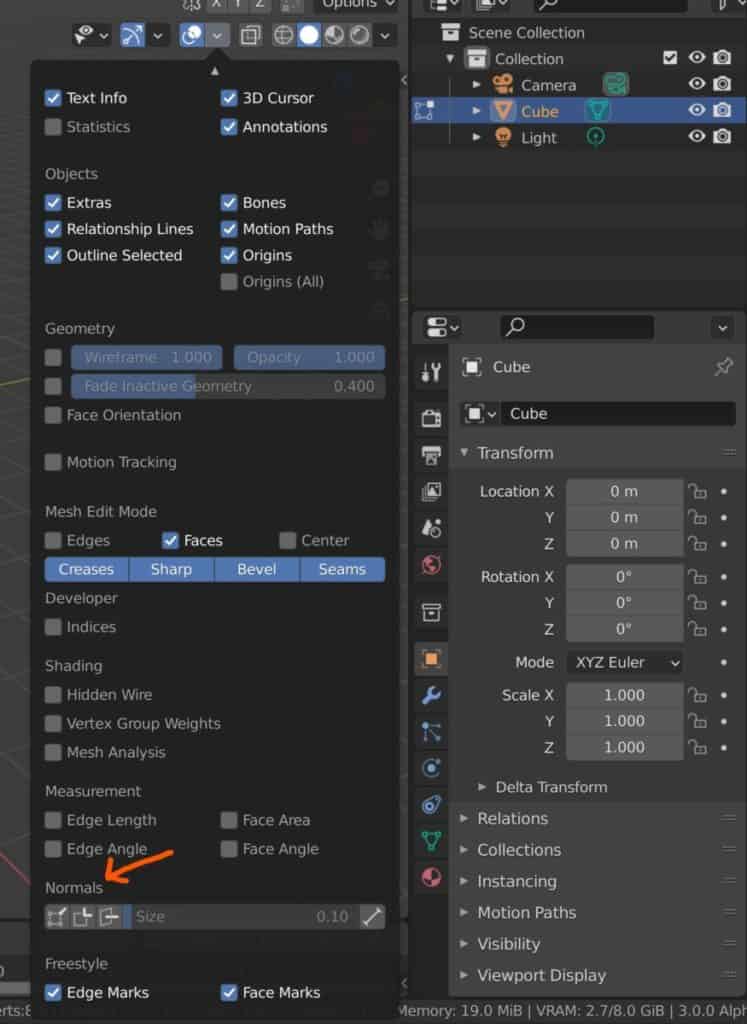
Towards the bottom though, you will find a section labeled as Normals. There will be three buttons here in a row, all of which are disabled. The first button will enable the normals for your vertices, the second will enable your split normals (direction of the vertex based on face positioning), and the third will be for the faces.
If you select any of these options, such as the vertex option, nothing will initially change. This is because the size of the normals is set too small, so use the slider to increase and you will begin to see blue lines extruding out from the vertices.
The direction of these lines is the front face direction of that vertex. If you do not see a blue line coming from a vertex, then that means that the geometry is facing the wrong way and needs to be corrected.
How To View The Orientation Of Faces Caused By The Normals?
Visually speaking, the faces of the object are what create its appearance and likeness to real-world comparisons. So when normals are incorrect, it is most visibly affected through these faces.
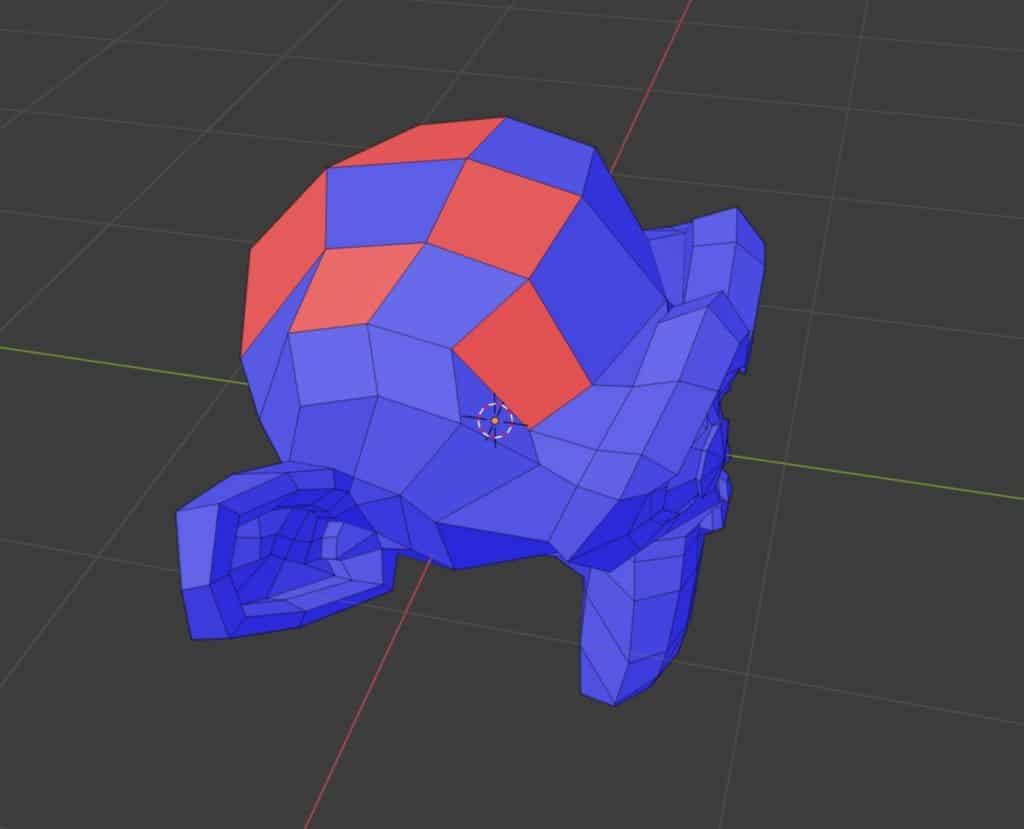
If using thin lines is not your preferred method of identifying normals, then another method is to use face orientation.
This is another overlay method that uses a simple color system to determine the front and backside of a face. The front side will appear as a blue color, while the backside will appear as a red color.
Incorrect normals affect shading and the way the materials applied can react to light, so this is a handy way of identifying faces that may come up against this kind of issue.
Simply speaking, you do not want to be able to see any red on your model at all with this enabled. You should only be seeing the blue color on a correctly constructed 3D model.
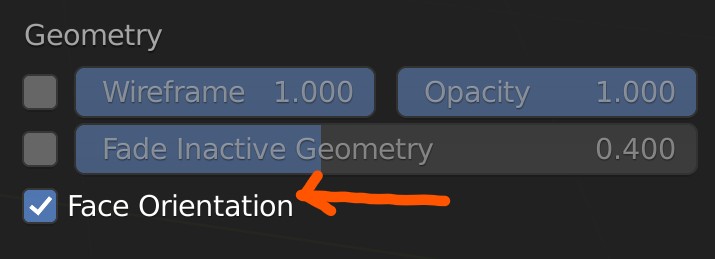
To enable the face orientation overlay, go to the overlays menu and you will see the option a third of the way down for face orientation. Click the checkbox and your model will appear as either blue or red depending on your normals.
If you see any red, then you know there are normals that need fixing on that part of the model.
The Effect Of Backface Culling In Games And How Normals Effect It?
When designing assets for video games, we need to be aware of certain constraints that need to be applied to the models that we create. An asset that is created for a game engine needs to work in an environment where rendering takes place in real-time. Therefore you will have more limitations compared to an asset used for a professional image render, or even animation.
One limitation that is often applied to objects is an effect referred to as backface culling. This is where a game engine attempts to save data by only rendering one side of your geometry, and not both sides, to effectively half the rendering workload.
The side of the geometry that is rendered will be the side that the normals are on, while the other side will not be rendered at all.
Ever played a game and tried to view your scene through the body of your character? Well if you do you will likely notice parts of your character clip out as you view your scene from inside the character’s geometry. This is an example of backface culling in effect.
If your normals are facing the wrong way to begin with though, then you won’t need to do this to see backface culling. If a face is directed the wrong way, then it won’t be visible in the game engine.
Blender allows you to preview this effect before you export to the game engine of your choice.
This time instead of going to the overlays menu we will instead need to access the viewport shading menu, which is located next to the button for your rendered shading.
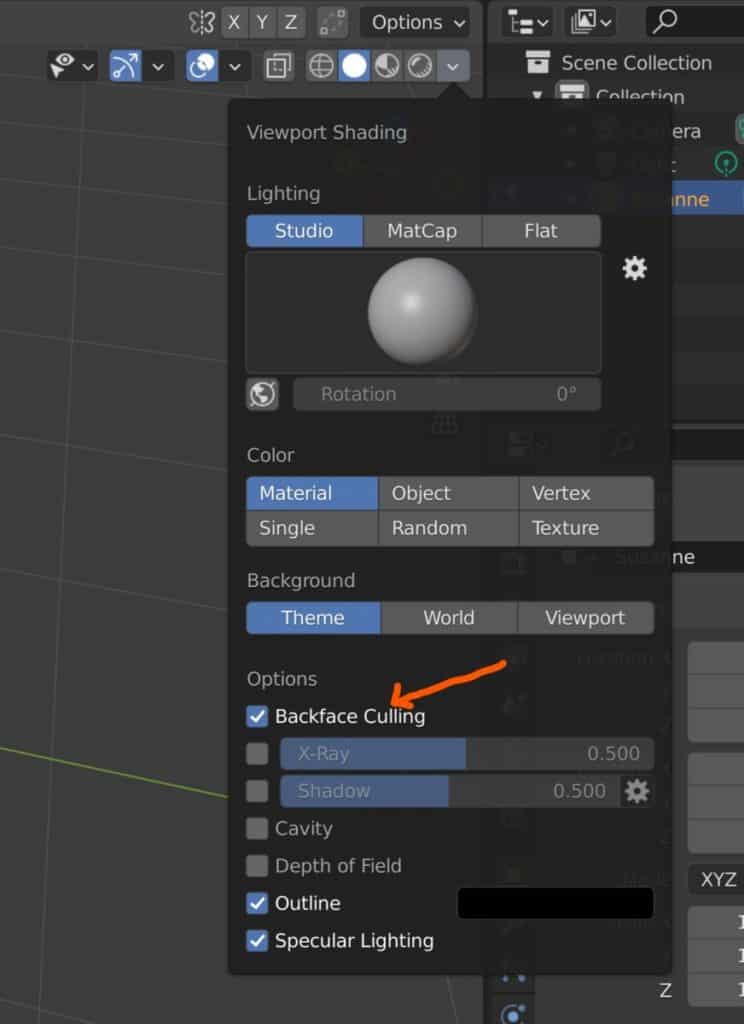
You will find it as the first setting under options. Tick the box to enable the effect in your 3D viewport.
If any of your normals are incorrect then you will be able to see through that geometry, like in or example here. Don’t worry if you can see all the way through though, as this behavior should be normal if you are viewing the faces from inside the object.
It is only a problem when you should be seeing that geometry from the outside.
The Quickest Way To Correct Your Normals?
There are a few methods that you could use to recalculate the normals so that they are all facing the correct direction. The quickest is to first select all of the geometry on your model by pressing the A key while in edit mode. It does not matter what type of geometry you have as your method of selection.
Then we need to access the normals menu, which we can do either by going to Mesh (Menu) > Normals > Recalculate Outside or by using the hotkey of Shift + N to access the same tool.
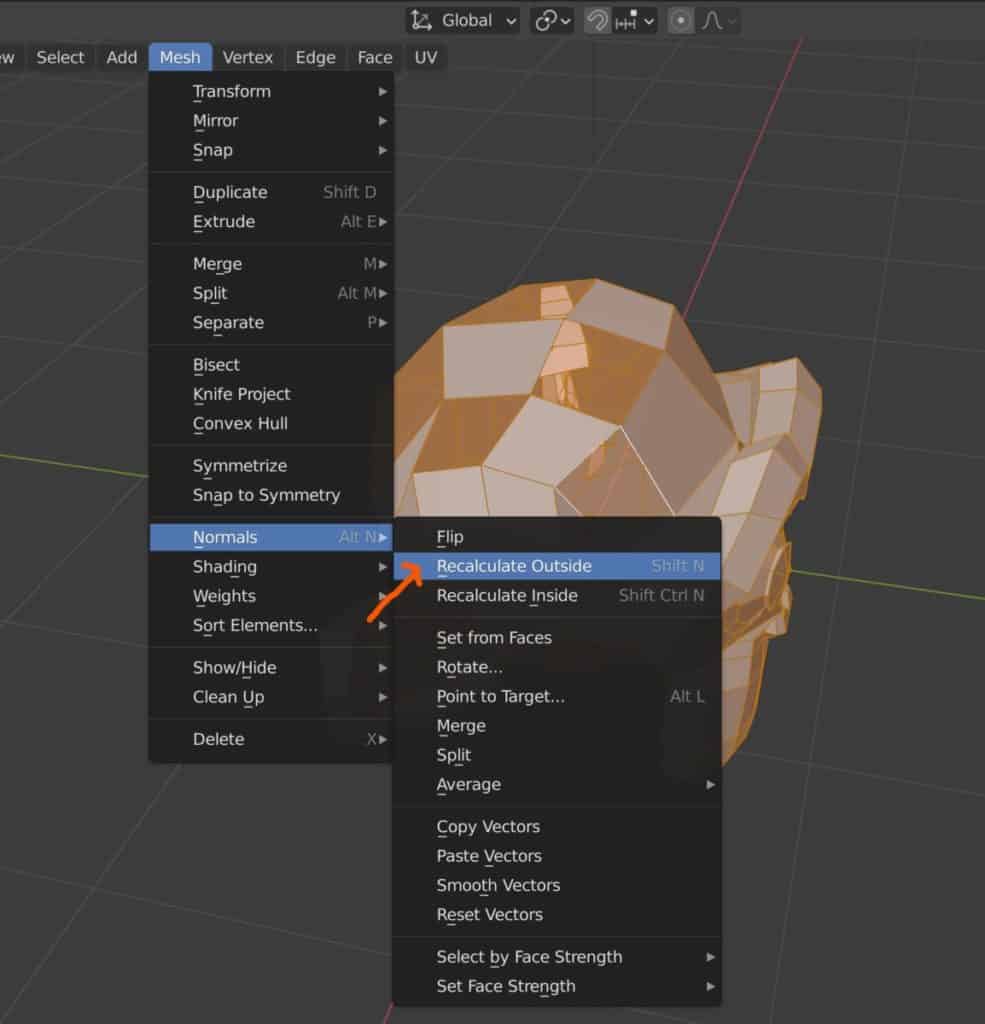
This will recalculate every vertex or face say that is pointing away from the center of the object so that all geometry will have their normals facing outwards.
Now if you use any of the three methods for identifying normals you should see that everything is now correct if there is any geometry that is still not facing the correct way you can select only that geometry, go to the normals menu, and select flip.
If you are viewing the model from the inside of the object, such as with a room, then you may want to recalculate your normals facing inwards instead. Make sure to use a method like backface culling to double-check this.
Thanks For Reading
We hope you found the content in this article helpful. We have devised a shortlist below of other articles that we believe you may be interested in reading…
- Changing The Unites Of Measurement In Blender
- Downloading The Latest Version Of Blender
- Removing All Of The Gridlines In The 3D Viewport
- Exporting An FBX File To Unity With Textures
- What Jobs Can I Get If I Learn Blender 3D?
-
Custom Normals: Blender Hard Surface Tip
Enhancing hard surface models with custom normals for realism.
-
Align Perfectly with Blender’s Snap Tools
Aligning objects perfectly with Blender’s advanced Snap tools.
-
Mechanical Parts: Blender Modelling Guide
Detailed guide to modeling mechanical parts with precision in Blender.