Textures can come in an unlimited number of forms, with 1000’s of image textures available to download off the internet and an infinite amount more that can be created procedurally, through either Blender or external software like substance designer. One popular type of texture used by artists is a decal image with transparency.
The quickest method for adding a decal is to use the 2nd object method. Import your decal as a plane using the ‘import images as planes’ add-on. Subdivide the geometry of the decal and then use the shrinkwrap modifier to wrap the geometry of the decal on top of the main object.
There are other methods to creating decals with transparent textures but using the 2nd object method is the quickest and easiest way to do it, only taking two minutes to do.
Using A Second Object To Overlay A Transparent Texture Onto Our Image
Blender is a program that is all about versatility, and there is normally always more than one way to complete a task. There are several ways in which you can add decals to your textures and objects, but the preferred method without paying for an add-on like decal machine is to use another add-on, and import images as planes.
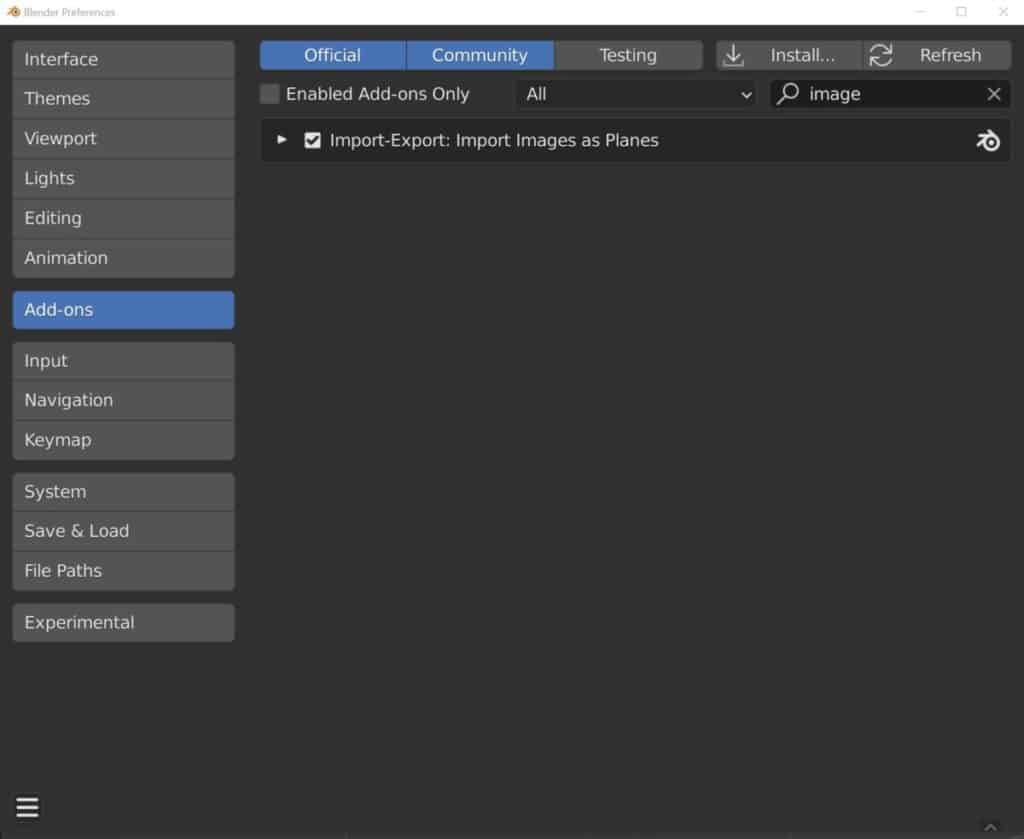
That means that in order to use this method we must first ensure that the add-on is enabled. Fortunately, import images as planes is already available in any build of Blender without the need to download it. However, it is not enabled by default.
Go to the edit menu at the top of the UI and then select preferences to open up the preferences panel in a new window. Then choose the Add-on section and type in import images into the search bar located at the top corner. Tick the box for the add-on to enable it and then close the preferences window.
With the add-on enabled, follow the step-by-step process below to add your image decal, assuming that you already have an object that you want to map the decal to.
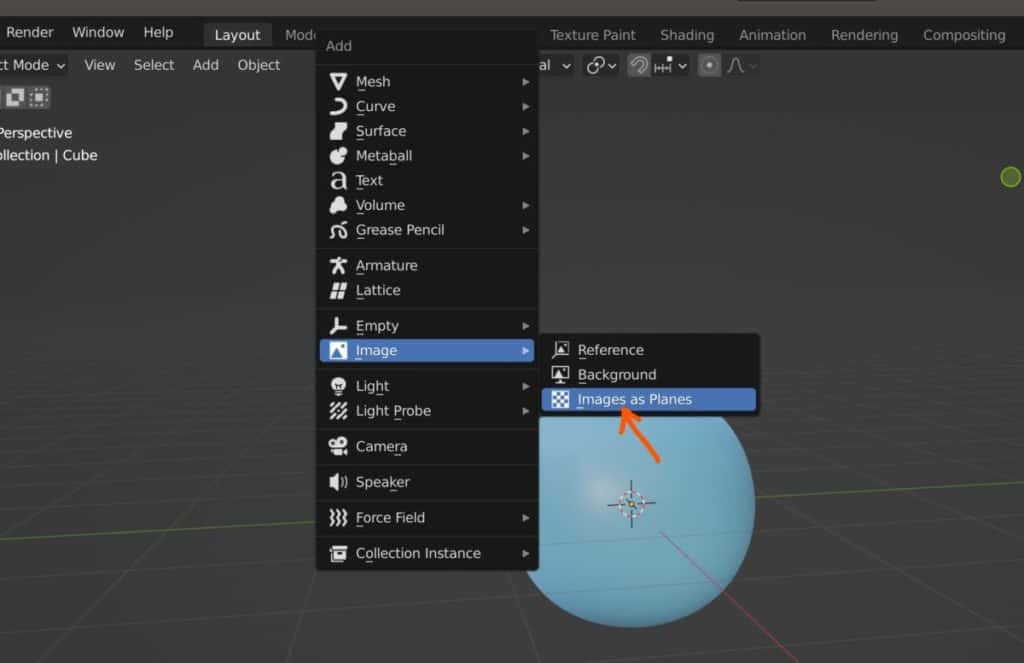
- Press Shift + A to open the add menu
- Go to Images, and then select Images as planes to open the file browser
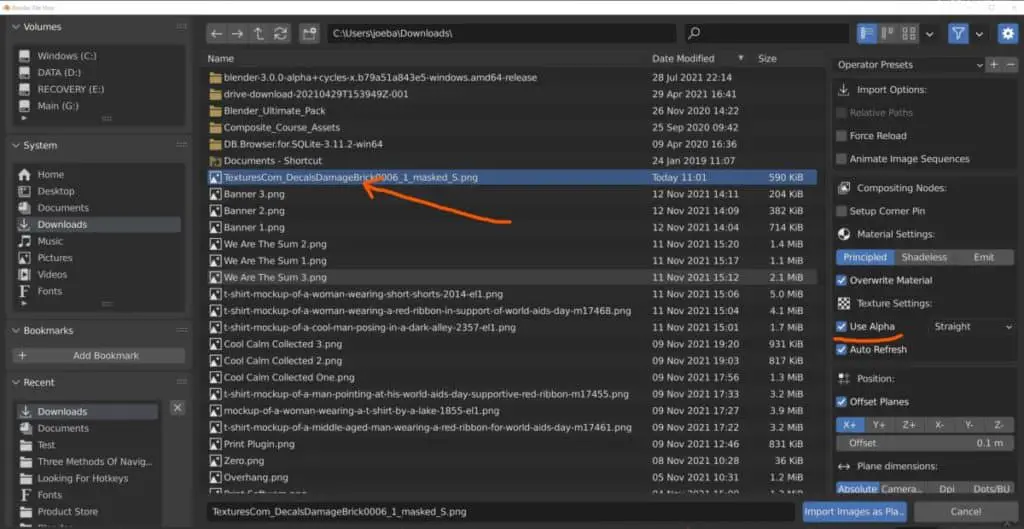
- Locate the png (recommended) image that you want to import, select and press the import button
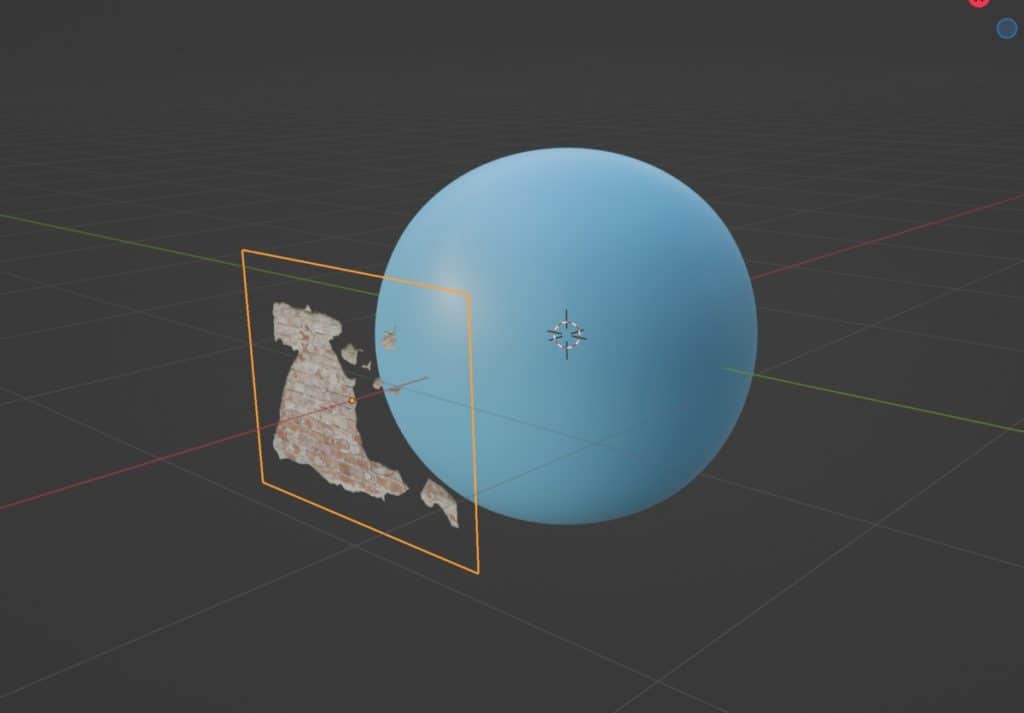
- Position the new plane close to the surface that you want to project it to
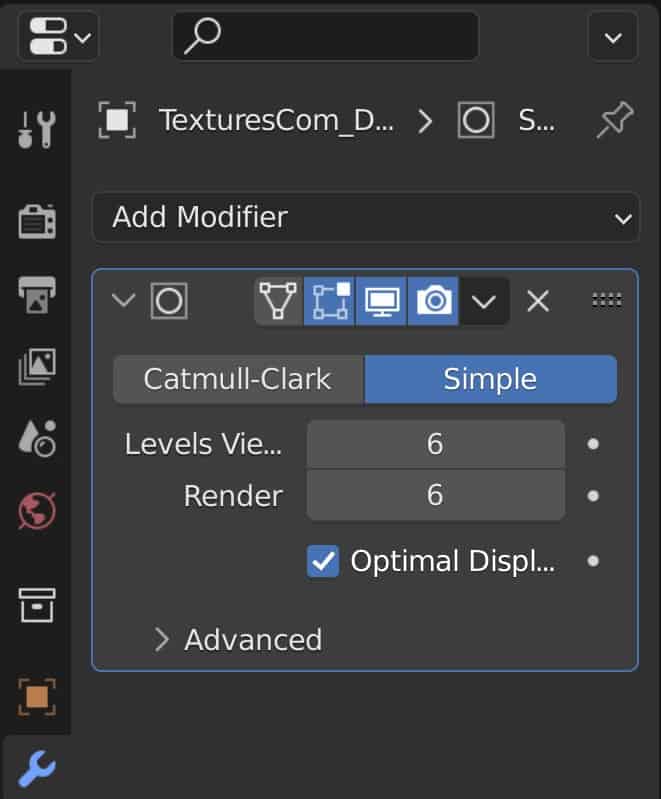
- Use the subdivide tool on the plane and increase the value of the subdivision to 20
- Add the Shrinkwrap modifier to the plane and assign it to the main object
Following the steps above should allow you to connect your decal plane to the main object even if the surface of the object is curved, bumpy, or deformed in some way.


Troubleshooting Steps For When The Texture Does Not Show Correctly
As with any tool, there are issues that can occur if the settings that you choose are not correct. Below we have a small list of likely issues that you will encounter.
- Texture Background Still Showing On Plane (Wrong Format) – The idea of using a decal is that it applies a custom shape or texture to the surface of the object, but all textures are the same square shape. If the background color of your texture is visible on the plane, then one reason why this could be the case is that you are using a jpg file format, which does not have a transparency channel. Make sure to choose a format that does have transparency for your decal, such as png or OpenEXR.
- Texture Background Still Showing On Plane (Alpha Disabled) – Even when you do choose the correct file format it may still not show the transparent background that allows only for the decal to be visible. In the import settings, go to the compositing nodes section and check the box for Use Alpha. The menu to the side channels the way the channels are packed. Select straight for PNG, and select premultiplied for other formats like OpenEXR.
- Decal Does Not Change When Shrinkwrap Is Used – Most issues that occur in 3D modeling and texture design occur because we missed a step earlier in the process. It is common to use the shrinkwrap modifier and find that your decal does not even move, and this is because you forgot to subdivide it beforehand. Simply use either the subdivide tool or the subdivision surface modifier to correct. Make sure to place the subsurf modifier above the shrinkwrap in the modifier stack.
- Decal not fully above object surface (Low Geometry) – Sometimes the decal does latch onto the target object, but some areas of the decal fall behind the main object’s geometry. This is because even though you may have used the subdivide tool, you did not add enough subdivisions for the decal to map smoothly on the surface. The solution again is to add another subdivision to the decal to correct this.
- Decal Not Fully Above Surface (Modifier) – If the decal is still not resting on top of the surface of the main object then you may need to look at the settings in the shrinkwrap modifier. In the modifier settings, you can try changing the snap mode, which alters how the decal is connected to the main object. You can also increase the offset value by a very small margin, which is a more sure way of bringing your decal out.
- The Decal Texture Is Distorted After The Shrinkwrap – Not only does the decal object need to have high-density geometry, but so does the main object that it is being projected to. If the decal appears distorted after using the Shrinkwrap modifier, then consider increasing the geometry count of the main object. This is more applicable to curved surfaces like on a UV sphere and is unlikely to occur on flat surfaces.
The Pros And Cons Of Using This Method To Add A Decal
We mentioned before that there are a few methods to being able to add decals to your objects, and that means that in order to find the right method for us, we need to assess the pros and cons of the methods that we choose to use.
Pro’s:
- Very quick and simple to apply decals
- Can add multiple decals across the surface of an object just by changing the decals’ initial positioning
- Shrinkwrap allows you to overlay textures on top of each other using the offset.
- With enough geometry, density can work on any surface
- Does not require the use of the complicated node system
Con’s:
- Requires the use of multiple objects
- Geometry density becomes an issue for topology and game design
- Not suitable for 3D printing as the decal is technically still separate from the main model
The Alternative Way To Add Decals To Your Objects
So the primary method of adding a decal to your object is the ‘sticker’ method for adding additional objects, but we could also use the ‘dye’ method of adding decals as an alternative, which involves using the node editor and UV map of the object.
With this method, we will not require a second object or the Add Images As Planes addon. To add your decal to an object’s material, first, add it in the UV image editor with the object selected and position the decal where you want it to go.
Then go to the node editor and add an image texture node to your current setup, and load in your decal image texture.
The best way to connect the texture to the node tree is to add a mix shader to the end of the tree, just before the output, then add a second shader node for the decal. This allows us to have a different material look just for the decal. Connect the primary shader to the first green input on the mix shader and the decal shader to the second. This is important as we want the decal to overlay the main material.
For the factor connect your alpha output for your decal texture to the factor of the mix shader. The decal should now appear as an overlay on the main material. You can change the material of the decal separately from the main material with this setup.
Thank You For Reading The Article
We thank you for taking the time to read through this topic, and we hope that the information that you found was sufficient. Take a look at some of our other Blender-related topics listed below.
- Painting Transparency Onto Your Image Texture
- Importing An Image Sequence As A Plane Object
- 8 Ways To Improve Your Material Workflow With The Node Wrangler
- How To Enable Transparency For Glass In The Eevee Render Engine
- Creating An Overlay For Videos In Blender
-
Animation-Ready Hard Surfaces in Blender
Preparing hard surfaces for animation with optimized topology in Blender.
-
Symmetry for Hard Surfaces in Blender
Ensuring symmetrical perfection in hard surface models with Blender.
-
Detail with Shrinkwrap: Blender Modelling
Achieving intricate detailing with Blender’s Shrinkwrap modifier.