One of the most important aspects to learn when becoming a 3D artist is how to create professional-looking renders of your objects and scenes. A rendered image is an image that is created using the data gathered from a 3D scene, from a specific viewport created by a camera object. So how can we manipulate our camera to create the best possible renders?
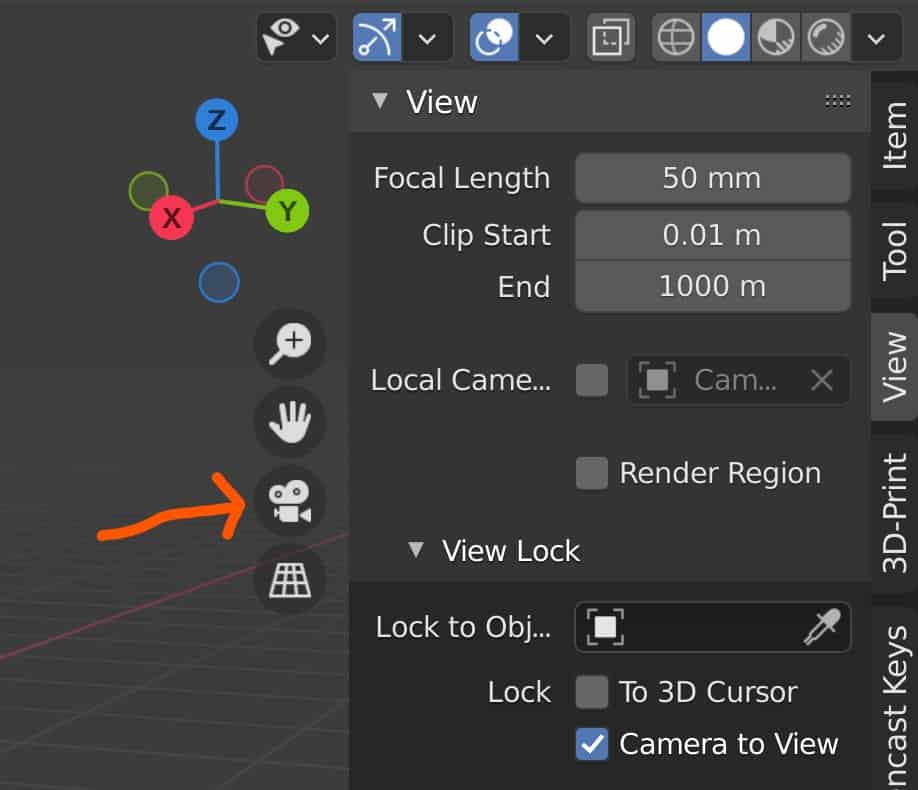
To correctly position your camera for rendering, open up your side panel in the 3D viewport by pressing the N key, then go to the View Tab > View. Under view lock, you will see the option to lock the camera to your view, so enable this option. Then press 0 on your number pad to go into your camera view, and begin navigating around your viewport. Now, your camera will follow you wherever you navigate to in your scene.
This is the easiest way of setting up our camera for rendering in Blenderbut there are other methods as well that we can use to improve our proficiency with the camera option.
The Difference Between The Scene Camera And The View Camera
If you are a beginner you may hear from time to time references to the view camera and references to the scene camera. When we talk about the scene camera, we are referring to the camera object that is used to create our rendered images and animations.
This is the camera that we actually need to select in the 3D viewport and position to get the correct angle and distance for the render.

If we are talking about the view camera though, we are referring to the artists’ view of the 3D viewport as a whole. When we perform traditional techniques for navigation, like orbiting and zooming, we are changing the viewports camera. However, we are not affecting the render here unless we link the camera object to our viewport.
This is what happens when we enable the option to link our scene camera to the viewport. It allows us to use or standard navigation techniques to move our scene camera and position it for rendering.
I Don’t Have A Numberpad, So How Can I Access The Camera?
Blender often provides multiple ways for using the same tool, in this case accessing the view of the scene camera. The quickest way to do this is to press the 0 key on your number pad.
However, if you do not have a number pad then there are two other methods for accessing the same view that does not require a full-sized keyboard.
In the viewport, you will see a column of buttons on the right-hand side next to the side panel. One of these buttons will have the icon of a camera, this is the camera view tool and will take you into your active camera’s view.
Alternatively, you can also go to View (Menu) > Viewport > Camera to again switch your view in the viewport to that of your camera.
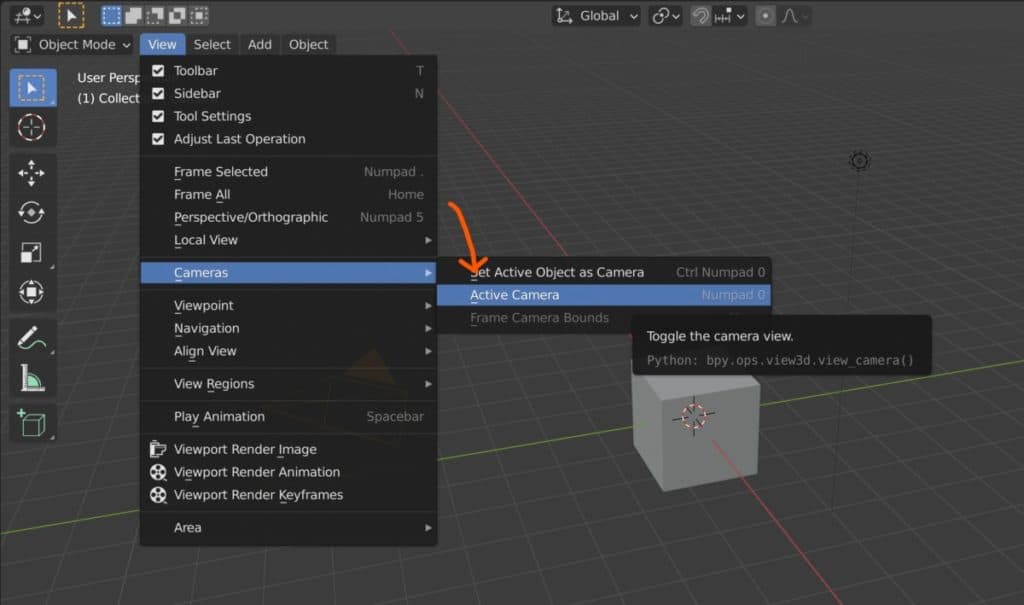
These methods can be ordered in terms of their speed, so the hotkey on the number pad is the fastest method, the button in the viewport is the second fastest and the menu option is the slowest.
Snapping The Camera To The Current Position Of The Viewport Camera?
You may find the perfect angle for your render using the viewport camera but your scene camera is still in another location.
What you can do as an alternative method for positioning your scene camera is to snap it to the view in the viewport. This can be done by using the hotkey of Control + Alt + NumPad 0 (Windows) or by going to View (Menu) > Align View > Align Active Camera To View.
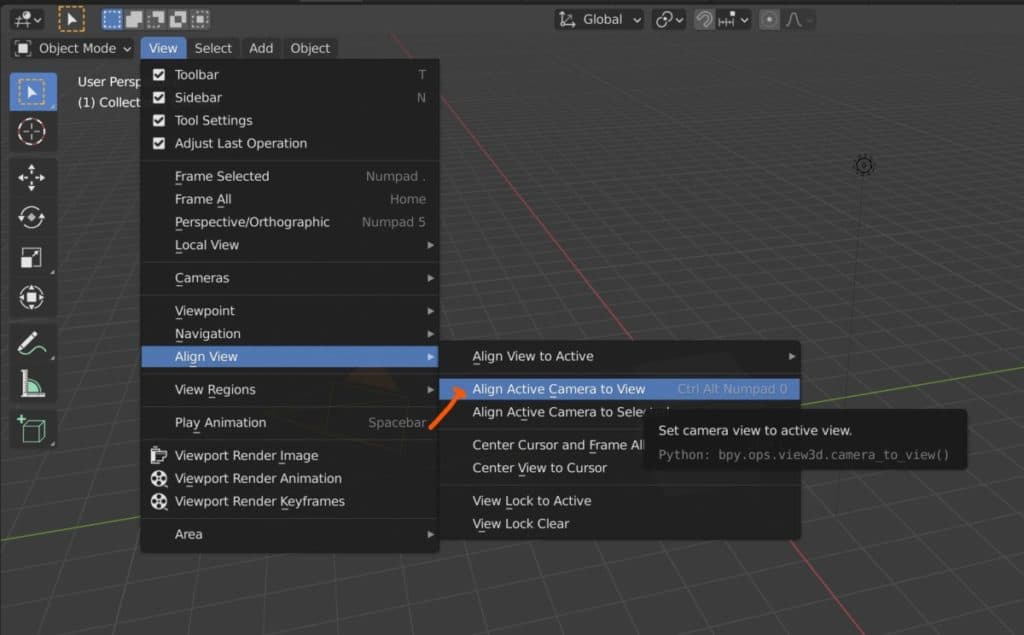
This will set your scene camera to the same position as your viewport camera, without even needing to enable the lock camera to view option in the side panel.
Using Fly Mode For Added Control When Positioning Your Camera?
If you are at the stage where you are still experimenting with where to place your camera, then a great technique to use is Fly mode.
This allows you to navigate your scene more like you would in an actual video game, and while it is generally much slower than the standard methods of navigation, it others a lot more control making it great for finding the perfect position for your camera.
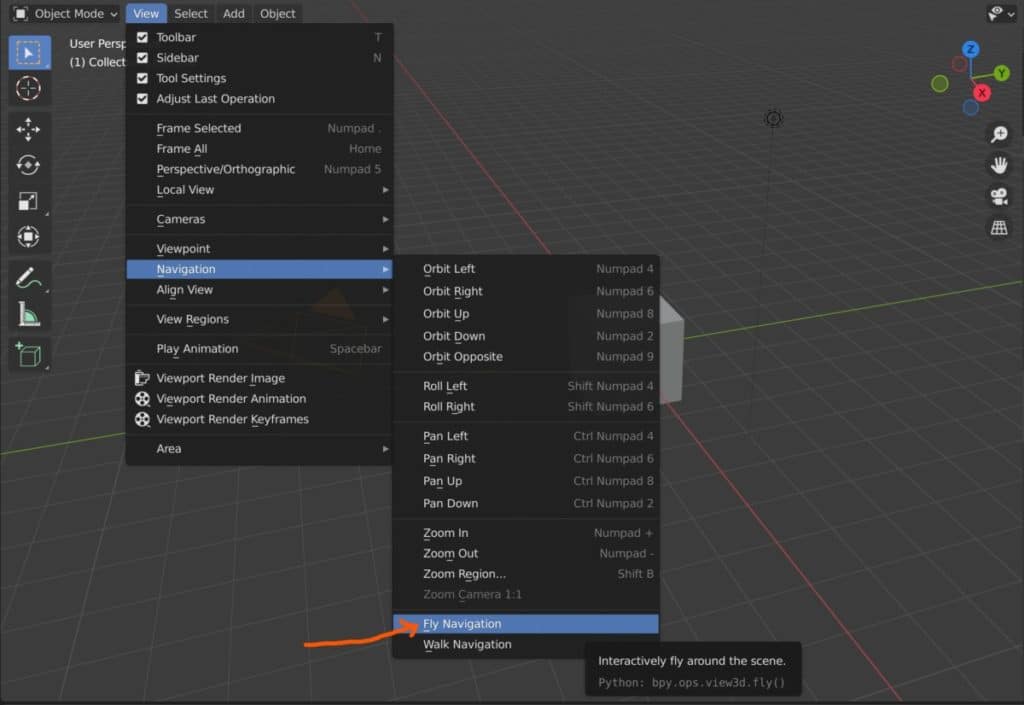
Before you enable Fly mode make sure that you have locked the camera to view from the side panel so that it follows the movement of the viewport camera.
To enable fly mode in your 3D viewport, use the hotkey Shift + ` or go to View (Menu) > Navigation > Fly Navigation. You will see a small box in the center of your viewport, where moving your cursor outside of the box will orbit your view in that direction.
With this tool, you can move the W, A, S, and D as your tools for zooming and panning. W will move your view forward and S will move it back, while A and D will move it left and right.
Take a few minutes experimenting with fly mode first as it is more difficult to use than standard forms of navigation but is a great way to find the view that you want for your render. Left-click will allow you to come out of fly mode and confirm the positioning of the camera.
Right-click on the other hand will cancel any changes to the view while in fly mode. You will see in the status bar at the bottom all the hotkeys that you can use to control the tool, so make sure to experiment with them to become more comfortable with the tool.

Beginners can make the mistake of holding down the W, A, S, or D keys which accelerates the view in the given direction. The correct way to use the tool is to simply press a key to move in that direction and then press again if you want to move faster.
How To Switch Between Multiple Cameras For Rendering?
Sometimes you may have more than one camera in your scene, and you wish to render an image from each camera. Much like your traditional mesh objects, you have an active camera system where one camera is designated your active camera the same way that one object is considered the active object.
Blender needs to know which camera is required for rendering which is why we have the active camera system. By default, you will already have a camera in your scene at the start of your project as it is one of the three defaults along with the cube and light objects.
If you add additional camera objects, then you to define which one is going to be your active object. By the way, the lock camera to view and snap to view tools will only work with the active camera, selecting another camera in the viewport does not change this.
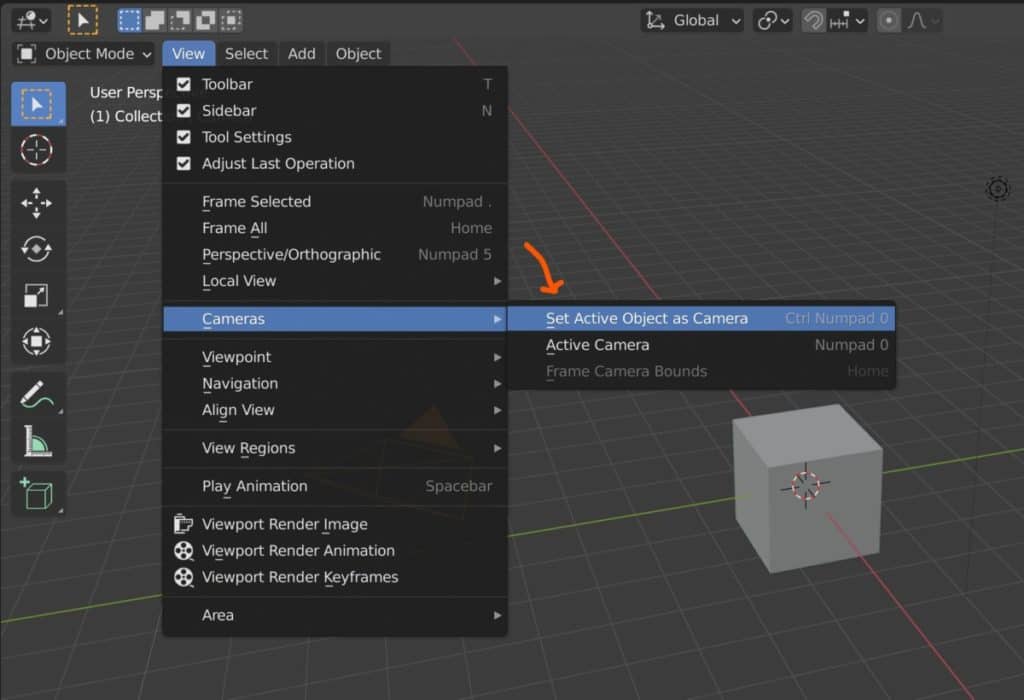
To assign a new camera as the active camera, first, select it in the viewport, then go to View (Menu) > Camera > Set Active Object As Camera. Alternatively, select the camera and press the hotkey Control + NumPad 0.
Thanks For Reading Our Article
Thank you for taking the time to read through our article, we have gathered a small list of other articles that we think you may be interested in reading…
- How To Render An Image In Blender?
- How To Navigate 3D Space In Blender?
- Should I Use Eevee Or Cycles For My Rendering?
- Can I Learn Blender On My Own?
- Do Professionals Use Blender?
-
Custom Normals: Blender Hard Surface Tip
Enhancing hard surface models with custom normals for realism.
-
Align Perfectly with Blender’s Snap Tools
Aligning objects perfectly with Blender’s advanced Snap tools.
-
Mechanical Parts: Blender Modelling Guide
Detailed guide to modeling mechanical parts with precision in Blender.