If you are new to Blender you may have seen a tutorial on Youtube where you create an object, then have to render an image using a render engine. Sometimes this is Eevee, and other times they have you switch to Cycles. But why do we need to use render engines in the first place and what is the difference between Eevee and Cycles?
The key difference between Eevee and Cycles is that the former is an online renderer that attempts to produce images in real-time, while Cycles is an offline renderer that calculates 3D data to produce realistic scenes. This creates many other differences including how light is calculated, the ability to control parameters for the render, and where the render engines are most suited.
The type of render engine channels the whole approach as to how the render engine is used and controlled. The primary purpose of any renderer is to be able to create images and animations from 3D scenes, but how these two complete that process is very different indeed.
The Difference Between An Online And Offline Renderer
Eevee and Cycles are by their very design ver different render engines with different feature sets. Eevee is what is known as an online renderer, while cycles is considered an offline renderer. This presents the most notable difference between the two in practice, which is the performance of the viewport.
If you were to use rendered view as your shading mode in the 3D viewport, you will find the behavior of the viewport is different for each. If you are using the Eevee render engine, you will be able to navigate your scene almost in real-time, minus a small window where the scene data is calculated each time you make a change or navigate the viewport, although this is only a third of a second in length.
Cycles on the other hand need to process a lot more information each time you change something or navigate the viewport, which causes the 3D view to become noisy, clearing up as time goes on. Being able to both orbit your view and keep your scene clear of noise would be impossible without the viewport denoising option, although this still results in a notable loss of detail as you orbit.
Why Do These Renderers Behave Differently?
So why is this behavior standard for these types of render engines? Well, starting with the online render engine that is Eevee, in order to calculate and produce images in real time it uses a process known as rasterization. This is an old industry-standard way of rendering computer graphics in real-time for video game engines.
Rasterization works by approximating the data of a 3D scene using the 2D view that you see on the screen and calculates the positioning of the objects, materials, and lighting on a pixel-by-pixel basis. In other words, it is actually faking the 3D effect as a 2D approximation to dramatically save on performance costs.
For many years this has been the necessary method for being able to produce 3D images on the screen in real-time without the risk of lack and poor performance in gaming. So you could say that Eevee closely resembles a game engine.
By comparison, the offline render engine that is Cycles uses path tracing to map out your scene in the viewport and for your render. Path tracing involves the calculation of light bounces that reflect off the surfaces of all the objects in your scene and creates an image based on that data.
This is a far more accurate way of doing things, and the result is very close to full realism in terms of how the lighting behaves. The only real difference is in Cycles you limit the number of light bounces that you have to work with, while in the real world this number is effectively infinite.
There are other smaller limitations to cycles, such as its poor ability to produce good caustics for glass, but in general, realism is its approach.
To summarize the difference between online and offline renderers, online render engines will prioritize blazing fast speeds, while online renderers will focus on maximum levels of quality.
Rendered Images And Animations Mimic Viewport Performance
the behavior that you will see in the viewport when comparing the two render engines while using rendered view, is similar to what you will experience in the actual renders. For Eevee, a rendered image will normally only take a few seconds to render at most.
However, a similar, or even the same scene in Cycles could take several minutes to be rendered. Rendered view in the viewport is designed to mirror what you will see in the renders, which is why the render times are somewhat comparable.
The Limitations Of Each Render Engine Type
Both render engines will have their advantages and disadvantages as expected, but because they are creating scenes using completely different methods their functions and limitations are completely different as well.
It should be noted that while we are comparing the two engines here, you cannot determine which engine is the best one overall, because that implies that they are to be used in the same scenarios, which they are not. Their limitations exist as a result of their purpose. Eevee is more for visualization for example and is not for creating highly realistic scenes.
Cycles is the opposite, the focus on realism presents limitations when it comes to general performance in renders and the viewport.
Below we list some of the core limitations of each render engine and compare it with how the opposite would perform. In rendering these limitations represent the difference between these engines, so if one render engine performs poorly in one area, then the other will generally excel.
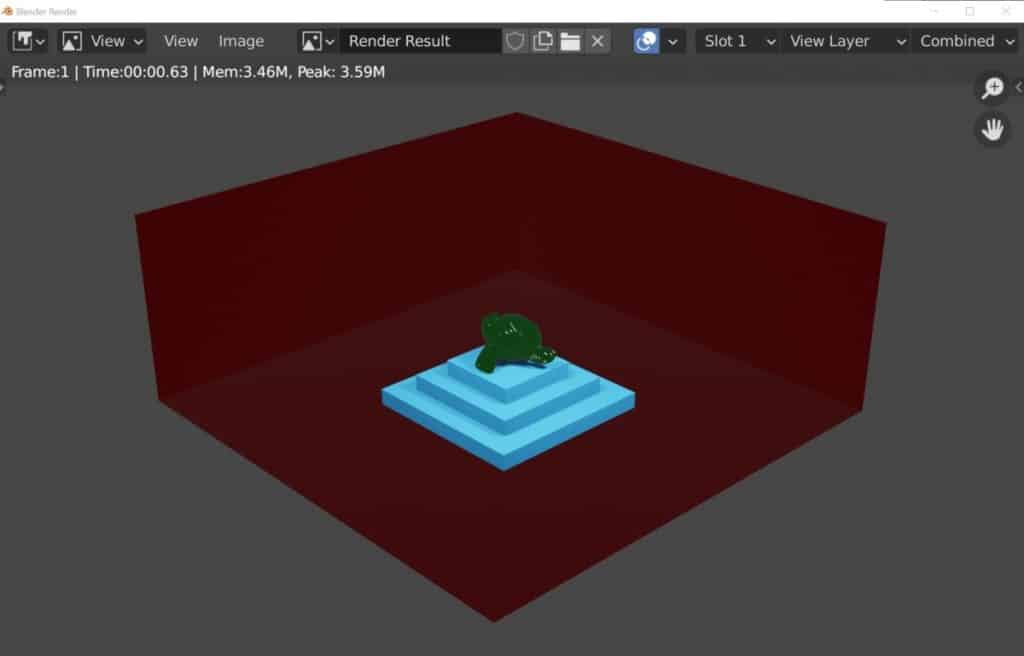
In the image above we see a render of the basic scene with Eevee as the render engine. No settings were changed other than setting the sample count to 500. Render time is less than a second but the image appears bland and lacking detail.
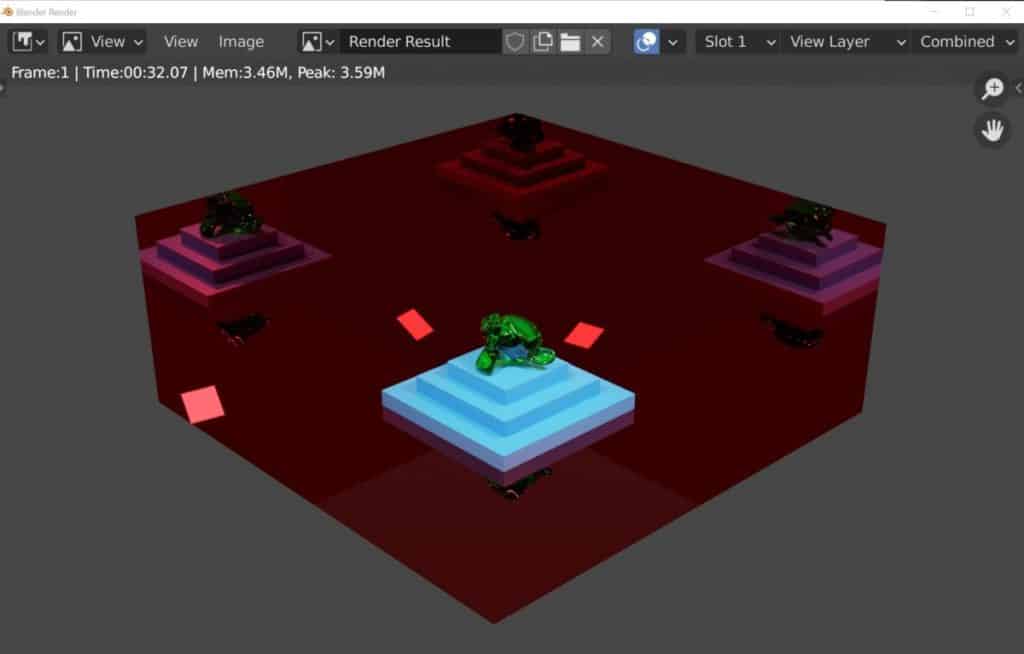
This image is of the same scene but with the Cycles render engine used to produce it. Again all of the settings are kept to the default values with the exception of the samples which are pushed to 500. The reflections are visible in this render and the lighting is generally more accurate. However, a render time of 32 seconds is far slower than what you can get in Eevee.
The Limitations Of An Online Renderer Like Eevee
Because we are using the rasterization method for rendering, there are a lot of limitations that are not applicable to Cycles. For example, lighting is far less accurate in Eevee, and the way lighting is calculated can create an effect known as light bleed.
Light Bleed
This is where the light bleeds through the other side of an object’s geometry, even if the surface is closed off and no light should be passing through. This is more common when you have a source of light close to a layer of thin geometry, and so a solution is to use the solidify modifier to make that geometry thicker.
By comparison, light bleed is not an effect that you will find using the cycles engine as the renderer calculates lighting based on the light paths and not the basic information provided by the viewport.
Shadow Map Resolution
Another limitation that you will find related to the lighting of the engine is low-resolution shadow maps. Again in cycles light is calculated accurately, and so the shadows are created as a result of that lighting.
In Eevee this process is an estimation based on the viewport data, approximating where there should be shadow based on what the light sees, and does this for each pixel.
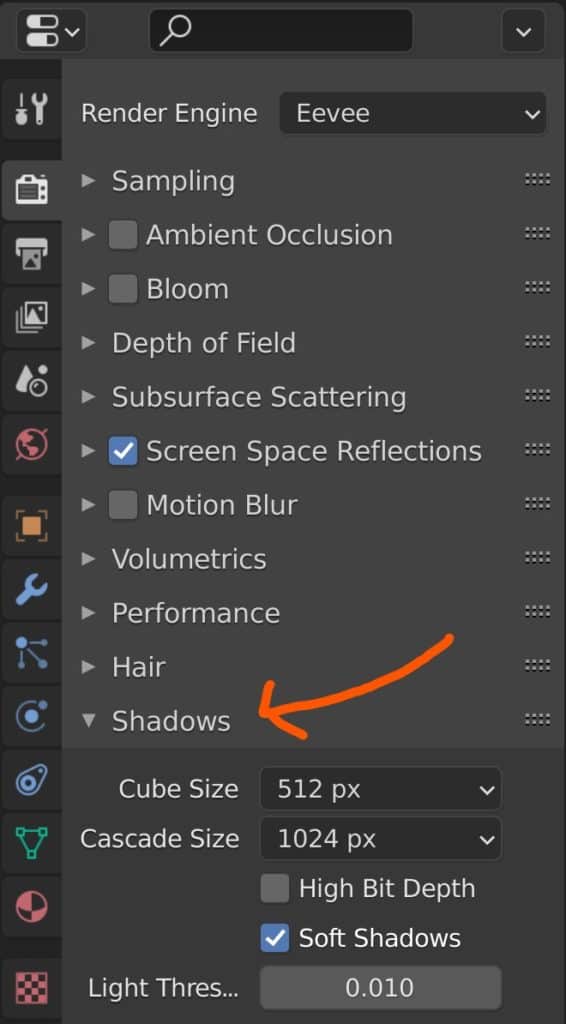
Because of this shadows in Eevee can display pixelation around the edges. Cube maps are used to define the resolution of the shadow maps, and can be changed by going to Properties > Render > Shadows, and increase the size of the cube map.
No CPU Option
For users of cycles, you have the option of using either your GPU or the CPU for rendering your image. However, this is not the case with Eevee, as the CPU is not efficient enough to render rasterized scenes in near real-time.
This is a small limitation, as few setups will see CPU performance outclass GPUs for rendering, unless you are using a 32 core or 64 core CPU.
Limited Ambient Occlusion
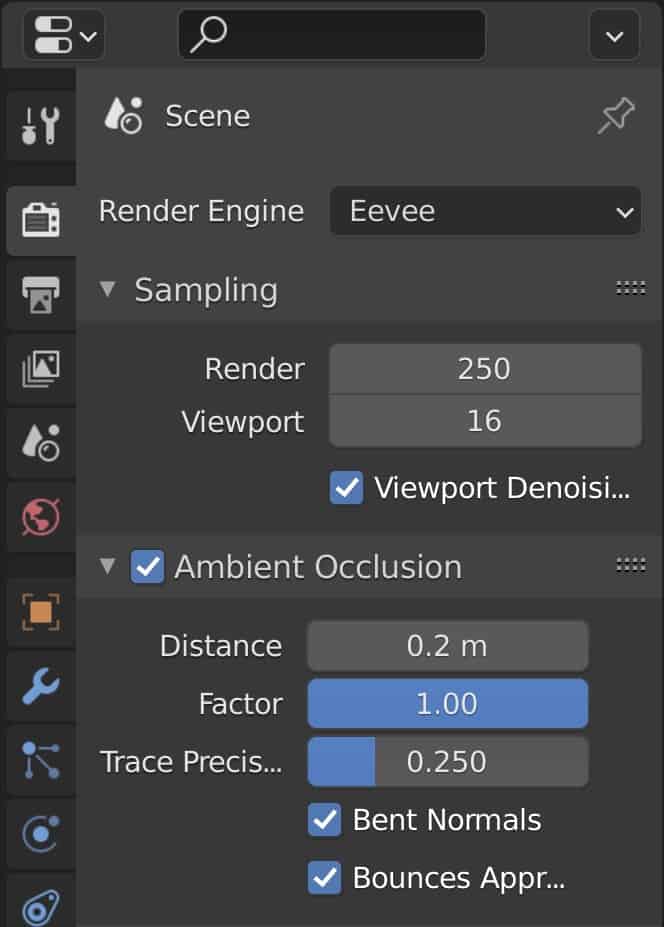
Ambient Occlusion can be enabled as an extra parameter in Eevee by going to Properties > Render > Ambient Occlusion, where you can adjust the strength of this effect. Like the other lighting effects, this uses the data gathered by the 2D image of the viewport to determine where the AO should be placed.
While the location for the AO is generally correct the amount of ambient occlusion is limited and in Eevee can only go so far from the target object.
As such a scene in Eevee may appear brighter than one in Cycles because the AO is not based on light paths in the Eevee engine. This can also create the effect of light hitting an area in your scene that it should not be able to reach.
The Effect Of Global Illumination
If you don’t know what this means, it is the process of calculating the indirect lighting, aka the light that does not come directly from the light source. This is another property of light that is applied to the cycles engine at a system level and so you don’t need to worry about it.
An example of global illumination in effect is when light bounces off an orange wall onto the surface of another object, and the light creates an orange hue on that surface as it picks up the color from the wall as it travels.
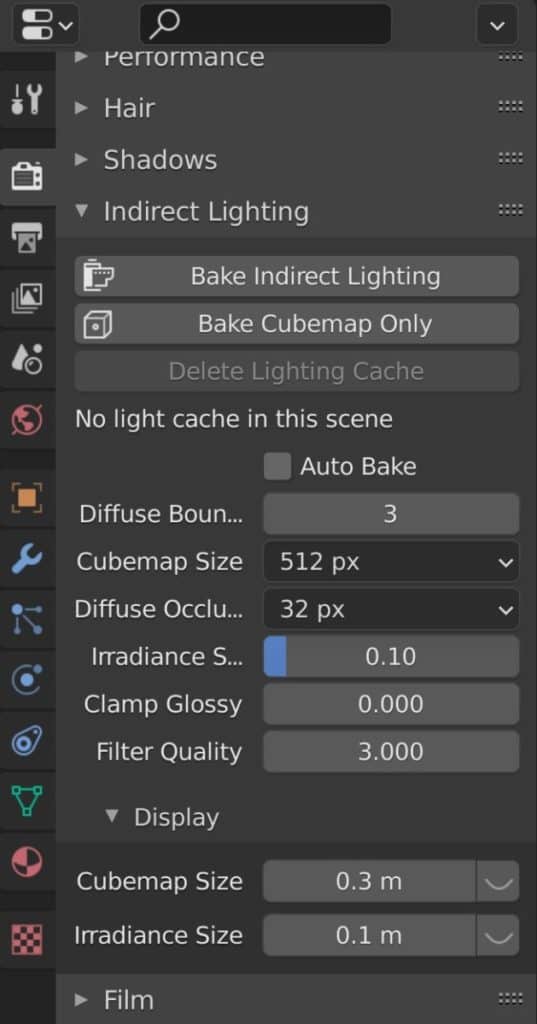
In order to calculate indirect lighting in Eevee, we would need to bake that lighting based on its two core components, which are the diffuse and specular channels. Each must be adjusted in its own way to correctly bake the lighting.
To bake your indirect lighting in Eevee, go Properties > Render > Indirect Lighting, adjust the settings and then click on Bake Indirect Lighting.
How Reflections Are Calculated
This is one of the more obvious effects where you can notice a difference between the two. In Cycles reflections are calculated using the light paths much like other properties and do so automatically with the engine, ie you can’t turn them on and off.
In Eevee reflections are turned off by default and need to be enabled by going to Properties > Render > Screen Space Reflections, and ticking the checkbox to activate.
This is where you can tell how rasterization works for rendering as the reflections are only visible when the objects are visible in the viewport, which is what we mean by screen space reflection.
Angle your view so that the object is no longer visible, and its reflection will disappear as well. To help improve on this, you can use what is known as reflection planes to help calculate areas of an object that are invisible into a reflection, increasing its accuracy.
The Challenge That Is Transparency
One of the most difficult attributes for any render engine to be able to calculate is the attribute of transparency, which represents the ability to see through a material and view what is on the other side. Both render engines have limitations here but these limitations are based on the initial render method.
For cycles, it is a case of using a minimum number of light bounces for the transparency channel so that light can continue to pass through a transparent object such as glass. If this number is not high enough then a transparent object will appear opaque with a black color.
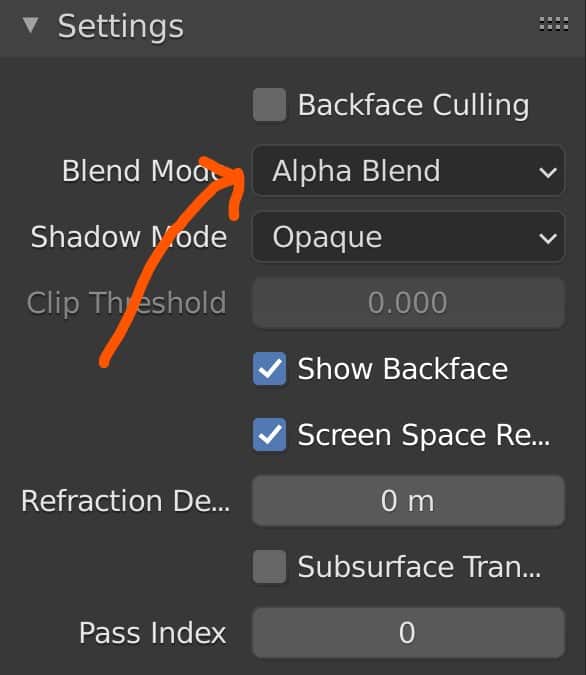
Eevee has several different methods for rendering transparency and you can find these methods for each material that you create by going to Properties > Materials > Settings and adjust the blend type. These options calculate how transparent objects will interact with other objects in the scene. In experimenting the different methods we like to use the alpha hashed method for scenes where objects may have part transparent textures like the leaves on a tree.
The Refraction Of Light
Refraction is the change of direction a light path undergoes when it passes from one medium to another. Glass is a common real world example where you can see the effect of refraction on a material. Eevee uses cube maps to determine where surrounding objects are and decides how to create the illusion of refraction.
As with all the other principles of light seen above, Eevee has to find ways of cheating the effect to save on performance as much as possible. The effect works well in Eevee though for simple objects, but when we look to apply refraction to something with more detail, the limitations of this trick become clear.
The refraction option exists as a single tickbox in Eevee, go to Properties > Render > Screen Space Reflections and tick the box labeled as refraction to enable it.
Also make sure that refractions are enabled for the material itself, which can be found by going to Properties > Material > Settings. Use the image in the previous section on transparency to help locate the option.
The Limitations Of An Offline Renderer Like Cycles
The limitations of Eevee all revolve around realism, which it sacrifices in order to prioritize speed and performance. Cycles is the reverse in this regard, as it focuses on realism at the expense of render time and viewport performance.
So the limitations are based around its speed, and not its feature set, which means that it has fewer limitations in total, but they are also more noticeable.
Noisy Viewport When Orbiting
The first thing that you will notice if you use rendered view for your 3D viewport is that whenever you orbit, pan or zoom around your scene the entire viewport is instantly filled with noise making the scene unrecognizable. At this point, Blender needs to recalculate all the light bounces and uses a sampling system to process the scenes data. Over time the image clears up and the scene becomes visible again.
Cycles X improves viewport performance dramatically, resulting in much shorter wait times for the image to clear after navigating to a new position. However, it cannot prevent the image from becoming noisy while you are navigating the scene and only improves the sampling speed once you stop moving.
Using a denoiser in the 3D viewport can help mitigate the noise to a degree when orbiting your view, but cannot eliminate it. Eevee, being a real-time render engine, does not have this problem and allows you to navigate your scene almost as if you were playing a game.
Longer Render Times
While Eevee will be able to render most scenes in a matter of seconds, Cycles can take much, much longer to render the same scene because it is using the path-tracing method for its rendering.
This is true for almost any scene that you can create and as a result, there are a lot of ways in which you can reduce the amount of time it takes to render your scene. Setup Blender correctly and you can reduce a 10 minute render down to as little as 90 seconds if you are smart, but this will always be much longer than the 5 seconds that you will have to wait in Eevee.
Another limitation related to the render times is that almost all of the methods that you can use to speed up your render times will come at some sort of cost. With denoising for example you can render a scene at a much lower sample count than normal, however, the denoise tool can eliminate some of the finer details in your scene as a consequence.
Poor Caustics
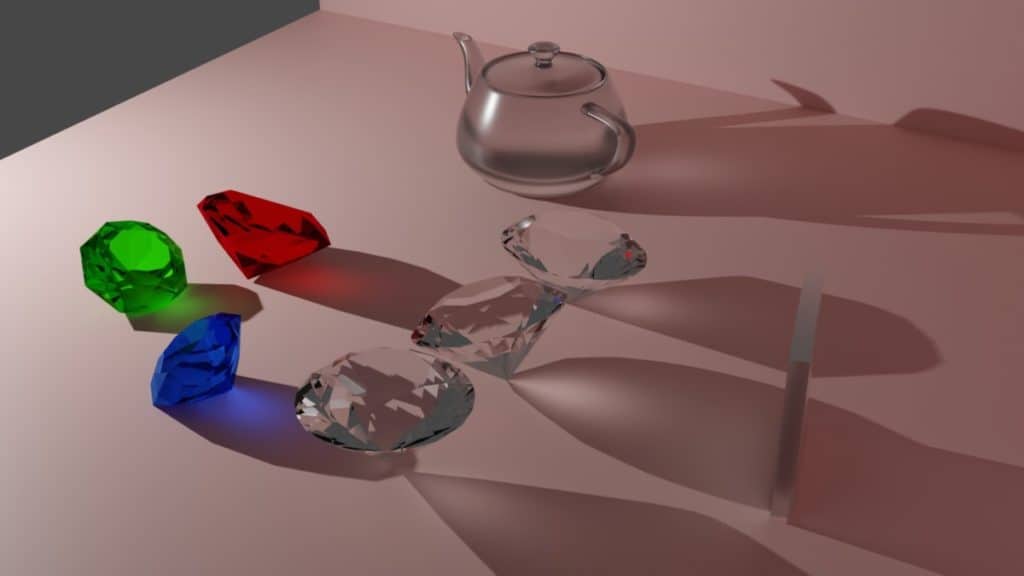
While the focus of Cycles is to produce realistic-looking scenes it is not perfect at every aspect of its job. Caustics represents the effect of light either being reflected or refracted from a transmissive object such as class onto another surface.
While Blender and the Cycles render engine does allow for the creation of caustics, they are not as accurate as other render engines that you will find such as Arnold and V-Ray.
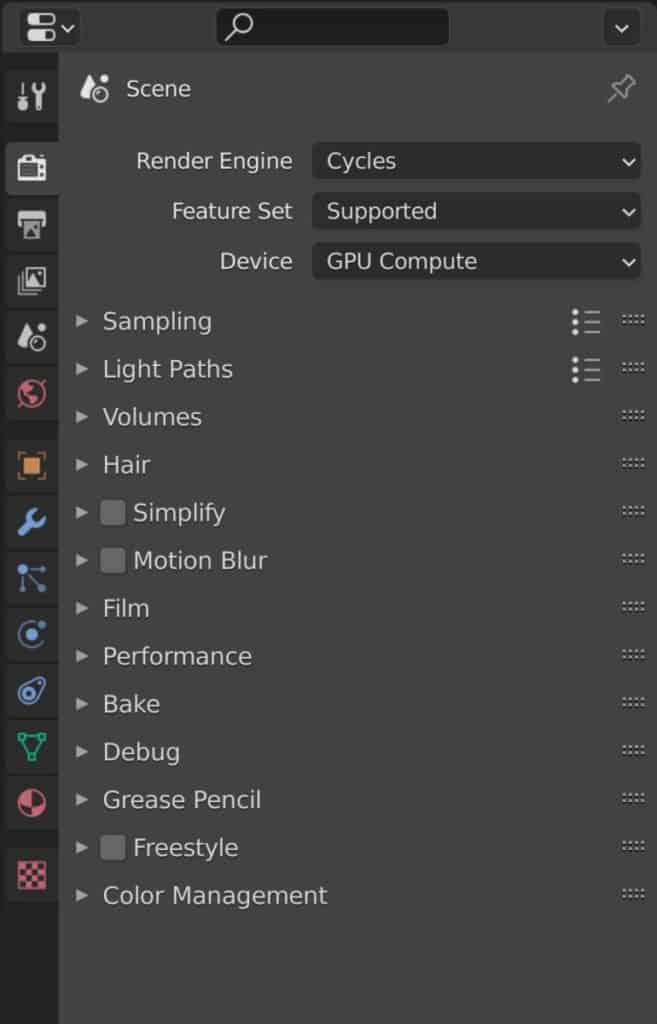
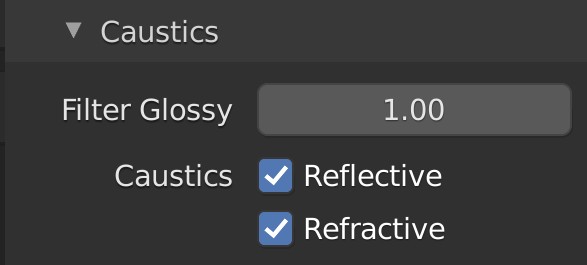
Caustics can be turned on and off by going to Properties > Render > Light Paths > Caustics and enabling either refractive or reflective caustics.
In addition, caustics also represent when of the most cost-heavy effects for rendering with Cycles, and having these options switched off can notably improve the render times of scenes that involve glass objects.
There are always workarounds to this in both engines. There is a material shader that is available on blend swap that we like that allows you to create accurate looking caustics in EEVEE. Even though the engine fakes these effects, it still looks very good and certainly better than what we get in Cycles normally.
You can view and download that material as part of a blend file from blend swap here.
The Lack Of Light Bounces
By comparison, the Eevee engine does not even use light paths to calculate its renders, so this one is not really a disadvantage as such for cycles, but it is a limitation.
The more light bounces that you use in a scene the more cycles needs to calculate, and so the more time it will take to complete the render.
This is not a linear comparison though as increasing your light bounces from 1 to 5 will have a much greater effect than increasing your light bounces from 8 to 16.
In the real world, light can bounce an infinite number of times until it has been absorbed by the objects that it hits. In Blender, the limitation is to use only a small number of bounces to calculate the scene.
In general, this is not much of a problem, as going beyond even 4 light bounces has a minimal effect on the look of the scene. Going to 2 or even a single light bounce has the most obvious impact.
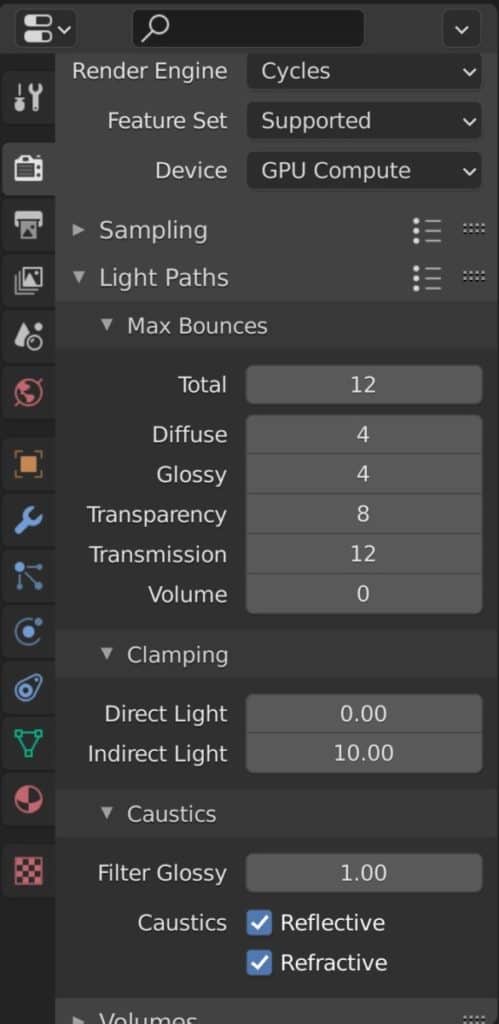
For light bounces in cycles keep most values to anywhere between 2 and 4. You also get control over the type of materials that your light bounces off such as diffuse and glossy. At times you may want your glossy value to be slightly higher than the others, and you will always want your transparency to be set to at least 8.
You can control these options by going to Properties > Render > Light Paths to manipulate the total number allowed for each type of material.
Where Should You Use Either Render Engine?
We will not say which render engine is the better overall, as that is not the point of these engines. They are designed to be opposite to each other in their approach to rendering and where they are best used. Both render engines have areas where they excel and where they do not.
Where Is Eevee Best Suited For?
Eevee is the perfect tool for visualization, as it allows you to preview the appearance of your models in real-time with materials, textures, and lighting all applied.
This makes it useful for creating concept art, or at the earlier stages of a render pipeline where you are still building up the scene and/or model but need to get a representation of what it could look like when completed.
It is also great as a preview for video game assets. While the art of ray tracing is becoming a growing force in the game industry, all games (minus a couple) are built from the ground up using the rasterization method of rendering. Ray tracing is normally a graphical extra to make a game look nicer in one aspect (ie shadows, reflections, etc).
While you will normally create the materials in the game engine itself, you can use Blender and Eevee to get a very good idea of what the model can look like before you export it.
What Is Cycles Best Suited For?
The two render engines can both be used in the same project but at different stages. Eevee is used as a visualization tool during the project while you are building up a scene or designing an object. Cycles on the other hand is used for the final render, as it shows off the scene in its best light.
This is true for both single images and for animations where you are looking to get the highest level of fidelity. However, in the case of animations, Eevee makes a compelling argument due to its much faster render times although setting Eevee up to look semi-realistic can take a long time in itself compared to the out of the best settings for Cycles.
Here Are Some Other Articles We Think You May Be Interested In
Thanks for taking the time to read through this article. We have gathered a list of other topics that we think you may be interested in reading.
- Should I Use Eevee Or Cycles For Rendering?
- How To Speed Up My Render Times In Cycles And Cycles X?
- How To Make Glass Transparant In Eevee?
- How To Make The Background Transparent?
- How To Apply An Image Texture To An Object?
-
Symmetry for Hard Surfaces in Blender
Ensuring symmetrical perfection in hard surface models with Blender.
-
Detail with Shrinkwrap: Blender Modelling
Achieving intricate detailing with Blender’s Shrinkwrap modifier.
-
Edge Loops for Hard Surfaces in Blender
Utilizing edge loops for defining crisp hard surface details in Blender.