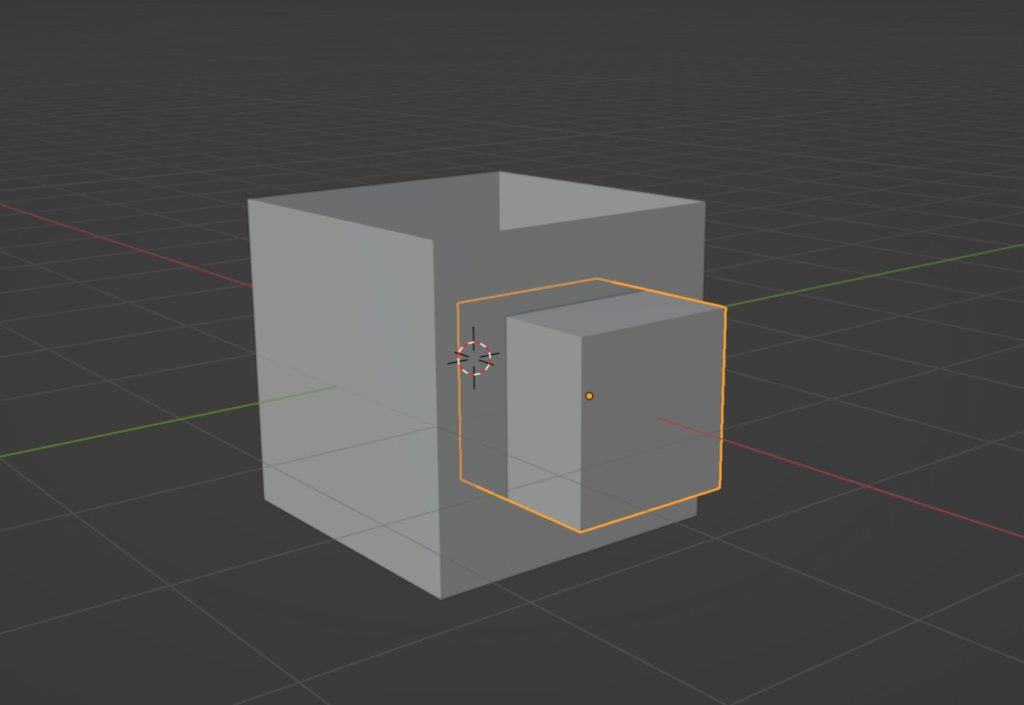
The boolean modifier is a tool that is often used to create custom shapes in seconds that may otherwise take minutes or longer using other tools, and there are different ways to which you can apply your Boolean. What if though you wanted the use the Boolean to cut holes into your mesh, but instead it only ‘dents’ the surface.
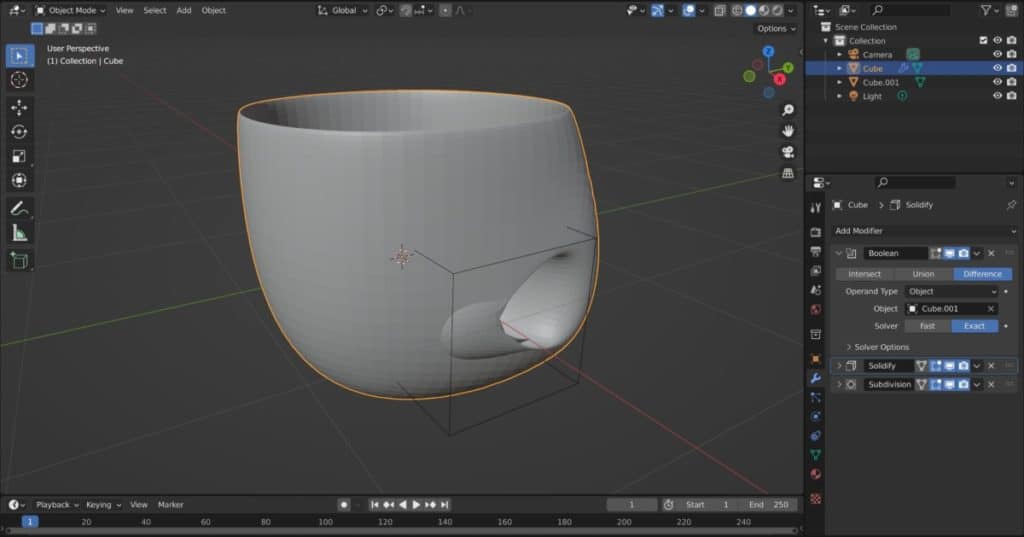
On hollow objects, the boolean modifier will deform the main object based on the position of the boolean when set to the intersection method. To create a hole, the main object must first have a thickness, using the solidify modifier, before using the boolean in the modifier stack. This will create a hole instead of a dent based on the booleans positioning.
The boolean modifier falls under the category of being easy to learn but difficult to master because of all the various ways that it can be used. But is its behavior intended for deforming hollow objects.
Creating Holes Using The Boolean Modifier
To use the boolean modifier you of course require an object to use the modifier on, but also a second object to act as the boolean tool.
One of the most common intentions for the boolean modifier is to cut holes of custom shapes into our models, but none of the three methods of boolean seems to work when first tested.
As a reminder of what each method does…
The Intersect method is used when you want to keep the section of the main object that is found in the same space as the boolean, subtracting from the surface area of the original any geometry that does not intersect.
The Union method combines the shape of the main object with the shape of the boolean object, adding to the surface area of the original.
The Difference method uses the shape of the boolean to redirect the geometry based on the area of the boolean that enters the original object’s space.
Of these methods, the intersect sounds like the best option, but it actually does the opposite in terms of the geometry that it cuts out. So we either need to invert it or go with a different method.
What you may not know is that the boolean calculates differently depending on if the object is hollow or has a thickness to it. In most cases when trying to use the boolean for holes, we are working with hollow objects and so the modifier contours the shape of the boolean to the object, creating a dent instead.
To successfully create a hole in your object, first, add the solidify modifier to the main object. If it is a closed model then nothing will appear to have changed. The thickness value of the modifier does not matter at this point.
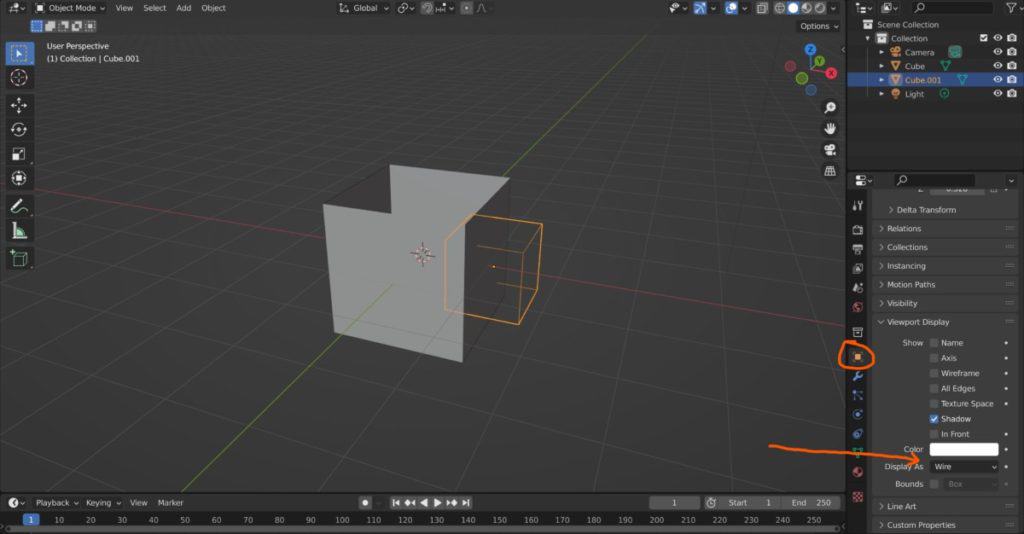
Next create the object that you are going to use as the boolean, which can be of any shape that you want, and position where you want to make the but.
Go to the object tab in the properties panel for the boolean object, and scroll down to where it says viewport display. Select and go to where it says Display As, open the menu and select either wireframe or bounds, which will hide the faces of the boolean and make it easier to view the effect on the main model.
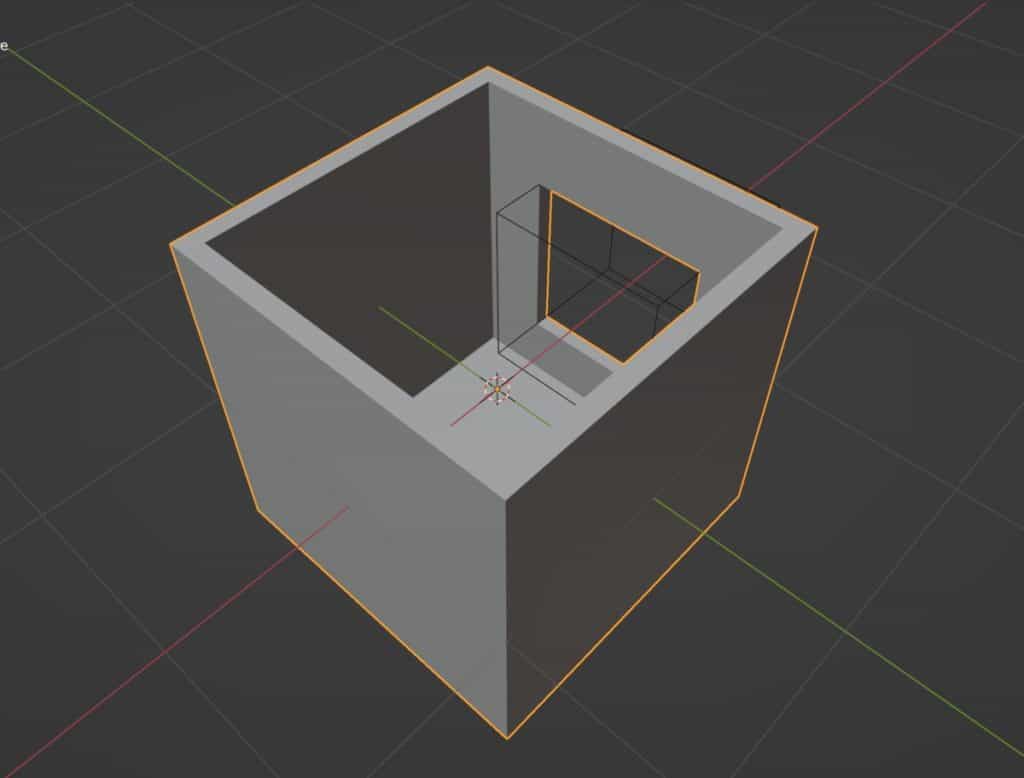
Now select the main object again and go make to the modifier tab. Add the boolean modifier and make sure that it is BELOW the solidify modifier. Then set the boolean type to difference, and the object to the target boolean.
The modifier should now be able to cut a hole through the surface of the main model.
Is There Another Way To Cut Holes Into Our Model?
In Blender, if you learn just one thing, it’s that you can always do something more than one way. Cutting holes using the Boolean modifier is the nondestructive method of creating those custom holes in your model, and is the recommended way because you can continue to edit the positioning of boolean even after activating the tool.
The second method goes in the opposite direction, as it follows a destructive workflow that is a permanent change short of using the undo tool. It is also destructive in terms of its effect on the object’s topology. I am speaking about the knife project tool.
With the knife project tool, the object required to act as the cutter only needs to be two-dimensional, so you can just construct the shape from a simple plane object.
So to use the knife project tool the first thing that you need to do is create that custom shape. It can be any 2D shape that you want but it should be 2D, so create a plane object and then edit the plane into the shape that you require.
Then you will need to move your view camera so that the project object is directly in front of the main object because the knife project tool uses the view camera to decide where to cut. This is easiest when using 2D views to project the object as they are set to orthographic and not perspective. Press 1,3, or 7 on the number pad to go into a 2D view, or press 5 on the number pad to switch from perspective to orthographic and vice versa.
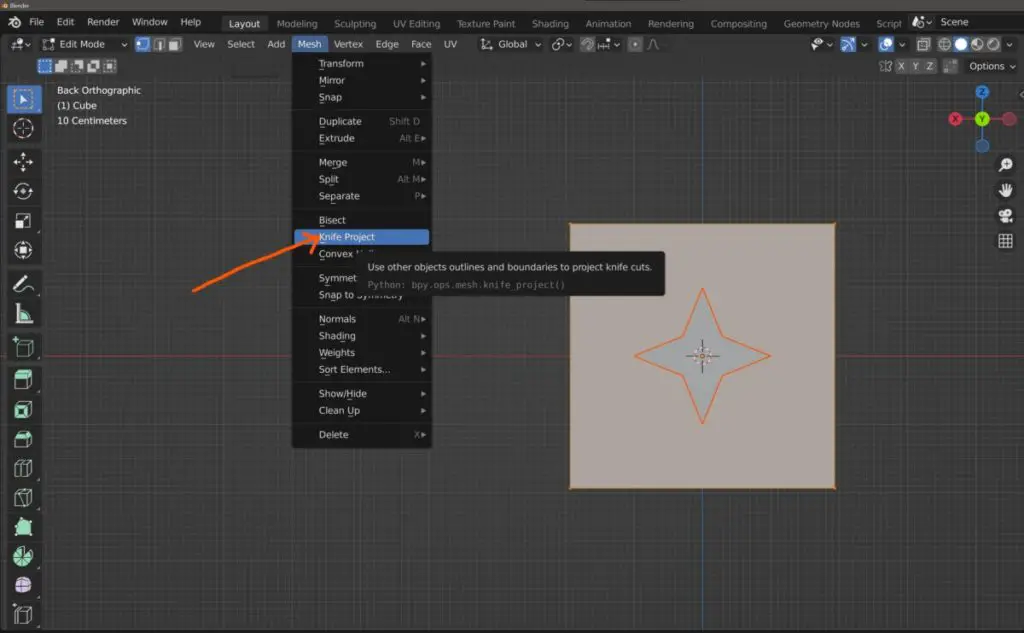
Select the main object and then press TAB to go into edit mode. Then press the A key to select all of your geometry. While in edit mode, hold down control and select the projection object, then go to the mesh menu and choose the knife project option.
This will cut the shape into the main object, you can select the cut trough option in the operator panel if you want the shape to cut all the way through your object.
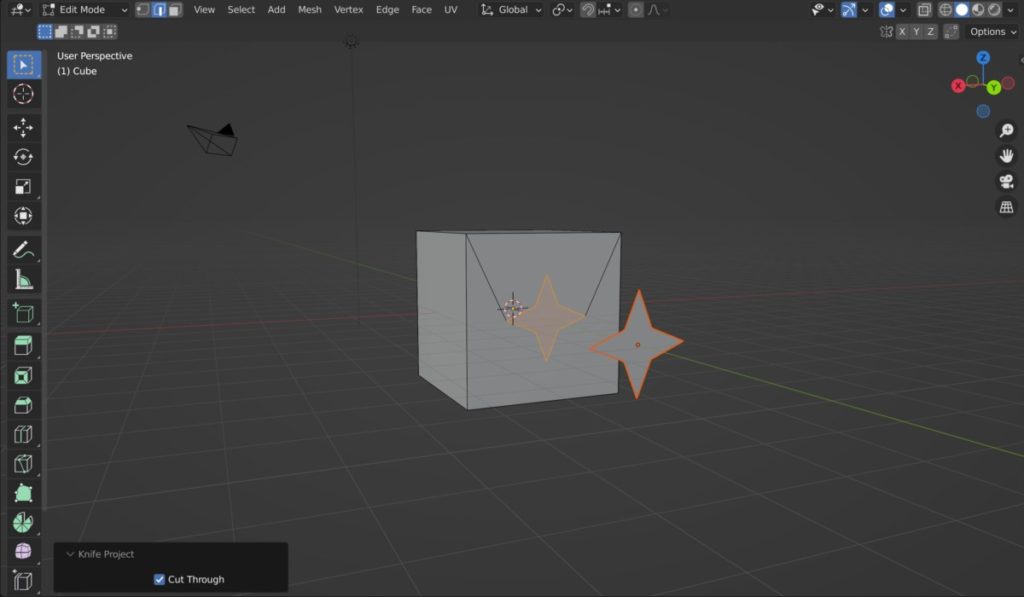
Finally, select the geometry that was created from the projection in face select mode and delete the faces to create the custom hole.
Boolean And The Modifier Stack
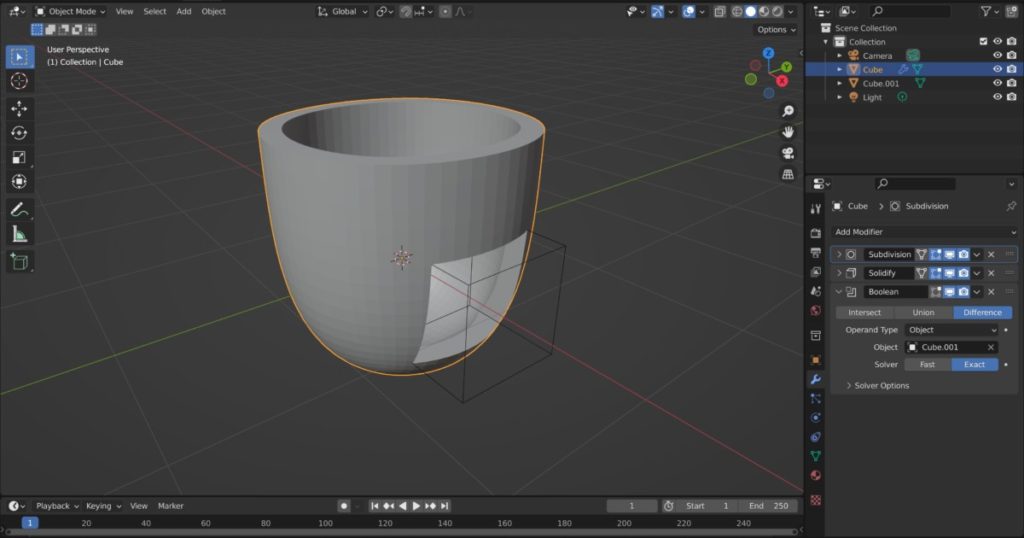
Some of the more commonly used modifiers are dependent on the topology of your model. For example, the subdivision surface modifier works far better when it is used on quad-based geometry. A major issue with booleans is the effect of the boolean is will create ngons on the geometry, which messes up modifiers like subdivision surface and the bevel modifier.
The best way to prevent this is to simply reorder the modifier stack so that your boolean modifiers are located at the bottom. This way the boolean will affect the model based on the effects of the above modifiers and not the other way around.
Thanks For Checking Out The Article
We thank you for taking the time to read through this article on creating holes using the boolean tool. We have gathered a list of additional articles for you to check out.
- Boolean Tool Fast Vs Exact Solver – What’s The Difference?
- The Shortcut For Adding A Mesh Object
- The Hotkeys Used For 3D Modeling
- Why Materials Get Deleted When You Leave Blender?
- Changing The Units Of Measurement In Blender
-
Animation-Ready Hard Surfaces in Blender
Preparing hard surfaces for animation with optimized topology in Blender.
-
Symmetry for Hard Surfaces in Blender
Ensuring symmetrical perfection in hard surface models with Blender.
-
Detail with Shrinkwrap: Blender Modelling
Achieving intricate detailing with Blender’s Shrinkwrap modifier.