The use of text objects in 3D modeling can have different implications for the appearance of a scene. But in many cases, you are more likely to see a form of text engraved into other objects rather than the text acting as an object in itself.
To engrave text into an object, create your text and then convert it into a mesh object. Then extrude out the text to make it 3D and place it on the object surface. For the main object use the boolean modifier and set to difference to engrave the text into the object.
Engraving text can be done when you want to create objects that actually have engraved words on the surface, such as the plaque on a sports trophy. There are of course a few things that we can do to make the process less disruptive to our model.
How Do I Engrave In Blender?
There are several key steps to engraving text into objects and several additional steps that can improve the final result. Below is the checklist of what you need to do to successfully engrave any text onto your mesh object.
To engrave text into 3D objects:
- Add a text object to your scene
- Change the characteristics of the text including its font and size
- Use the extrude tool to make the text 3D
- Convert the text into a mesh object
- Use the decimate modifier and limited dissolve to clean up the text
- Position your text so that it overlaps the surface of the main object
- Add the boolean modifier to the main object and set to intersect
- Adjust positioning and then apply the modifier
- Fix shading issues with the bevel modifier and autosmooth
If you follow these steps then you will be able to engrave text onto any flat surface in Blender 3D.
Adding Text Into The 3D Viewport
The first step is going to be adding text into your 3D Viewport, which is the same process as adding in any other type of object in Blender.
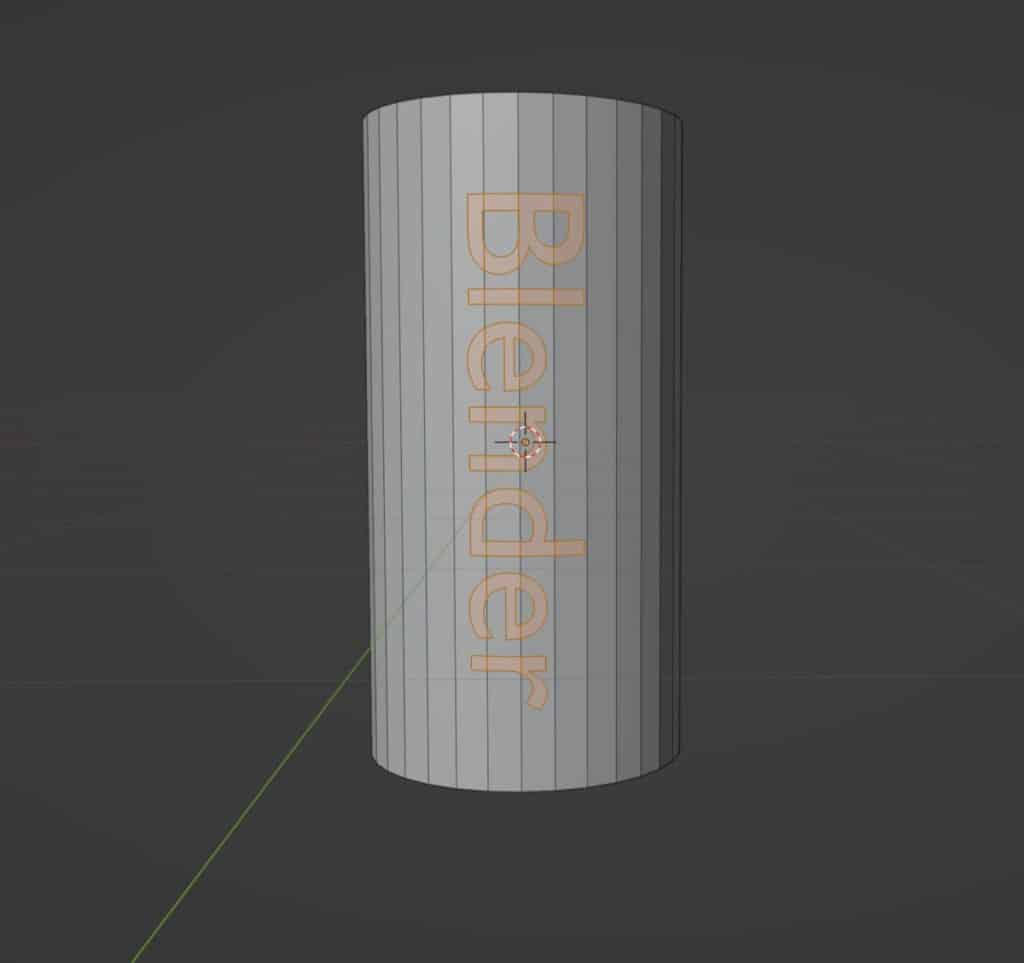
To add your text object, press the hotkey Shift + A to open the Add menu and select Text from the list. The object will be added at the position of the 3D cursor and will be oriented on the Z axis facing up.
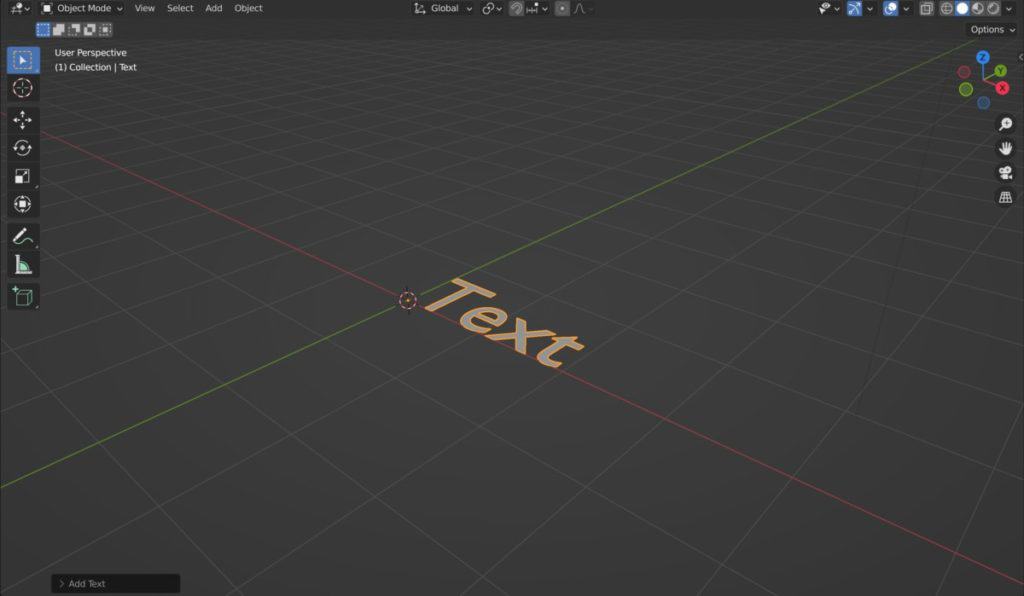
When you press the TAB key for your text object, you will enter edit mode. Unlike mesh objects where you use edit mode to adjust the geometry, with text objects it behaves similar to that of a normal text-based application.
Use the backspace button on your keyboard to delete the default text, and then type in the text that you want to use.
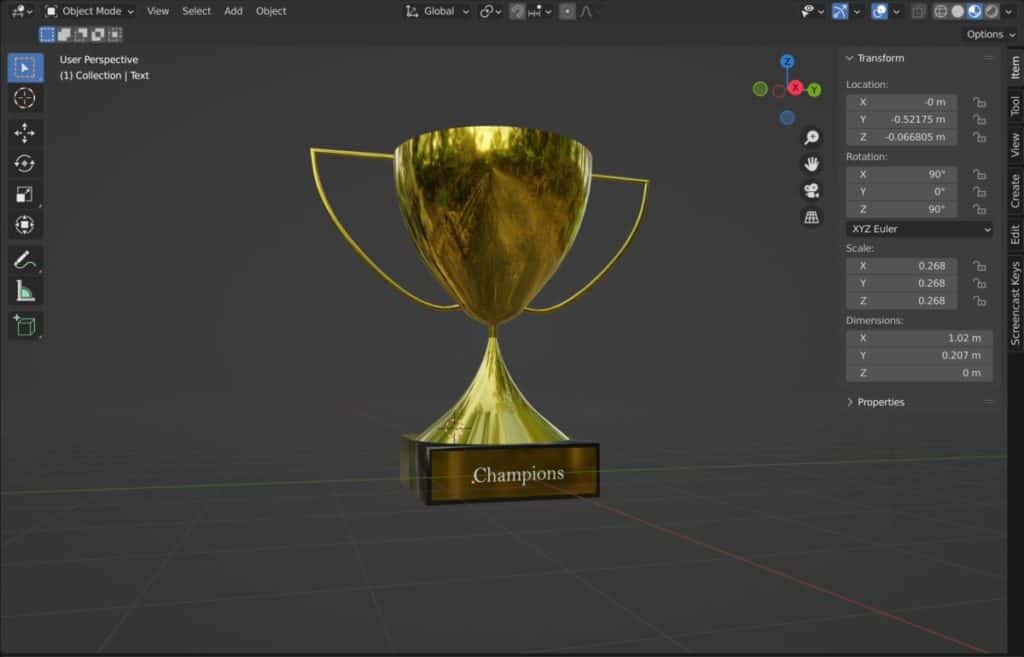
For example, we are going to use the word champions for our text.
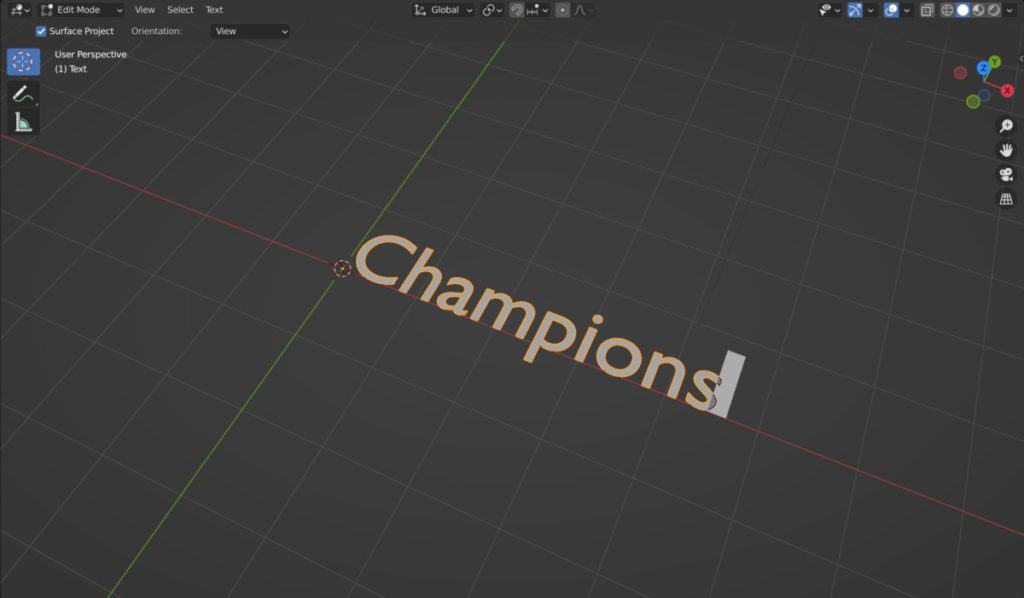
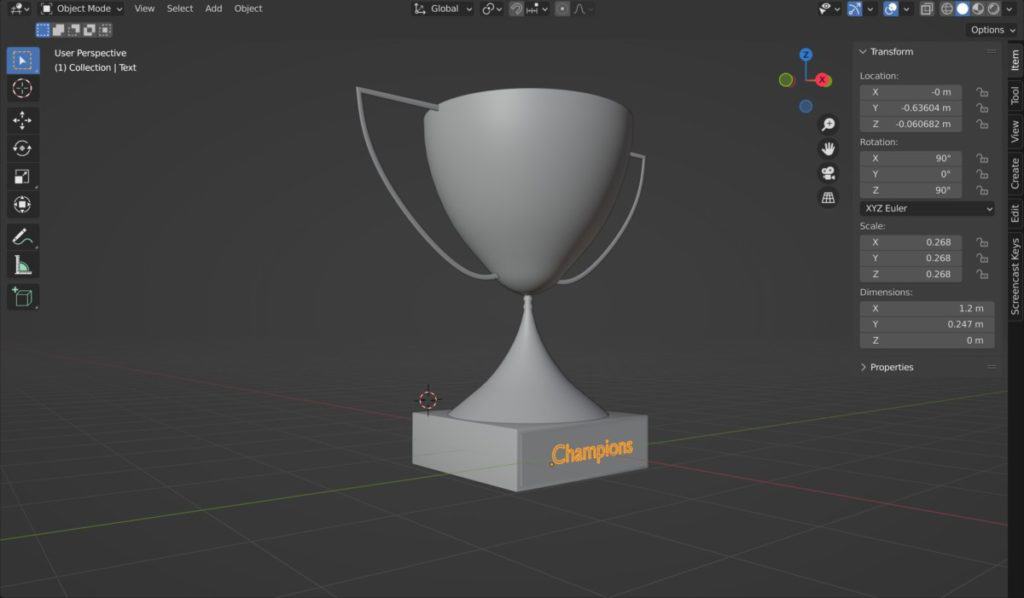
Assuming that you will already have the object that you want to engrave the text on, you will want to rotate and position your text to match up to the surface of the object.
In our example, we have a trophy with an empty plaque, and we need to align the text to the plaque.
When it comes to extruding your text, you can either do this before you convert it to a mesh object or after.
If you want to extrude your text before you convert it to a mesh object, then go to the object data tab in the properties panel. The icon for it will be the letter a in lower case.
One of the first options that you will see here is the ability to extrude your text. Make sure not to go too high with this number, as we only want the text to push slightly into the target object to create the engraving.
Changing The Text Font In Blender
You may not like the big and basic font that comes default with the Blender software and may be looking for something with a bit more style or with a handwritten feel.
Blender allows you to use any external fonts that are on your computer easily so that you can load a particular font in to change the appearance of the text.
Note that unlike the ability to extrude, changing the font can only be done while the object remains a text object, and cannot be changed after it becomes a mesh.
Accessing The Windows Font Library
If you are using a windows device, then you will have access to a secret library of fonts that you can use. You just need to direct Blender to the fonts folder.
Go to the edit menu in the header bar for the Blender UI and then select the preferences panel to open a new window for your settings.
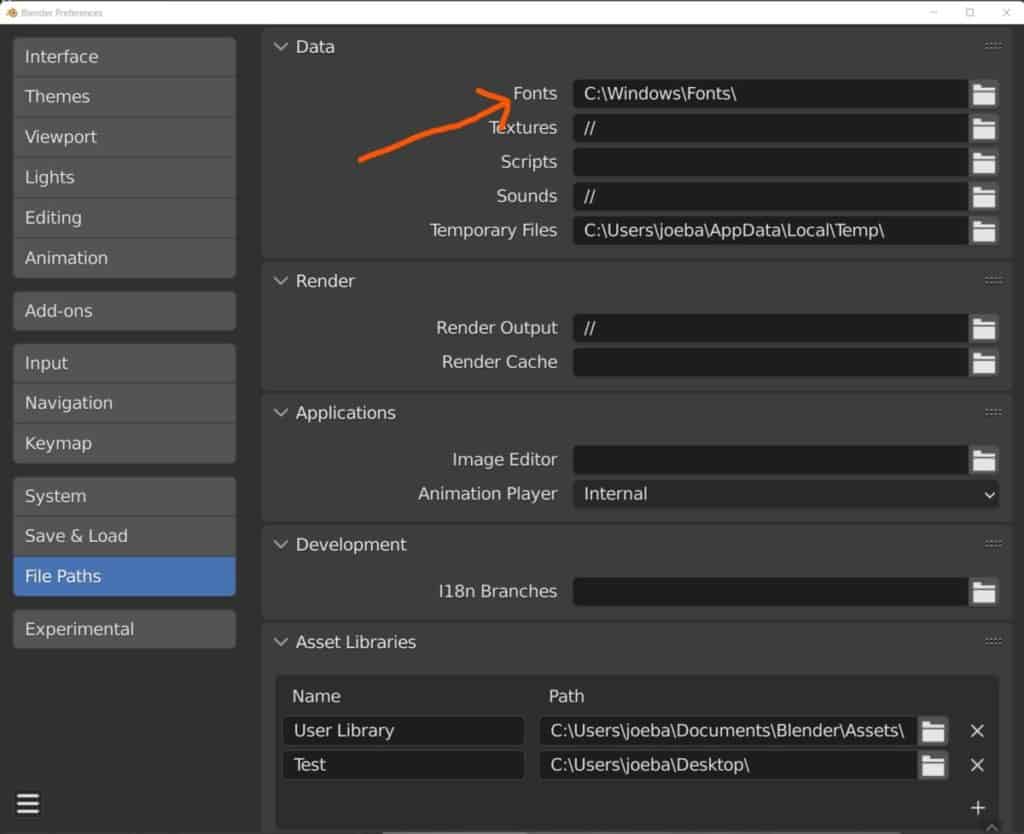
Then go to the file paths and the first option that you will see is for the fonts folder. To link up to your windows fonts folder, type C:\Windows\Fonts\ into the empty space or use the folder icon next to it and locate the library in the file browser.
When done close the preferences panel and return to the object data tab in the properties panel. Open up the Font section and then click on the folder icon next to regular to open the file browser. You should immediately be taken to the windows fonts library.
From here you can select the font that you want to use for your text. We like the look of the Bell MT Regular font for our engraving, so we will choose that and then click on the open font button.
As soon as the file browser closes the font of the text should change. If it has not then you may have added your font to the bold or italic variants instead, make sure it is connected to regular for now.
Downloading Custom Fonts From The Internet
While the library on windows is certainly large, you cannot tell what the fonts look like until you actually load them into Blender, and most of them are fairly boring fonts anyway.
If you want to access custom fonts, then there are several websites that you can try that will allow you to download and use any font that you can find and like the look of.
Our favorite site is dafont.com which has some incredibly creative font files that you can use. Make sure that the author allows you to use their fonts for commercial purposes if that’s your intention.
All you need to do is download your chosen font and then in Blender direct your font type to that download.
Conversion From A Text Object Into A Mesh Object
Once you have the font set up you can now look at converting your text object into a mesh object, so that we can use it for our boolean modifier. Unfortunately, the boolean modifier cannot detect text objects which is why we need to convert it.
To convert a text object into a mesh object, select your text object in object mode then open the object menu in the header of the 3D viewport.
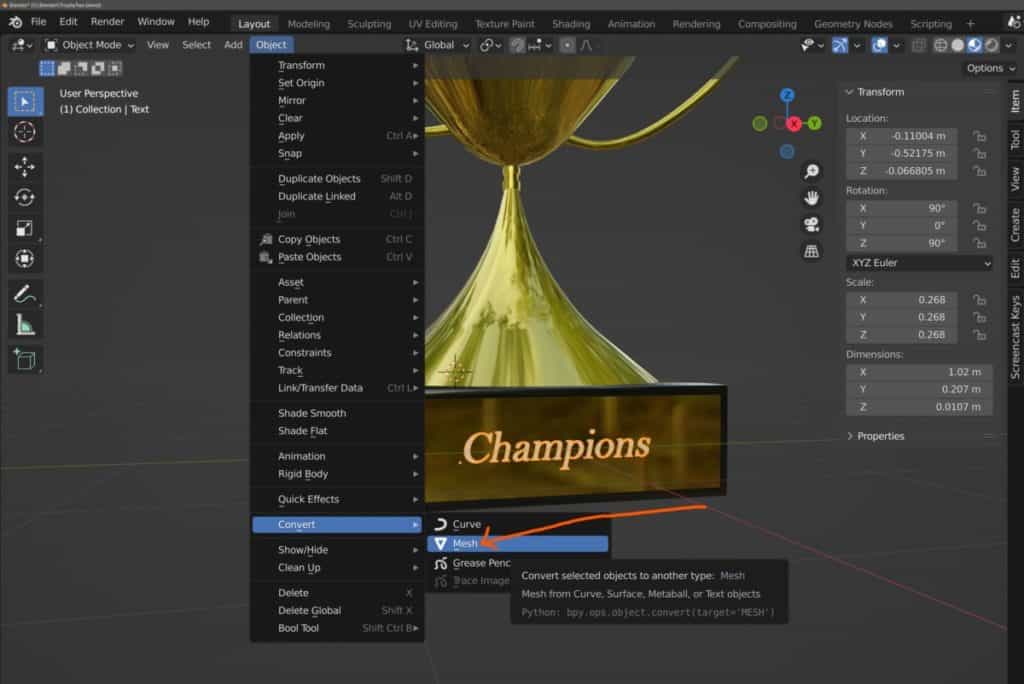
Towards the bottom, you will find the convert option, highlight it to open the next menu, and from here select the convert to mesh option.
This will convert your existing text object into a mesh object with actual geometry. In the bottom corner of the viewport, you have the operator panel for the convert tool, which has a single option inside when it is opened.
The keep original option will allow you to keep the text object when enabled whilst still creating the mesh object, leaving you with a text variant and a mesh variant at the same time.

We recommend this is ticked as you cannot convert back to a text object from a mesh and so if you want to make changes you can use the text object that has been maintained with this option.
Move your text object away and then hide it from the viewport and from rendering using the icons in the outliner panel.
Bonus Step: Cleaning Your Text Objects Geometry
When using the converted text objects for your boolean, you will come across the issue of topology. Topology is the flow of your geometry and is important for animation, game design, 3D printing etc.
While you are unlikely to do anything with text other than look at it, going into edit mode will demonstrate that the topology of the text is very messy, so it is good practice to clean up our text before we use it as a boolean.
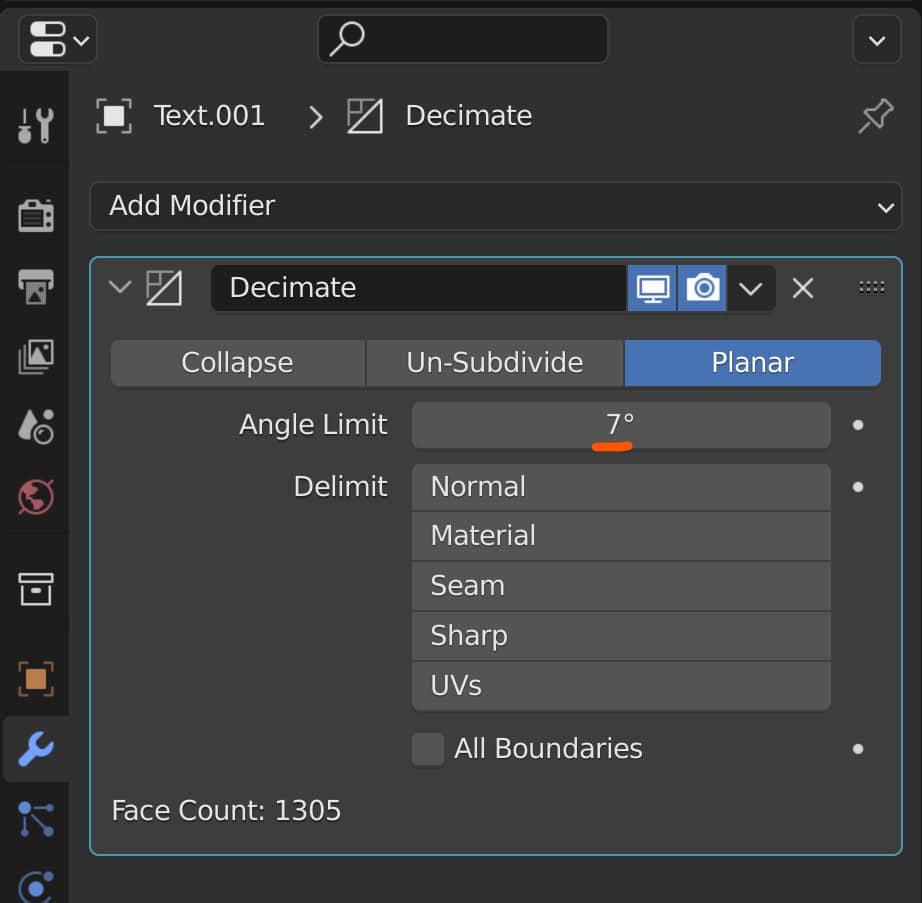
There are two tools that can help you to very quickly simplify the topology of your letters. The first tool to use is the decimate modifier, which will be used to dramatically reduce the number of vertices on our text.
Letters are complicated shapes to form in 3D modeling using normal methods, and if we go to the bottom corner of the UI we will see that the Champion text has over 15,000 vertices when we switch to edit mode.
Go to the modifiers tab for your text (Mesh version, ignore the text version for now) and then add the decimate modifier. We have three forms of decimating here but as we are working with letters that have flat faces and unpredictable topology, the planar option will be the best for this situation.
The main parameter to change here will be the angle value, which reduces the geometry as we increase the angle. For text, you will want to set this to between 7 and 8, as going higher will begin to deform the letters.
Setting the angle value to 7 will reduce our face count here from over 11,000 to 1,300, almost a 10x decrease to the number of faces.
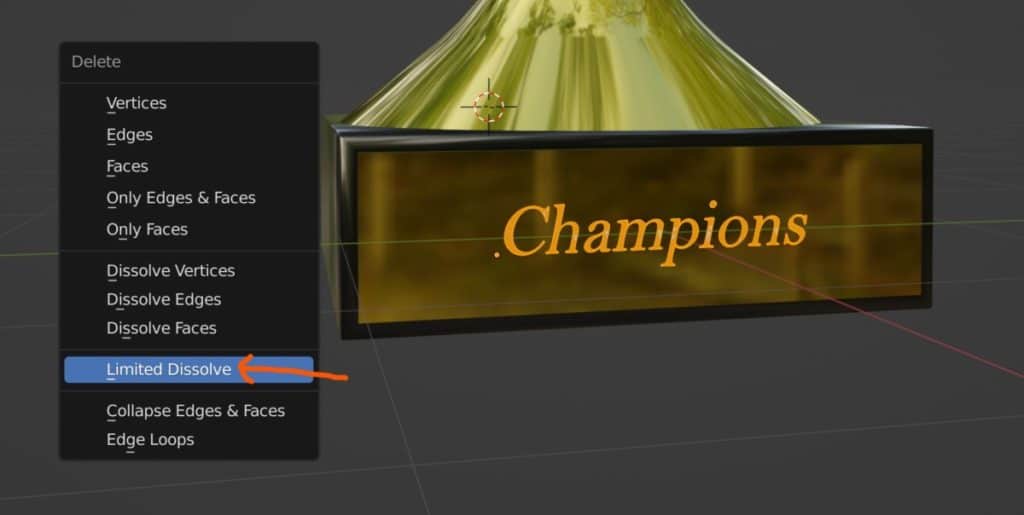
Alternatively, you could also use the limited dissolve option which works in a similar way. Select your geometry in edit mode using the A key and then press the DEL key to open up the delete menu.
In this menu, you will find the limited dissolve tool, which reduces the geometry based on the angular value of your vertices. Setting this value to 7 gives us the same result as the modifier.
As a final tip for reducing your geometry for your text, you can use the merge by distance tool, which is accessed by pressing the M key while in edit mode. Again make sure that all of your geometry is selected.
Increase the distance value when you use the tool until the letters begin to physically deform, then reduce the value to just before that point.
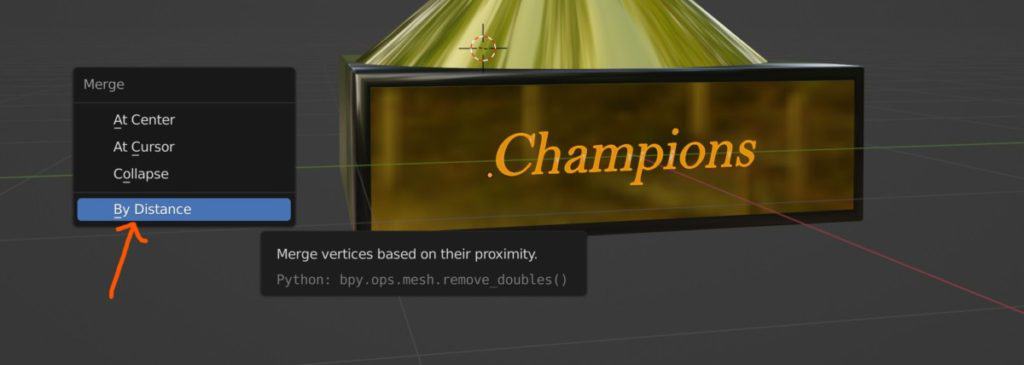
In our example, we were able to get our face count done to about 800 by using a distance value of 0.02, which is not bad considering what it was before.
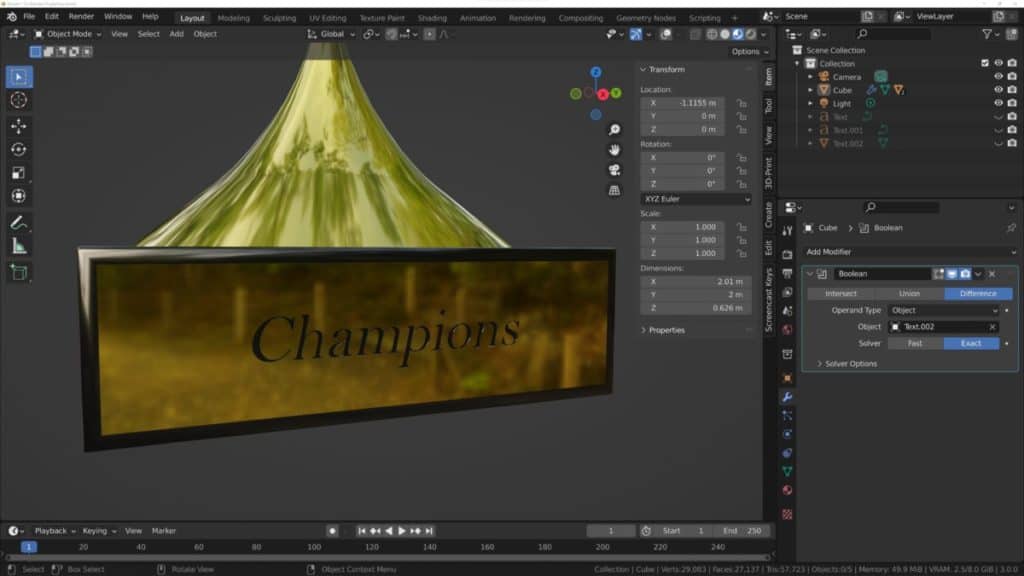
Using The Boolean Modifier To Engrave The Text
Now we need to use the text as a boolean to engrave it into the surface of the main object, which in our example is the plaque on the trophy.
Make sure that the text object is pushing slightly underneath the geometry of the main object, and then select the main object that you want to engrave.
Go to the modifiers tab and then add the boolean modifier to your object. We have three boolean methods to choose from here.
The intersect option will only maintain the geometry that is within the bounds where the main object and the boolean overlap. This will delete almost all of the model and leave behind the area that we actually wanted to be rid of.
The union option will merge the geometry of the two objects together, while still maintaining the boolean as its own model. This will result in the text extruding out of the plaque rather than into it.
The difference option on the other hand will delete the geometry that is overlapping between the main model and the boolean. It is effectively the opposite to the intersect option and what we need for our engraving.
Set the boolean object to your text and then hide the text from view. You should now see the engraving on the surface of your object
If you have any issues with the result of the boolean, you can either try moving the boolean a bit. or changing the boolean solver from exact to fast or vice versa.
How To Curve Your Text So That You Can Map It To A Curved Surface?
In this demonstration we have focused on engraving a text object into a flat surface, but are we able to do the same with curved surfaces?
The answer is yes, as all we need to do is tell our text to follow the curvature of the object’s surface, which requires a slightly different process to mapping your text to a flat surface.
Add your text and then edit it however you see fit, changing your size and font to match your project. In our example, we are going to add text engraving to the trophy itself, which has a curved surface.
This time, we will not be extruding the text so keep that setting at 0. Instead, convert it to a mesh object once you have decided on your font style.
Next, go to the modifiers tab and add a shrinkwrap modifier to your text mesh. There are different ways that we can project our text onto the curved surface here, but the easiest is to use the Tangent Normal Project warp method to wrap it onto the surface.
Depending on your orientation, you may need to switch the positive option to negative or enable one of the three axis options, but this can differ for each use case. For us, we set our shrinkwrap to move along the negative direction and set the axis to X.
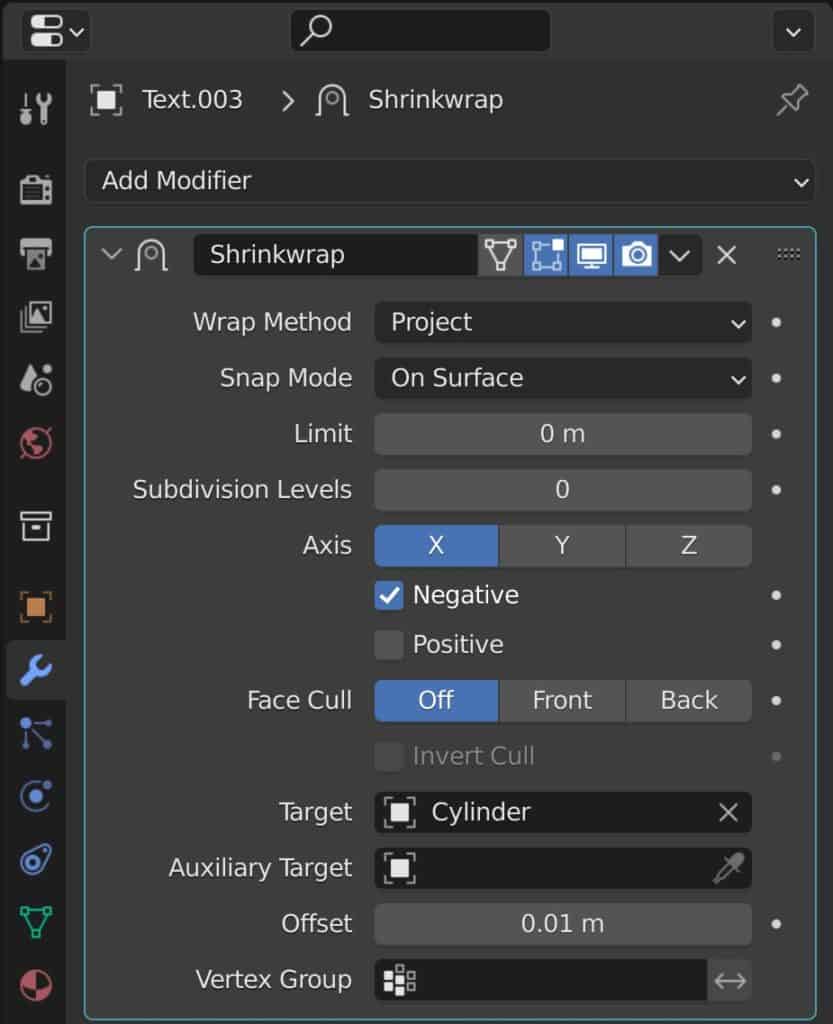
Only when the text has been shrink-wrapped should we look to add thickness to it, which is important for the boolean.
Add a solidify modifier to the text and make sure it is under the shrinkwrap in the modifier stack, the set the thickness value to a low value.
The text may not be in the correct spot on the surface and the thickness may only be going one way. So in the shrinkwrap settings set the offset to .1 so that a part of the text object is just above the surface.
Now select the main model and add the boolean modifier to it, assigning the text as the boolean and setting it to difference.
You may notice some weird shading occur around the letters. This is likely to happen when the topology of the letters has not been cleaned up. Remember, the fewer vertices that your letters have the better the boolean will work.
Using The Knife Project Tool As An Alternative Method To Engraving
If you do not want to use the boolean tool then there is an alternative method to creating an engraving of your text onto an object, with the knife protect tool.
The regular knife tool is used to create custom cuts into your geometry to alter the topology of the mesh. The knife project tool however uses the outline of other objects and projects that outline onto the surface of the model. This works great with text objects.
To use this method, create your text object and then position it in front of your main object. The camera view is important here so use one of the 2D views to get a straight look at the two objects.
Change the font, size, and rotation to however you want. you will not have to convert the text into a mesh object for this to work.
Select your text object first, which is important, and then select the main object second, then hit the tab key to enter edit mode.
Next, go into the mesh menu in the 3D viewport header and locate the knife project tool, and select it. The tool will work instantly, so orbit your view so that you can see the projection of your text on the model.
Note: extra steps are required if you have converted your text to a mesh object, and we recommend using this method specifically with text objects for the sake of simplicity.
Thanks For Reading The Article
We appreciate you taking the time to read the article. We hope that you were able to find the information that you were searching for. Below we have compiled a list of additional topics that you may be interested in reading.
- Importing A 3D Model Into Blender
- Downloading The Latest Version Of Blender
- Rendering your Animations In Blender
- Extruding 3D text In Blender
- Overlays And Decals For Textures
-
Mechanical Parts: Blender Modelling Guide
Detailed guide to modeling mechanical parts with precision in Blender.
-
Subsurf Modelling: Hard Surfaces in Blender
Achieving high-quality hard surfaces with Subsurf Modelling techniques.
-
Sharp Edges in Blender with Crease Sets
Utilizing crease sets for maintaining sharp edges in subsurf modeling.